Project 10                            .018 x .025 Posted Arch wire

Purpose

1.     Retraction of anterior teeth

2.     Final tooth positioning

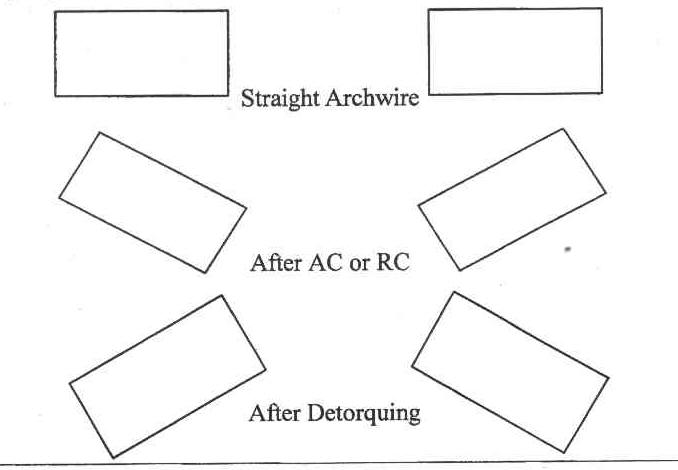
3.     Proper angulation

4.     Proper inclination

5.     Final space closure

6.     Proper arch form, etc

7.     Final bite opening

8.     Obtain maximum fine tuning

When Placed

1.     Retraction of anterior teeth

2.     Final phase of treatment

Approximate Treatment Time

3-5 months

Contra-Indications

1.     When there are rotations, etc. to be corrected

2.     When it is very difficult to place arch wire into brackets

Instruments:

1.     Light Wire or Bird Beak Pliers (201-425 or 201-426)

2.     Mathieu Narrow Tip (201-121)

3.     Mathieu Wide Tip (201-101)

4.     Ligature Director (200-201)

5.     Schure Band Seater (200-208)

6.     Distal End Cutter (201-205)

7.     Pin and Ligature Cutter (201-107)

8.     Heavy Wire Cutter (200-412)

Material:

1.     .018 x .025 Arch wire (posted)

2.     Pletcher Springs

3.     Power chain

4.     Alastiks

Force System:

1.     .018 x .025 Arch wire (Posted)

2.     Pletcher Spring

3.     Power chain

 
Procedure
1. Using the wax bites, size the arch wires so that the electrodes on the .018 x .025 are just distal to the laterals on the upper and lower arches.

2. Shape the upper and lower arch wires to lie passively in all the bracket slots.  Place a moderate compensating curve in the arch wire.  Position the arch wire so that the electrodes are pointing up and the curve is like a rocking chair curve.  By placing this compensating curve, it will cause the posterior portion of the arch wire to roll to the lingual.  If uncorrected, this would cause the posterior segments to have lingual root torque which you do not want.

3.Using two sets of pliers (lingual arch forming, flat on flat, torquing, etc), remove the lingual torque in the posterior segment distal to the electrode and place labial torque
   a. With electrodes pointing up, grasp the arch wire with one set of pliers and place distal to the electrode and the other set of pliers on the tip end of the arch wire.  With one continuous turn, twist the pliers to the outside 180 degrees and release the wire.  This will remove the lingual torque in the posteriors and place additional labial root torque for the posterior (see diagram above).
    b. Repeat this procedure for the other side of the arch wire

4. Using the wax bite, cut the arch wire on the distal to be at least 1-2 mm longer than the second molar buccal tube.  Round off all four corners of the arch wire slightly to allow ease of placement.

5. Place the pletcher spring on the distal of the arch wire and pull forward passively.  Mark the long arm of the spring approximately 2 mm short of the electrode on the arch wire.  Using the tweed loop forming pliers, form helicals in the front of the mark using the free end of the spring and turn back to the mark.  Cut excess wire and the spring should now be 2-3 mm short of the electrode.  Engage the helical of the spring over the electrode.  This should produce 150-200 grams of force.  Bend the electrode over to the mesial.  Repeat for the other side.
6. Allow the pletcher spring to lie on top of the arch wire that is in the bracket slots and place an alastik over the pletcher spring, arch wire and bracket to ligate.  This will not interfere with the arch wire engagement and will prevent the pletcher spring from sliding up on the tissue.

By: Jenni and Suniti.
A case related to this technique.

Xin Wei, DDS, PhD, MS 1st edition 11/21/2013, last revision 11/23/2013