
|
|
|
|
|
|
|
|
|
|
|
|
|
|
|
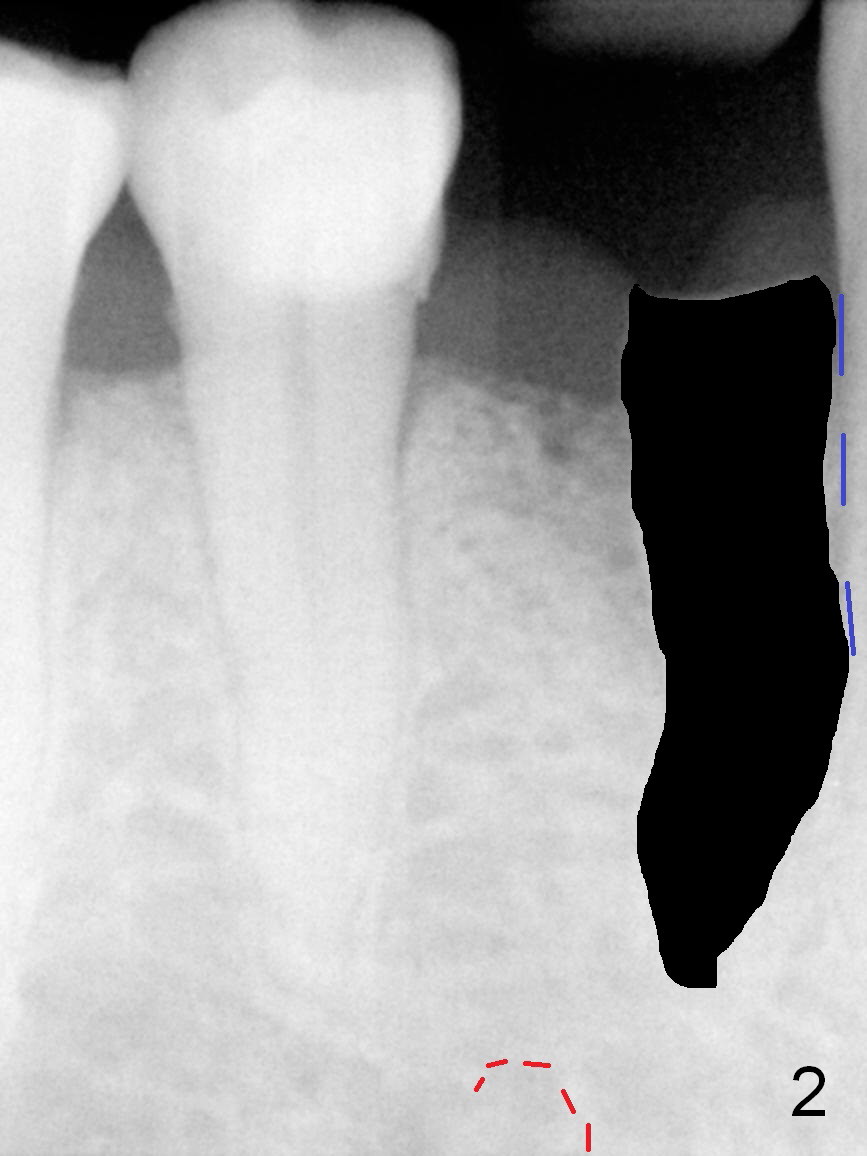
Osteotomy Position and Depth Control
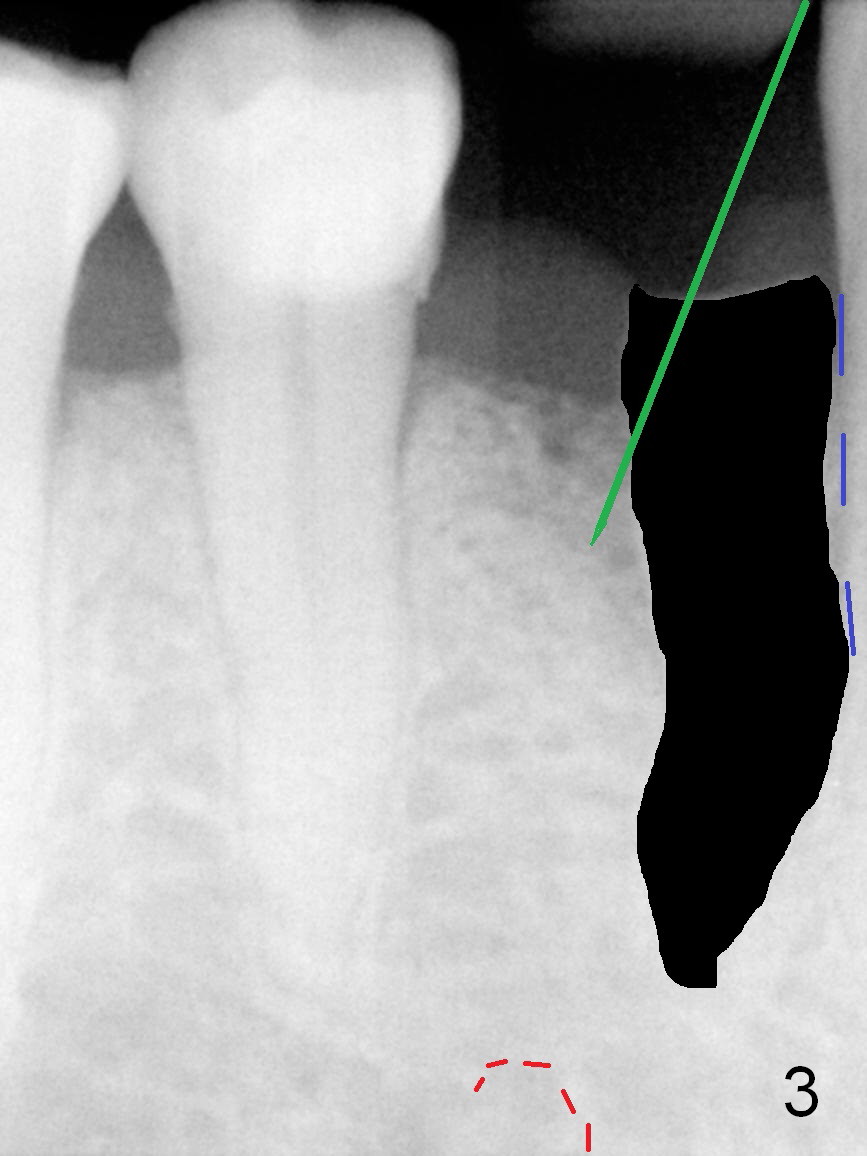
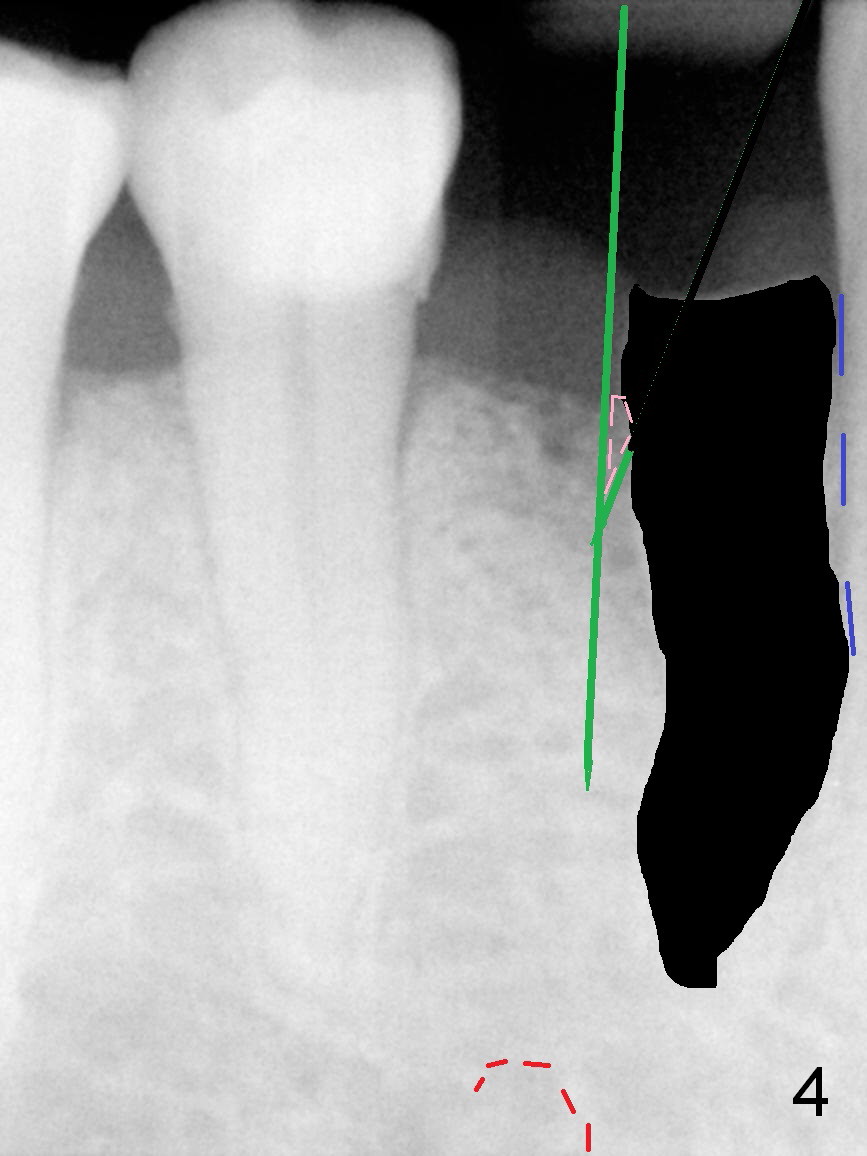
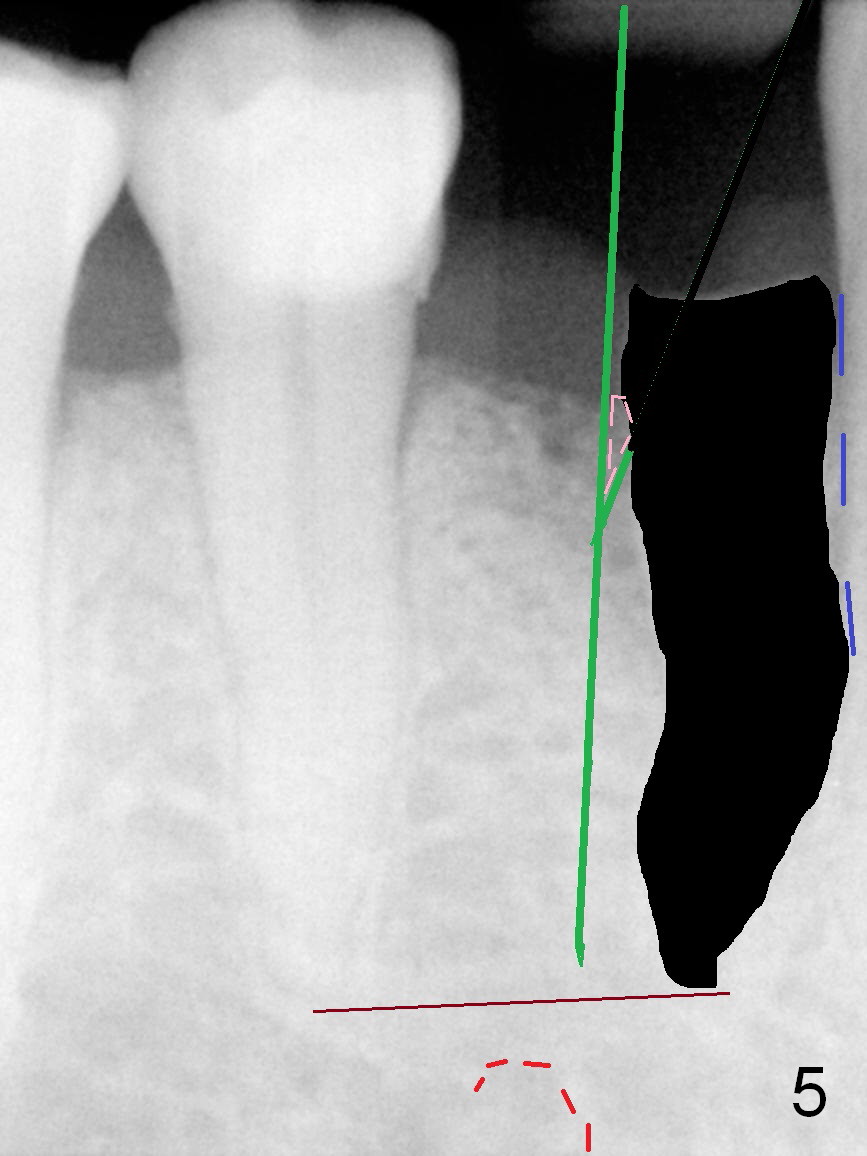
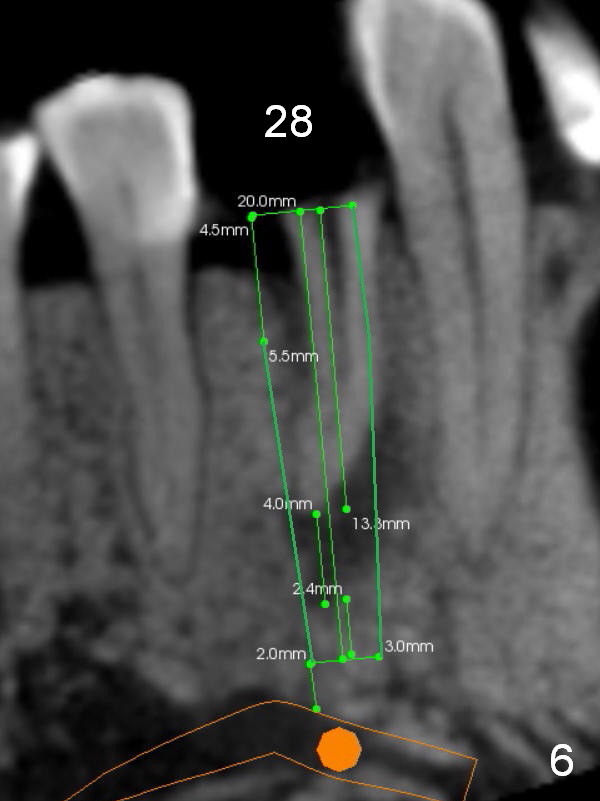
A 73-year-old man requests extraction of the lower right 1st premolar and implant restoration (Fig.1: #28). The root of the affected tooth (Fig.2 black area) is not only curved, but also deviated mesially (close to the root of the canine (blue dashed line). Osteotomy should be established with a sharp 1.5 mm pilot drill obliquely in the distolingual slope of the socket (treated with Metronidazole, Fig.3 (green line)). Once bony penetration is obtained, the drill straightens up in the middle of the socket and along the ideal long axis (Fig.4). Remove the bone in between (Fig.4 pink dashed line) if there is resistance to change in the trajectory. A PA is taken to confirm the position and trajectory. Then extend the osteotomy (Fig.5 green line) , but not beyond the apices of the neighboring tooth and the original socket (brown line), since the Mental Loop is nearby (Fig.2-5 red dashed line).
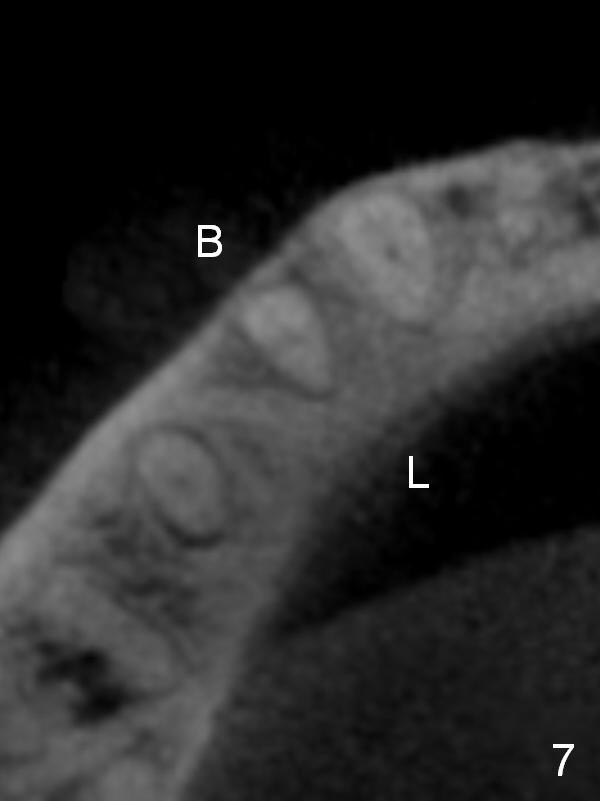
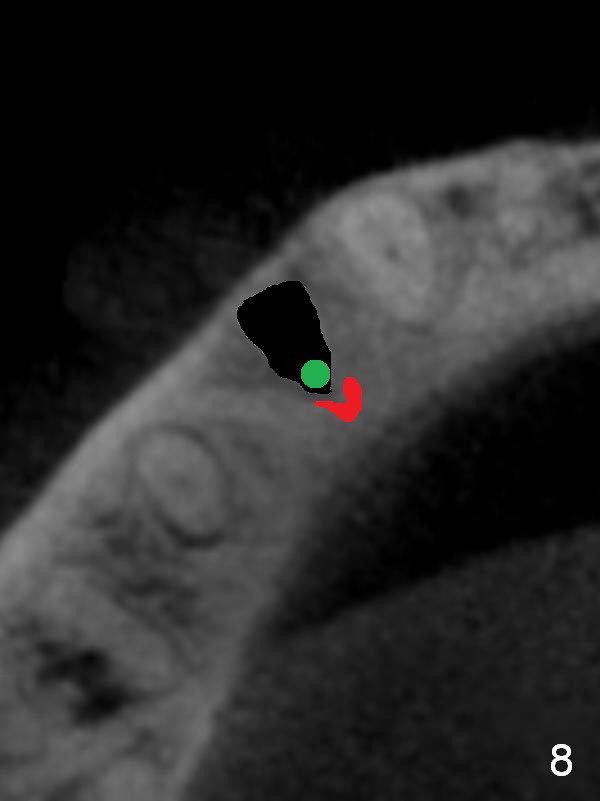
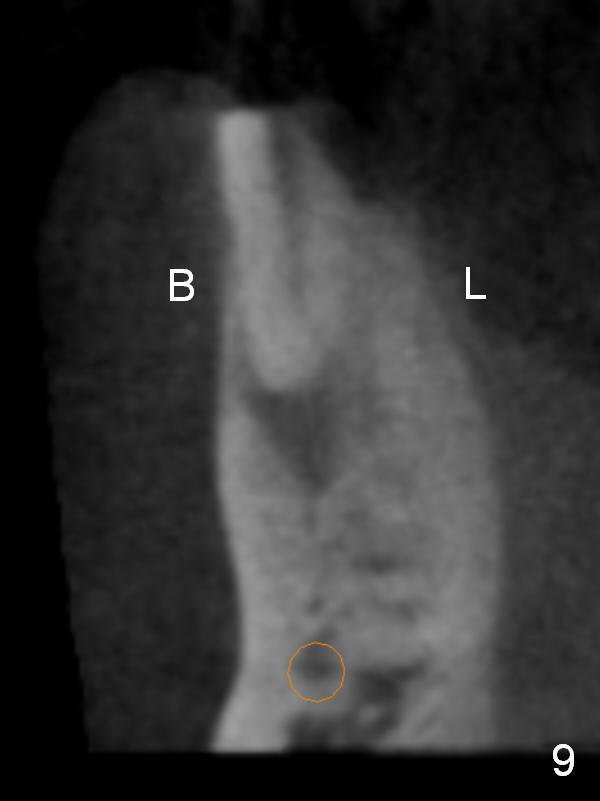
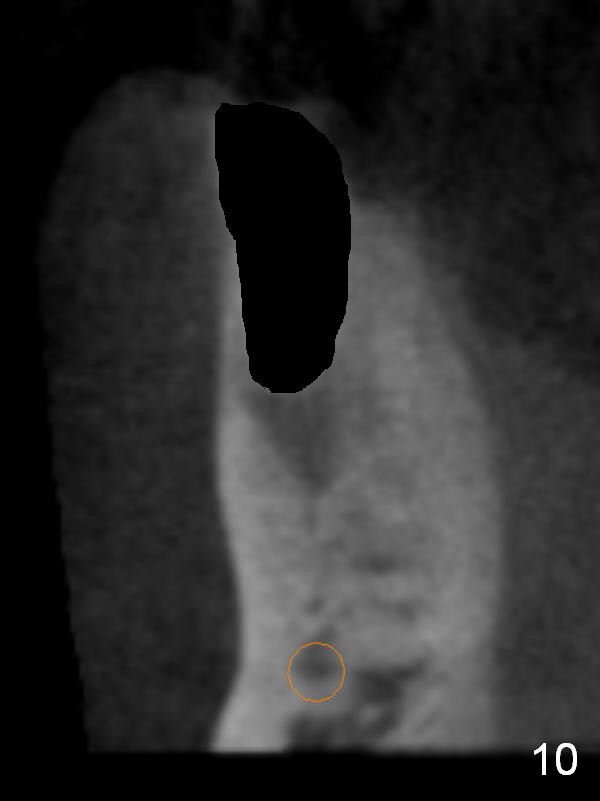
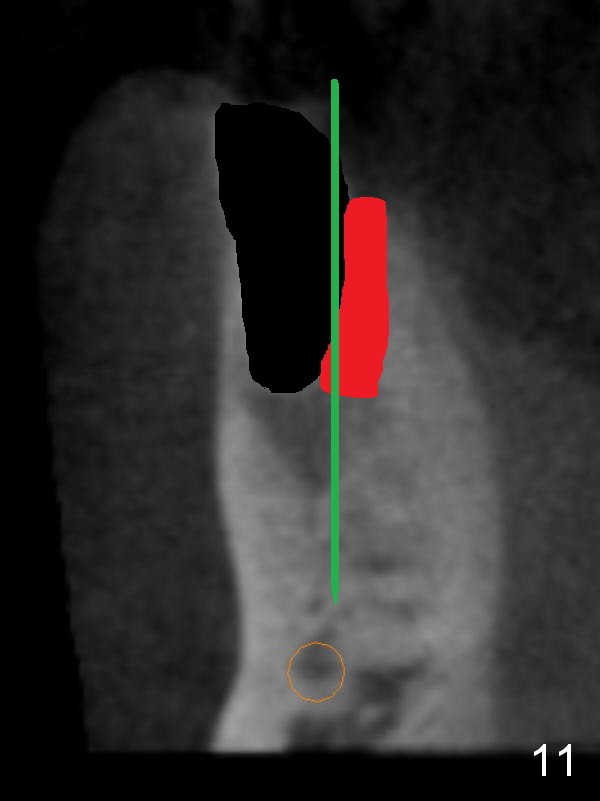
CT sagittal section shows that it is possible to place 4.5x20 mm implant (Fig.6). Axial (Fig.7) and coronal (Fig.9) sections show that the lingual (L) plate is much thicker than the buccal (B) one. To prevent the implant being buccally deviated, a Lindermann bur is used after extraction (black area in Fig.8,10) to remove ~ 1mm bone from the lingual plate (red area in Fig.8,11). A 2 mm pilot drill is placed as lingual as possible (green in Fig.8,11). If the implant (Fig.12) starts to deviate buccally while being placed, remove it from the osteotomy and remove more bone from the lingual plate. Place the implant again and monitor the trajectory tightly.
Return to Lower Premolar Immediate Implant
Xin Wei, DDS, PhD, MS 1st edition 10/18/2015, last revision 11/04/2015