,%20no%20graft.jpg)
%20and%20graft%20.5-1%20mm.jpg)
%20abutment.jpg)
|
|
|
|
|
||
|
|
|
|
|
|
|
|
|
|
||||
Poor Control of Osteotomy Depth
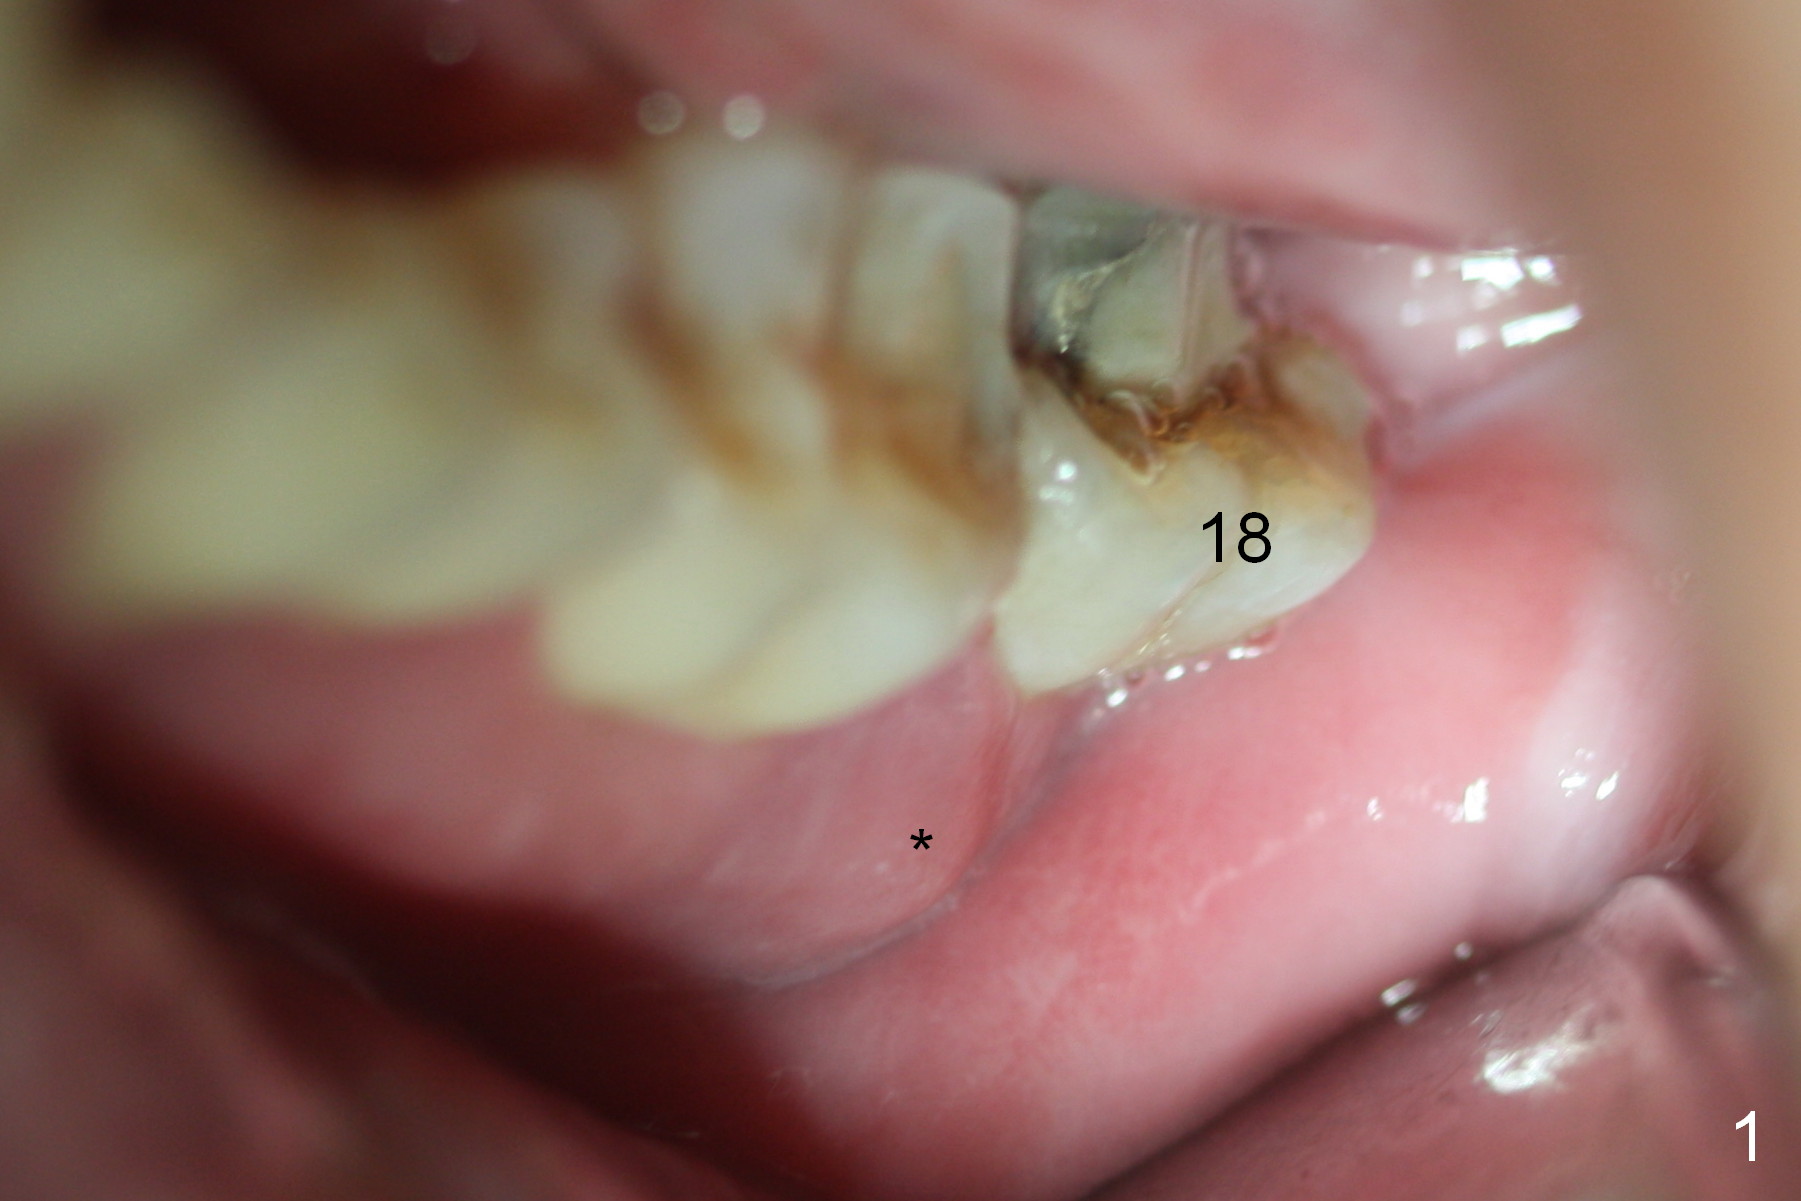
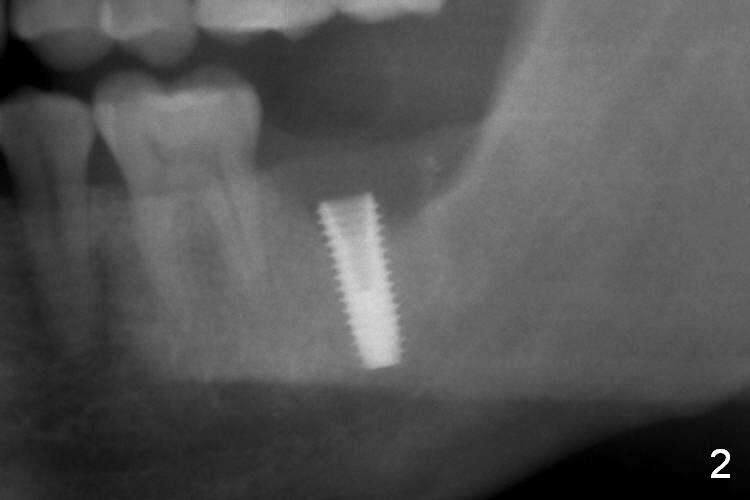
In spite of oral Amoxicillin, the abscess associated with the fractured tooth #18 is not under control (Fig.1 *). After extraction, the septum is found to be thin and appears not to be a good site of implant placement. Osteotomy starts in the mesial socket. The depth is 13 mm from the mesial crest. Unfortunately when burs are being used, the septum is used as landmark (2-3 mm deeper). The bottom of the osteotomy looks and feels solid. When a 5x13 mm implant is placed to the depth, the patient feels pain. Panoramic X-ray shows that the implant is close to the Inferior Alveolar Canal (Fig.2). The implant is backed up. When an abutment is tried, the implant is dislodged from the osteotomy site. After use of 5x11.5 mm drill against the lingual wall, a 5.5x11.5 mm implant is placed with < 35 Ncm (Fig.3). The low primary stability is in part due to the thin septum (Fig.3 <). The radiolucency apical to the apex of the implant is over preparation of the osteotomy (Fig.3 *). When autogenous bone, .5-1 mm mineralized cancellous & cortical allograft and Osteogen are placed around the implant, the bone density increases (Fig.4 *). An immediate provisional is fabricated without cement to hold bone graft in place.
The bottom of the mesial socket would be more reliable landmark for stoppers. Those from Sinus Master Kit are as short as 2 mm. Take a PA after use of the 1st drill. When round burs (2.8 and 3.6 mm vs. 2 mm of pilot drill) are used, the depth may be increased slightly. It seems that the round burs are less traumatic to the Inferior Alveolar Neurovascular bundle. In fact, there is no postop paresthesia in this case. The distal socket and apical space disappear 11 months postop (Fig.5). An angled abutment (5.5x15°B 4 mm) is used before impression to change the mesiobuccal trajectory.
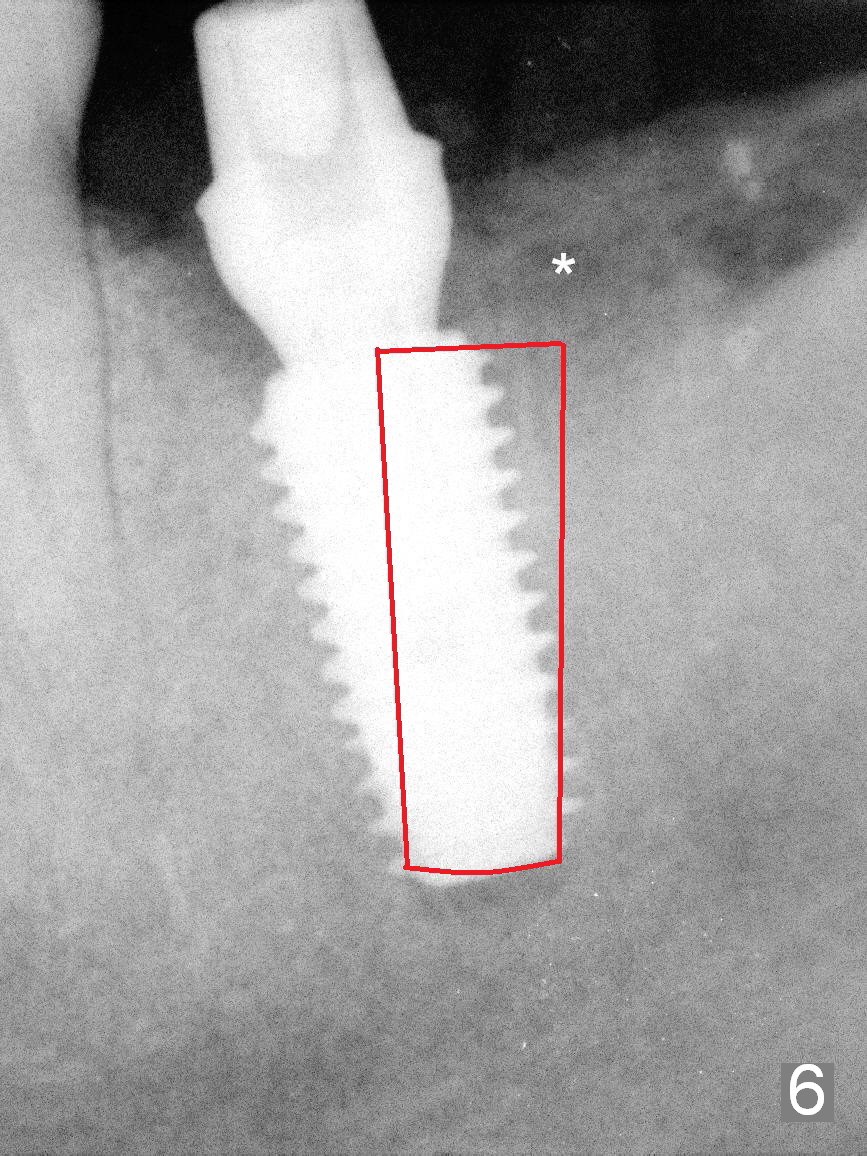
In fact the trajectory could have been changed immediately post placement. Remove the implant and change the trajectory while is is being reinserted (Fig.6).
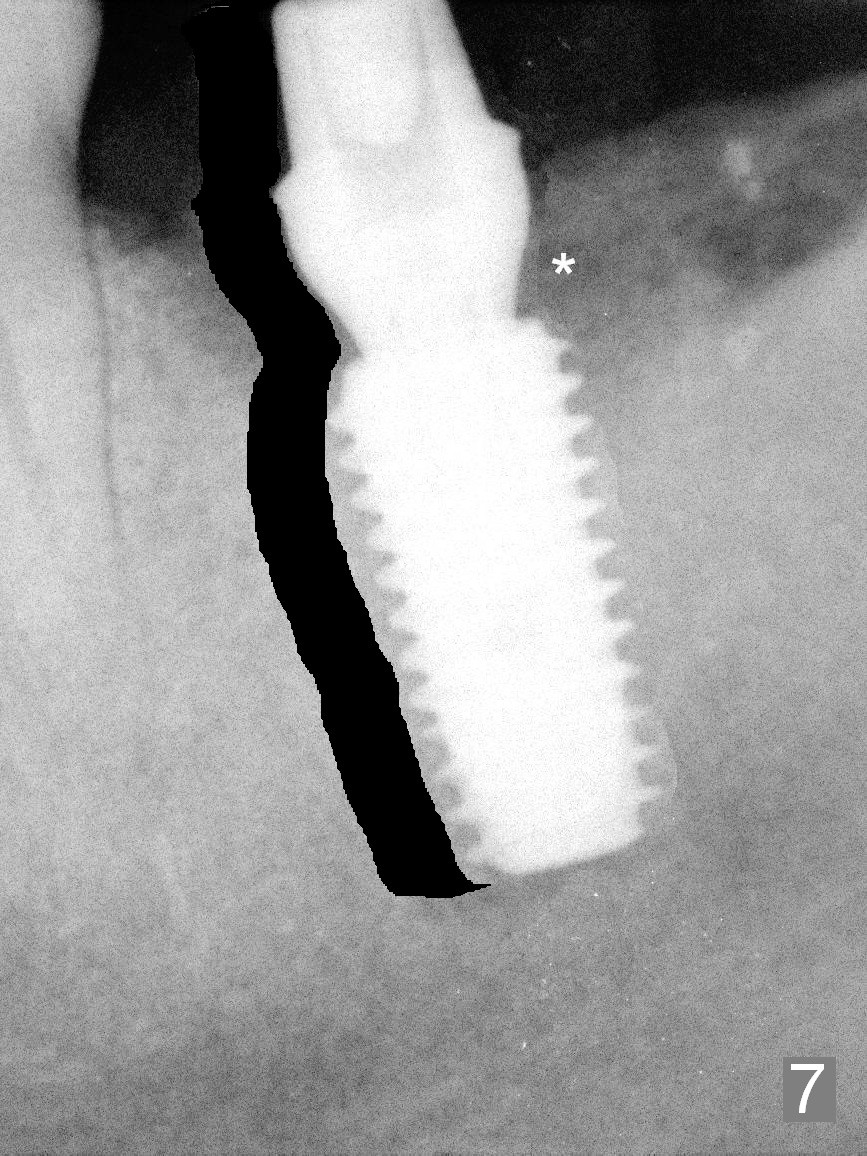
More ideally, remove the thin septum at first, start osteotomy in the middle of the socket and place an implant (Fig.7).
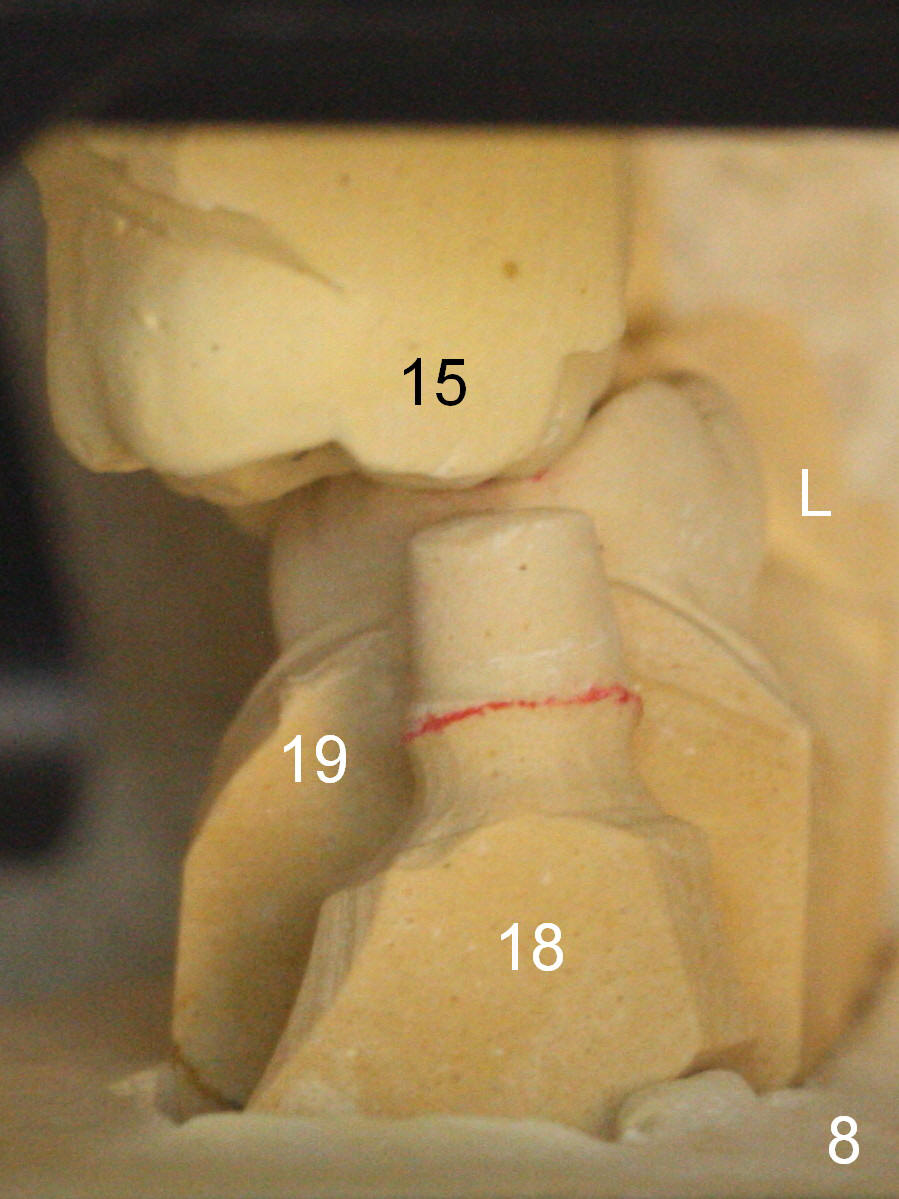
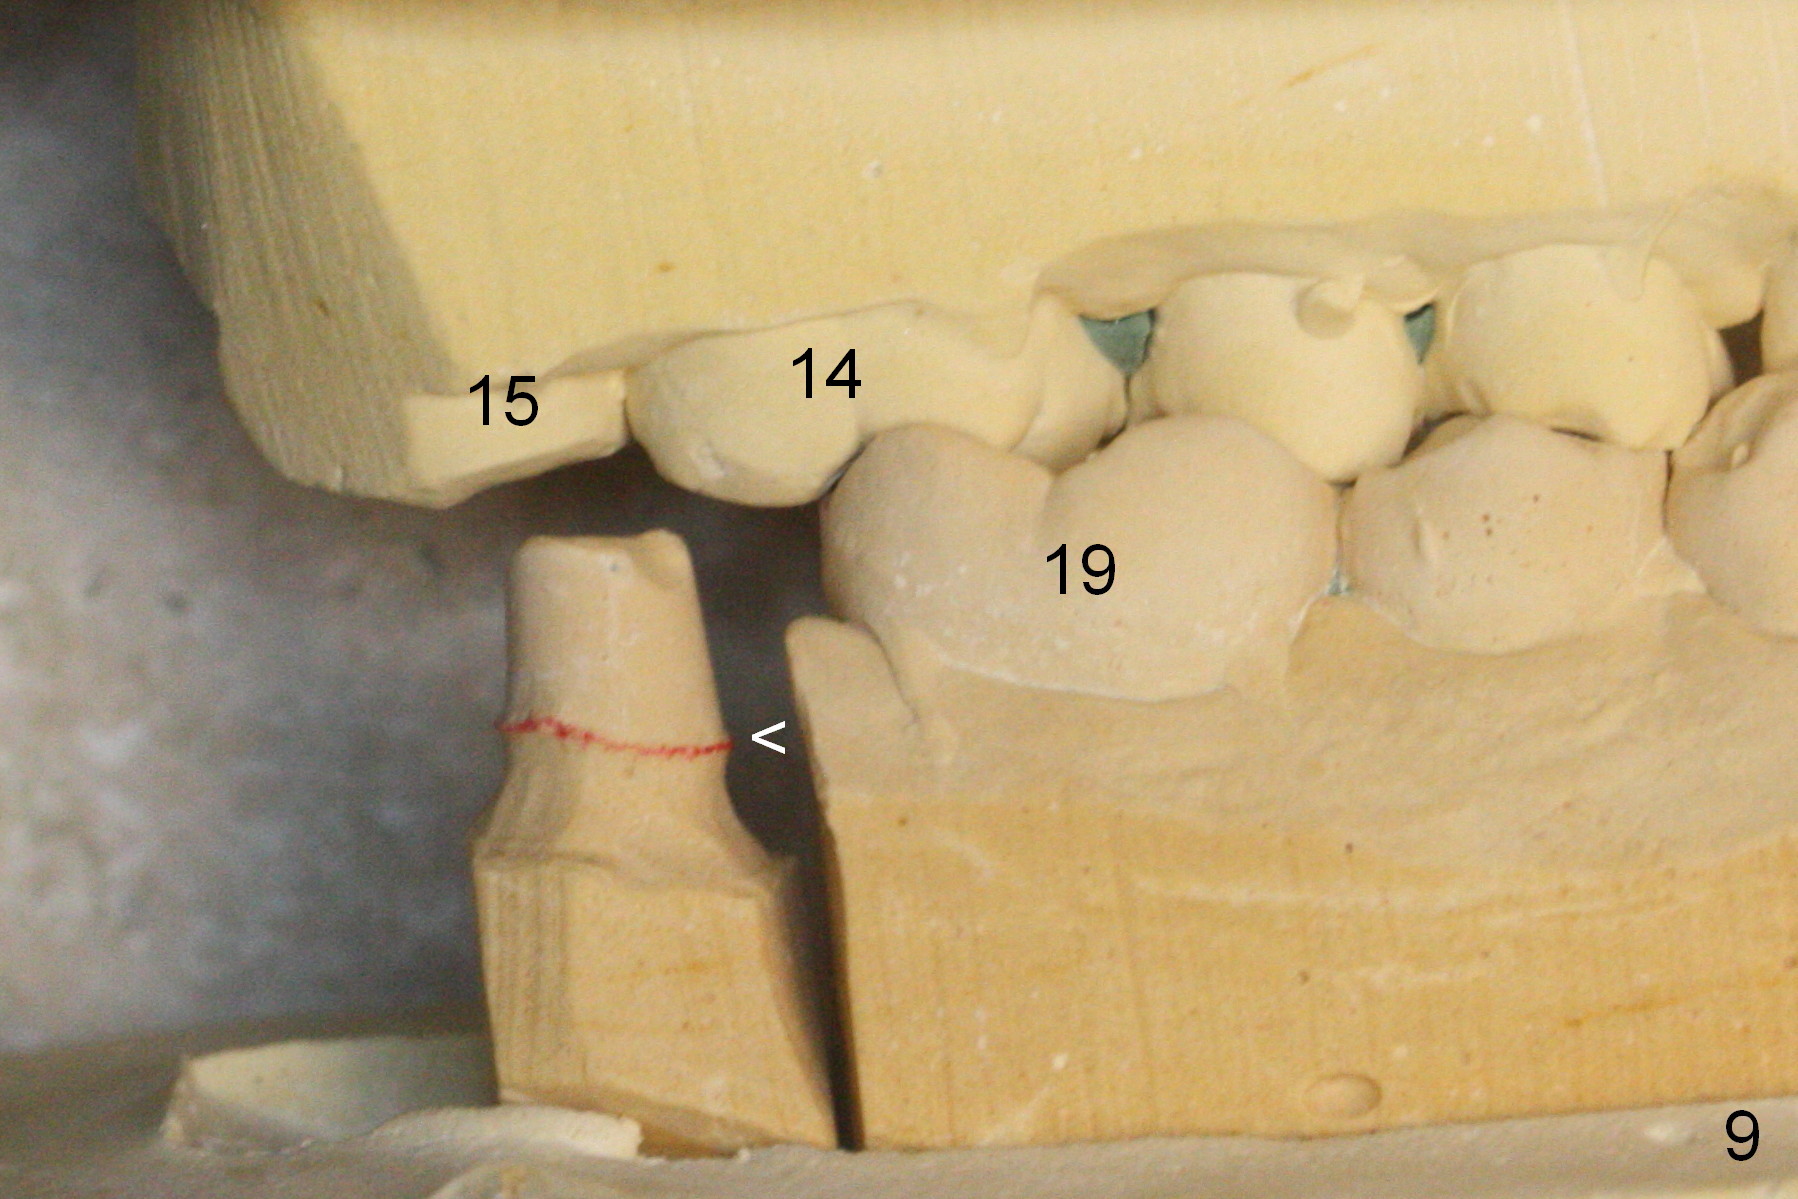
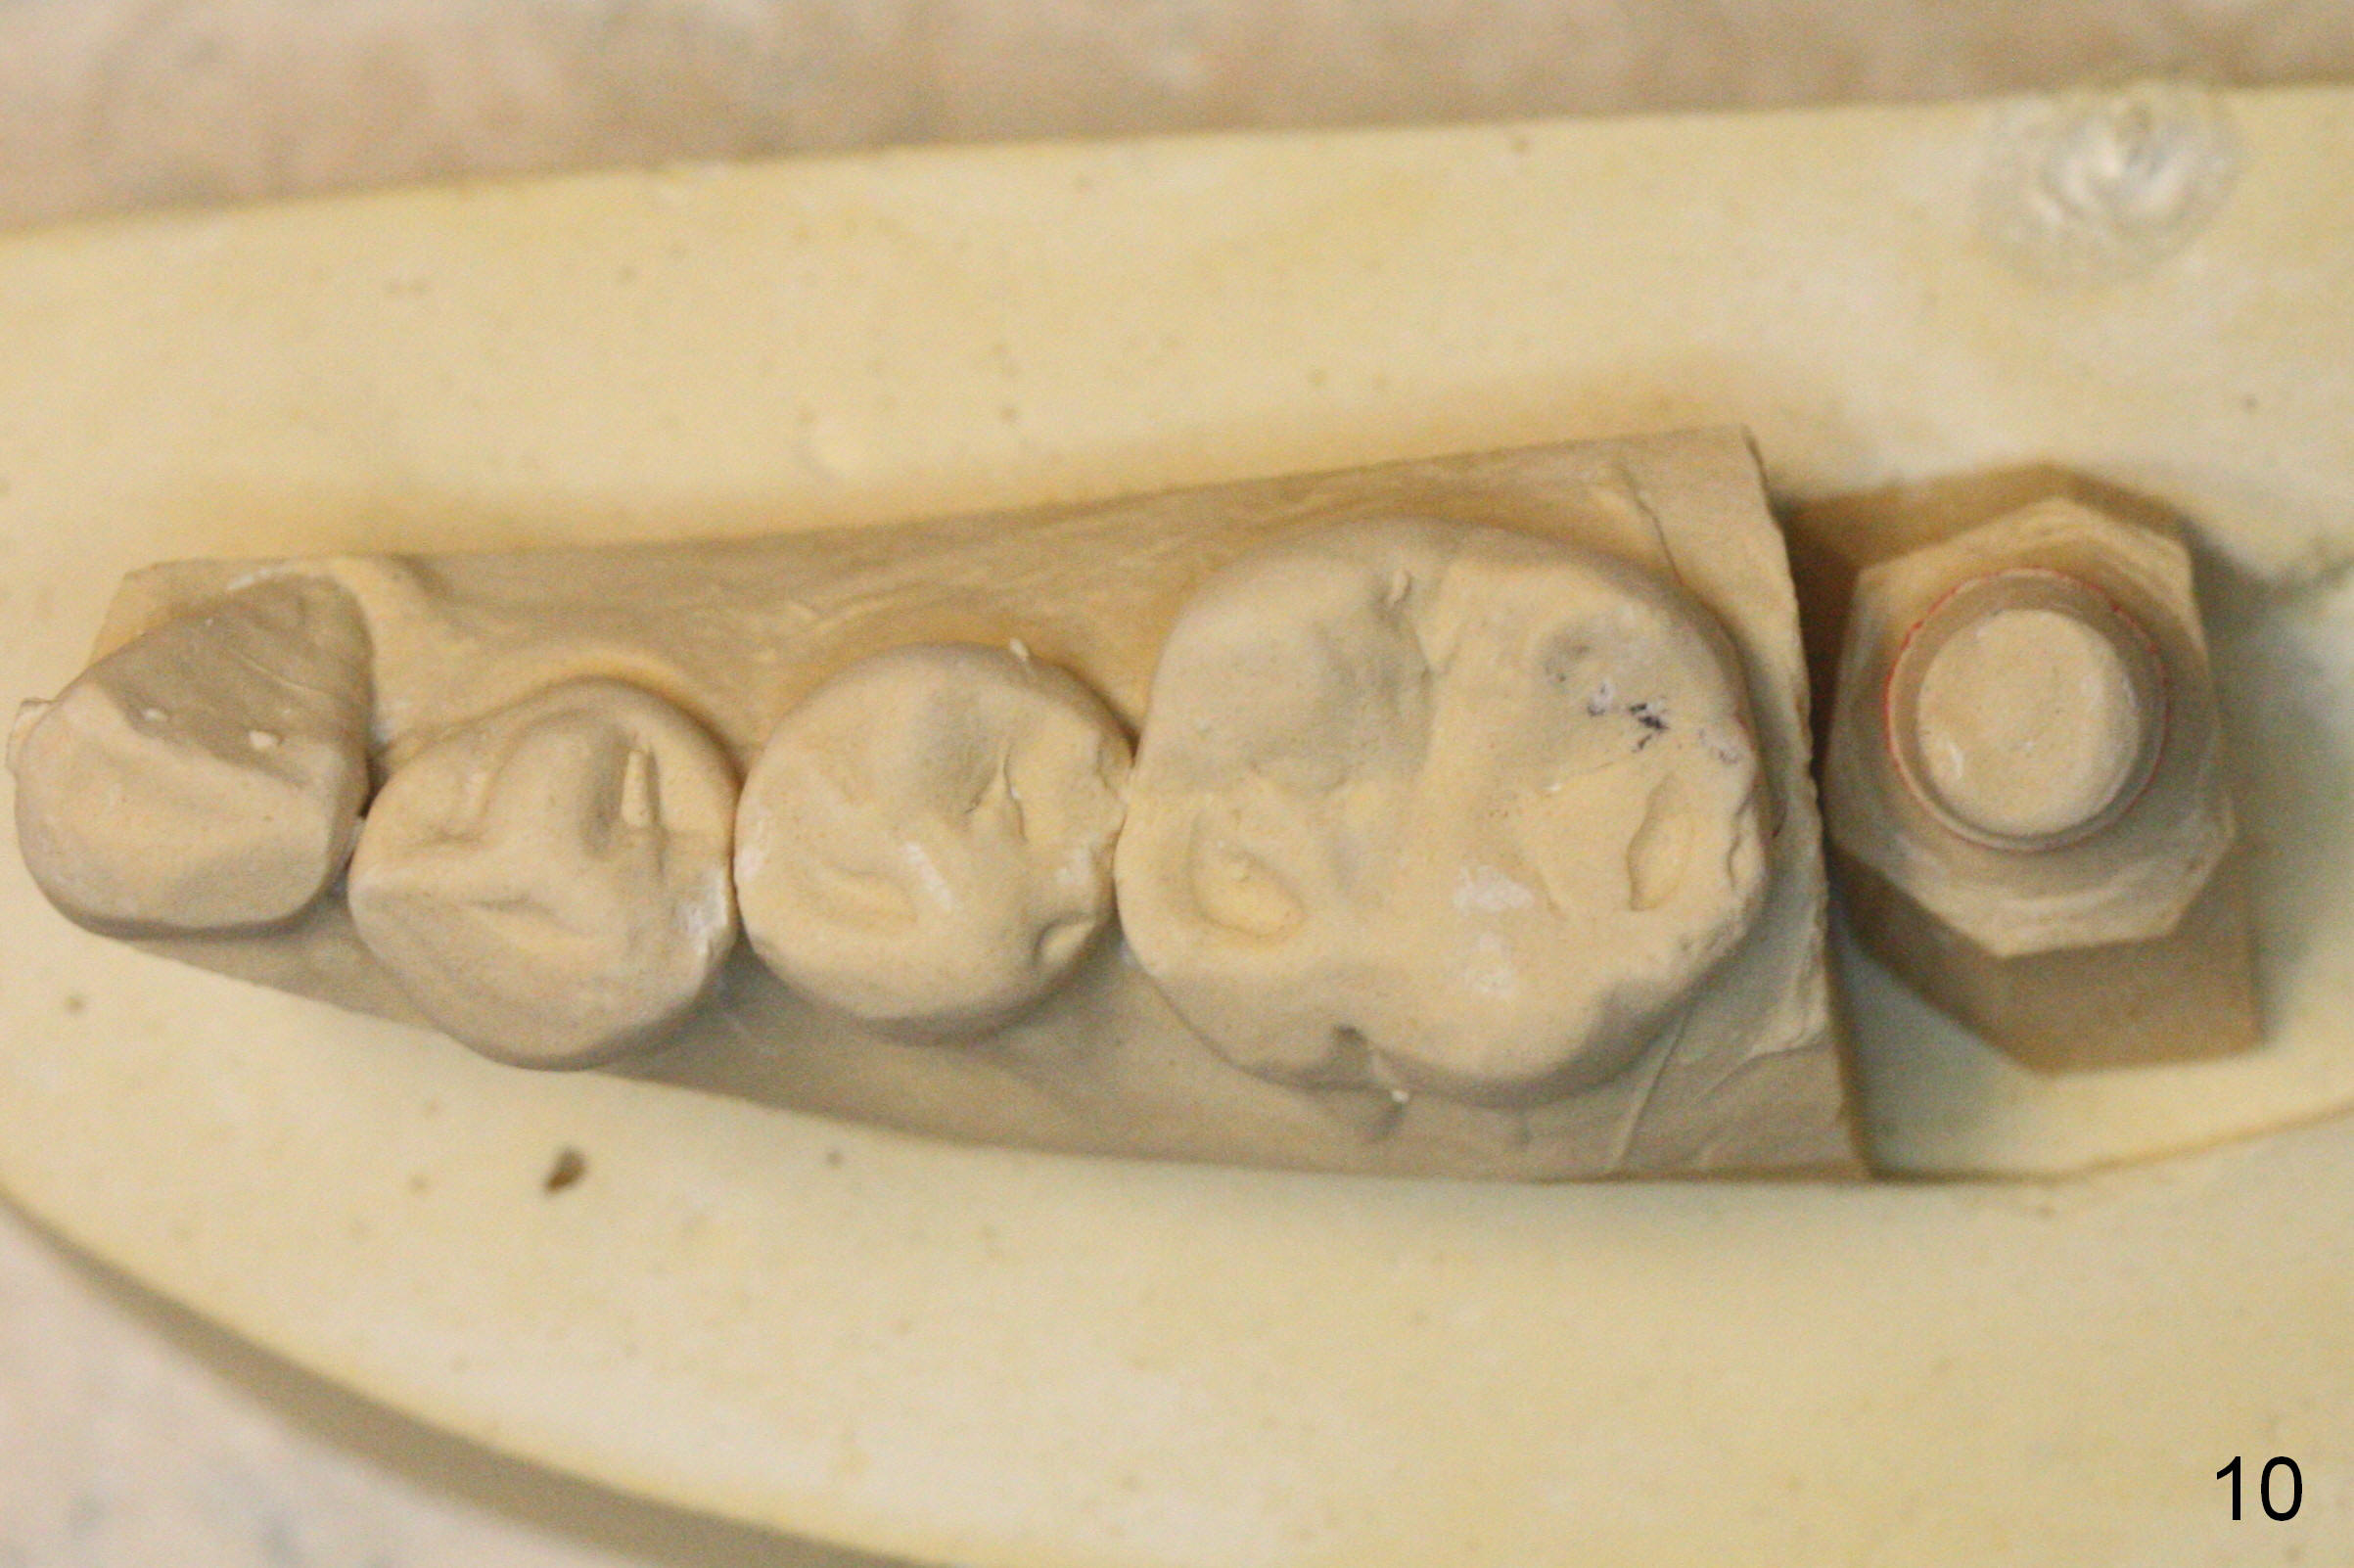
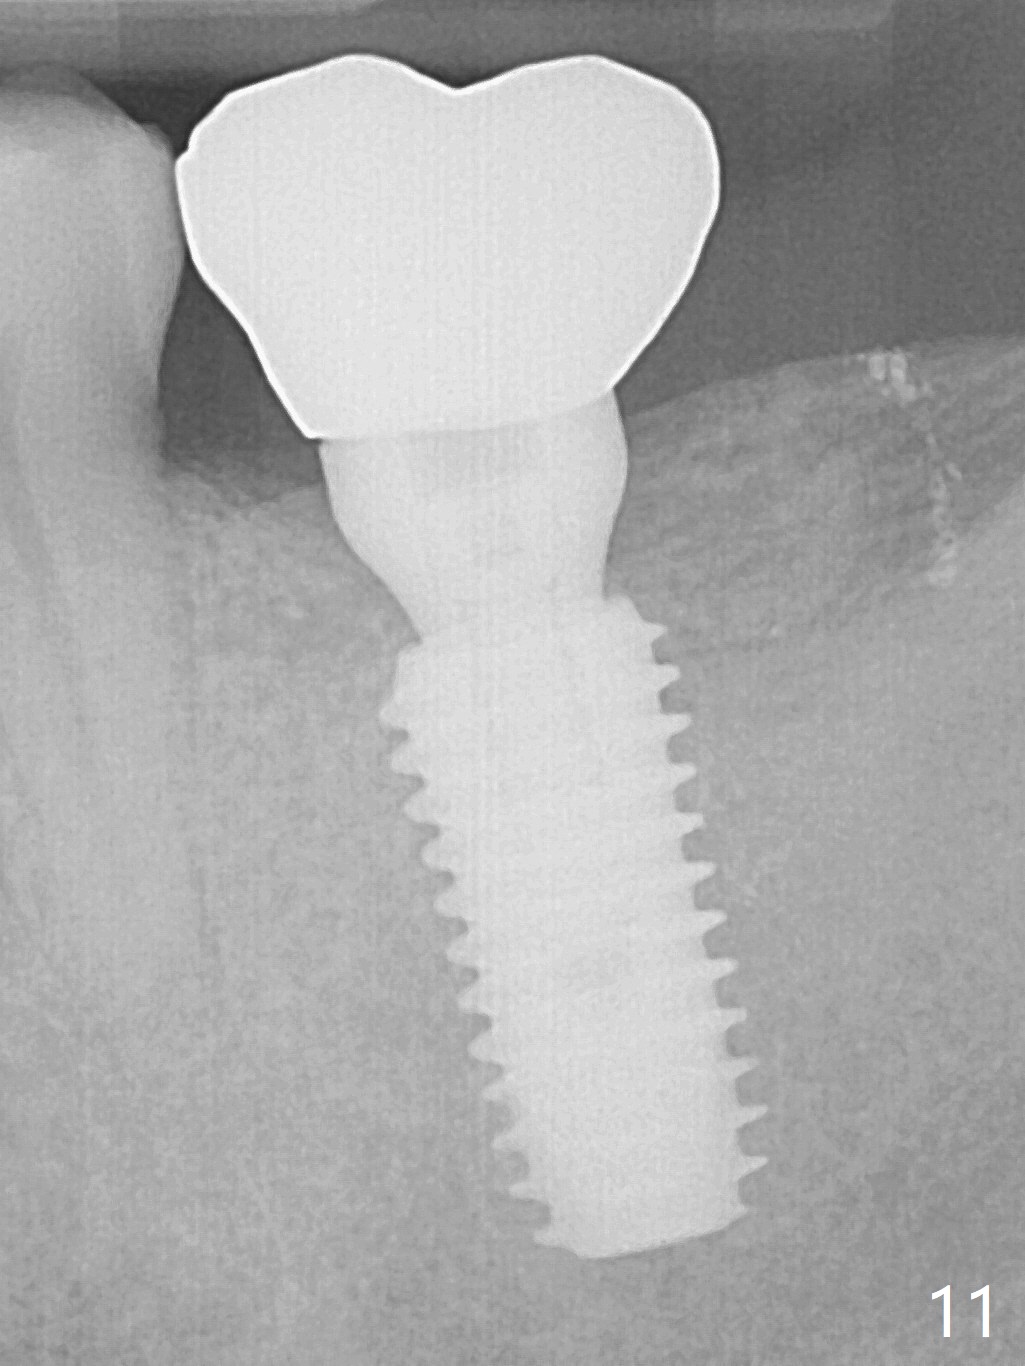
The distal view of the model shows that the implant is placed ideally buccolingually (Fig.8), whereas it may be placed slightly lingually from the occlusal view (Fig.10). Use of the angled abutment allows easy access to the mesial margin by impression material (Fig.9 <). There is no bone loss 1 year post cementation (Fig.11).
Return to Lower Molar Immediate Implant,
#9,31
Xin Wei, DDS, PhD, MS 1st edition 01/29/2016, last revision 01/19/2018