.jpg)
,%202nd%20shot.jpg)
.jpg)
|
|
|
|
|
|
|
|
|
|
|
|
|||
IS Guide for UF Implant
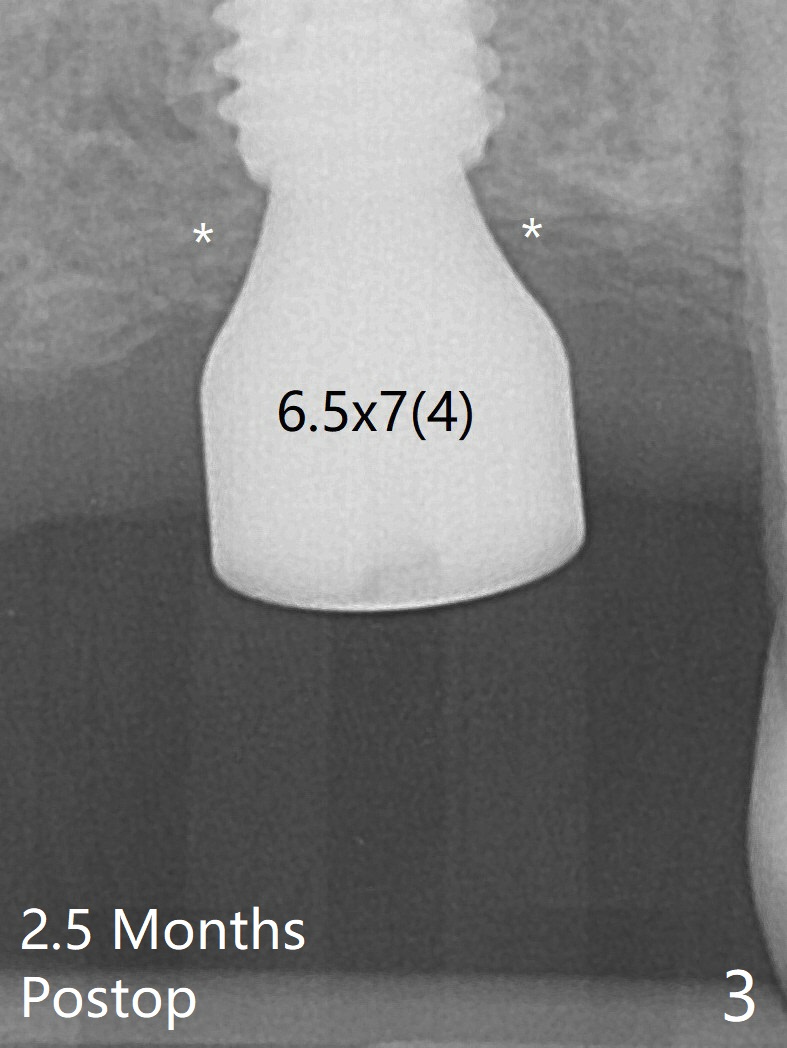
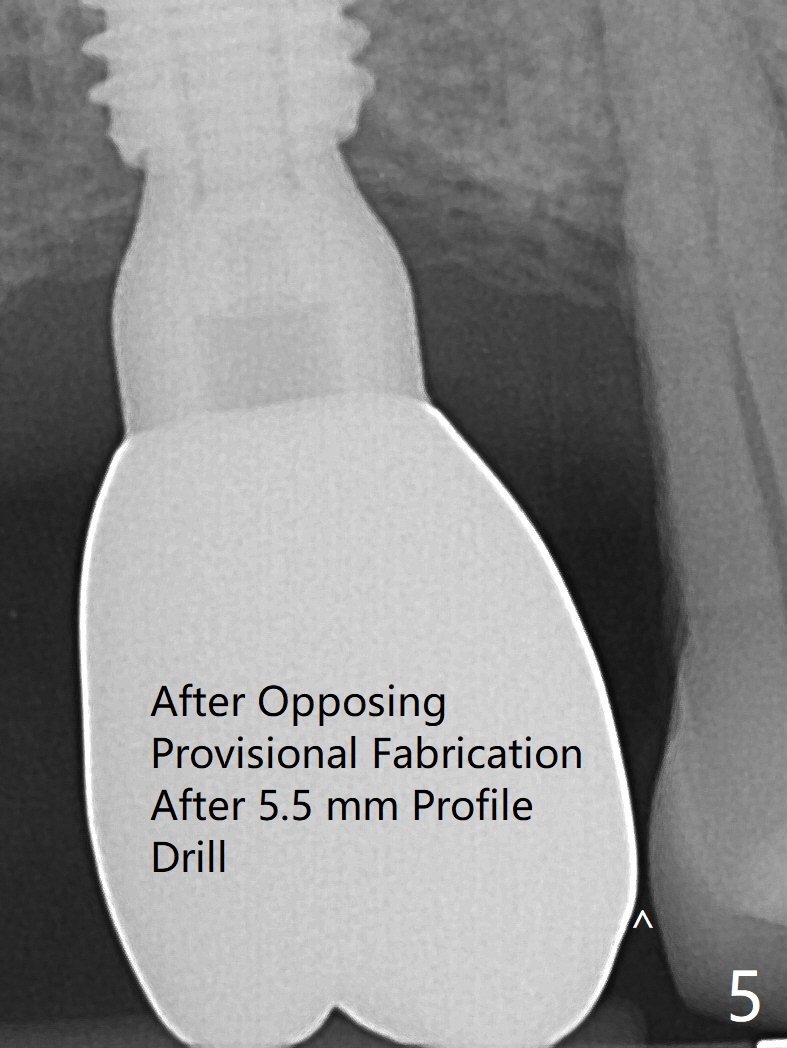
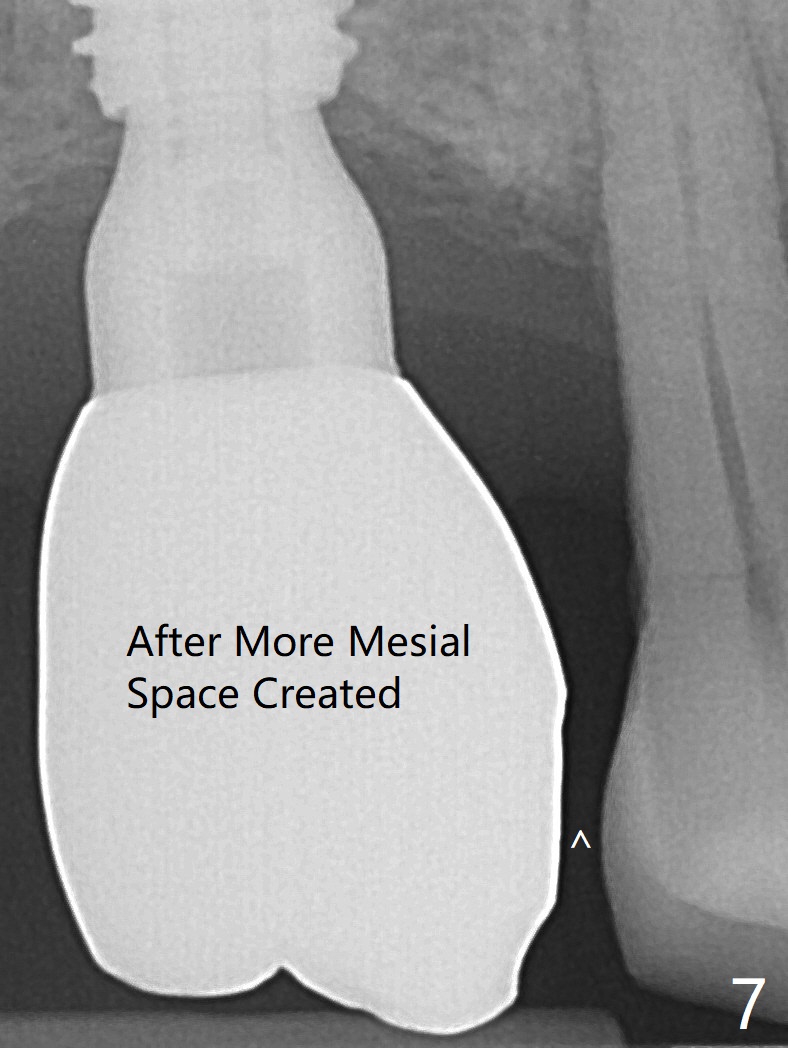
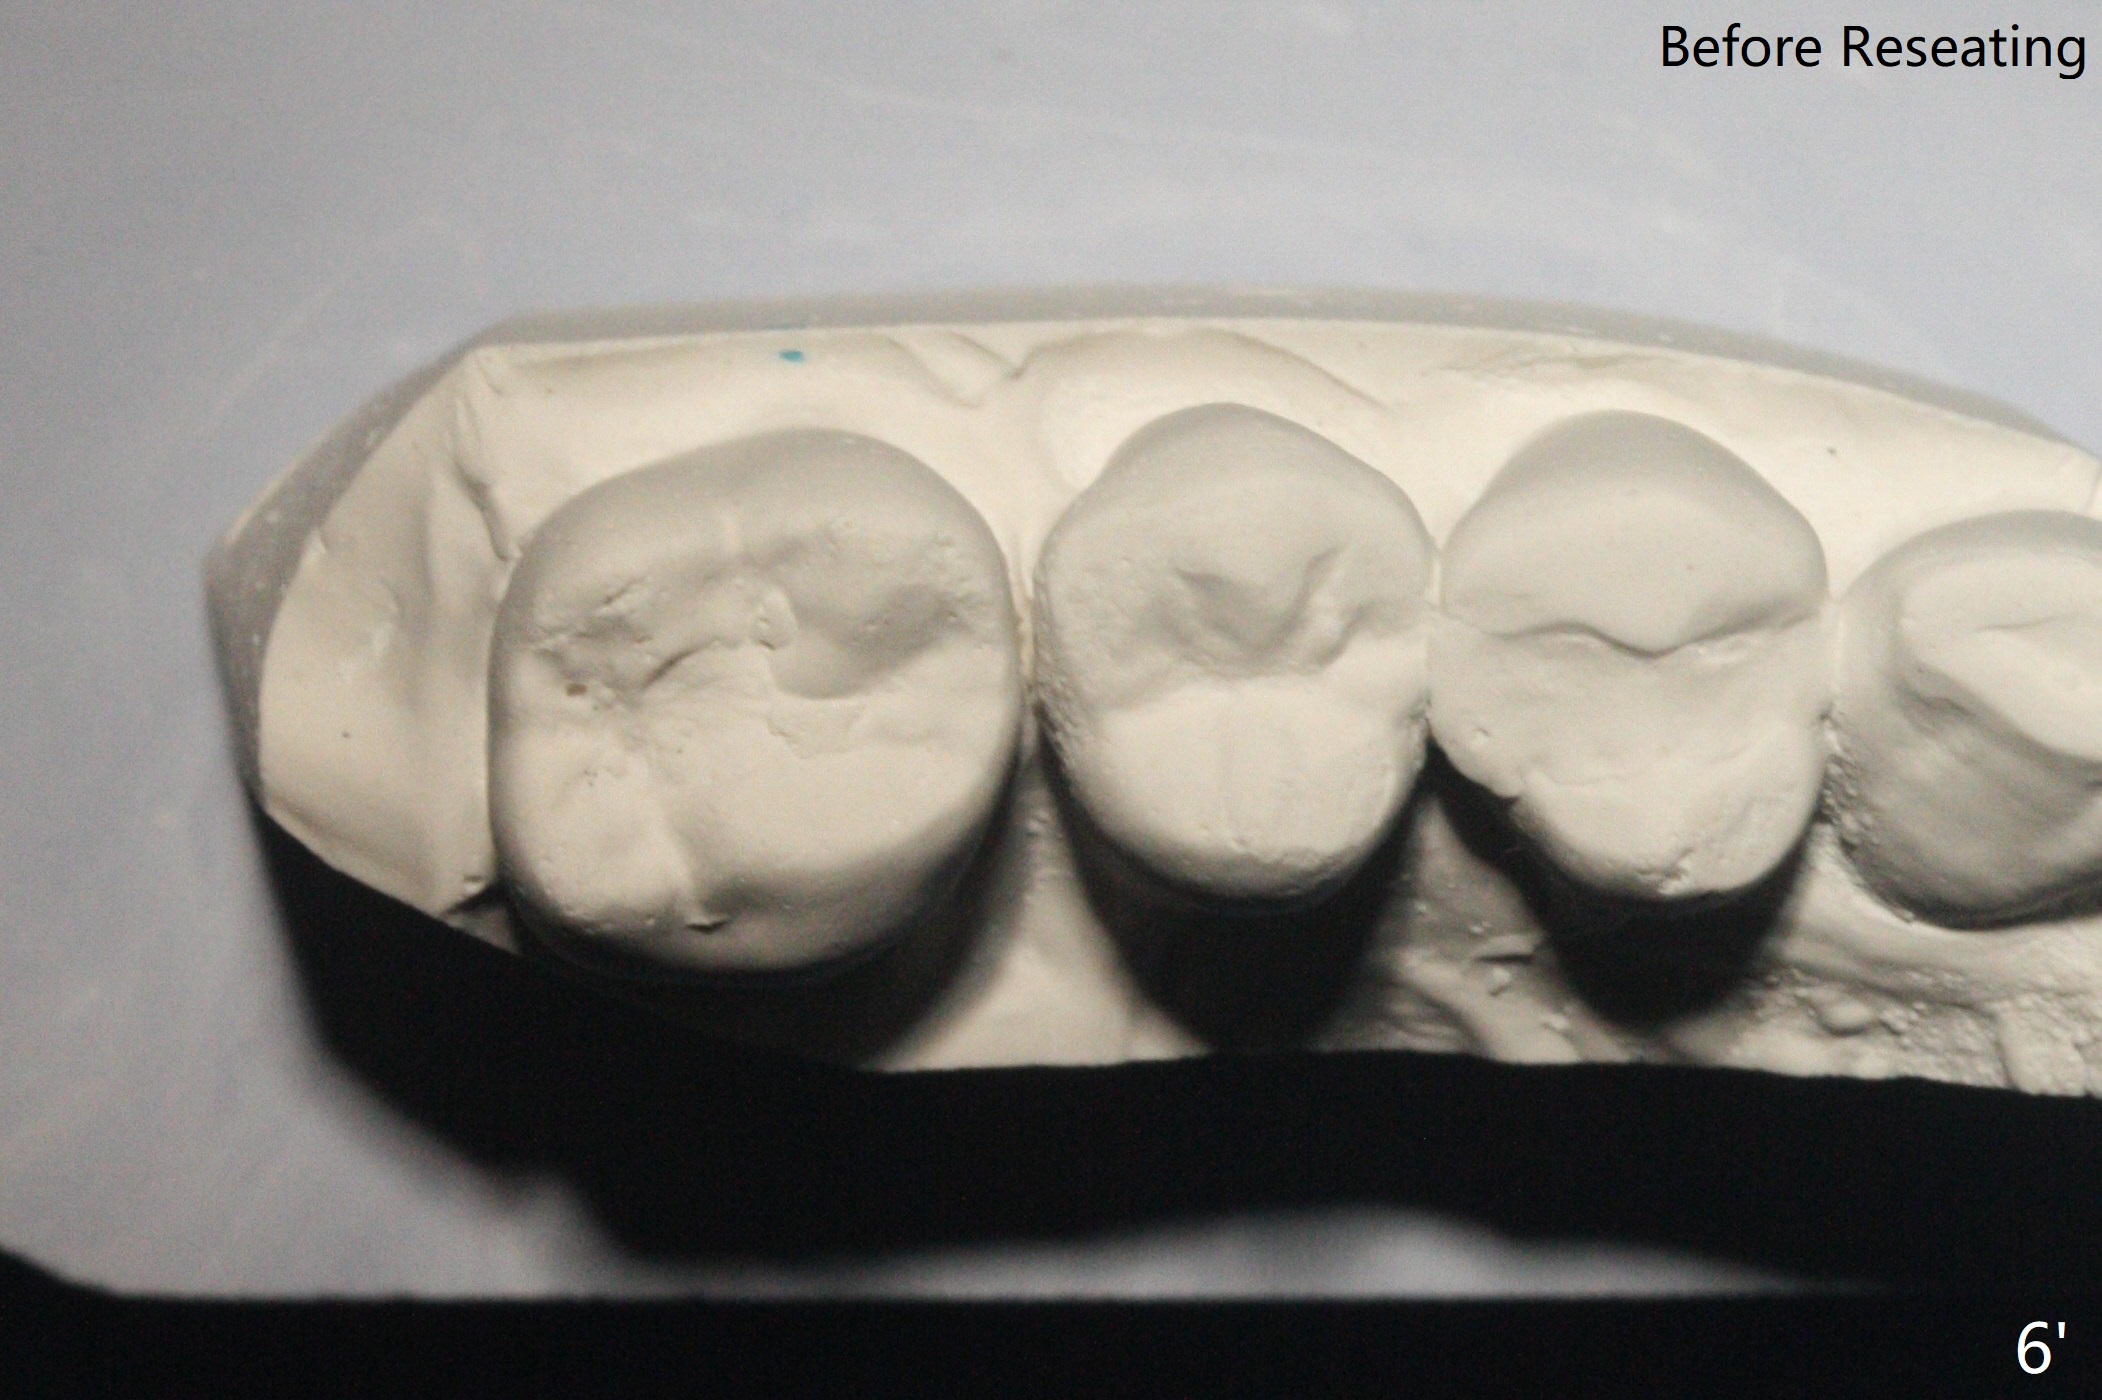
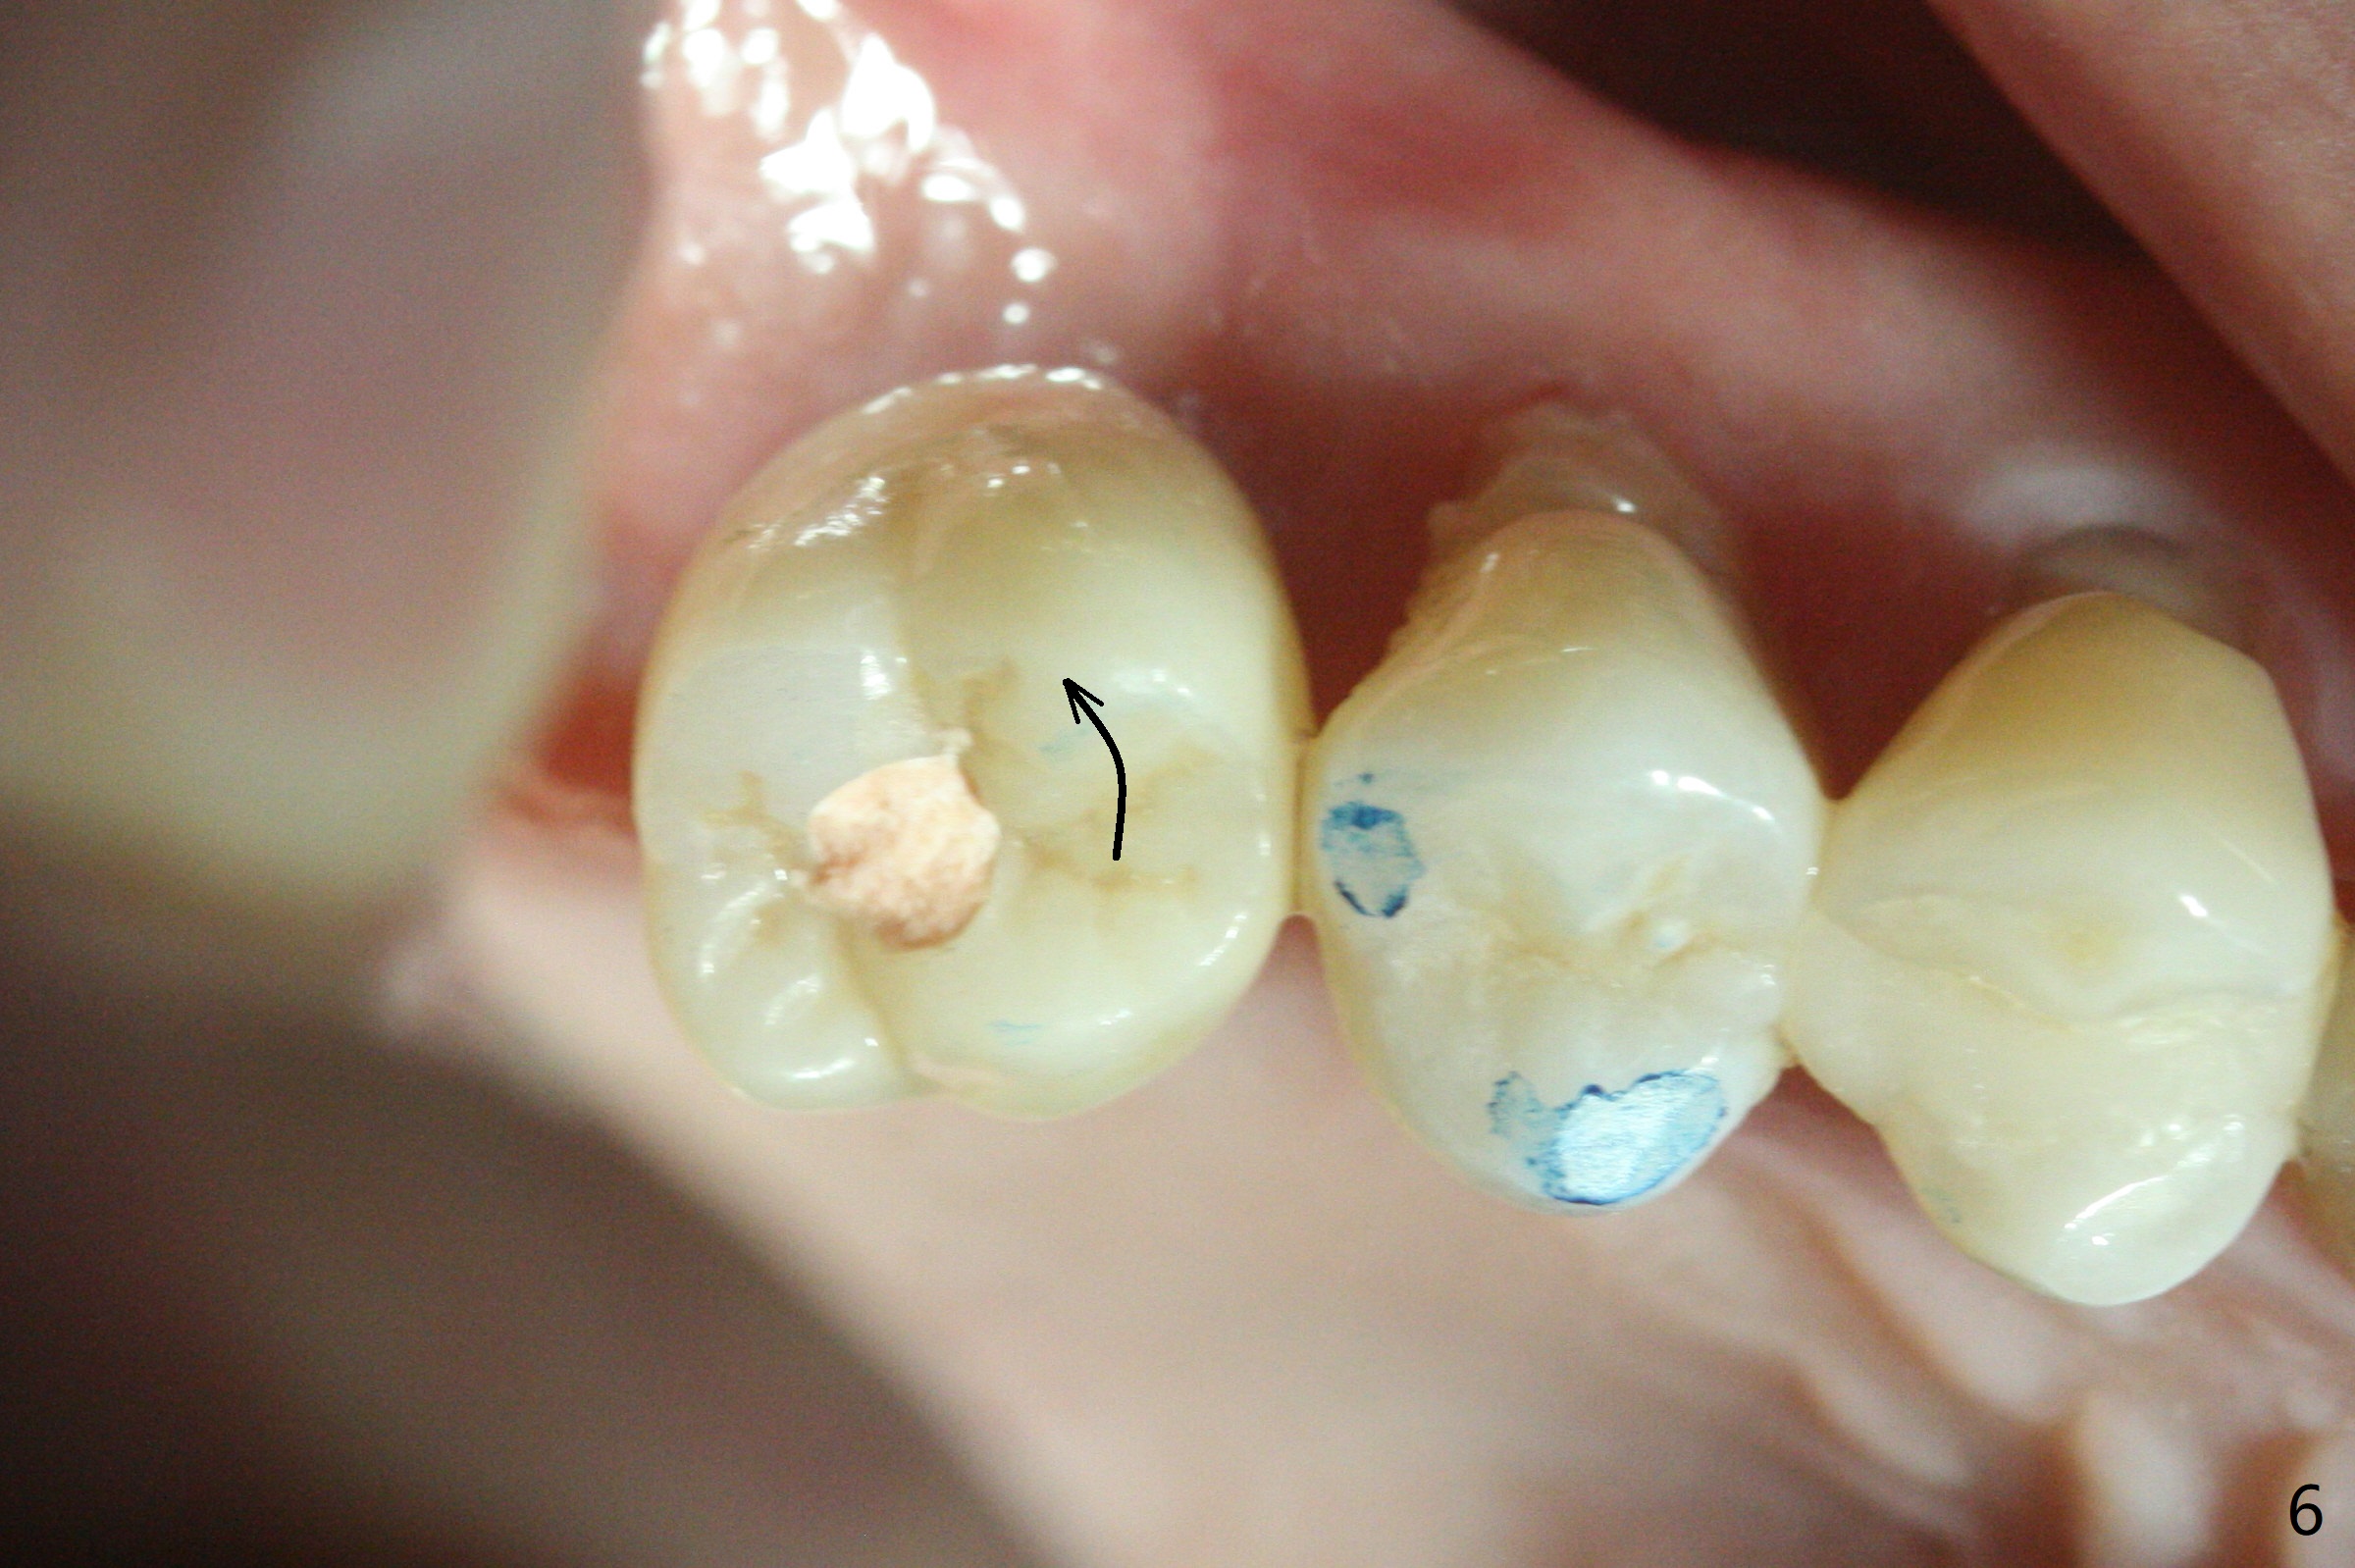
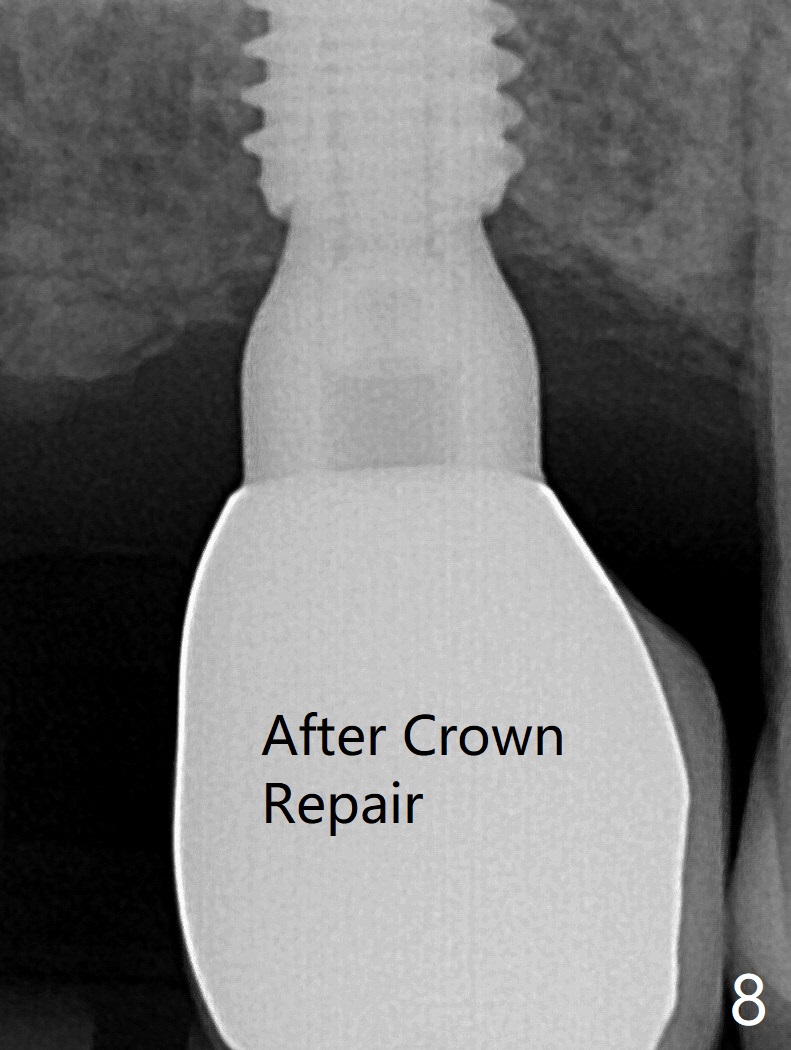
After osteotomy at #3 according to drill sequence except 5 mm cortical tap reaching 1st line (instead of 3rd one for 12 mm offset), a 5x10 mm UF implant is placed with satisfactory stability and level (Fig.1,2). The bone harvested from the osteotomy is used for #31 socket preservation. Parallel PA (taken with sensor I) shows proximity of the healing abutment with the crestal bone (Fig.3). In spite of using a smaller cemented abutment, there is a gap between it and the implant, suggesting incomplete seating (Fig.4 < (use of sensor II)). If the screw becomes loose in function, a 6.0 mm profile drill has to be used. The screw becomes loose when #30 provisional is fabricated. In fact the screw is loose when the opposing provisional is fabricated (i.e., 13 months post cementation). After use of 5.5 mm profile drill, the crown/abutment is turned and reseated completely (Fig.5). The mesial clearance is limited (^). The crown will be repaired when the opposing permanent crown is cemented. When the opposing permanent crown is cemented, the already turned crown (Fig.6 curved arrow) has no occlusal contact. The mesial clearance for pick up impression is limited. The crown has to be removed for further reduction of the mesial surface. In fact the crown before turning has no mesial contact; the model is taken for #30 crown fabrication (Fig.6'). After mesial clearance is created (Fig.7 ^) and the crown/abutment is reseated, X-ray has to be taken for seating confirmation before pick up impression. The abutment appears to remain completely seated when it is reseated with the repaired crown (Fig.8). Then the crown is cemented. After curing, the crown/abutment is removed for cement removal. The screw is torqued at 20 Ncm (vs. 35 Ncm recommended by manufacture). The access hole is closed with plumber tape and composite.
Return to Upper Molar Immediate Implant, Trajectory II Torque
Xin Wei, DDS, PhD, MS 1st edition 09/20/2019, last revision 03/19/2021