.jpg)
|
|
|
|
|
|
|
|
Free-Hand Osteotomy
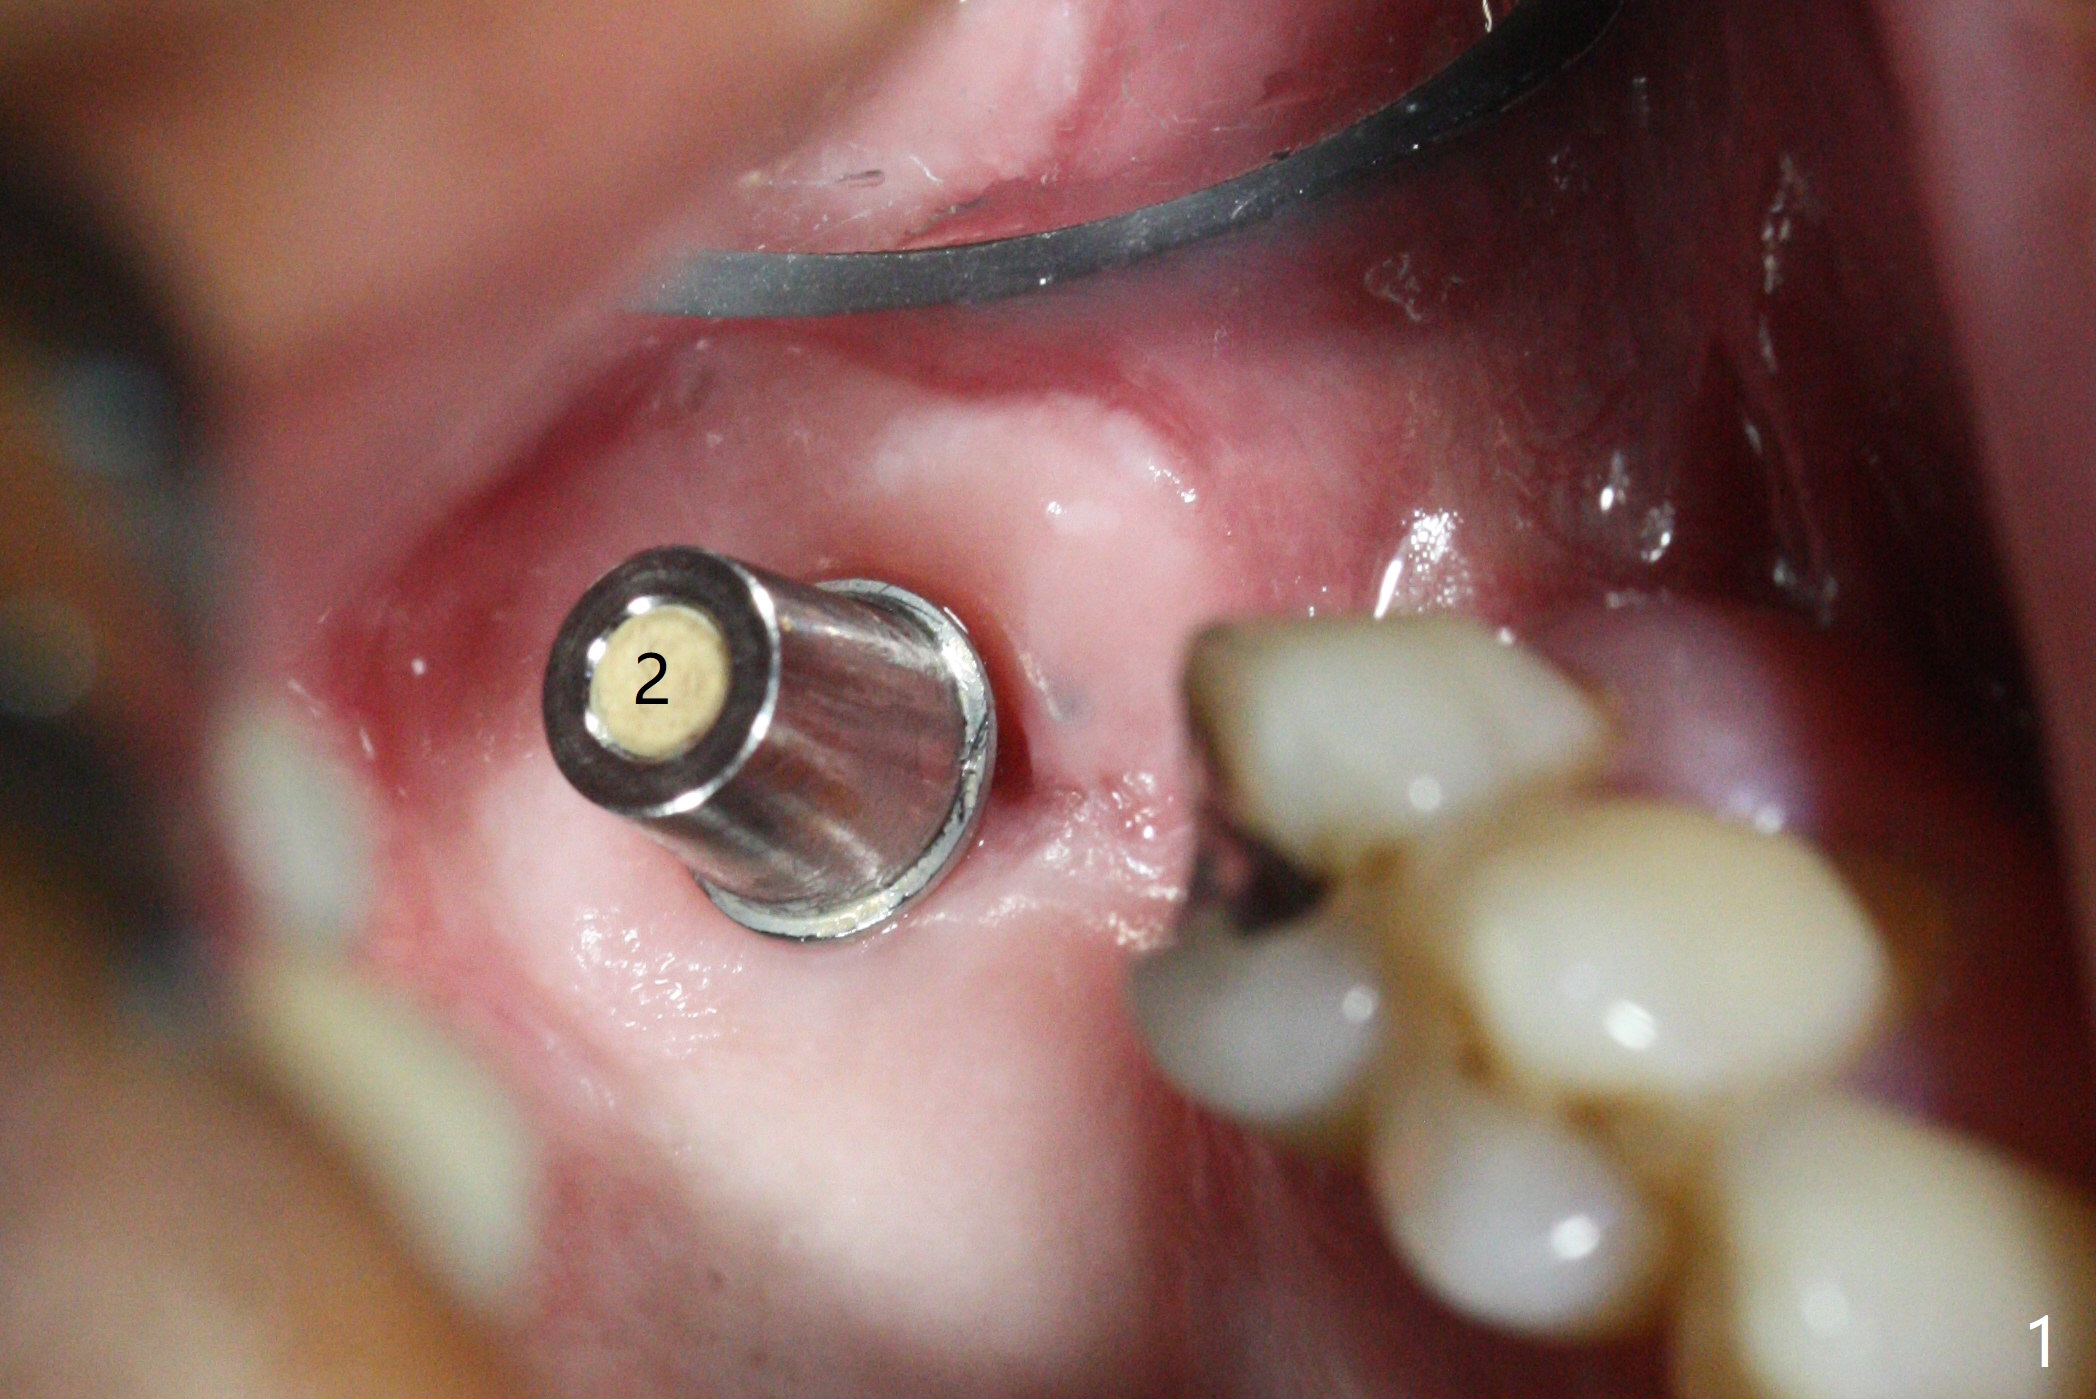
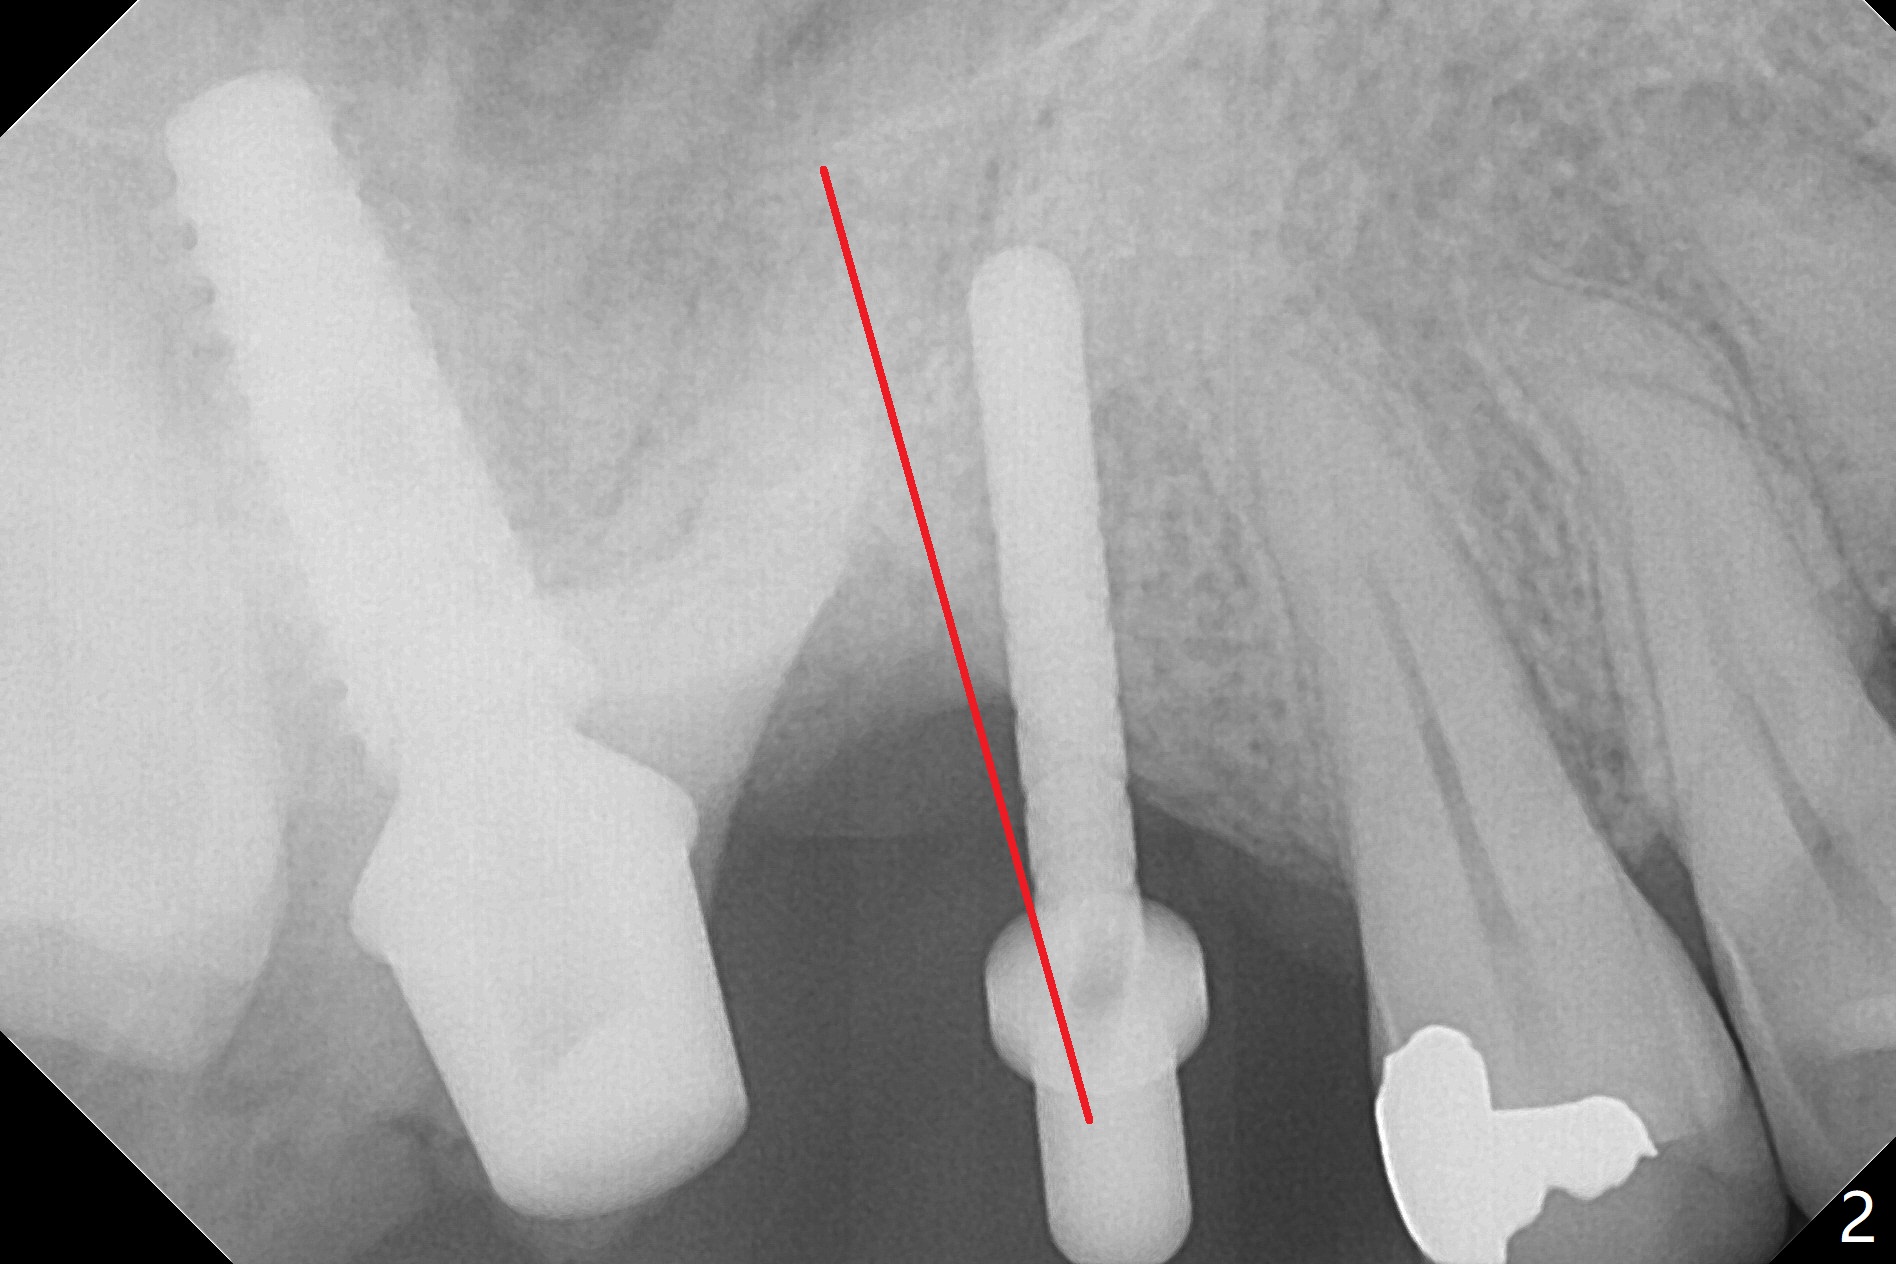
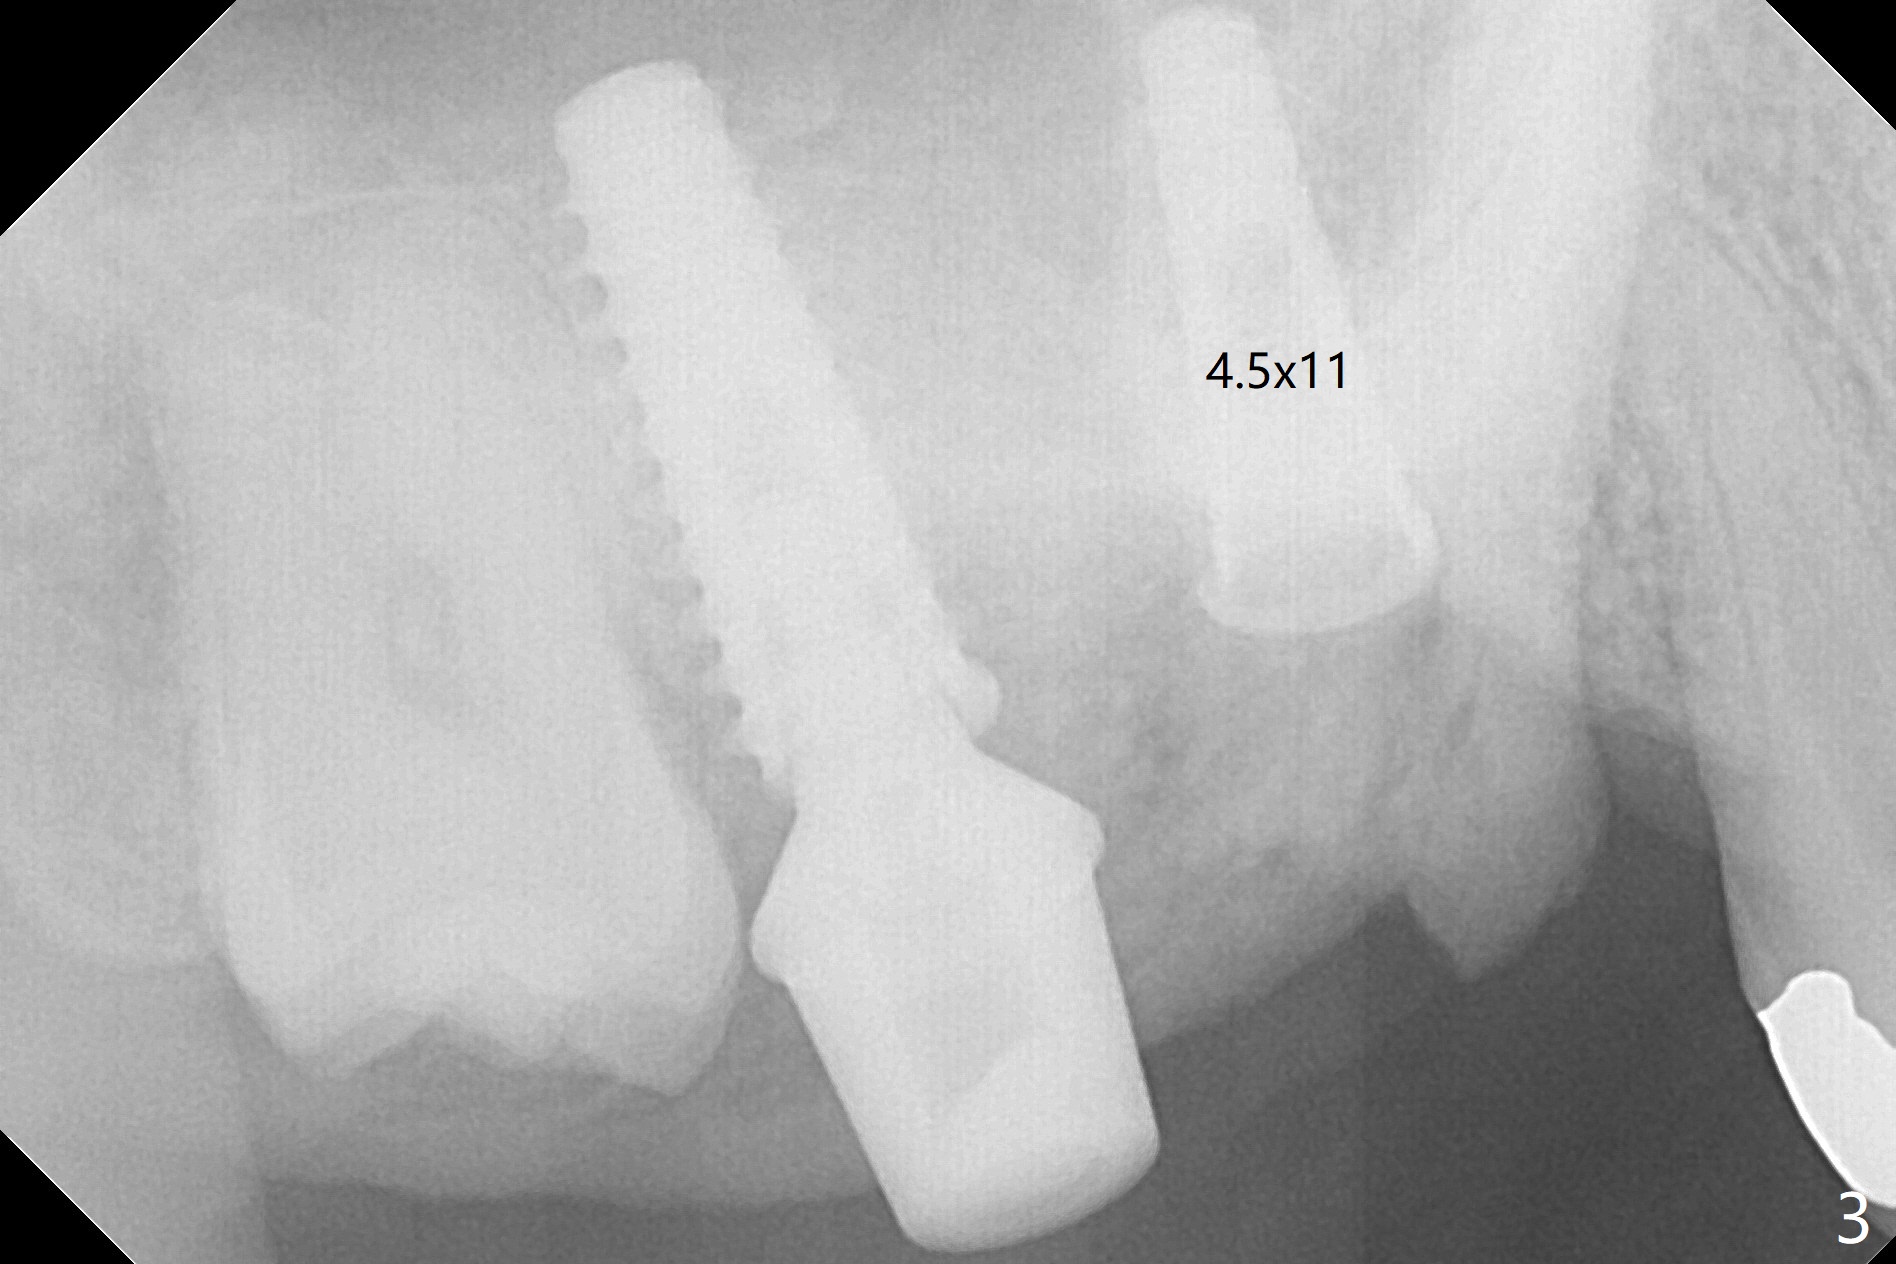
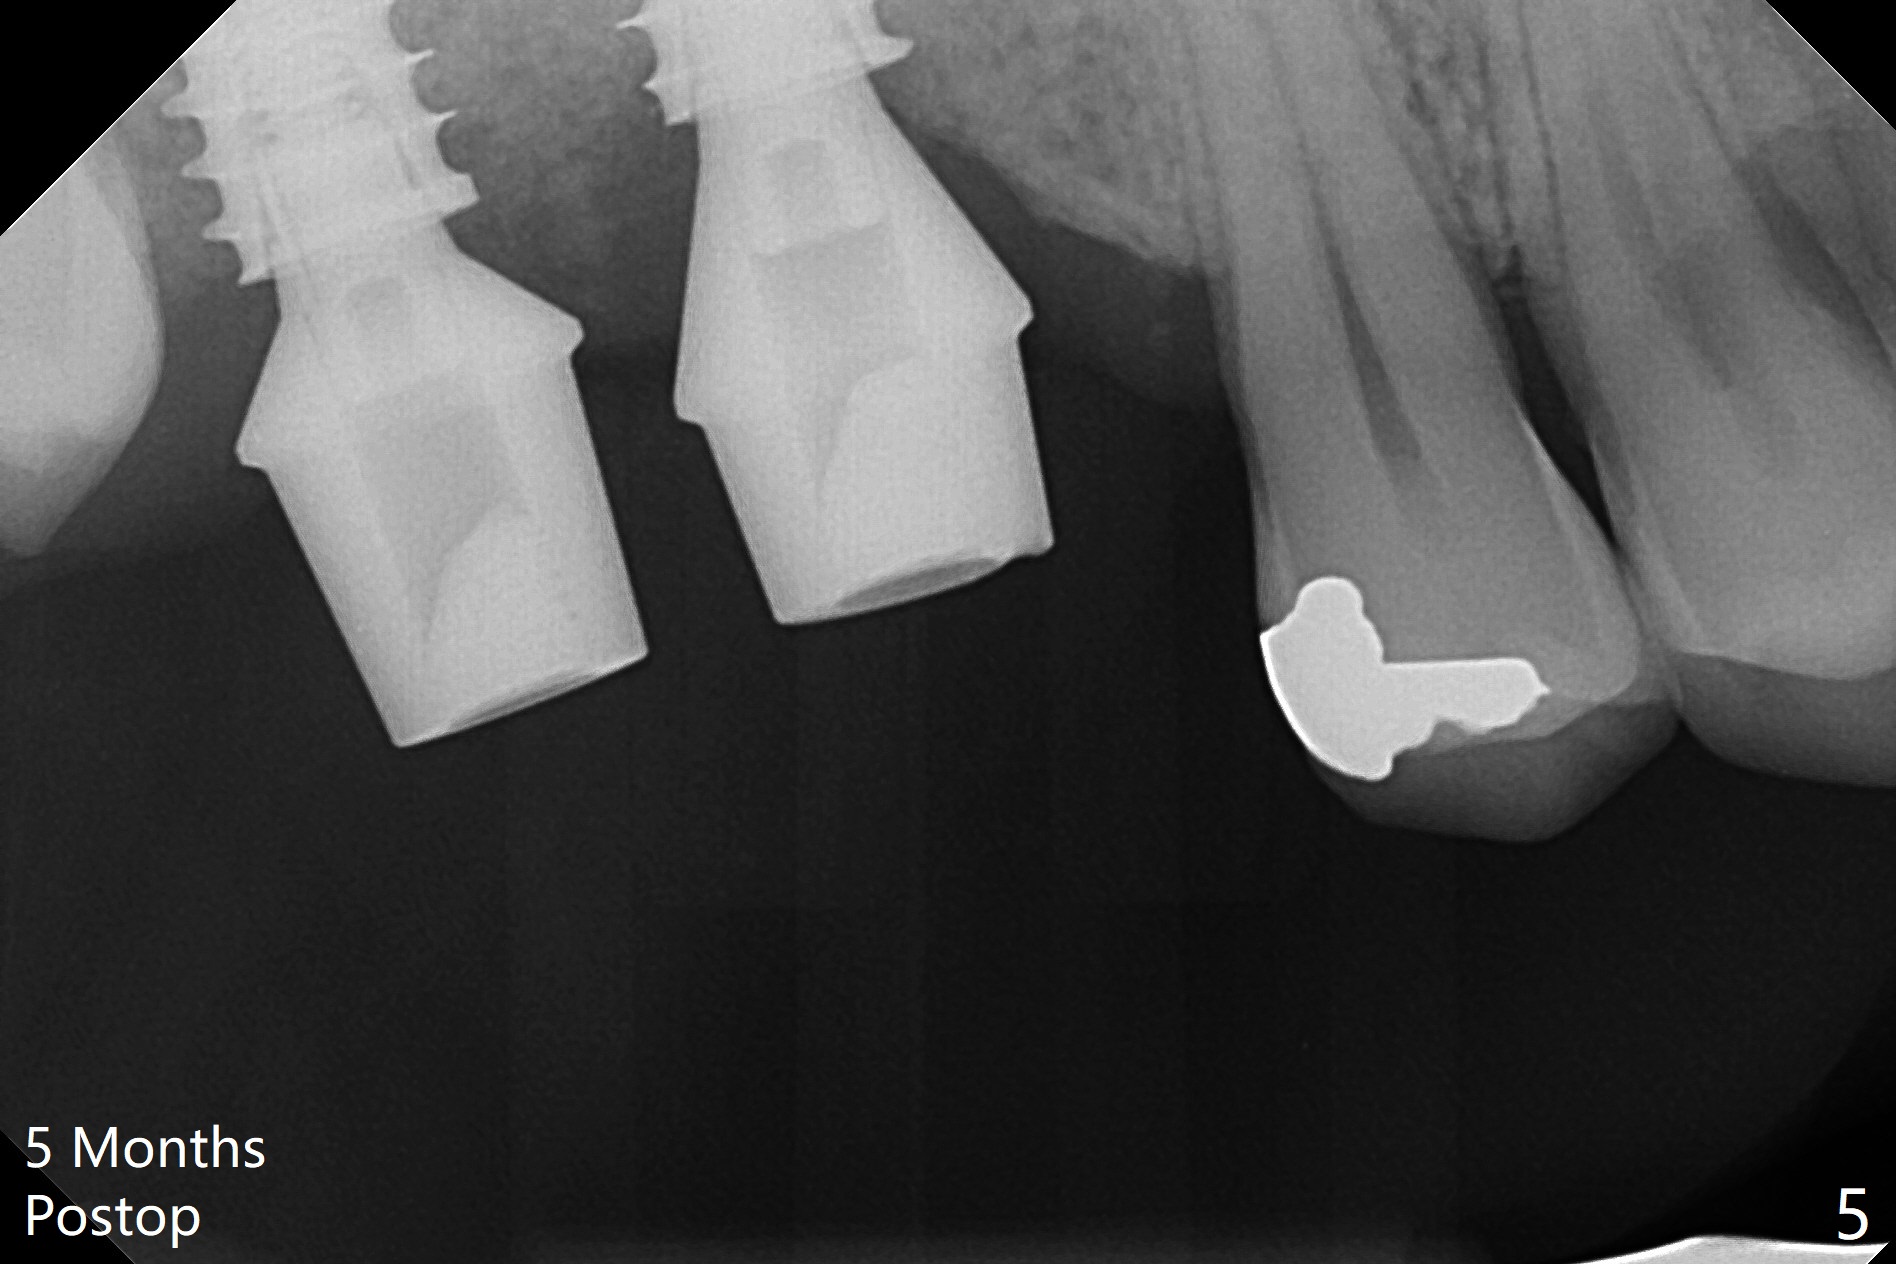
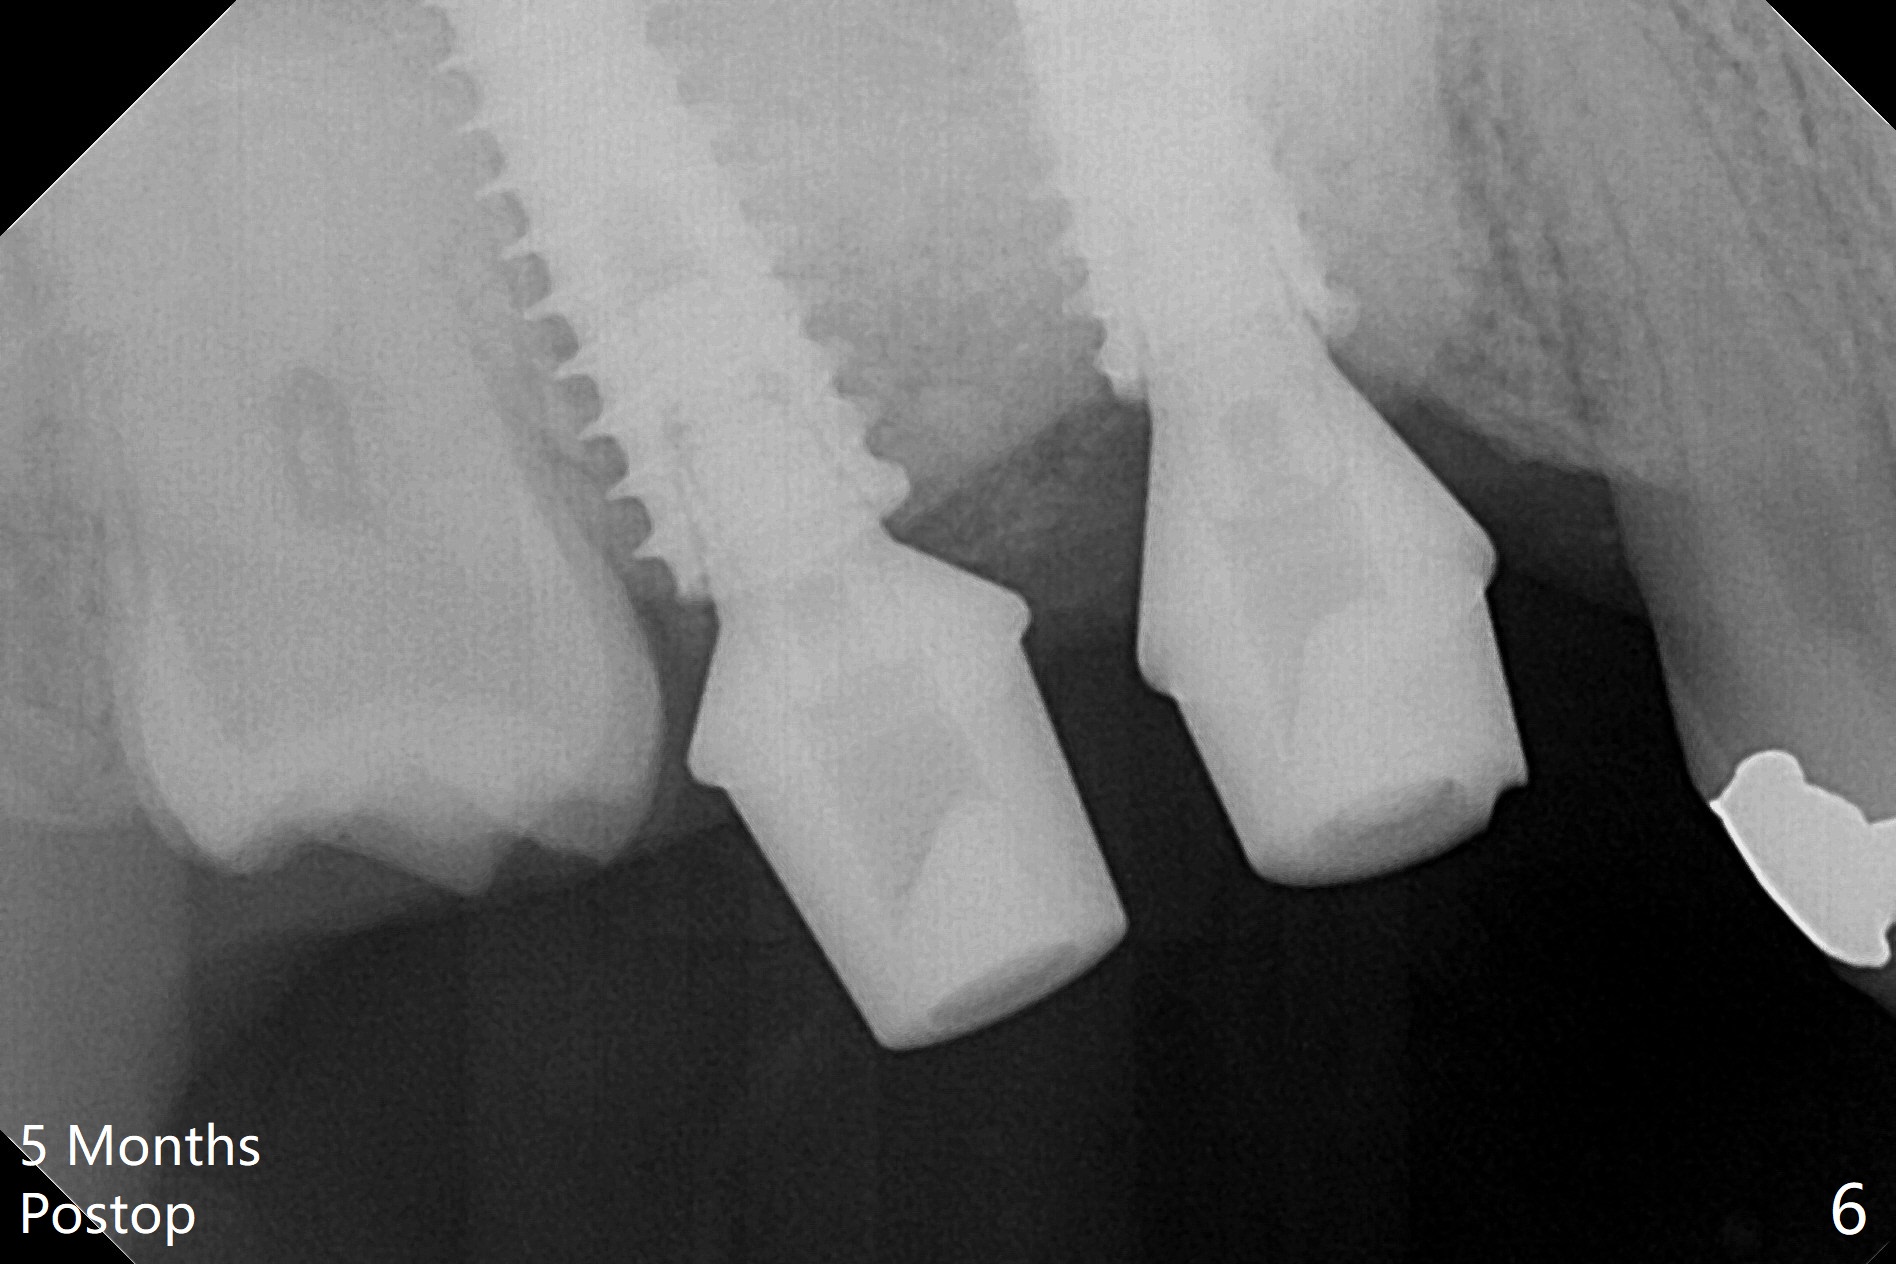
The gingiva at #2 adapts to the abutment 3.5 months post placement (Fig.1). After incision, osteotomy at #3 is initiated by free hand, which is found off (Fig.2 (red line: normal trajectory)). After repositioning osteotomy, a 4.5x11 mm dummy implant is placed with minor trajectory issue (Fig.3). Following further adjustment, a 5x11 mm implant is placed with relatively normal axis; a 6.5x4(4) mm abutment is inserted. Autogenous bone, Vanilla and Osteogen are placed distobuccally (Fig.4). Guided surgery should be more efficient and precise. There is no implant thread exposure 9 and 5 months postop at #2 and 3, respectively (Fig.5,6). The mesial wall of the crown at #2 is thin, having a crack line. The crowns at #2 and 3 are cemented with RelyX Ultimate Adhesive Resin Cement bonding. If the crown fractures, change the abutment (6.5x5.7(2) mm) to the one with smaller diameter (4.5 or 5.0 mm), or trim the abutment mesially heavily. Guided surgery or stent should prevent the potential complication.
Return to Upper Molar Immediate Implant, Armaments Xin Wei, DDS, PhD, MS 1st edition 02/23/2018, last revision 09/09/2018