.jpg)
.jpg)
.jpg)
|
|
|
|
|||
|
|
|
|
|
||
|
|
|
|
|
||
|
|
|
||||
Osteotomy in Middle of Socket
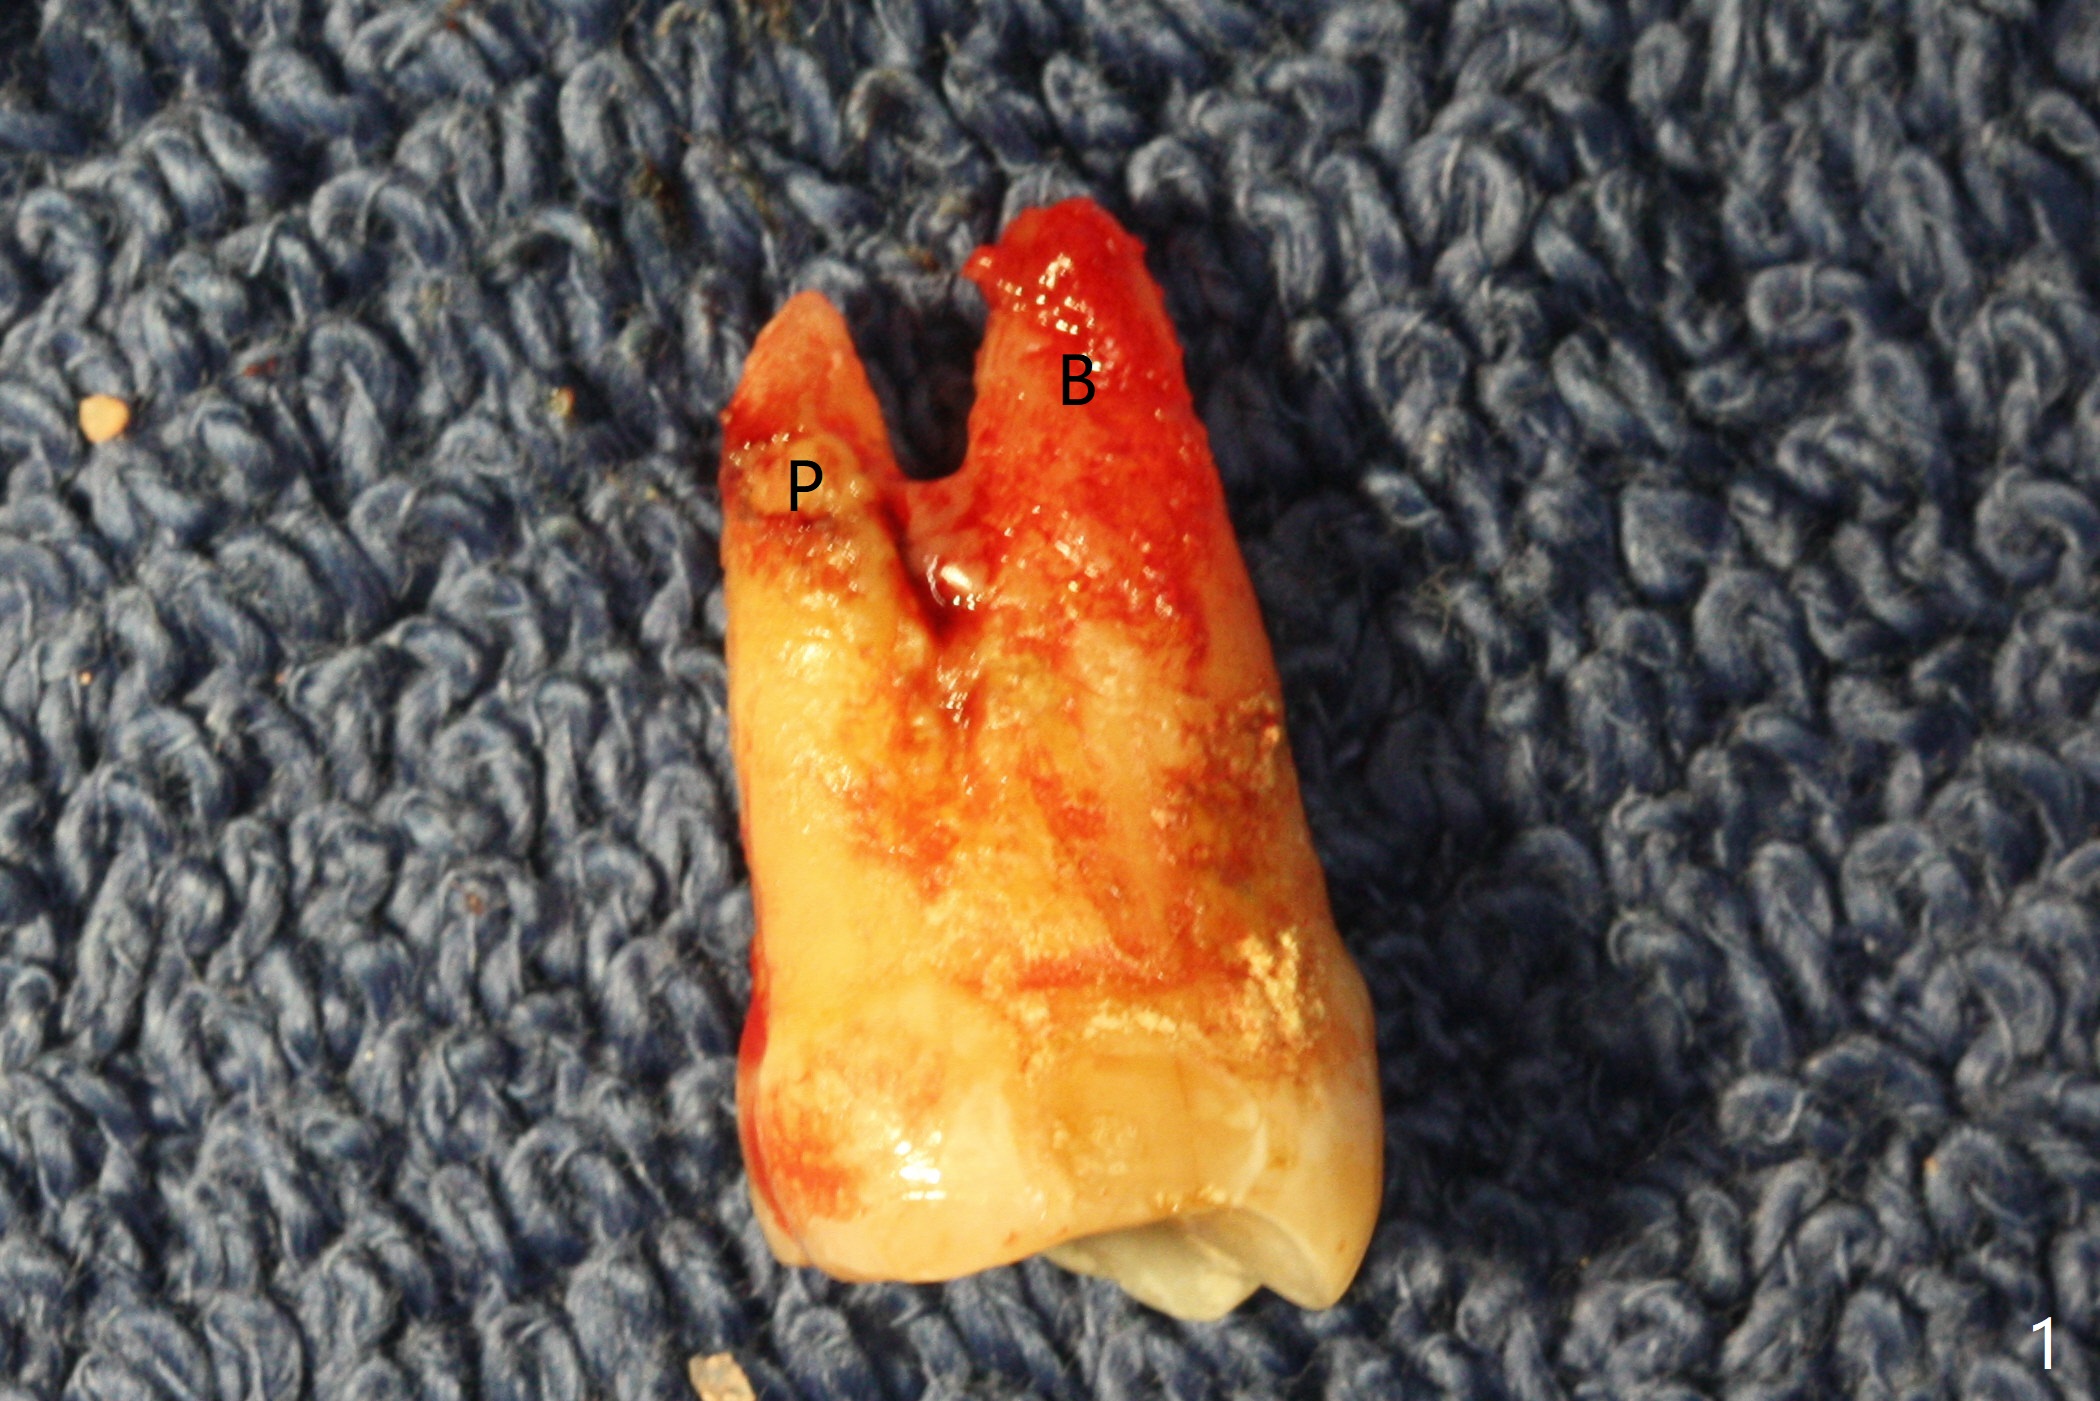
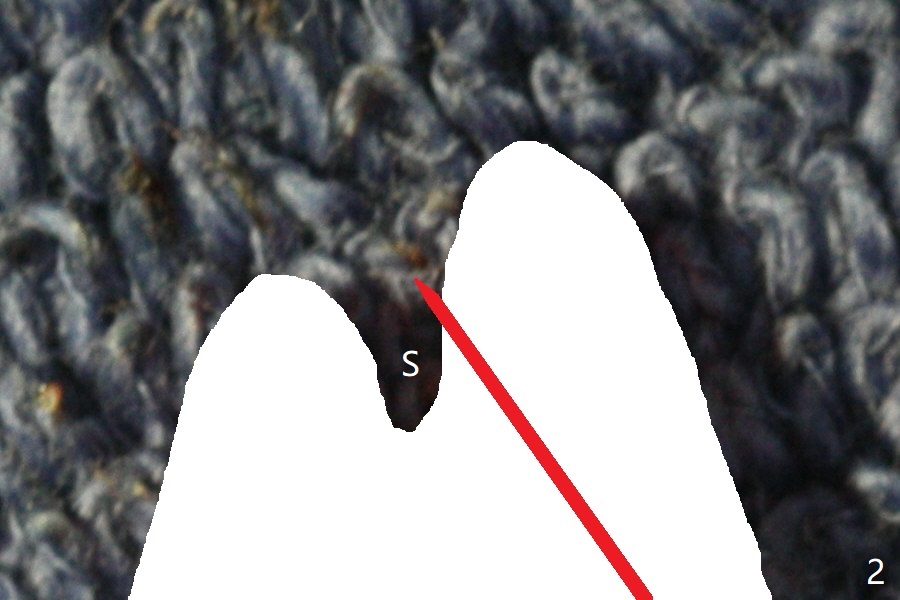
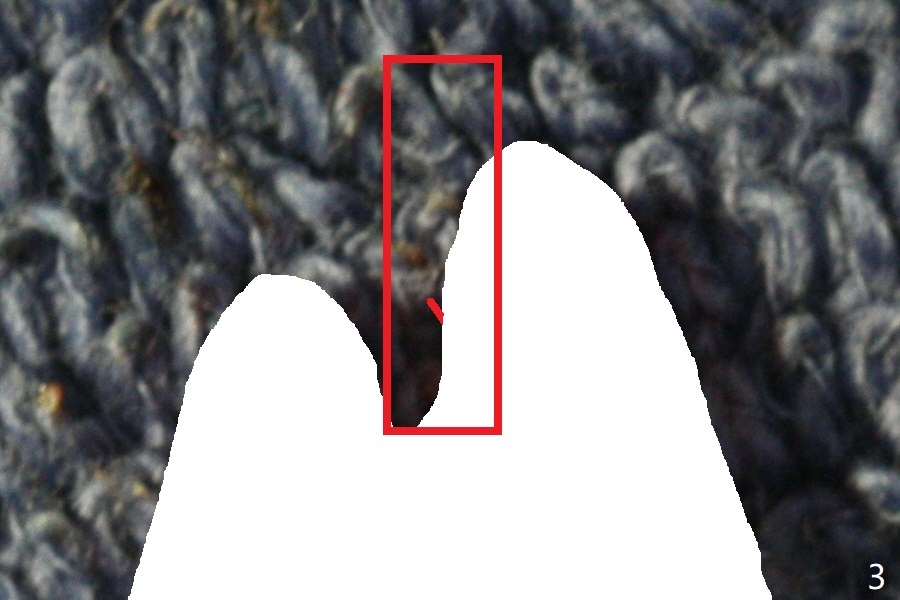
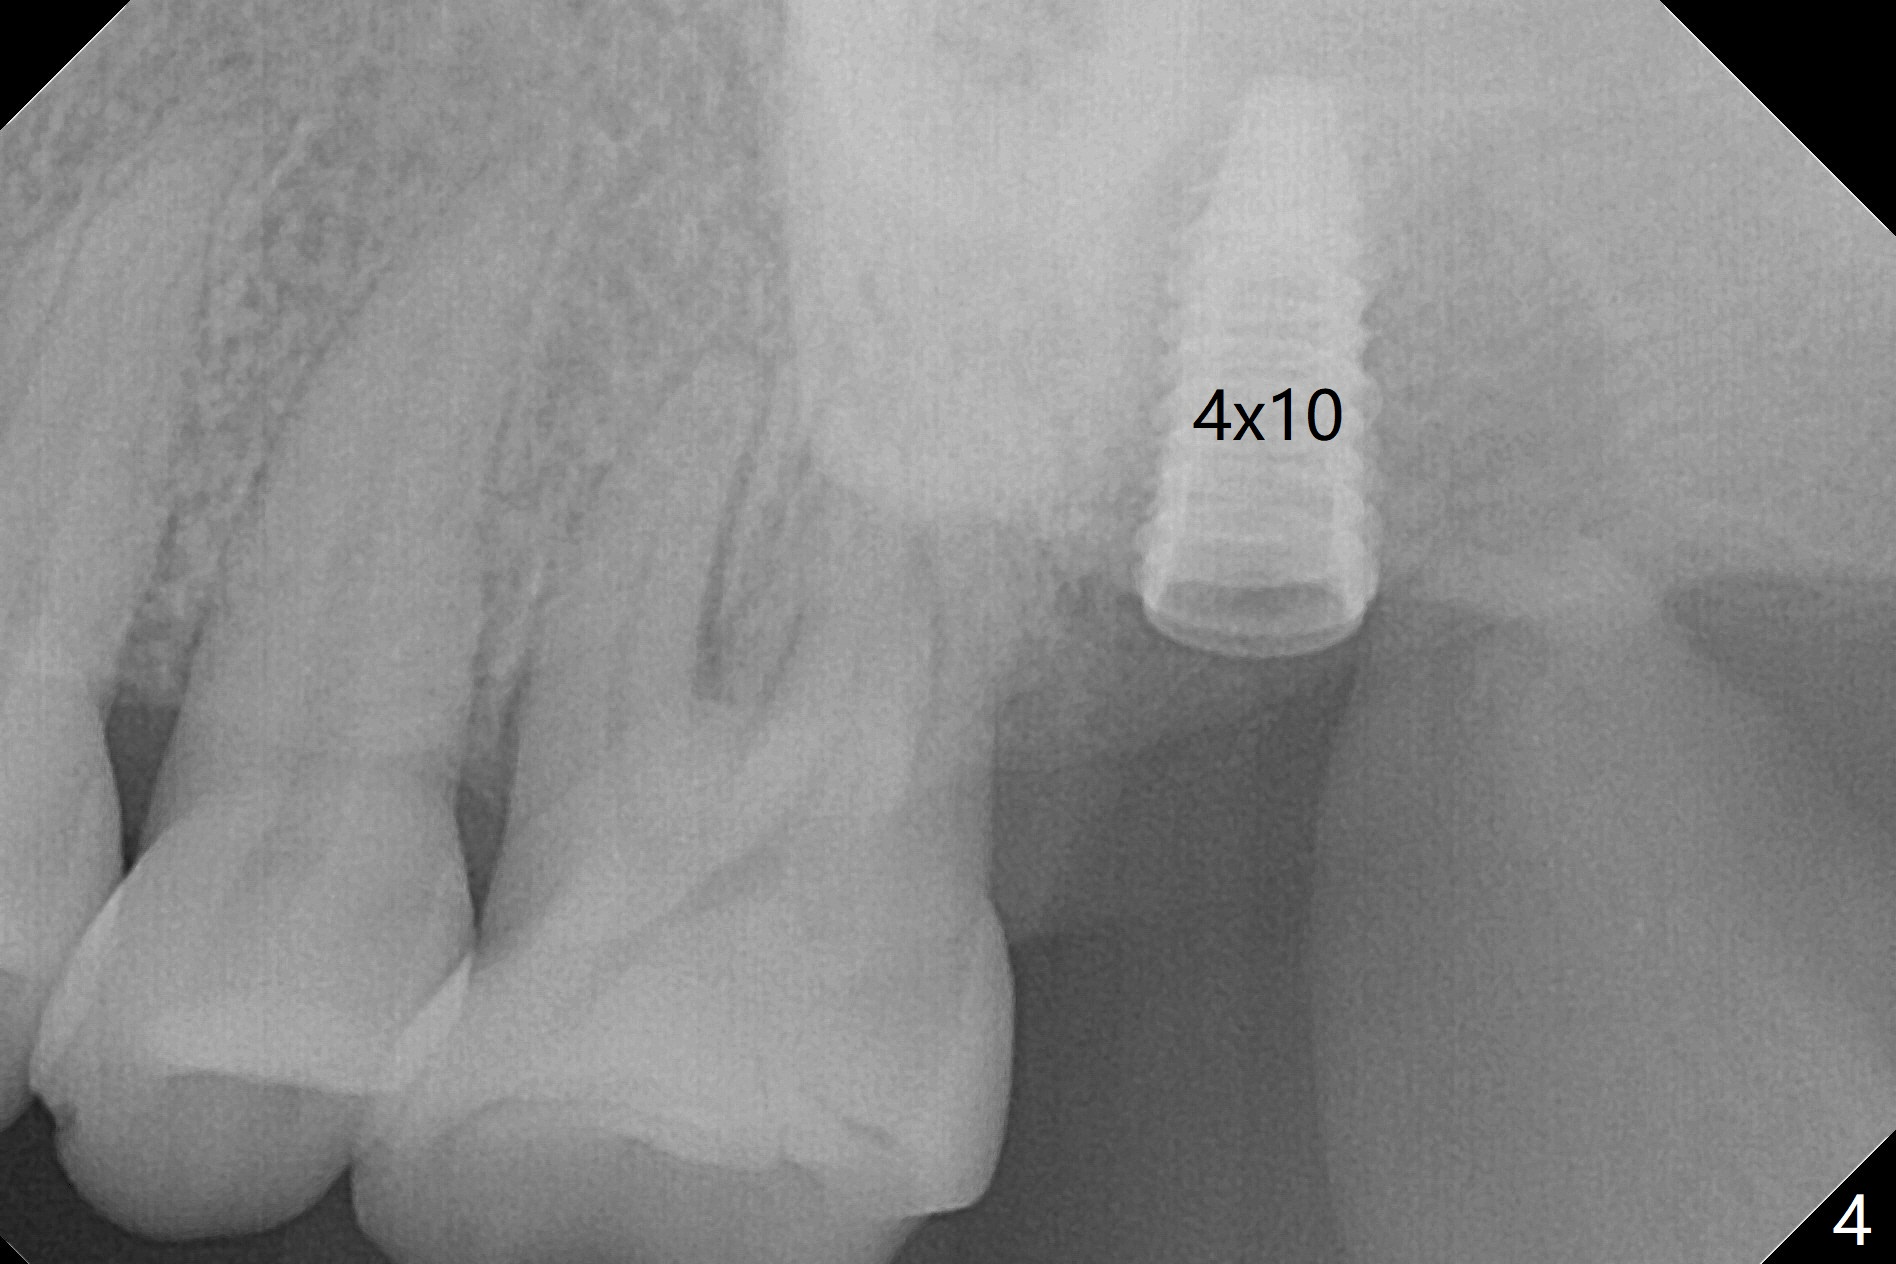
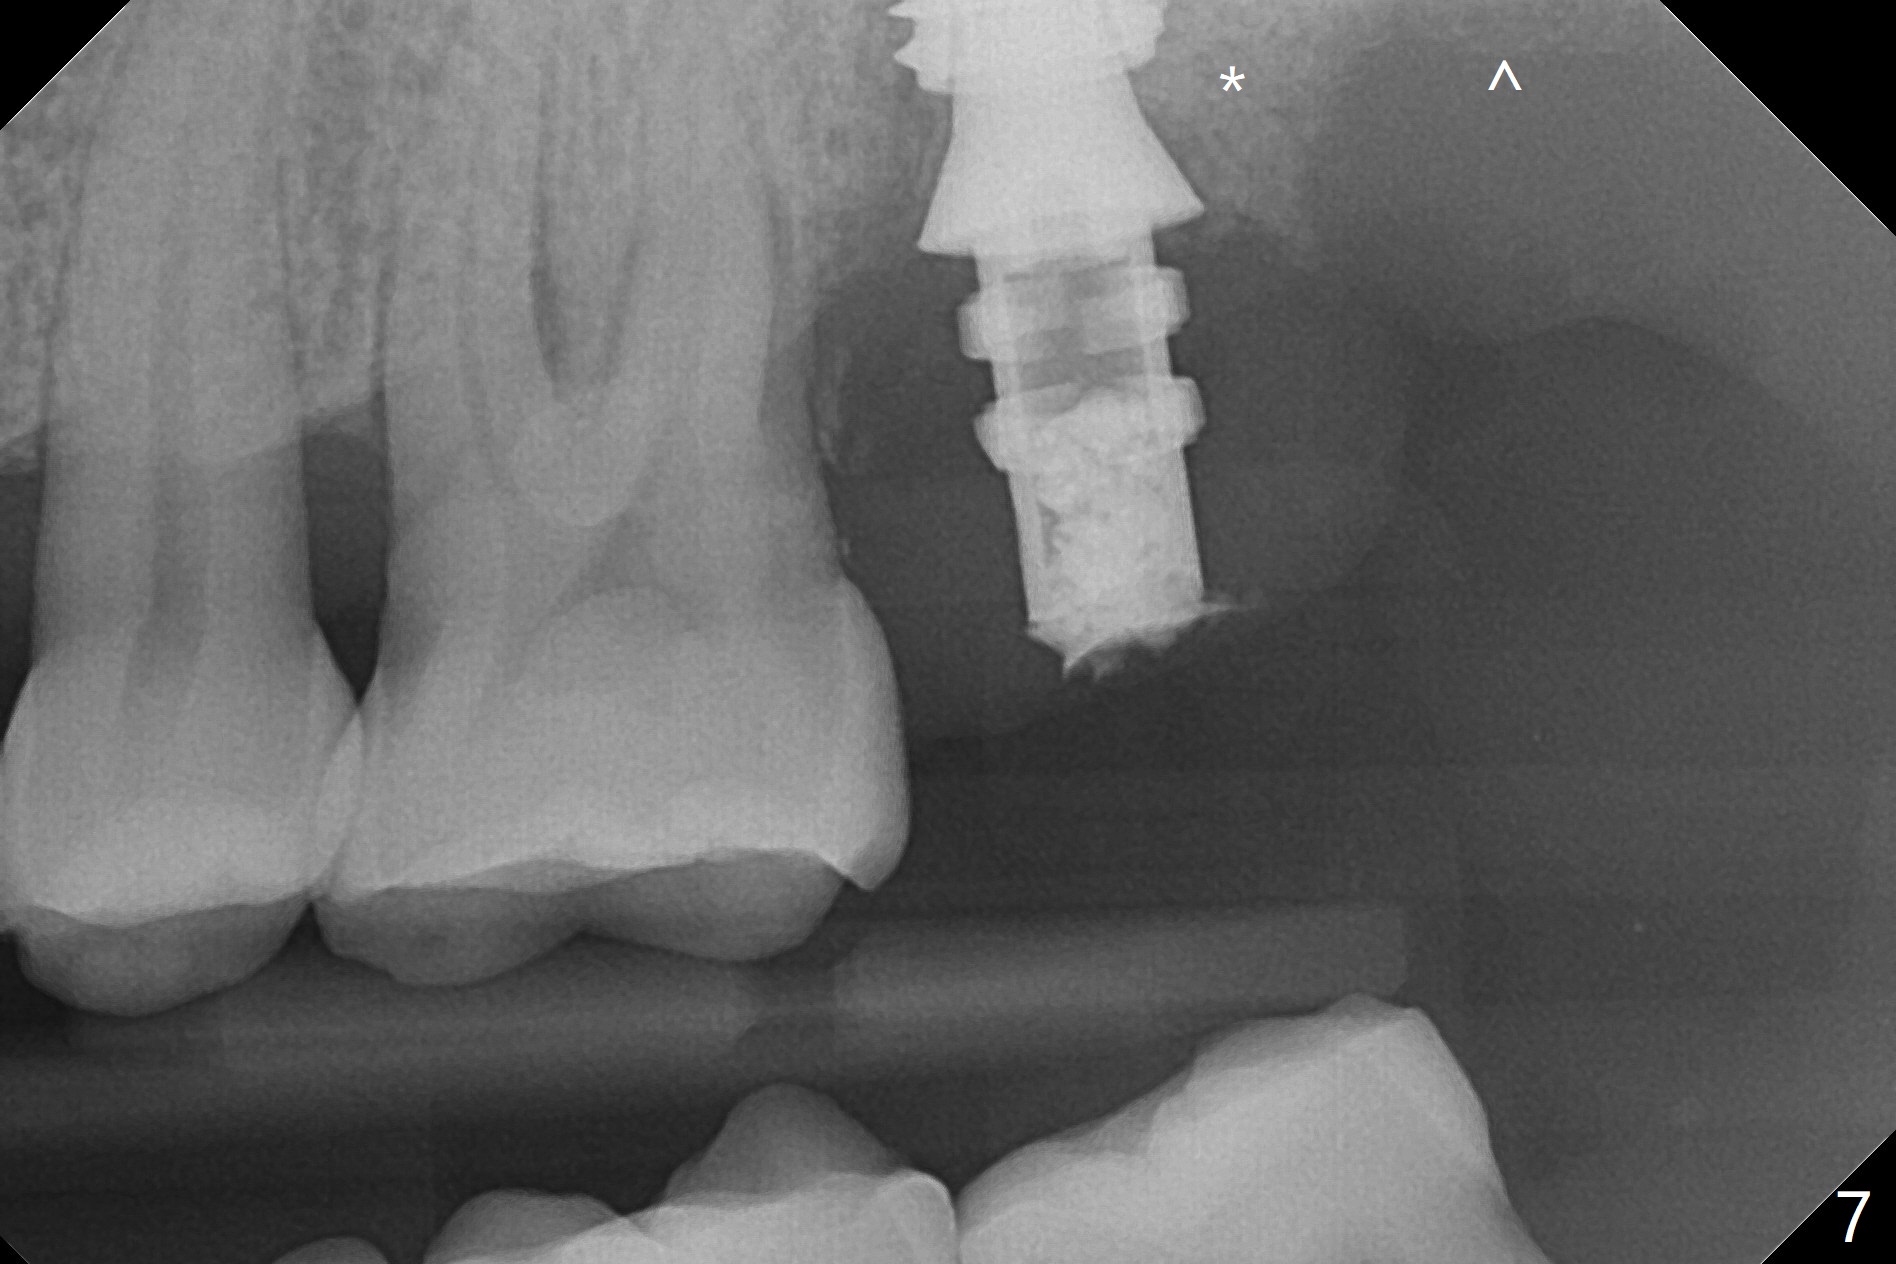
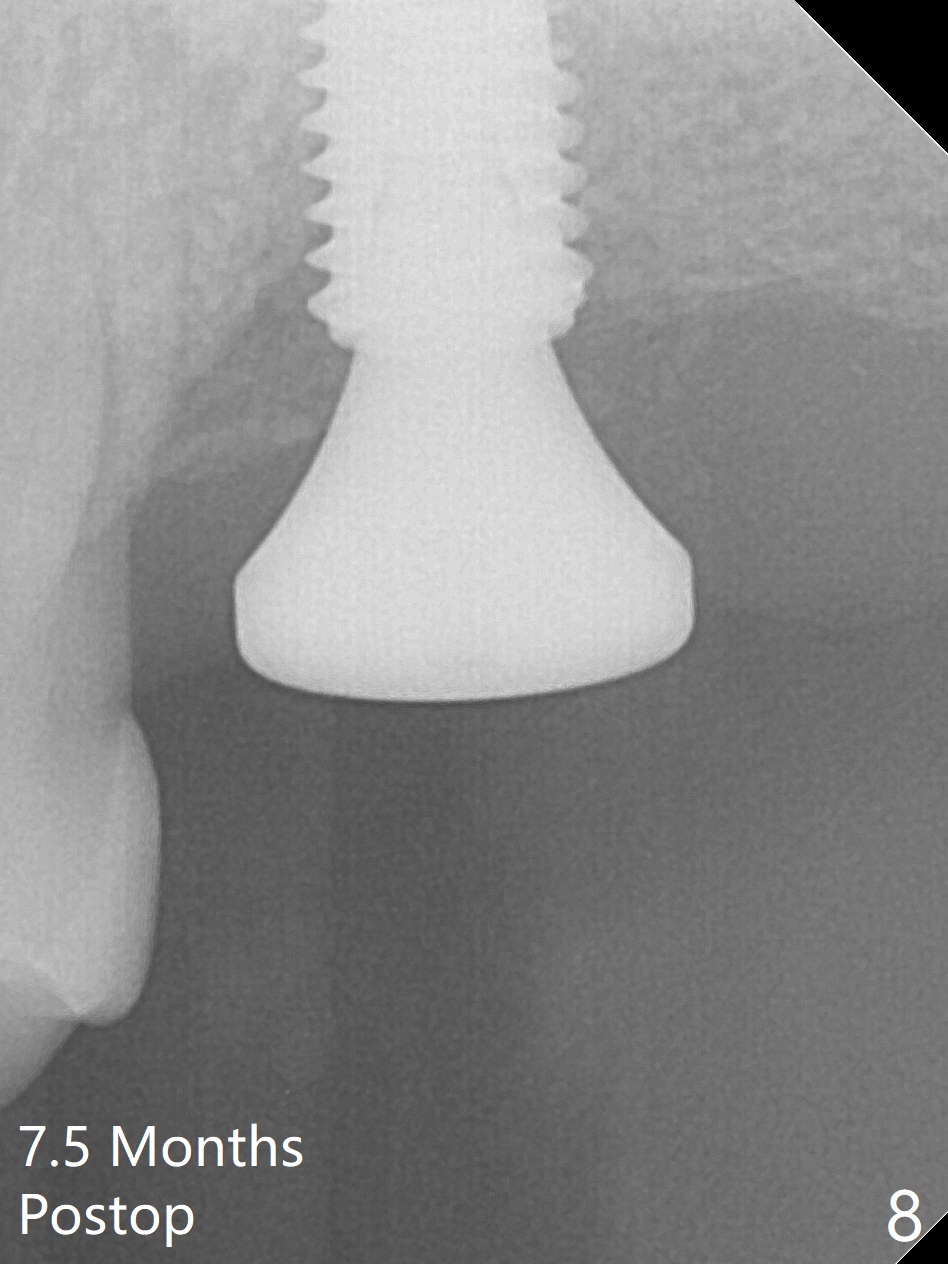
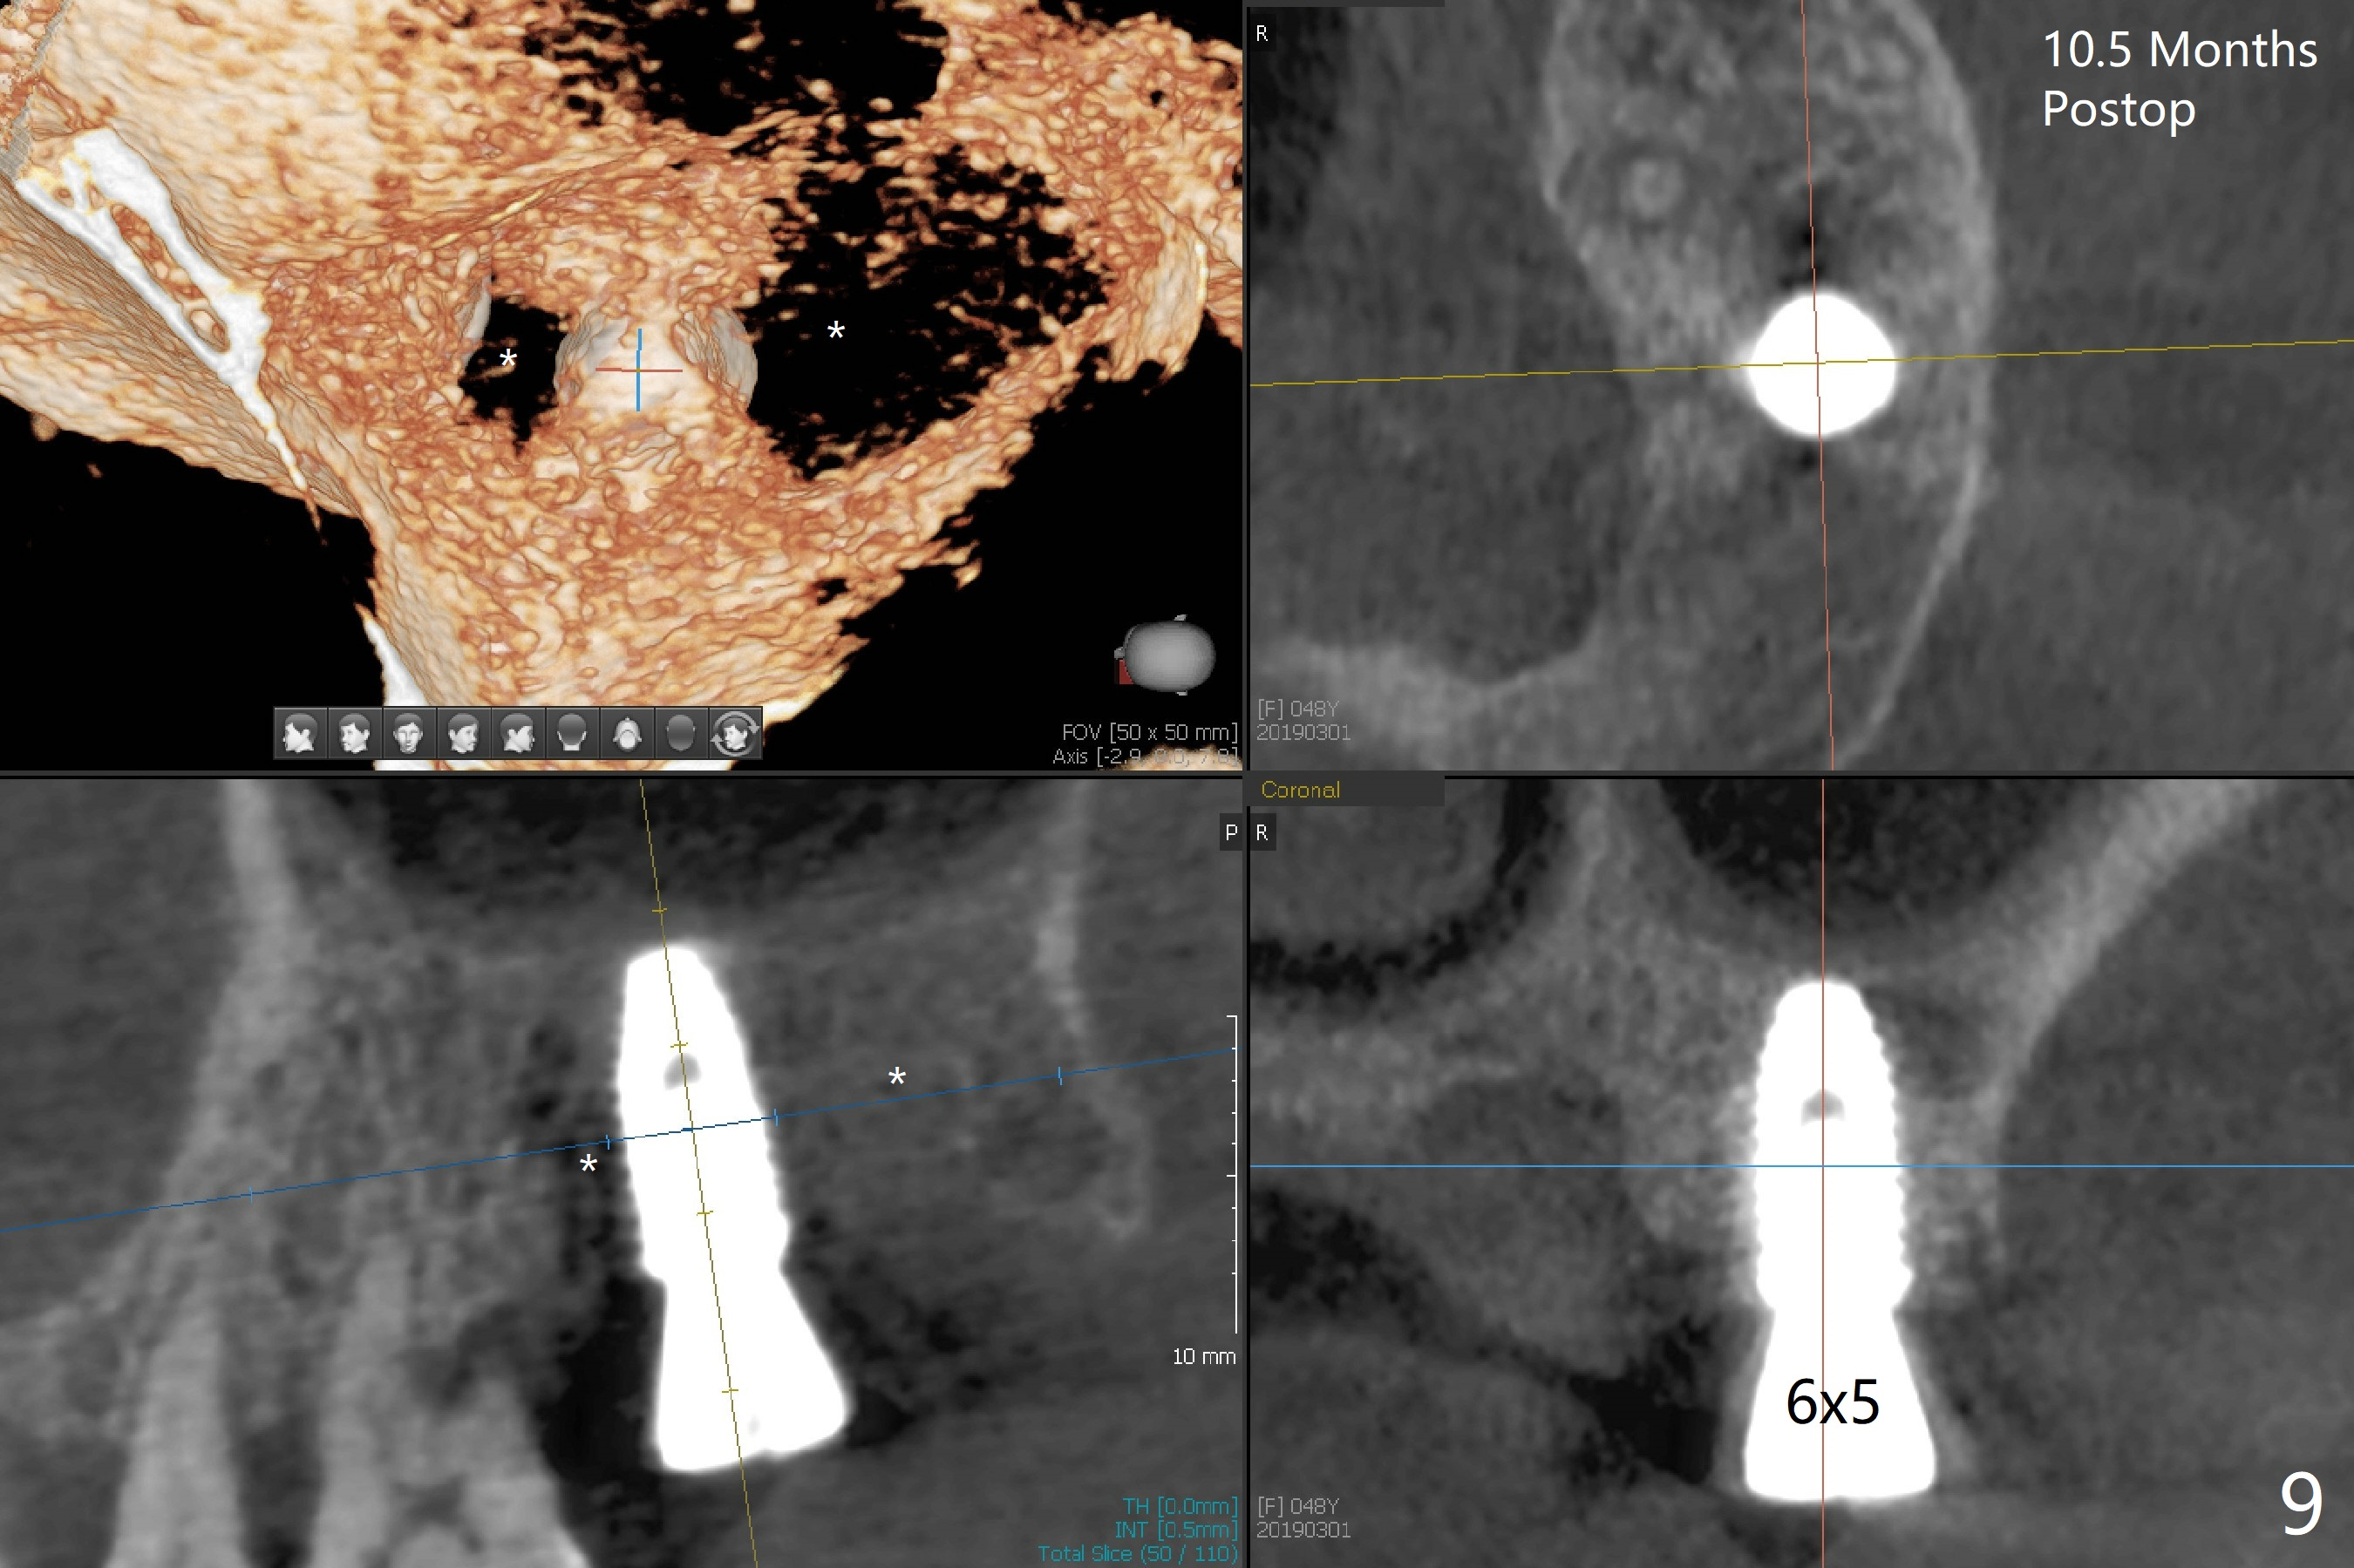
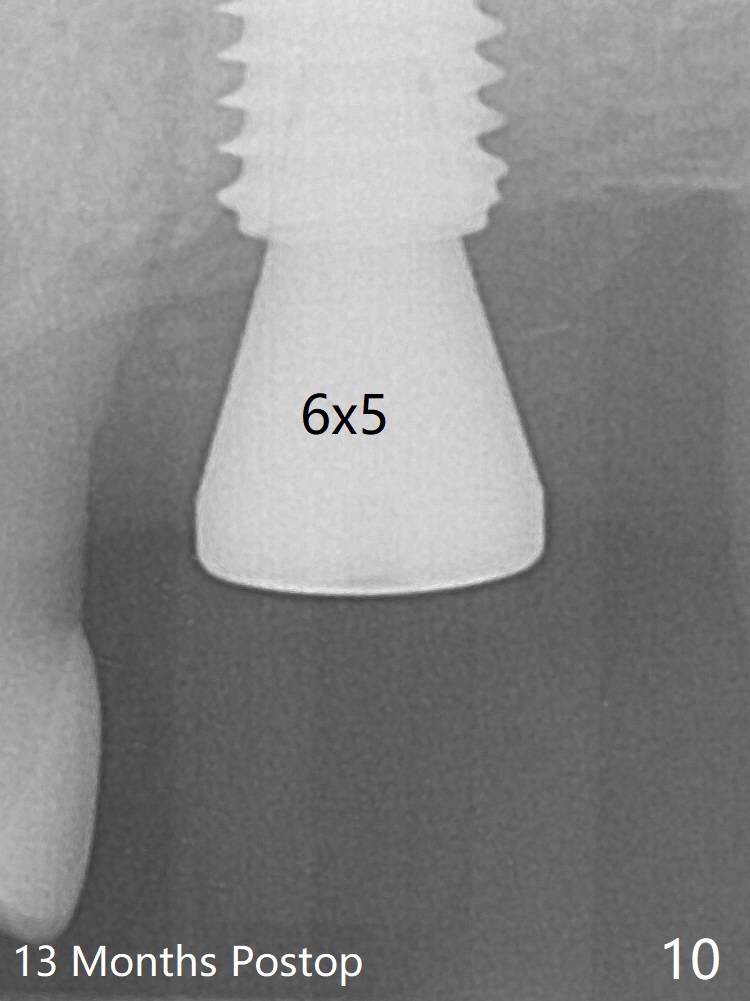
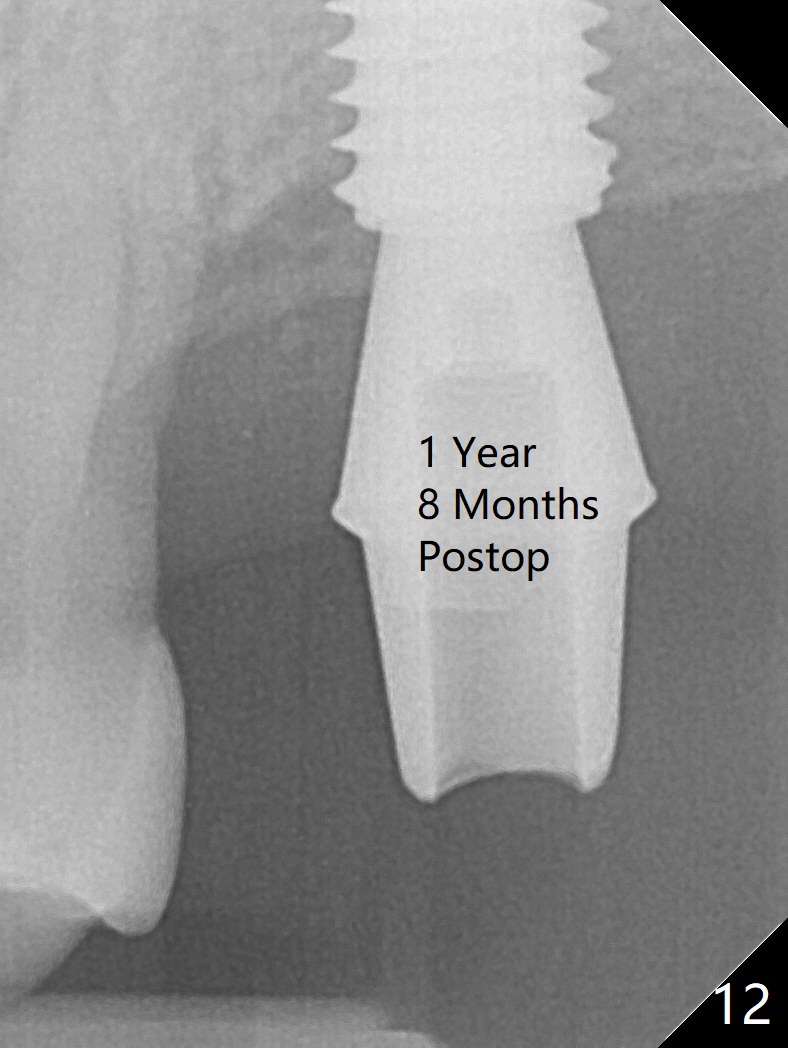
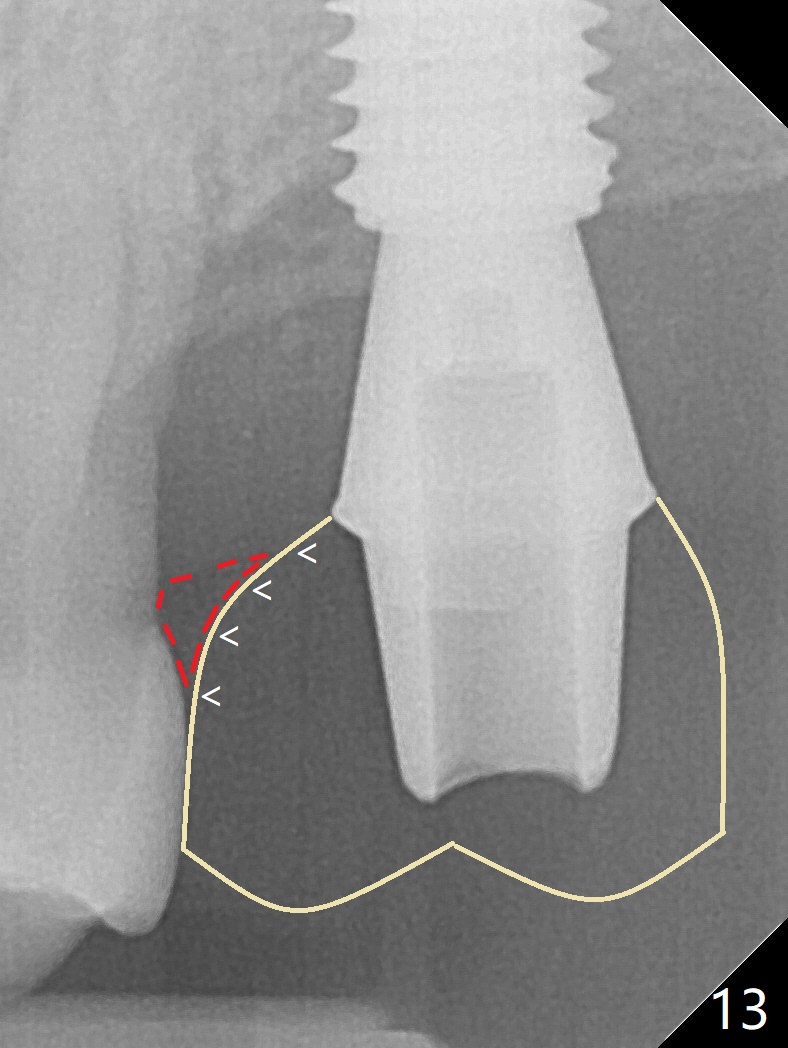
Although the buccal (Fig.1 (mesial view of the extracted tooth #15): B) root is larger than the palatal (P) one, the palatal socket is larger than the buccal one (Fig.2 white area) because of the bone loss of the former. For better restoration, osteotomy (Fig.2 red line) is initiated in the buccal slope of the septum (S) so that the final osteotomy is in the middle of the whole socket (Fig.3 red box). In fact a 3 mm stopper is not used because of the slope and the clumsy stopper. Stopper would be indicated if the bottom of the bone were flat. At first a 4x10 mm dummy implant is placed with stability (Fig.4). After further osteotomy and sinus lift (Fig.6 red dashed line: sinus floor), a 5x10 mm implant is placed with 30 Ncm, followed by insertion of a 5.2x8(2) mm temporary abutment (Fig.5,6). The latter holds an immediate provisional and Vanilla Graft/Osteogen (Fig.7 *) in place (^: distal crestal bone). Although the bone looks normal around the implant 7.5 months postop (Fig.4), the implant is unstable, probably due to the large preexisting defect. In contrast the implant placed at the healed site of #3 is stable 6.5 months postop. The 8x5 mm healing abutment that dislodged for 1 day could not return. A 6x5 mm one is used; it appears that the bone density mesial and distal to the implant is low (Fig.9 *). The implant looks normal and is stable 13 months postop (Fig.10). A 5.7x5.5(5) mm cementation abutment is placed for a provisional (progressive loading, Fig.11). There is no pain associated with the provisional for mastication. Impression is taken 7 days later. The patient has pain when the permanent crown is cemented. It appears that the implant does not osteointegrate and should be removed. A 6x14 mm tissue-level implant will be immediately placed following a 5 and 6x14 mm taps and bone graft and PRF (Metronidazole). In fact there is no pain when the existing abutment is torqued at 35 Ncm 1 year 8 months postop (Fig.12). The mesiogingival portion of final restoration (Fig.13 arrowheads) should be bulky so that the gingival embrasure (red dashed line) is minimal to reduce food impaction.
Return to Upper Molar Immediate Implant, Prevent Molar Periimplantitis (Protocols, Table), Armaments #2 Delayed Healing Xin Wei, DDS, PhD, MS 1st edition 04/19/2018, last revision 12/29/2019