 |
 |
 |
 |
 |
 |
 |
 |
 |
|
Short Tatum Implant (Part 2)
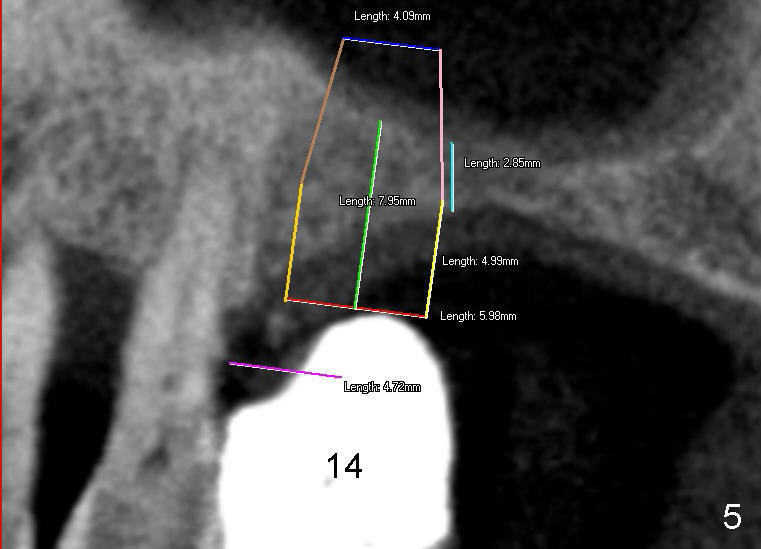
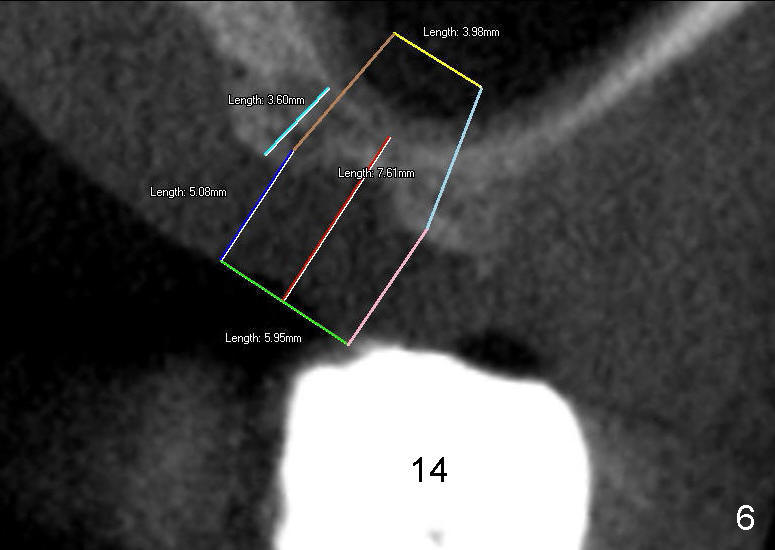
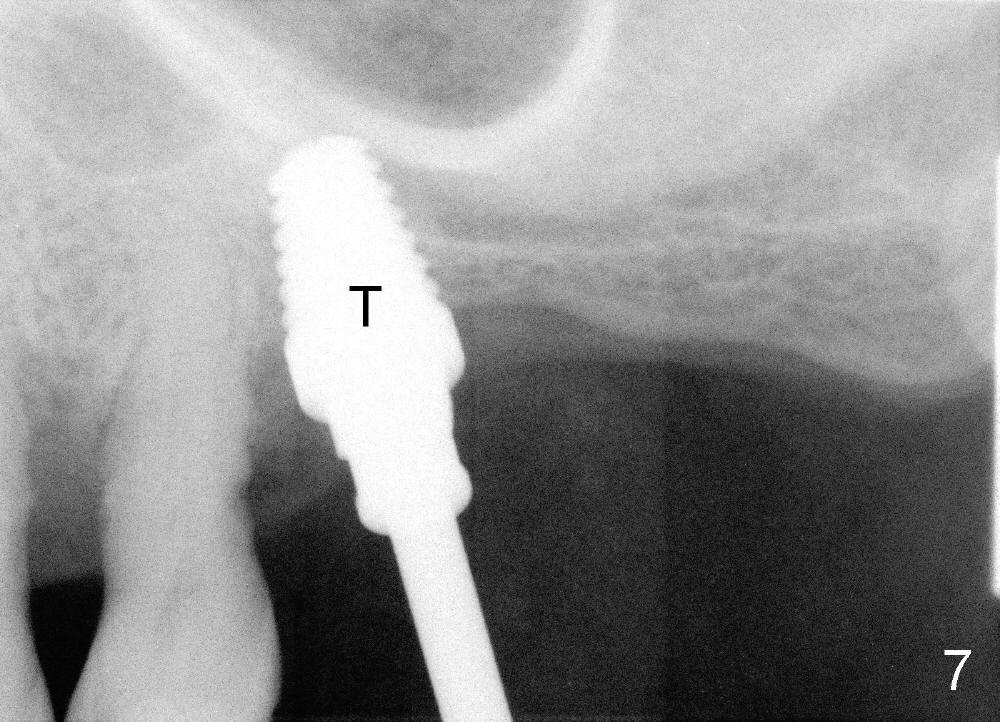
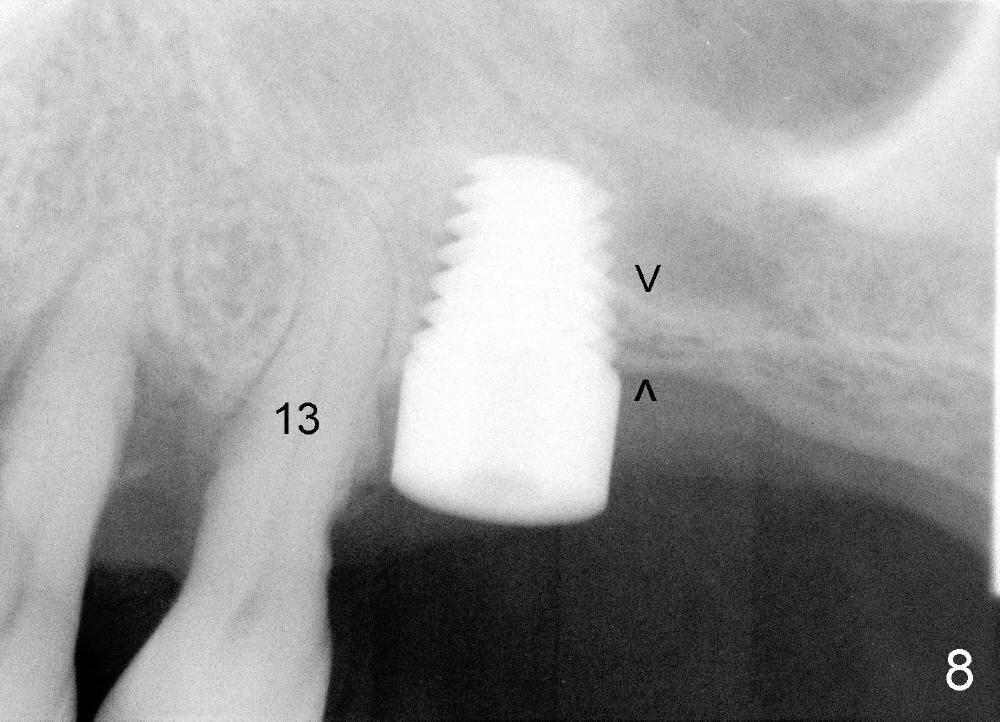
Mr. Wu (54 years old) is also scared of dentistry. He postpones implants for several years. One day he decides to get implant treatment. Easy placement is tried at the sites of #21 and then #7 (Fig.2). He is doing fine postop on both these occasions. Attention is turned to the site of #14 with 2.85 mm bone in height distally (Fig.5 CT sagittal section). The white area represents the crown at the site of #14 (CT scan stent). The coronal section also shows limited bone height (~3 mm) (Fig.6). A 6x11 mm tapered implant is planned to get as large as implant/bone surface area, particularly the mesial aspect (Fig.5,6). Tatum bone expansion technique is used to created osteotomy (#15 blade, BS 4-6 mm, BB 4-10 mm at the depth ~8 mm, RT 2-5 mm at 11 mm, no drill). A 6x11 mm tapered tap is applied (Fig.7 T). It appears that the tap tilts mesially. Adjustment of trajectory is made with RP, RB 4-5 mm at 11 mm and 7x11 mm tapered tap (with resistance). The corresponding implant is placed with >60 Ncm (Fig.8; distal bone quite narrow (between arrowheads). The patient is doing great a month postop with no sign of infection or mobility.
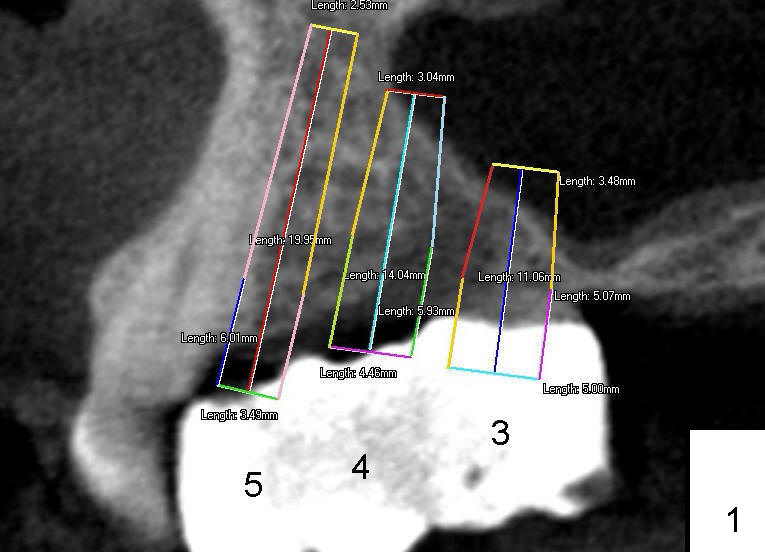
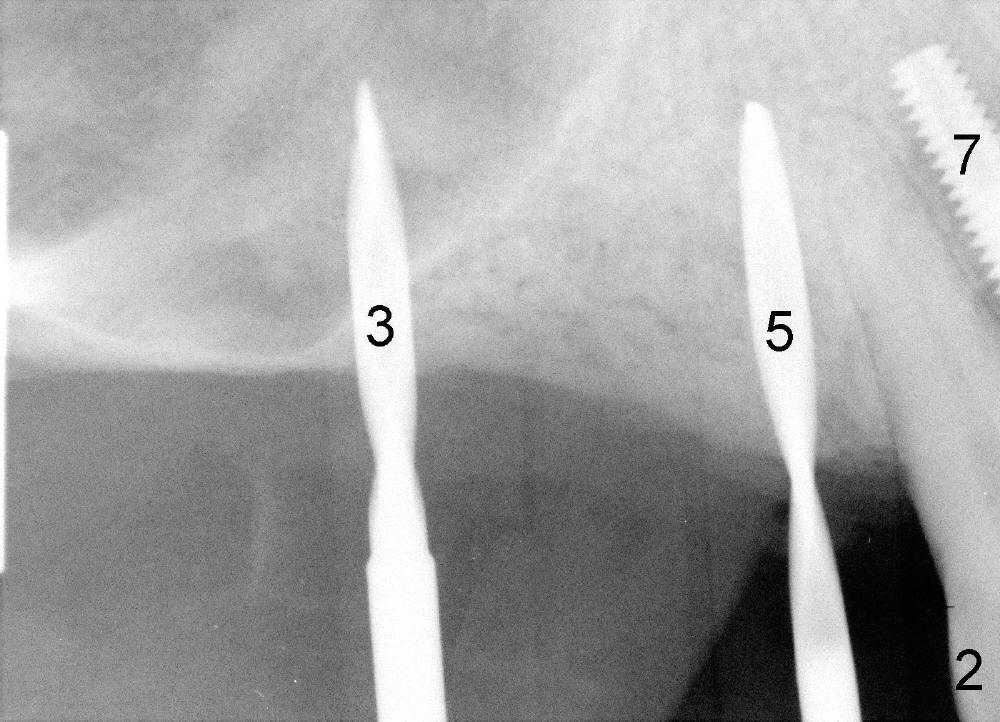
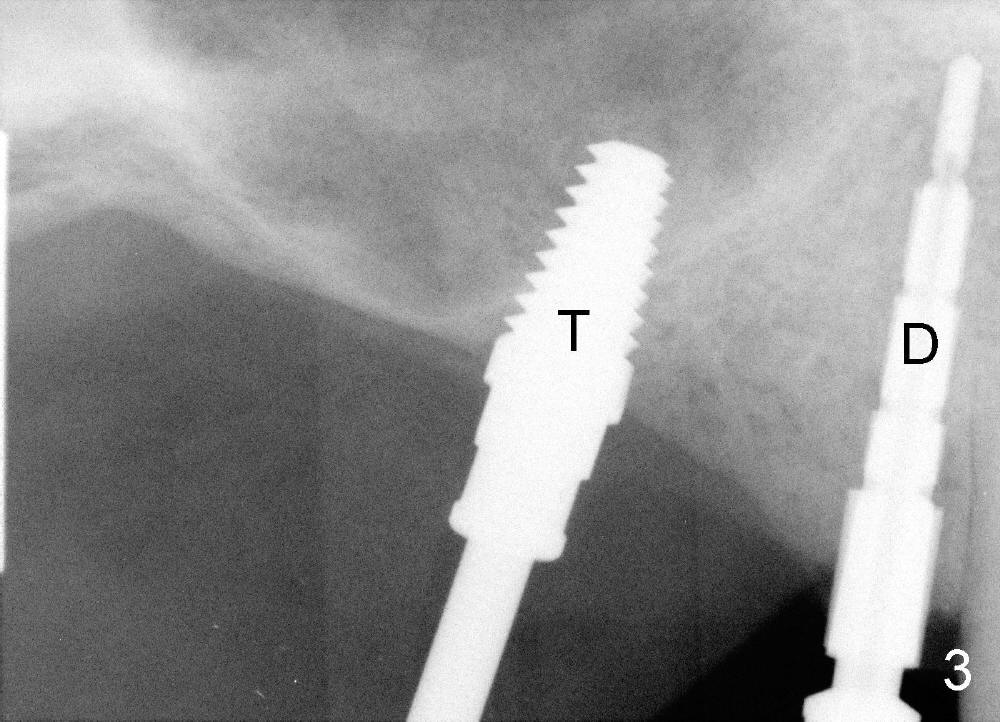
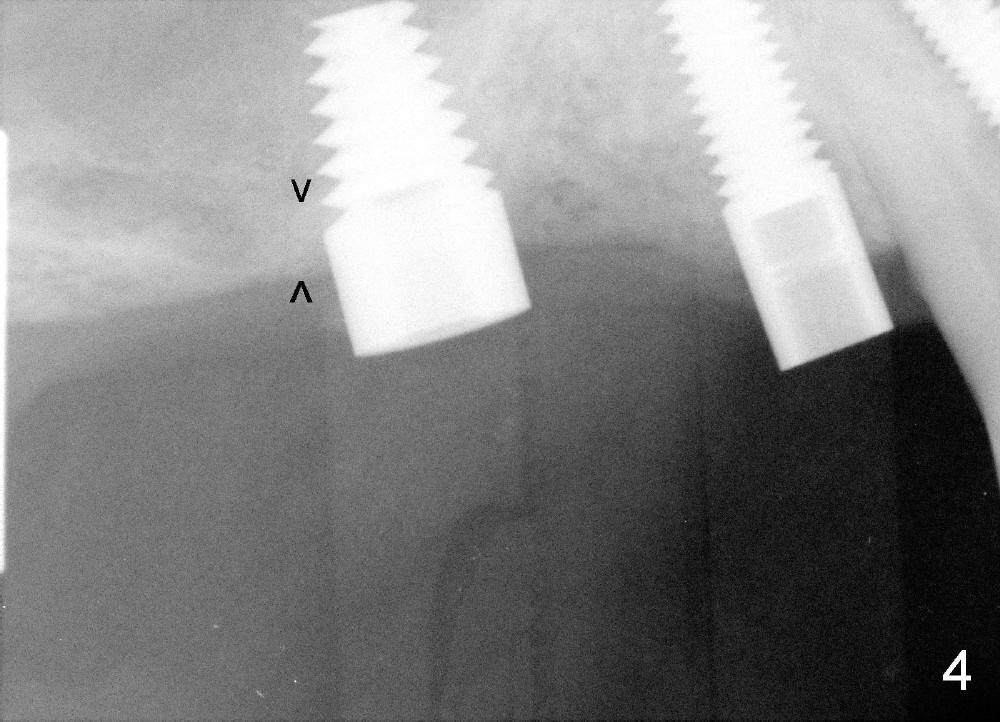
It appears that sinus graft is necessary for #3-5 implant placement (Fig.1). Mr. Wu says "Do whatever you think appropriate." But the framework partial denture is suddenly broken at the major connector. He cannot eat well. We do not have time to do sinus graft! Short implant is planned to be placed at the site of #3 (5x11 mm, Fig.1). After initial bone expansion until RT 2 mm (as mentioned above), two-mm pilot drills are inserted at the sites of #3 and 5 (Fig.2). The sinus floor is perforated at #3. The osteotomy for #3 is then moved mesially ~ 2 mm using osteotomes (RT 2-4mm). While bone expansion (osteotomes and taps) is being used to create osteotomy for #3, tapered drills for #5. Fig.3 shows 5x11 mm tap and 3.5x20 mm drill in place. Finally 6x11 mm and 4x20 mm implants are placed with >60 Ncm (Fig.4). The patient is also doing great nearly two weeks postop. A third implant is planned to be placed at the site of #5 1-3 months later.
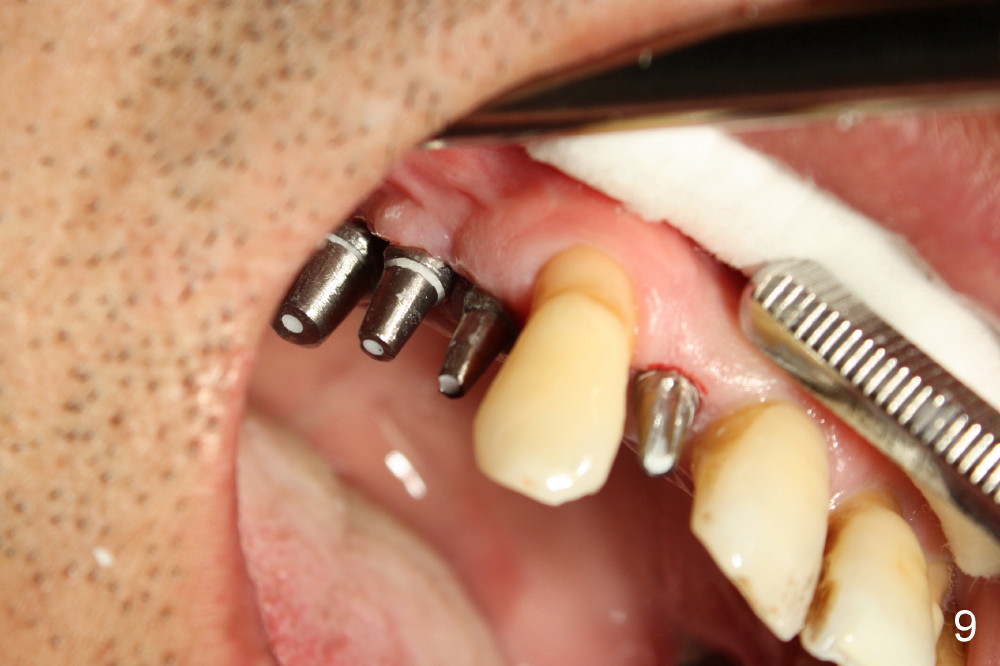
Fig.9 shows 4 uniposts being prepared in 1 appointment yesterday. There happens to be no occlusal reduction on the posts, probably due to history of chronic periodontitis. If I had to cut down posts for occlusion, it would have taken me four appointments.
Nowadays I worry a lot about restoration when I place every implant. The good thing is that I try to place the implant as deep as possible. But for young patients, there is not much space vertically. The best is to have shorter abutments so that we sometimes do not have to spend a lot of time for occlusal reduction. Some of patients have implants placed somewhere else before coming to my office. Preparation for impression is much quicker. I have hard time to explain to my assistants and front desk persons why I am so slow in dealing with Tatum restoration. I hope that you realize the degree I love the Tatum system. My proposal is nothing but make the company more competitive and more user friendly. Thank you very much.
Dr Wei, I am unclear on why it would take such a long time to cut down posts ?? It takes me approx. 15 seconds to cut off the top of a post to the desired length. I use a 557 or 558 burr with water. The preparation on the 4 posts shown are well done and appear to have been correctly finished on the implant. Dr Borgner Friday, May 24, 2013 8:55 AM
Dear Dr. Borgner: Thank you very much for the reply. I suddenly realize that the biggest difference between our preparation methods is that I grind a little bit by bit of the top end of the unipost, whereas you apparently cut off the top portion of the unipost. You must have good judgement how much you have to cut off the top portion of the unipost. In fact it is not safe to grind the unipost extra-orally. It is easy to slip. I may try your way. It will take a while for me to practice cutting the unipost in 15 seconds. To me it is still waste of time.
How do you avoid water spray for extra-oral preparation? Every time I wet my pants.
One month later, an implant is placed at #4, which develops periimplantitis 2 year later.
Return to Professionals
Xin Wei, DDS, PhD, MS 1st edition 04/21/2013, last revision 11/15/2015