
|
|
|
|
|
|
|
|
|
|
|
|
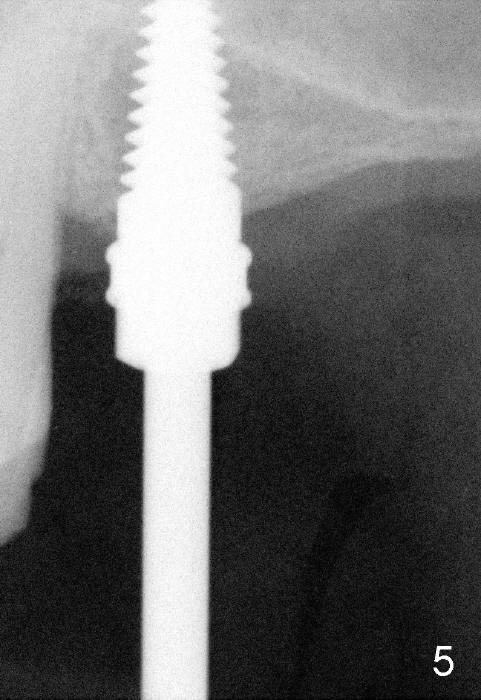
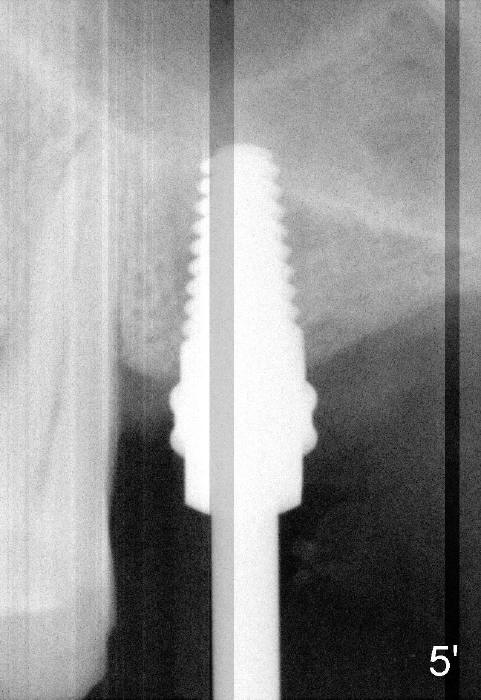
Tap Drill and Its Adapter
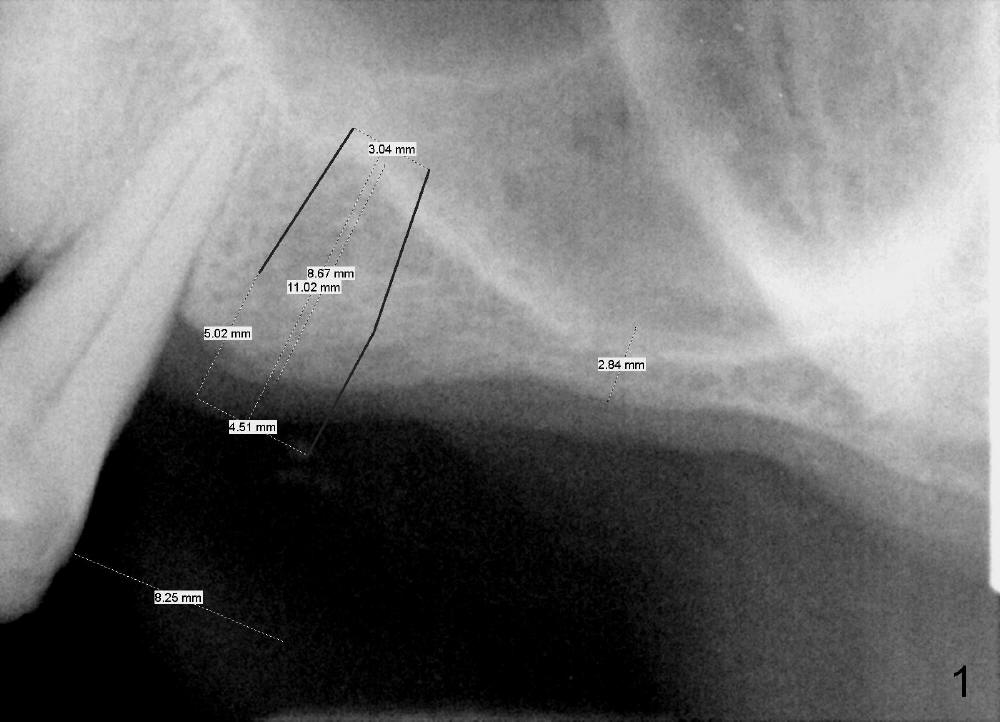
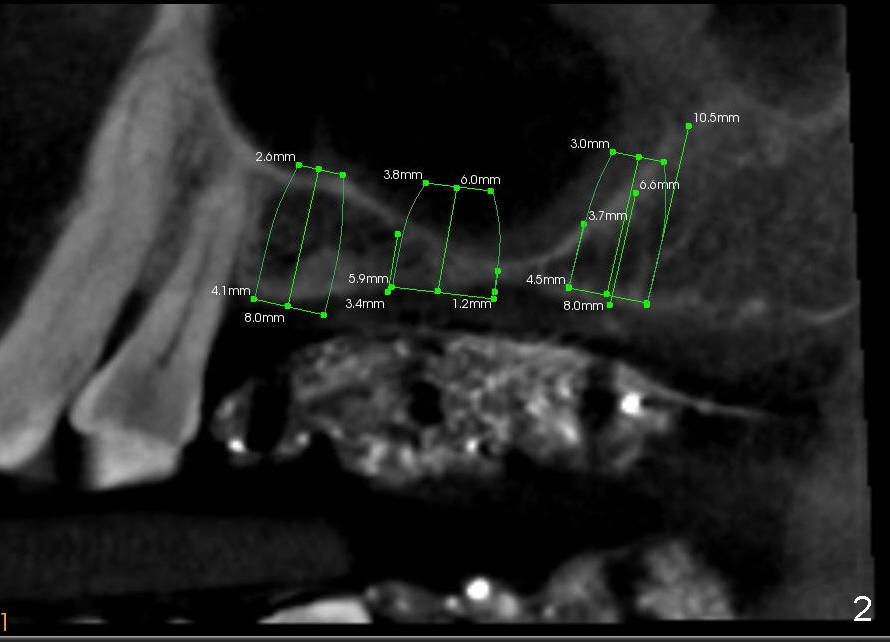
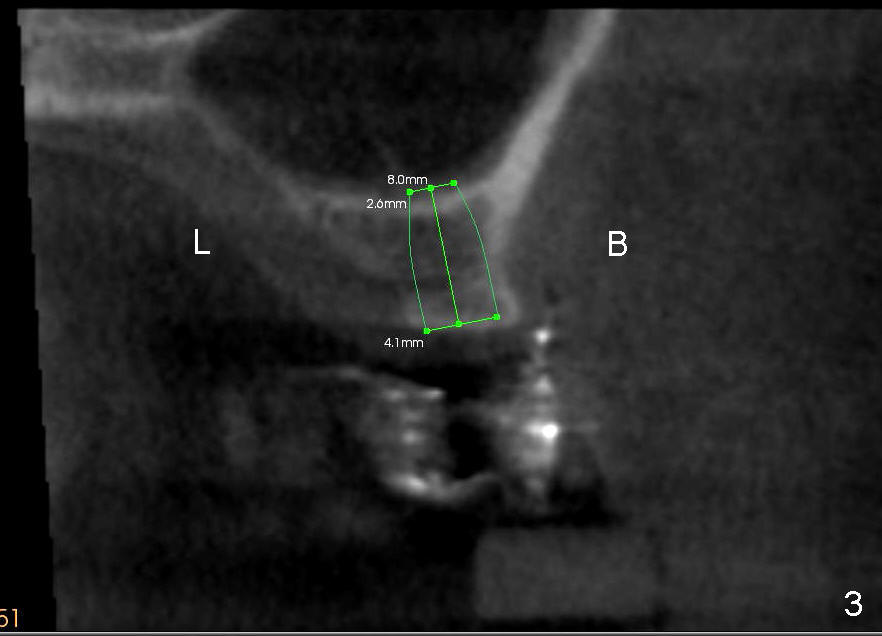
Davis has multiple missing teeth. We plan to place an implant at the site of #2, but he thinks that the tooth #31 is useless. Since there is an opposing tooth and implant placement at the site of #14 is challenging due to limited bone height (Fig.2: CT sagittal section), his first implant will be at the site of #13 (Fig.1-3). Two implant designs are gingiva- (Fig.1) and bone- (Fig.2,3 (coronal section) level.
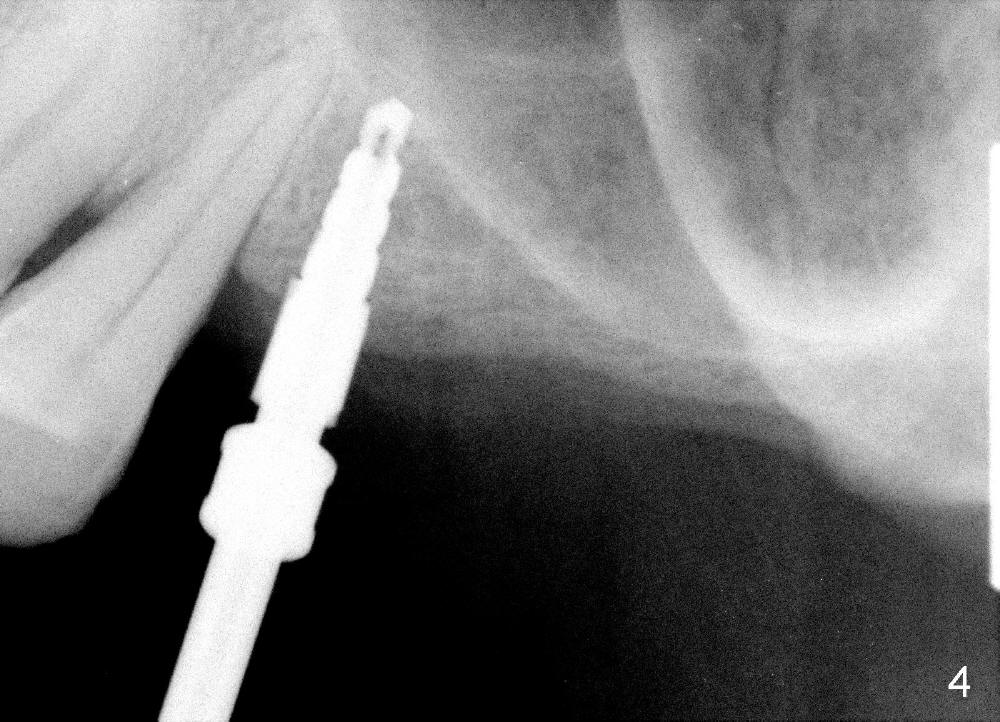
CT analysis (Hounsfield units) shows D2/3 bone at the site of #13. Osteotomy is created by using drills. Fig.4 shows 3.5 mm drill at the depth of 8 mm. The trajectory needs to be adjusted. When 4 mm drill is done, the osteotomy is ovoid in shape. The implant should be 4 or 4.5 mm?
To solve the dilemma, 4.5x11 mm tap is placed by a wrench at the depth of 8
mm. So an adapter is required. Hand placement of the tap is more
controllable than handpiece's in term of trajectory (Fig.5, 5'). Although hand
placement of the tap is slower, it gives us time to watch whether the buccal
plate is fracturing or not. The depth is also controlled better
(intentional sinus lift without bone graft). Finally 4.5x11 mm implant is
placed relatively ideally (Fig.6 I with insertion torque 60 Ncm). A
restorative abutment (A) is placed immediately for a provisional (immediate
loading). There is no nasal hemorrhage intra- or post-op.
Xin Wei, DDS, PhD, MS 1st edition 01/15/2014, last revision 01/16/2014