
|
|
|
|
|
|
|
|
|
|
|
|
|
|
|
|
|
|
|
|
|
|
|
|
|
|
|
|
|
|
|
|
|
|
|
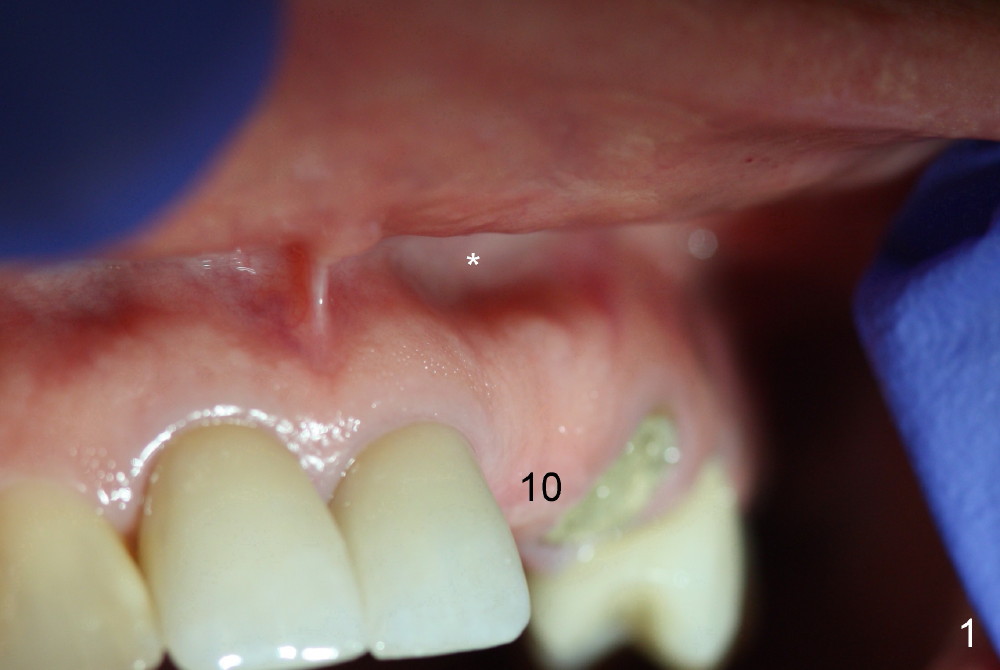
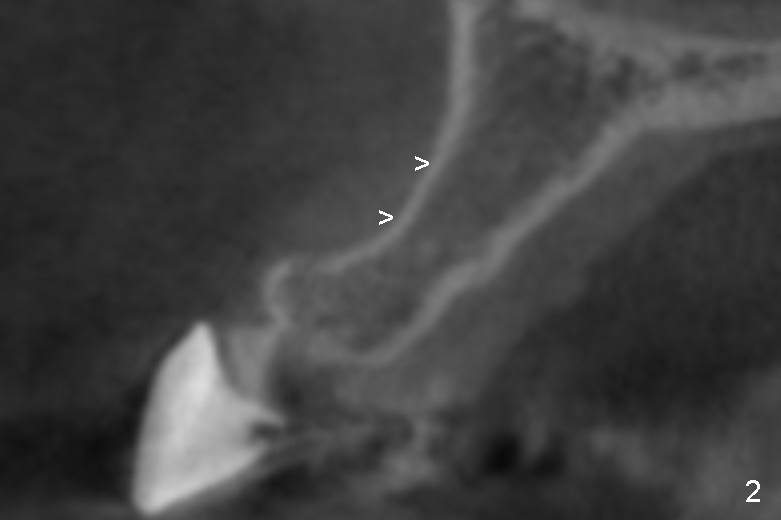
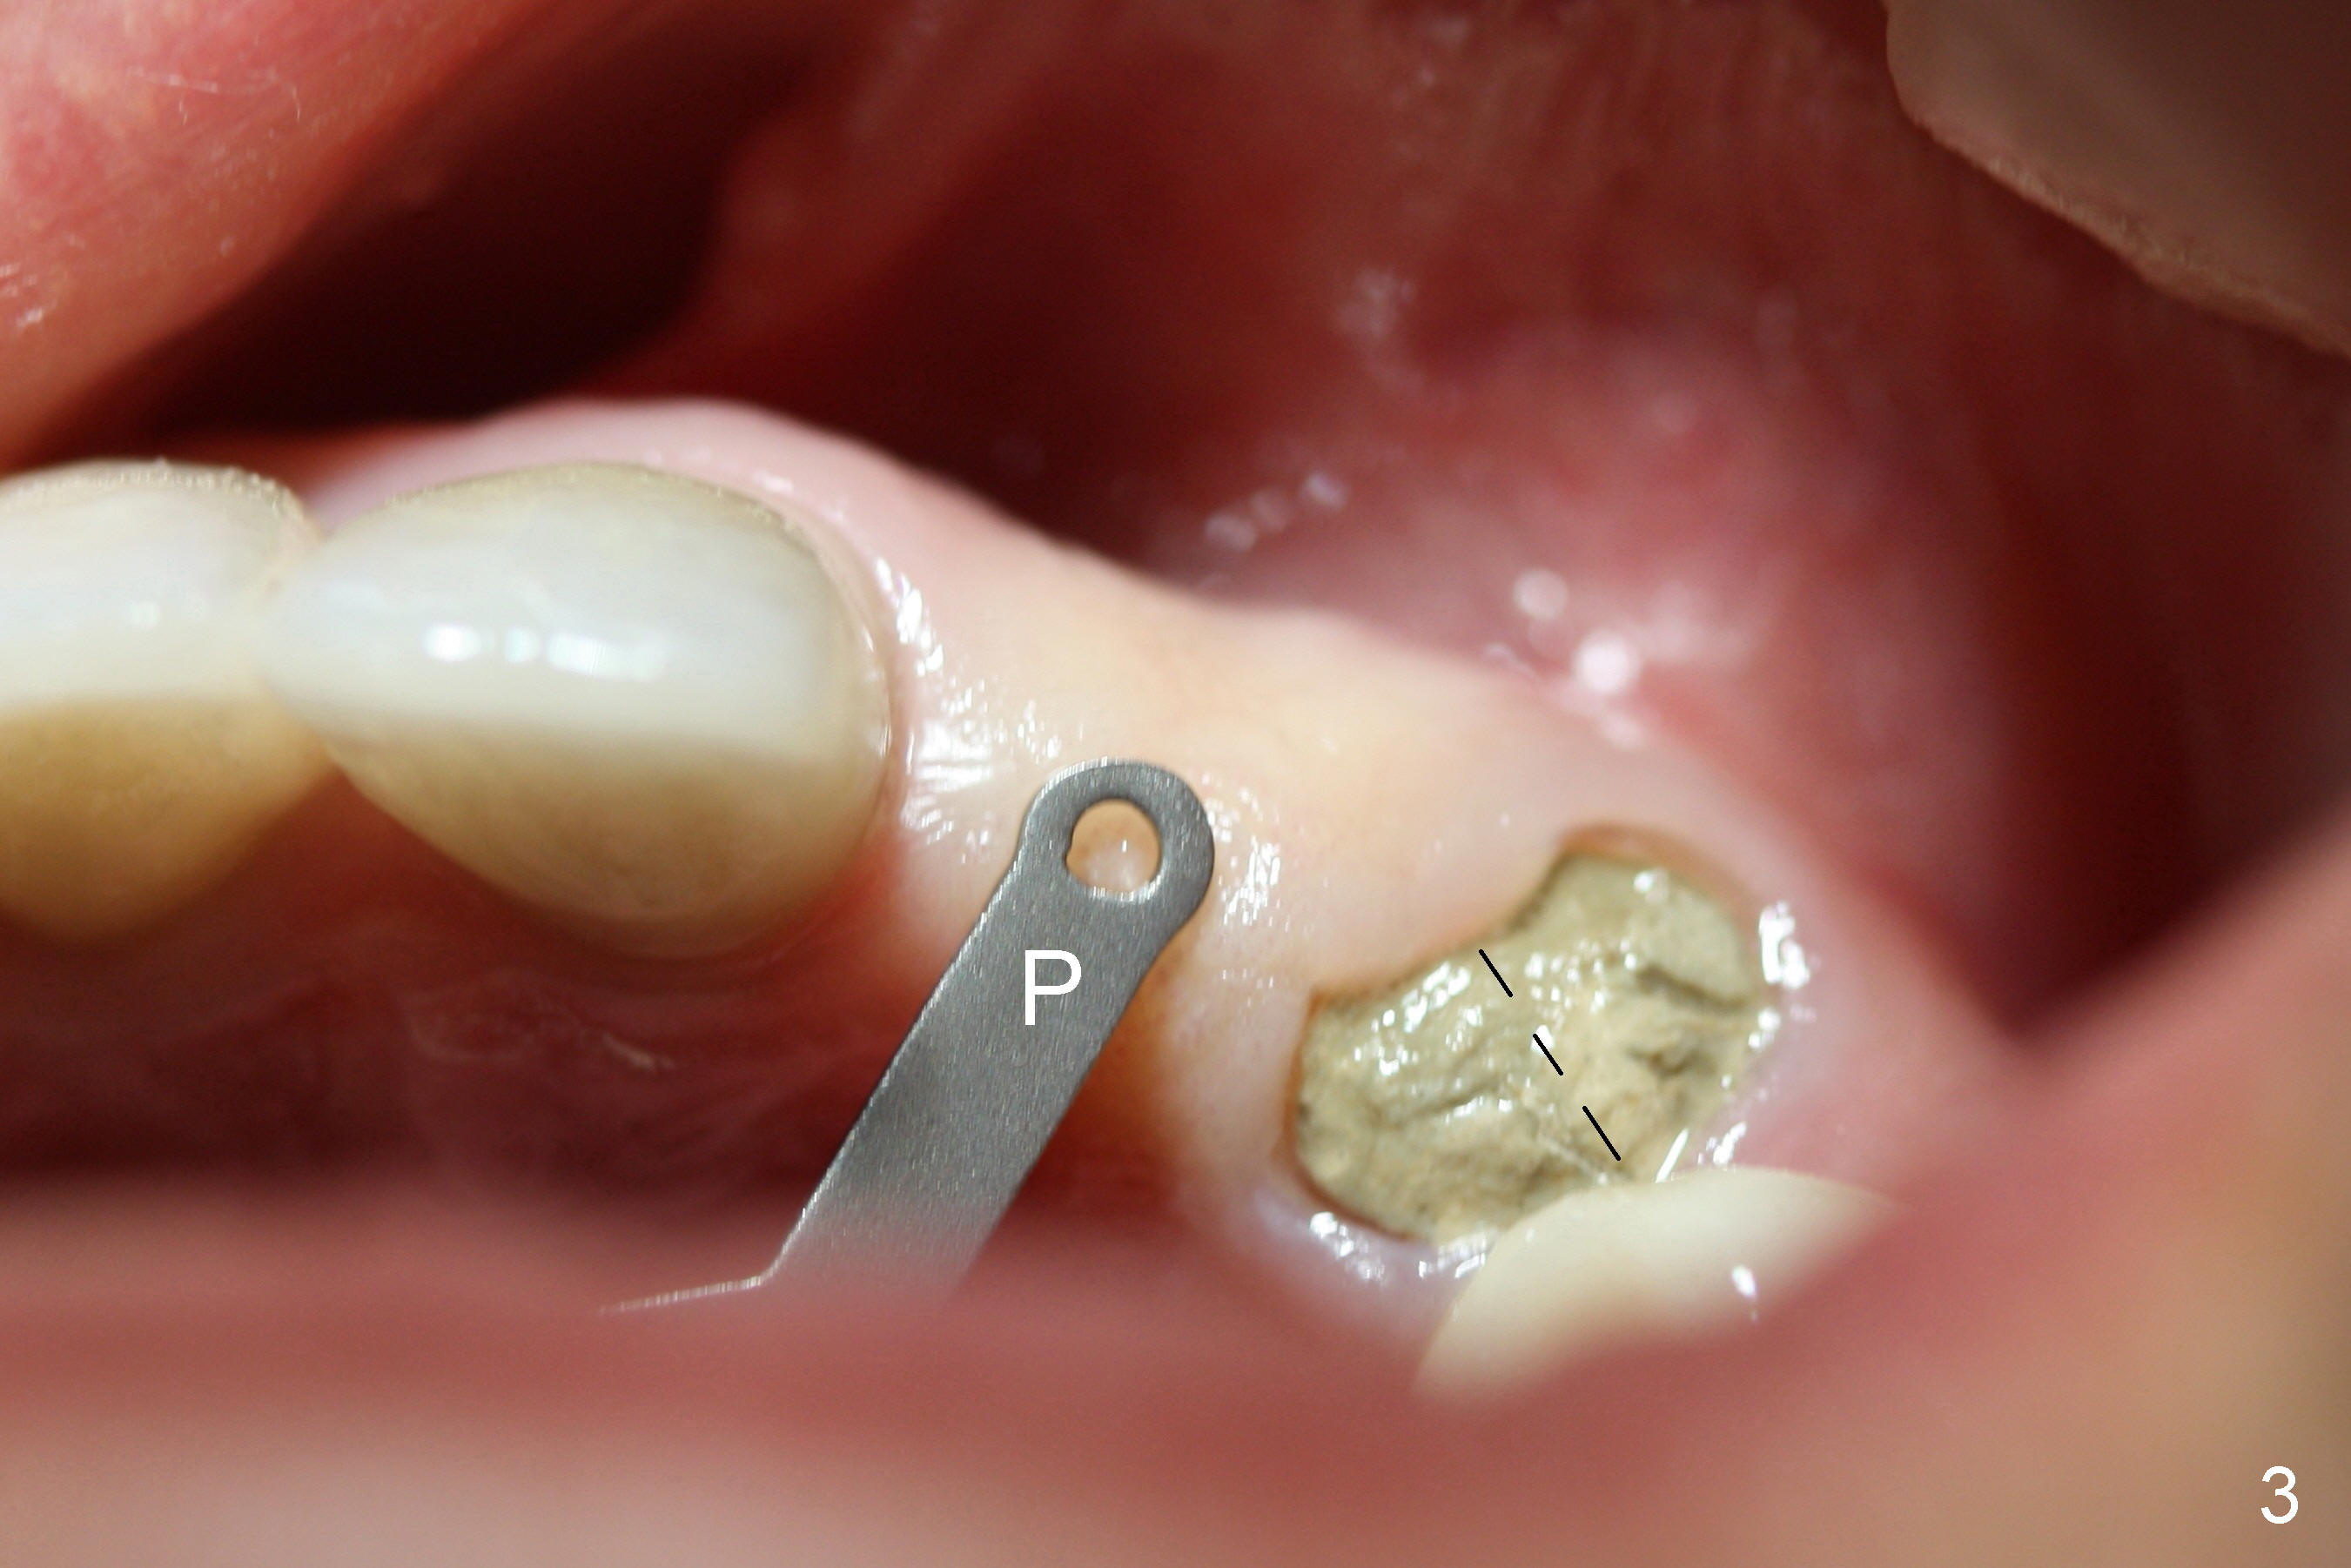
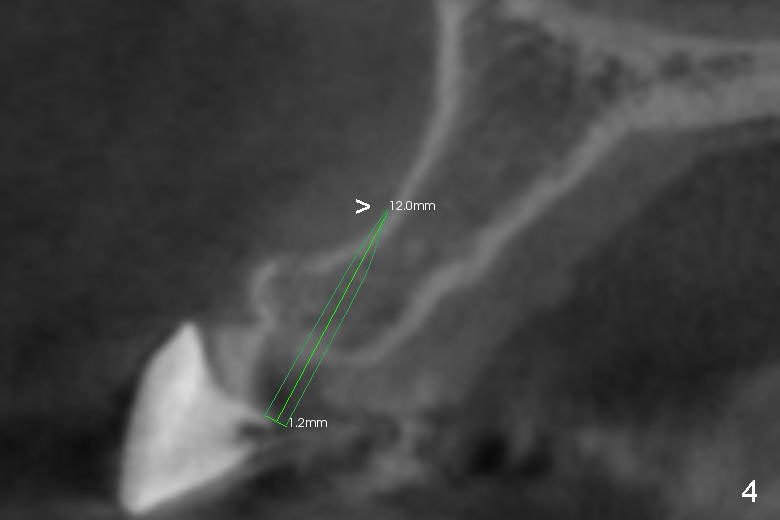
One and Two-Piece Implants
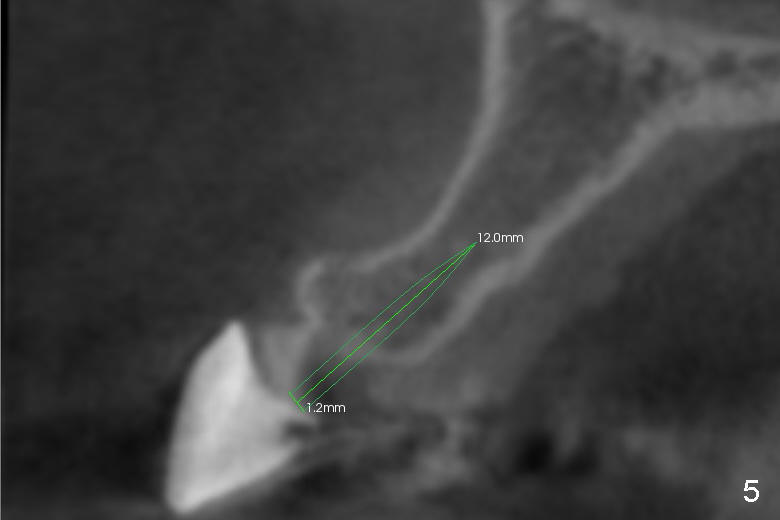
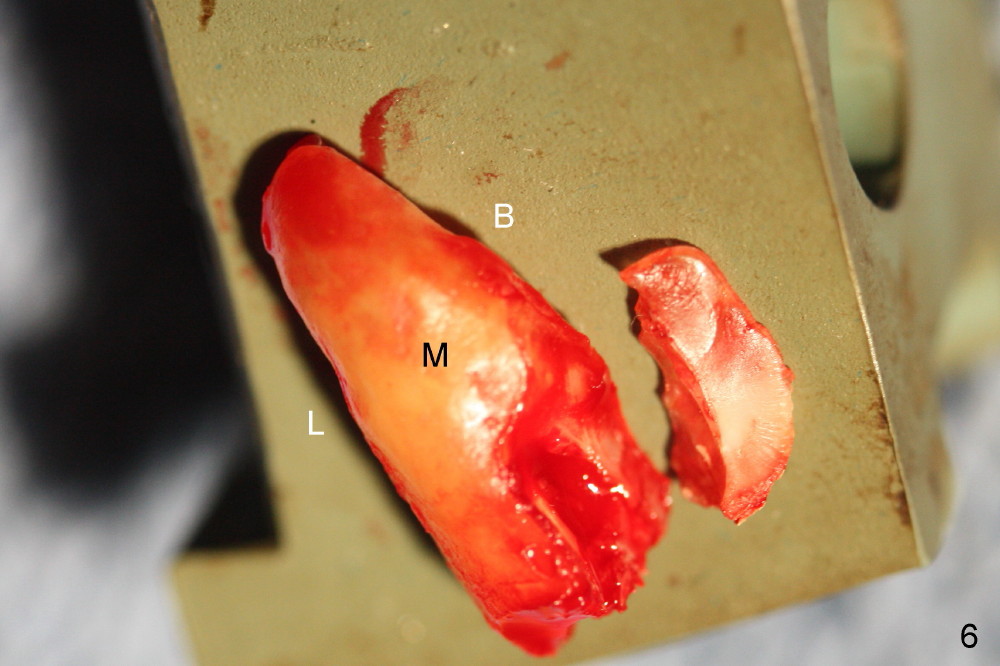
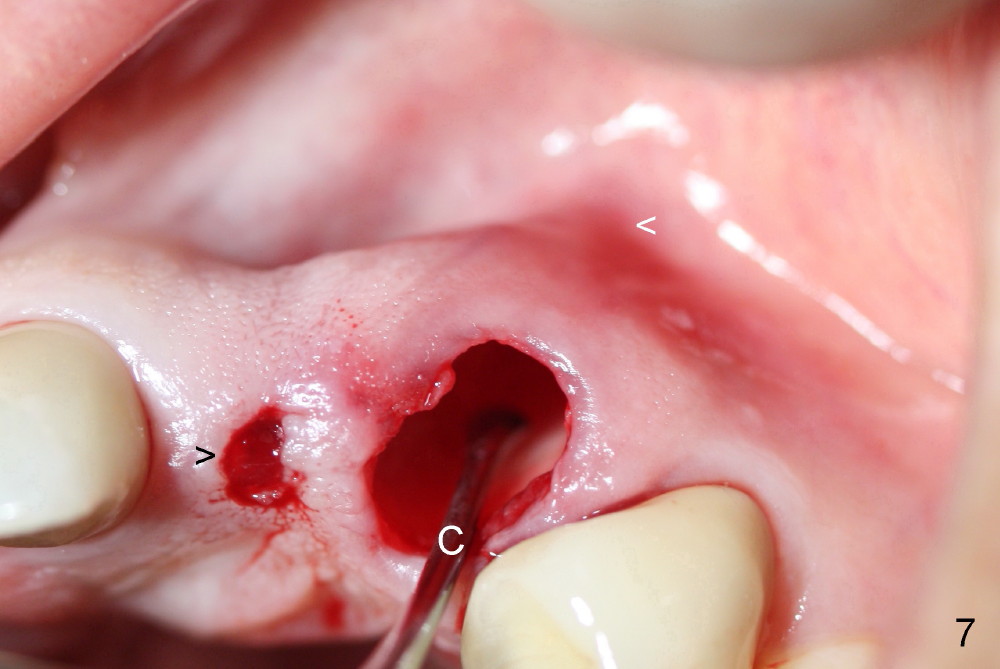
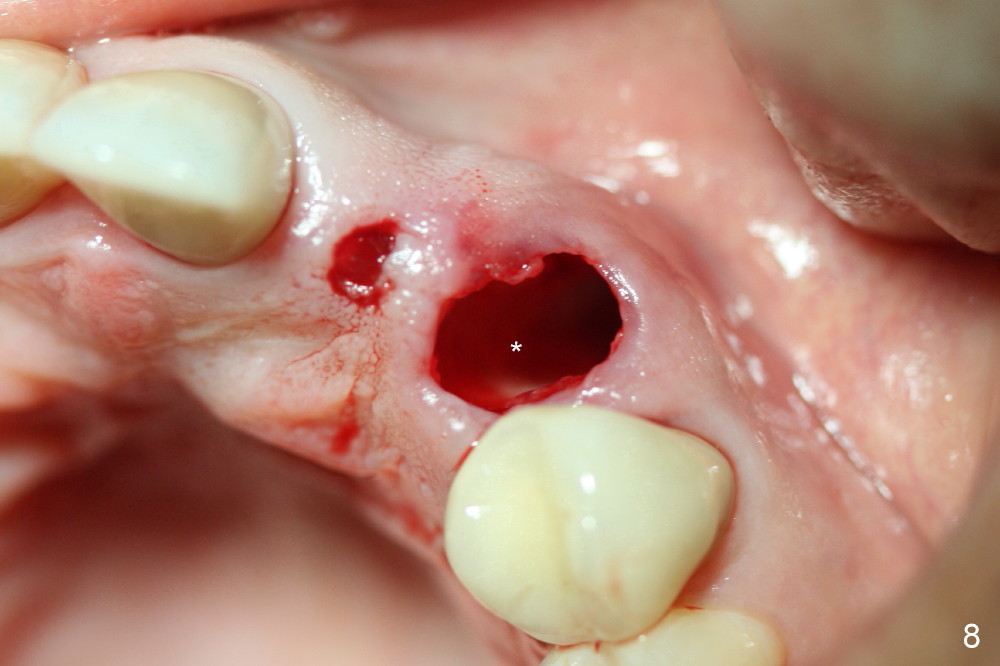
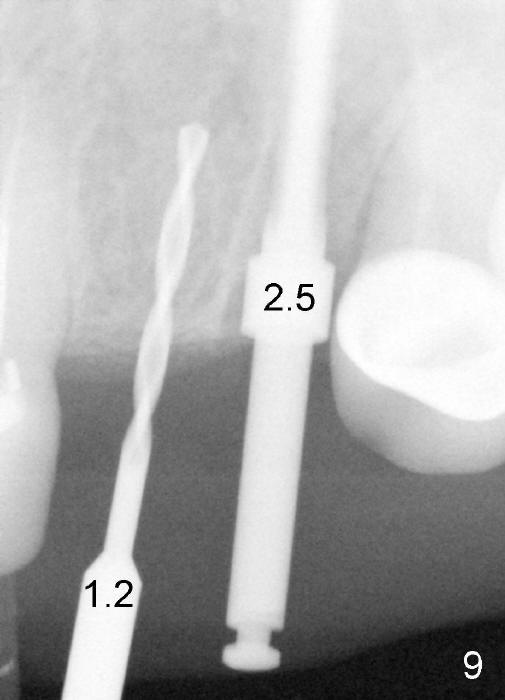
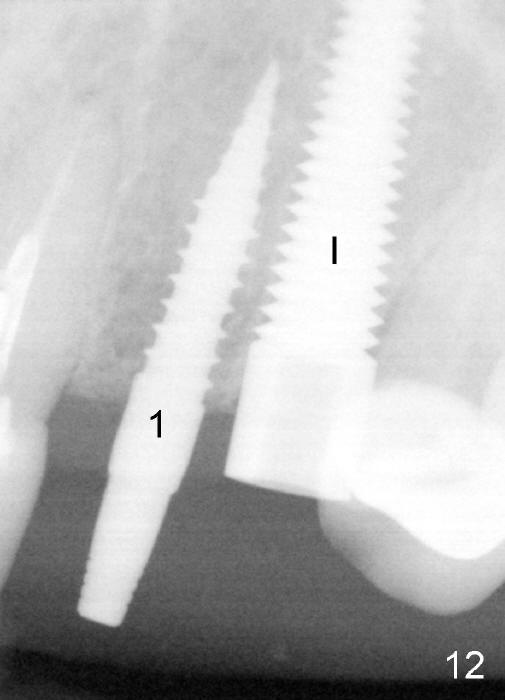
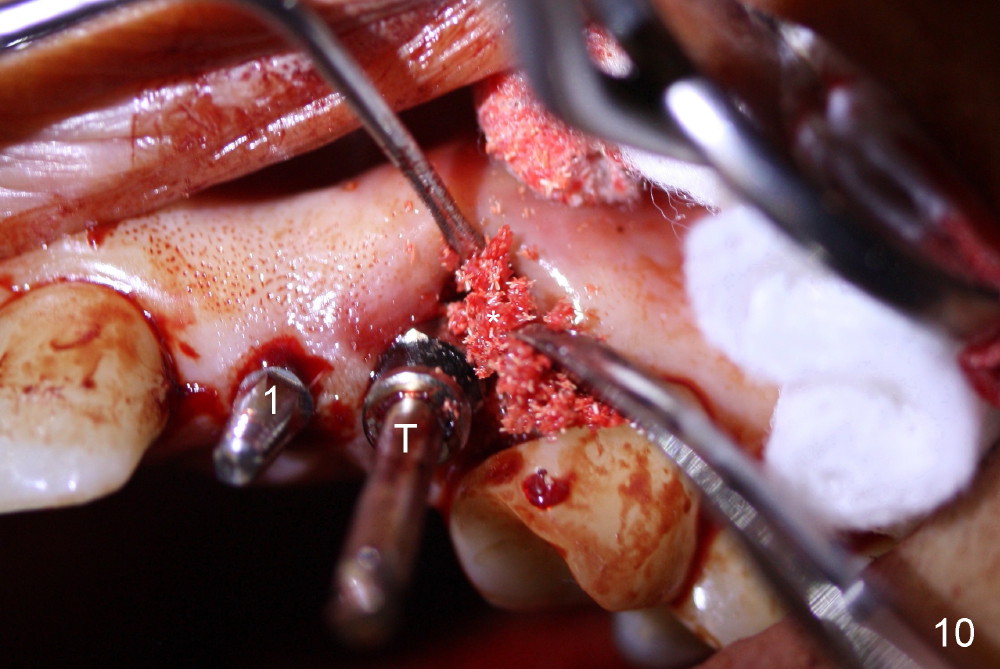
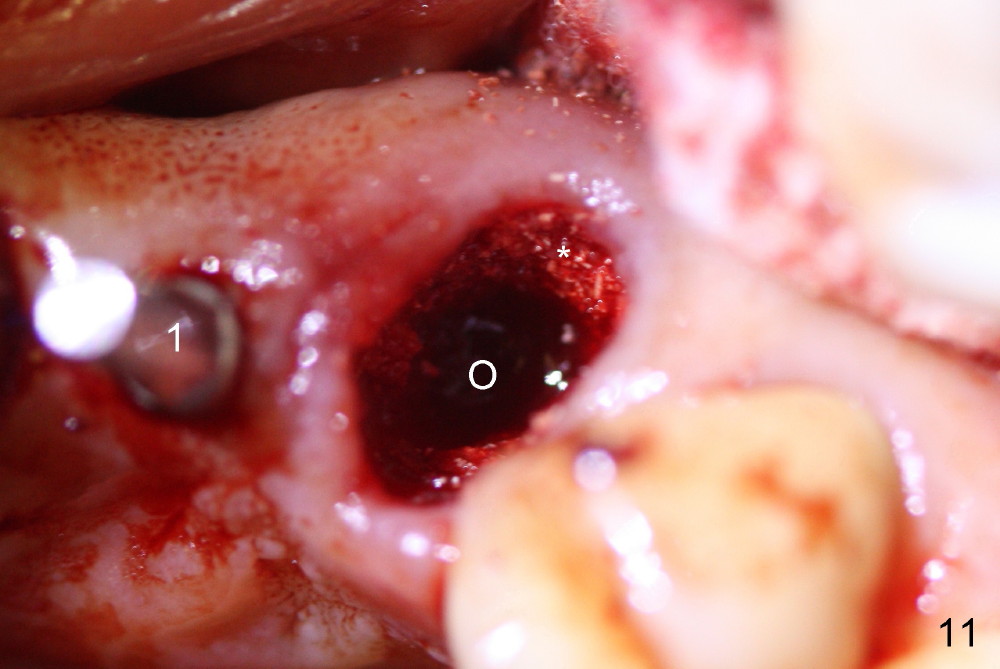
The patient has to return for implant placement, because the temporary removable provisional for #10 and 11 is breaking down. Preop photo shows the labial plate undercut over the site of #10 (Fig.1 *), corresponding to that of CBCT coronal section (Fig.2 >). A 3 mm implant positioner (Fig.3 P) is placed over the ridge of #10 to make sure that there will be sufficient keratinized gingiva surrounding the prospective 3 mm implant. After using 2.5 mm tissue punch, osteotomy is initiated with a 1.2 mm pilot drill at the depth of 12 mm. Unfortunately the labial plate is perforated, most likely at the undercut (Fig.4 >). The osteotomy is then re-directed (Fig.5). The residual root at #11 is extracted by sectioning (Fig.3 dashed line: Fig.6) and proximators (). When the root is removed, a surgical curette (Fig.7 C) is used to confirm the flimsy, delicate, thin labial plate, and apical perforation (white <). To provide the best chance for the apical defect to heal, the osteotomy starts in the middle of the palatal wall of the socket (Fig.8 *). Intraop PA is taken with 1.2 mm pilot drill and 2.5 mm reamer placed at #10 and 11 sites, respectively (Fig.9). Following sequential osteotomy, a 3x14 mm 1 piece implant is placed at #10 (Fig.10: #1); while a 5x20 mm tap (T) is in place of #11 osteotomy, allograft and Osteogen is placed in the buccal aspect of the socket (*). When the tap is removed, bone graft (Fig.11 *) is visibly buccal to the osteotomy (O), to which a 5x20 mm implant is inserted (Fig.12 I). An abutment is inserted to the implant at #11 (Fig.13 A), followed by fabrication of immediate provisionals. Before cementation of the latter, more bone graft is added to the buccal and lingual remaining sockets of #11, then covered by collagen dressing (Fig.13 *).
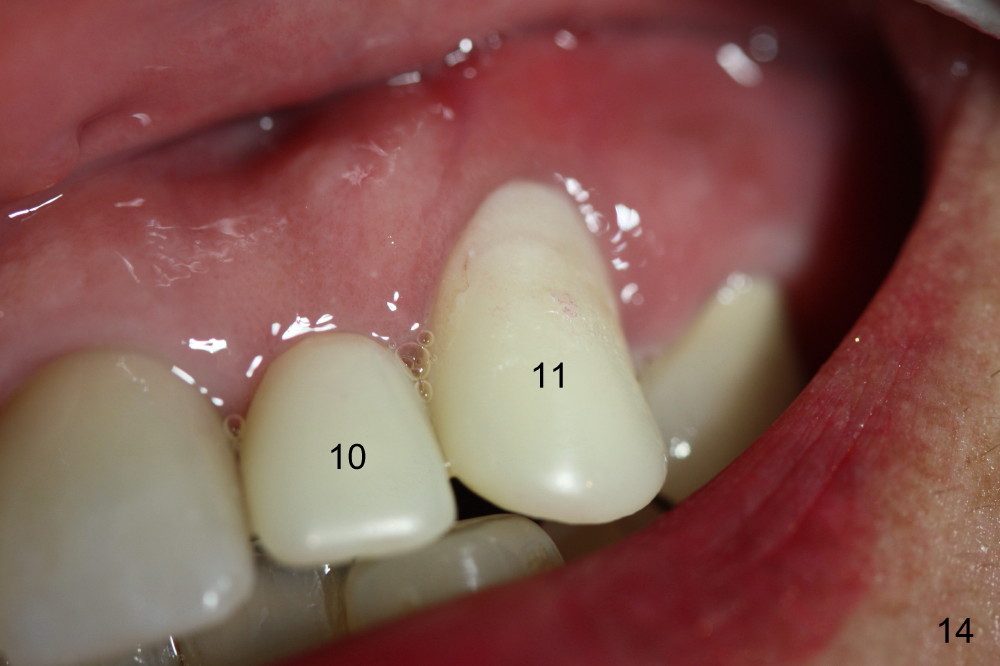
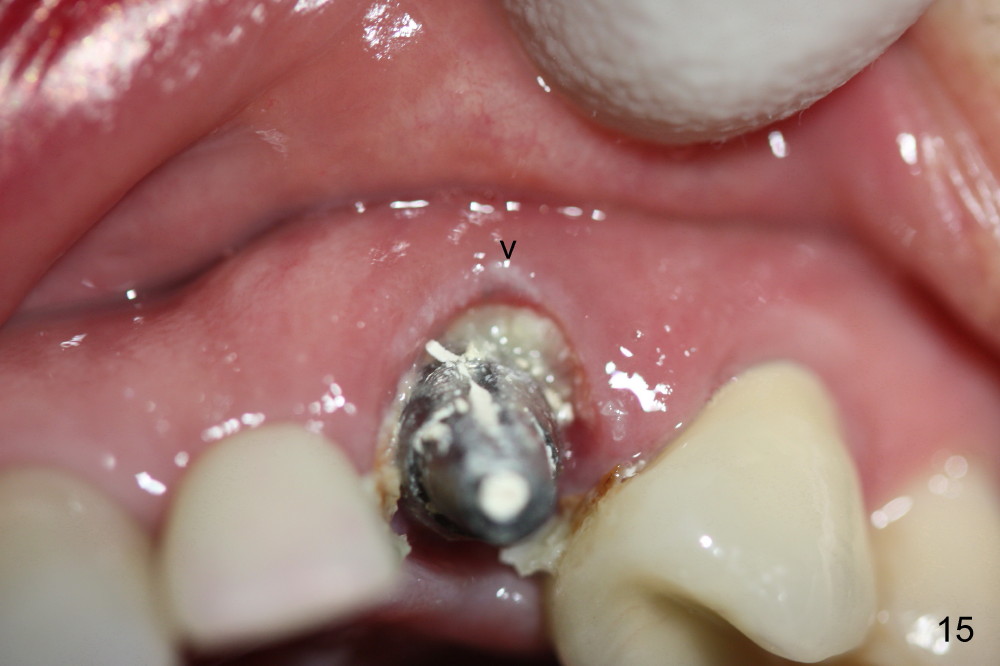
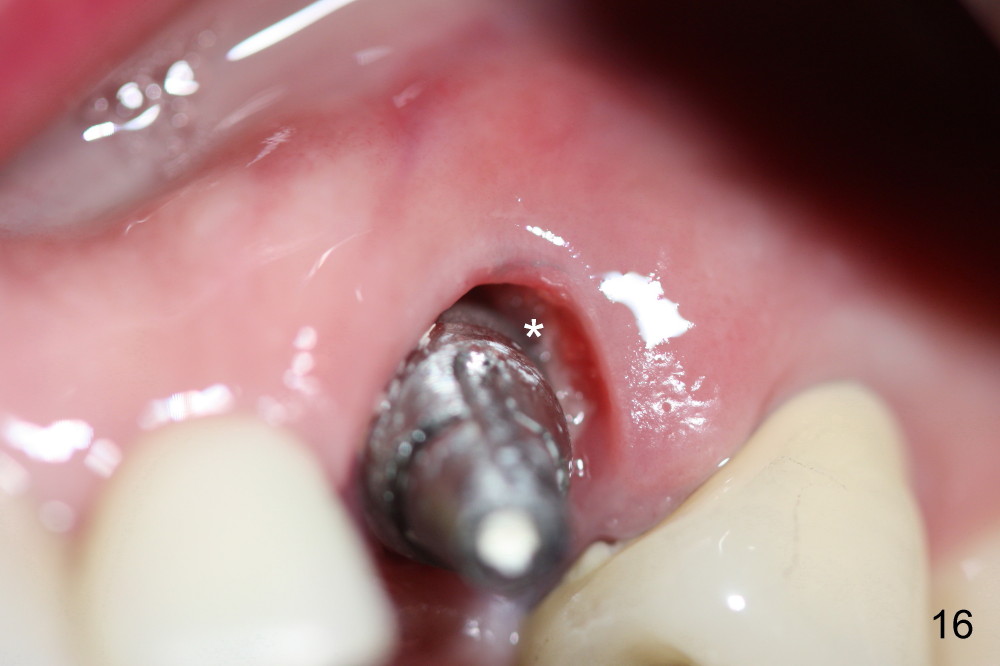
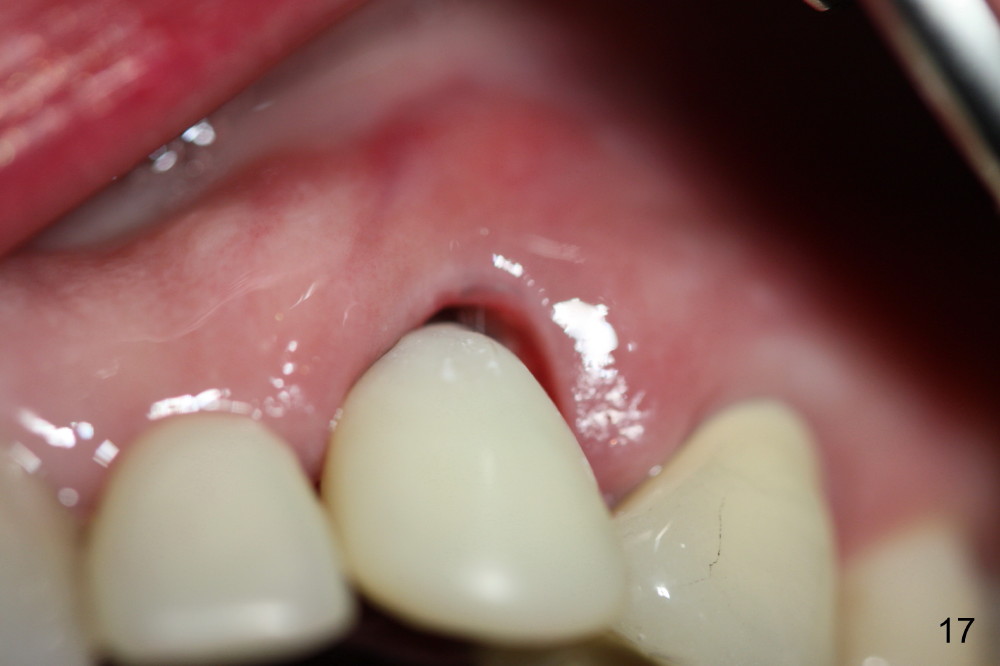
The patient returns 3 weeks postop. The provisional at the site of #11 looks too long (Fig.14). It appears that the provisional over covers the gingiva by 1-2 mm (Fig.15 arrowhead). After removal of tissue debris (Fig.16), the trimmed provisional is re-cemented (Fig.17). The margin of the provisional is subgingival mesiobuccally, while the distobuccal gingiva is free to grow down by itself.
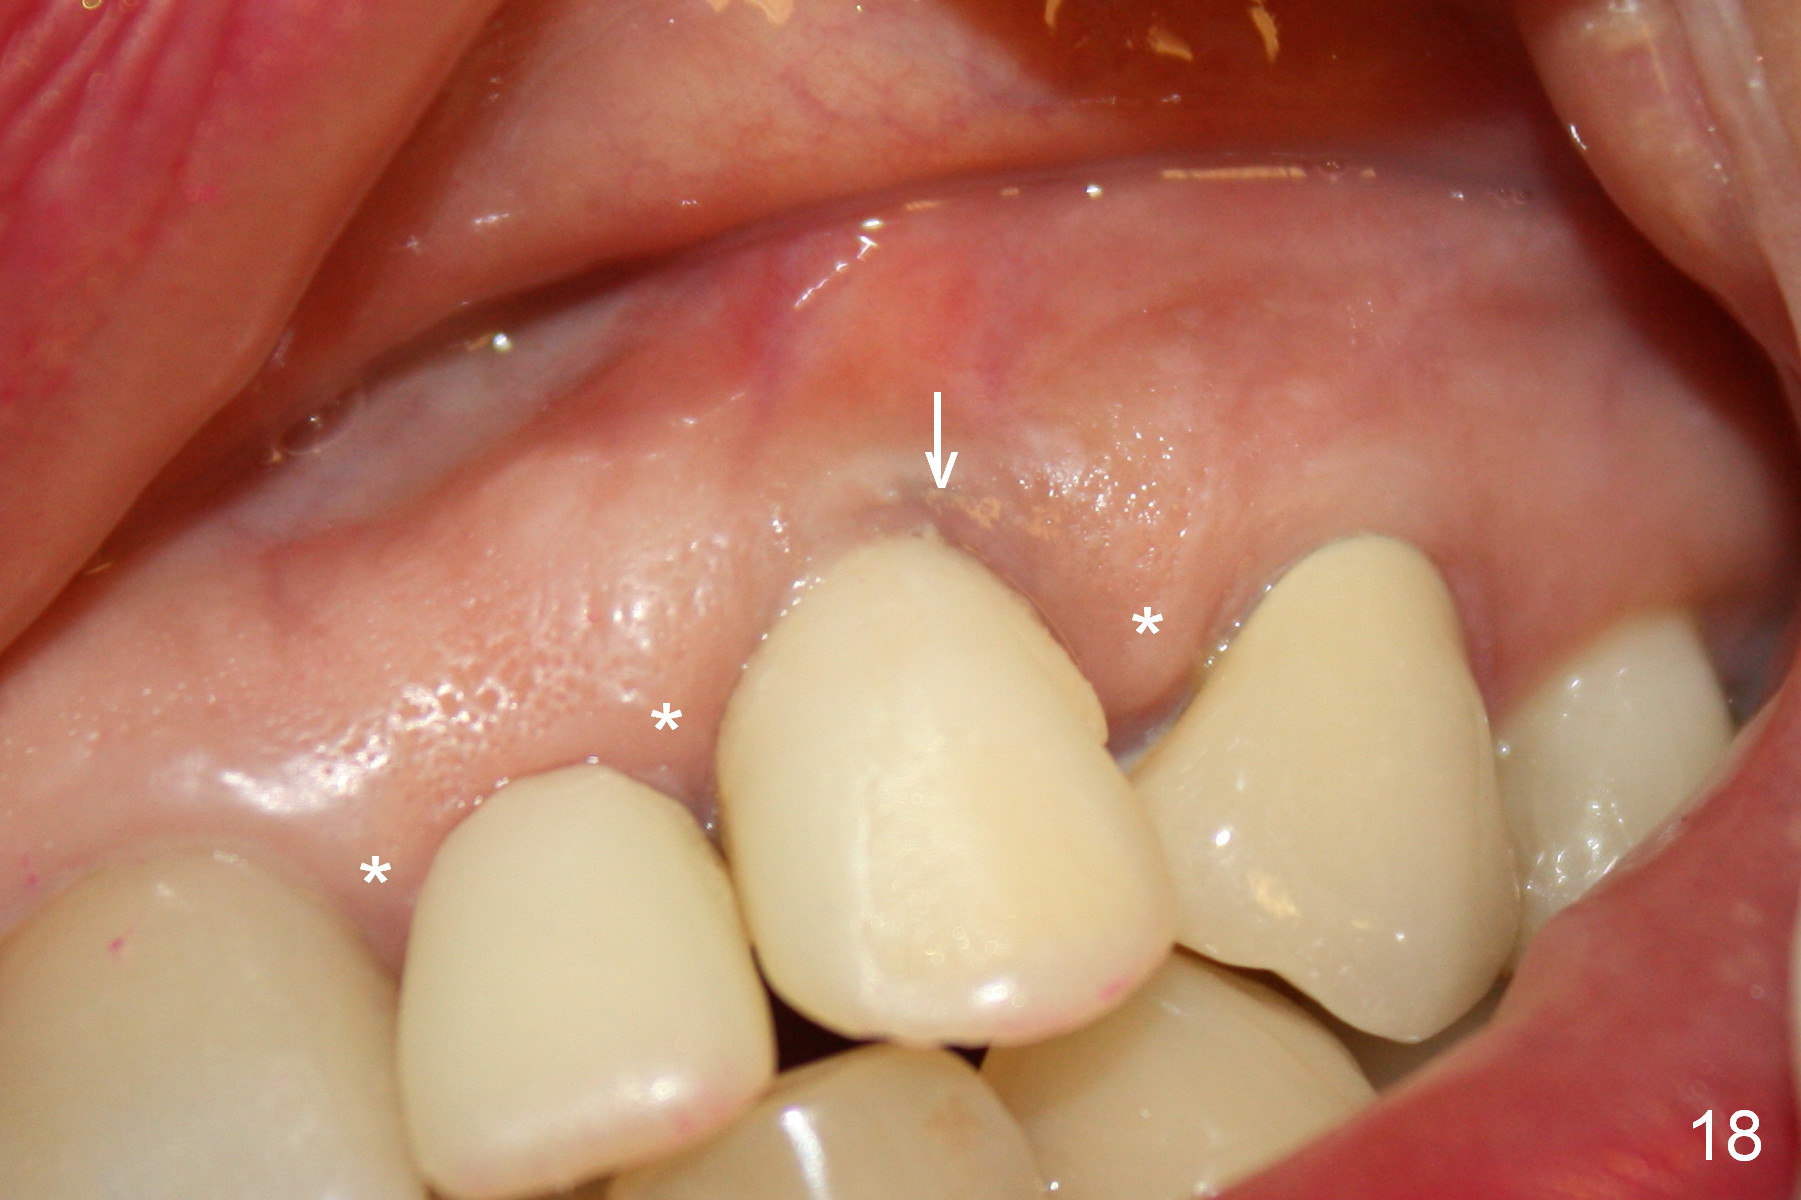
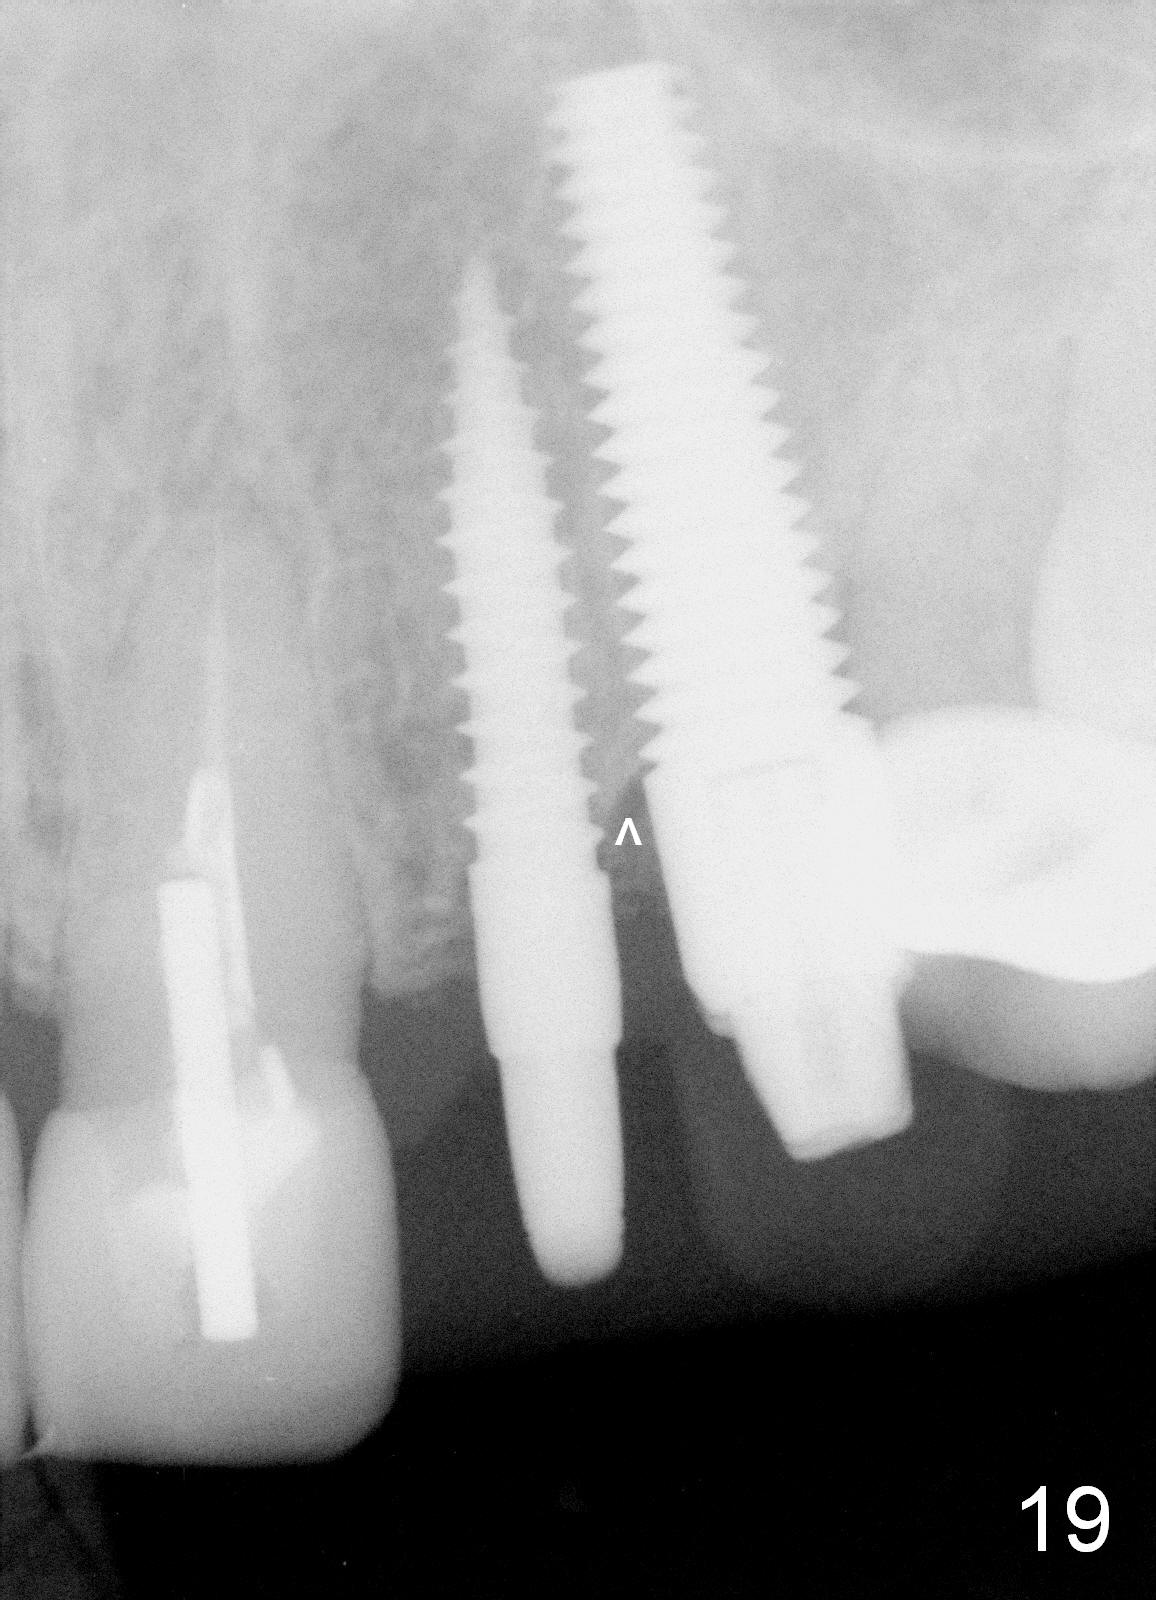
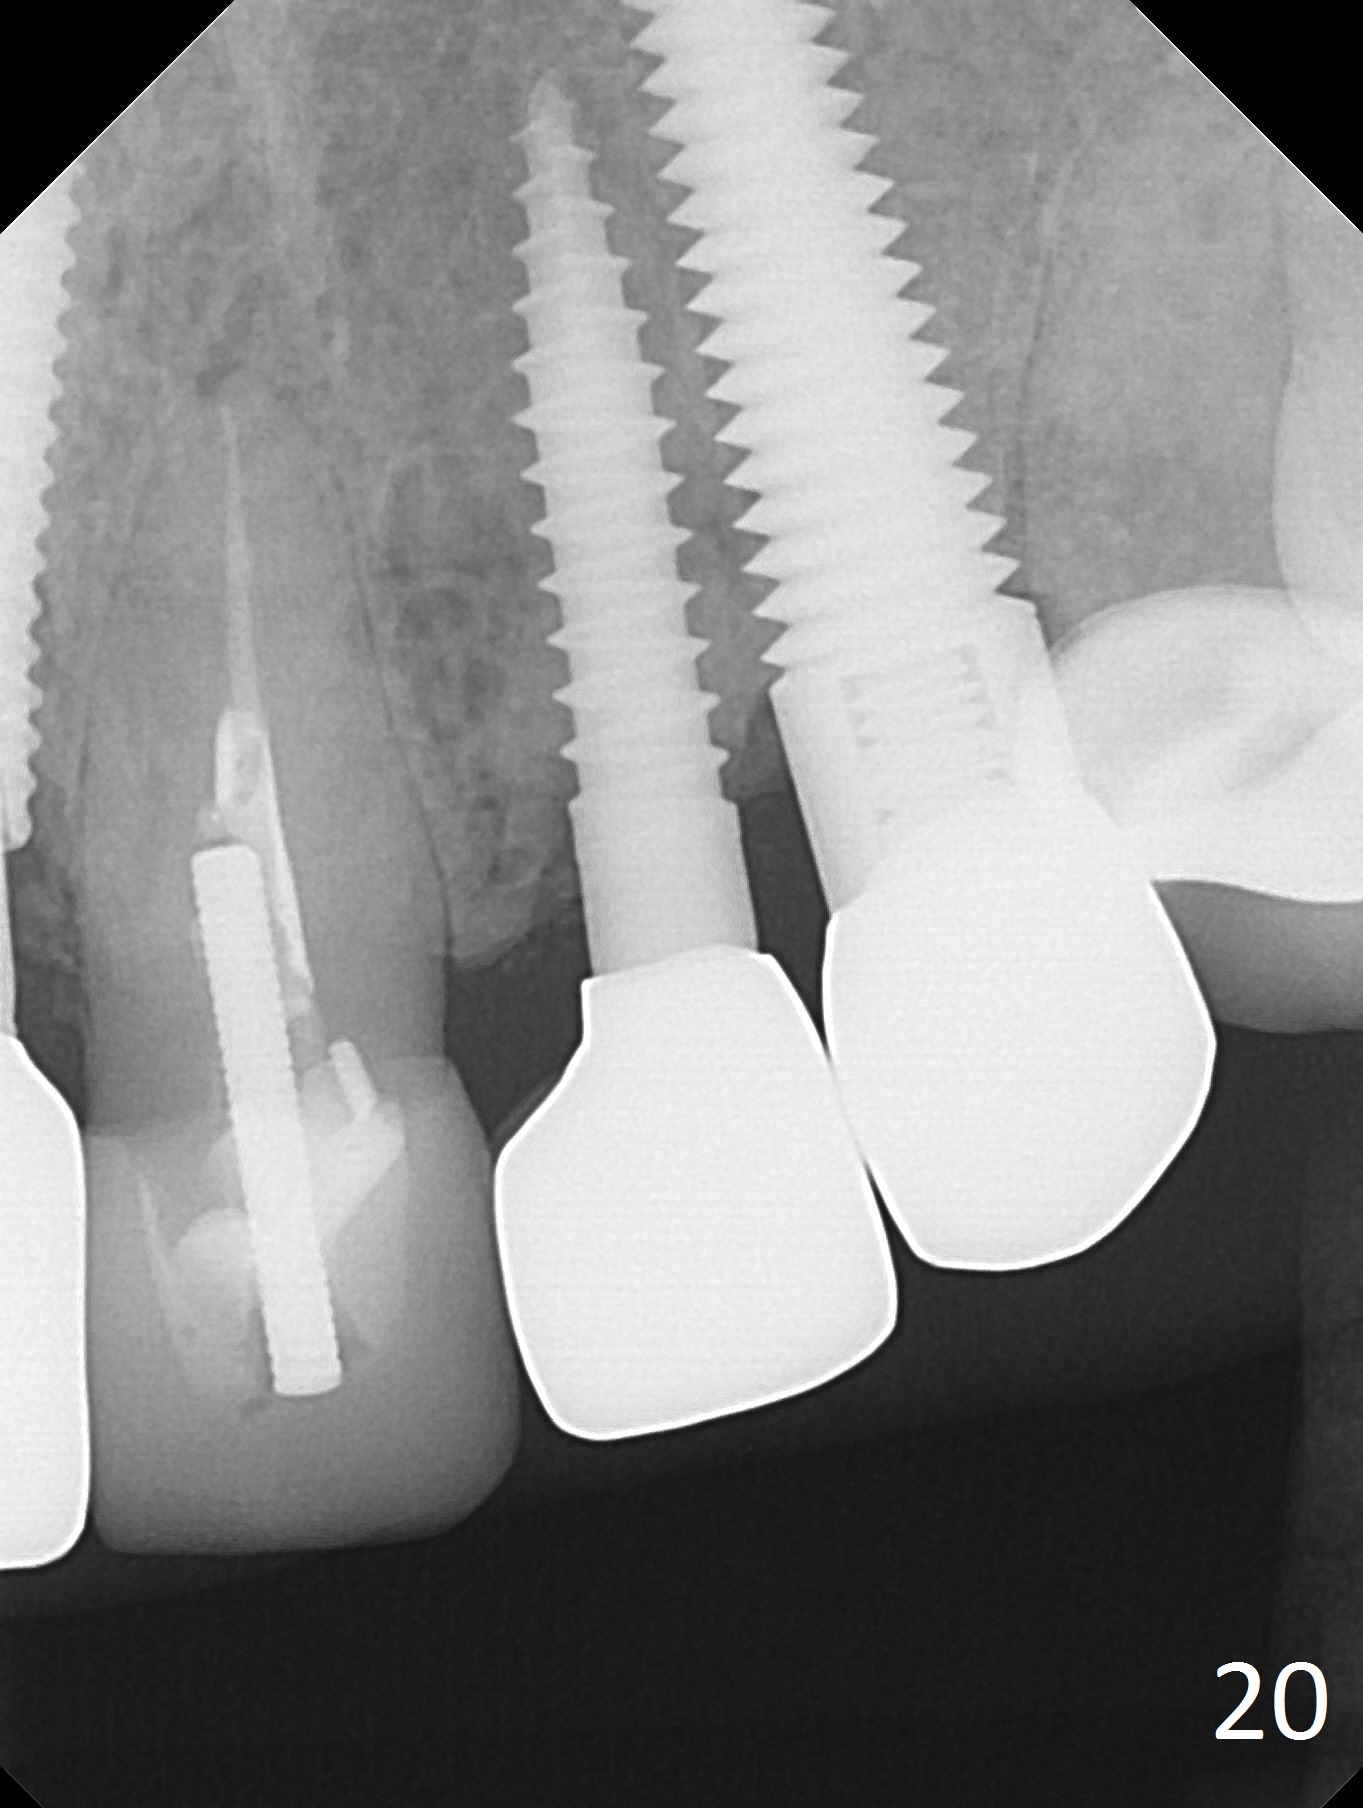
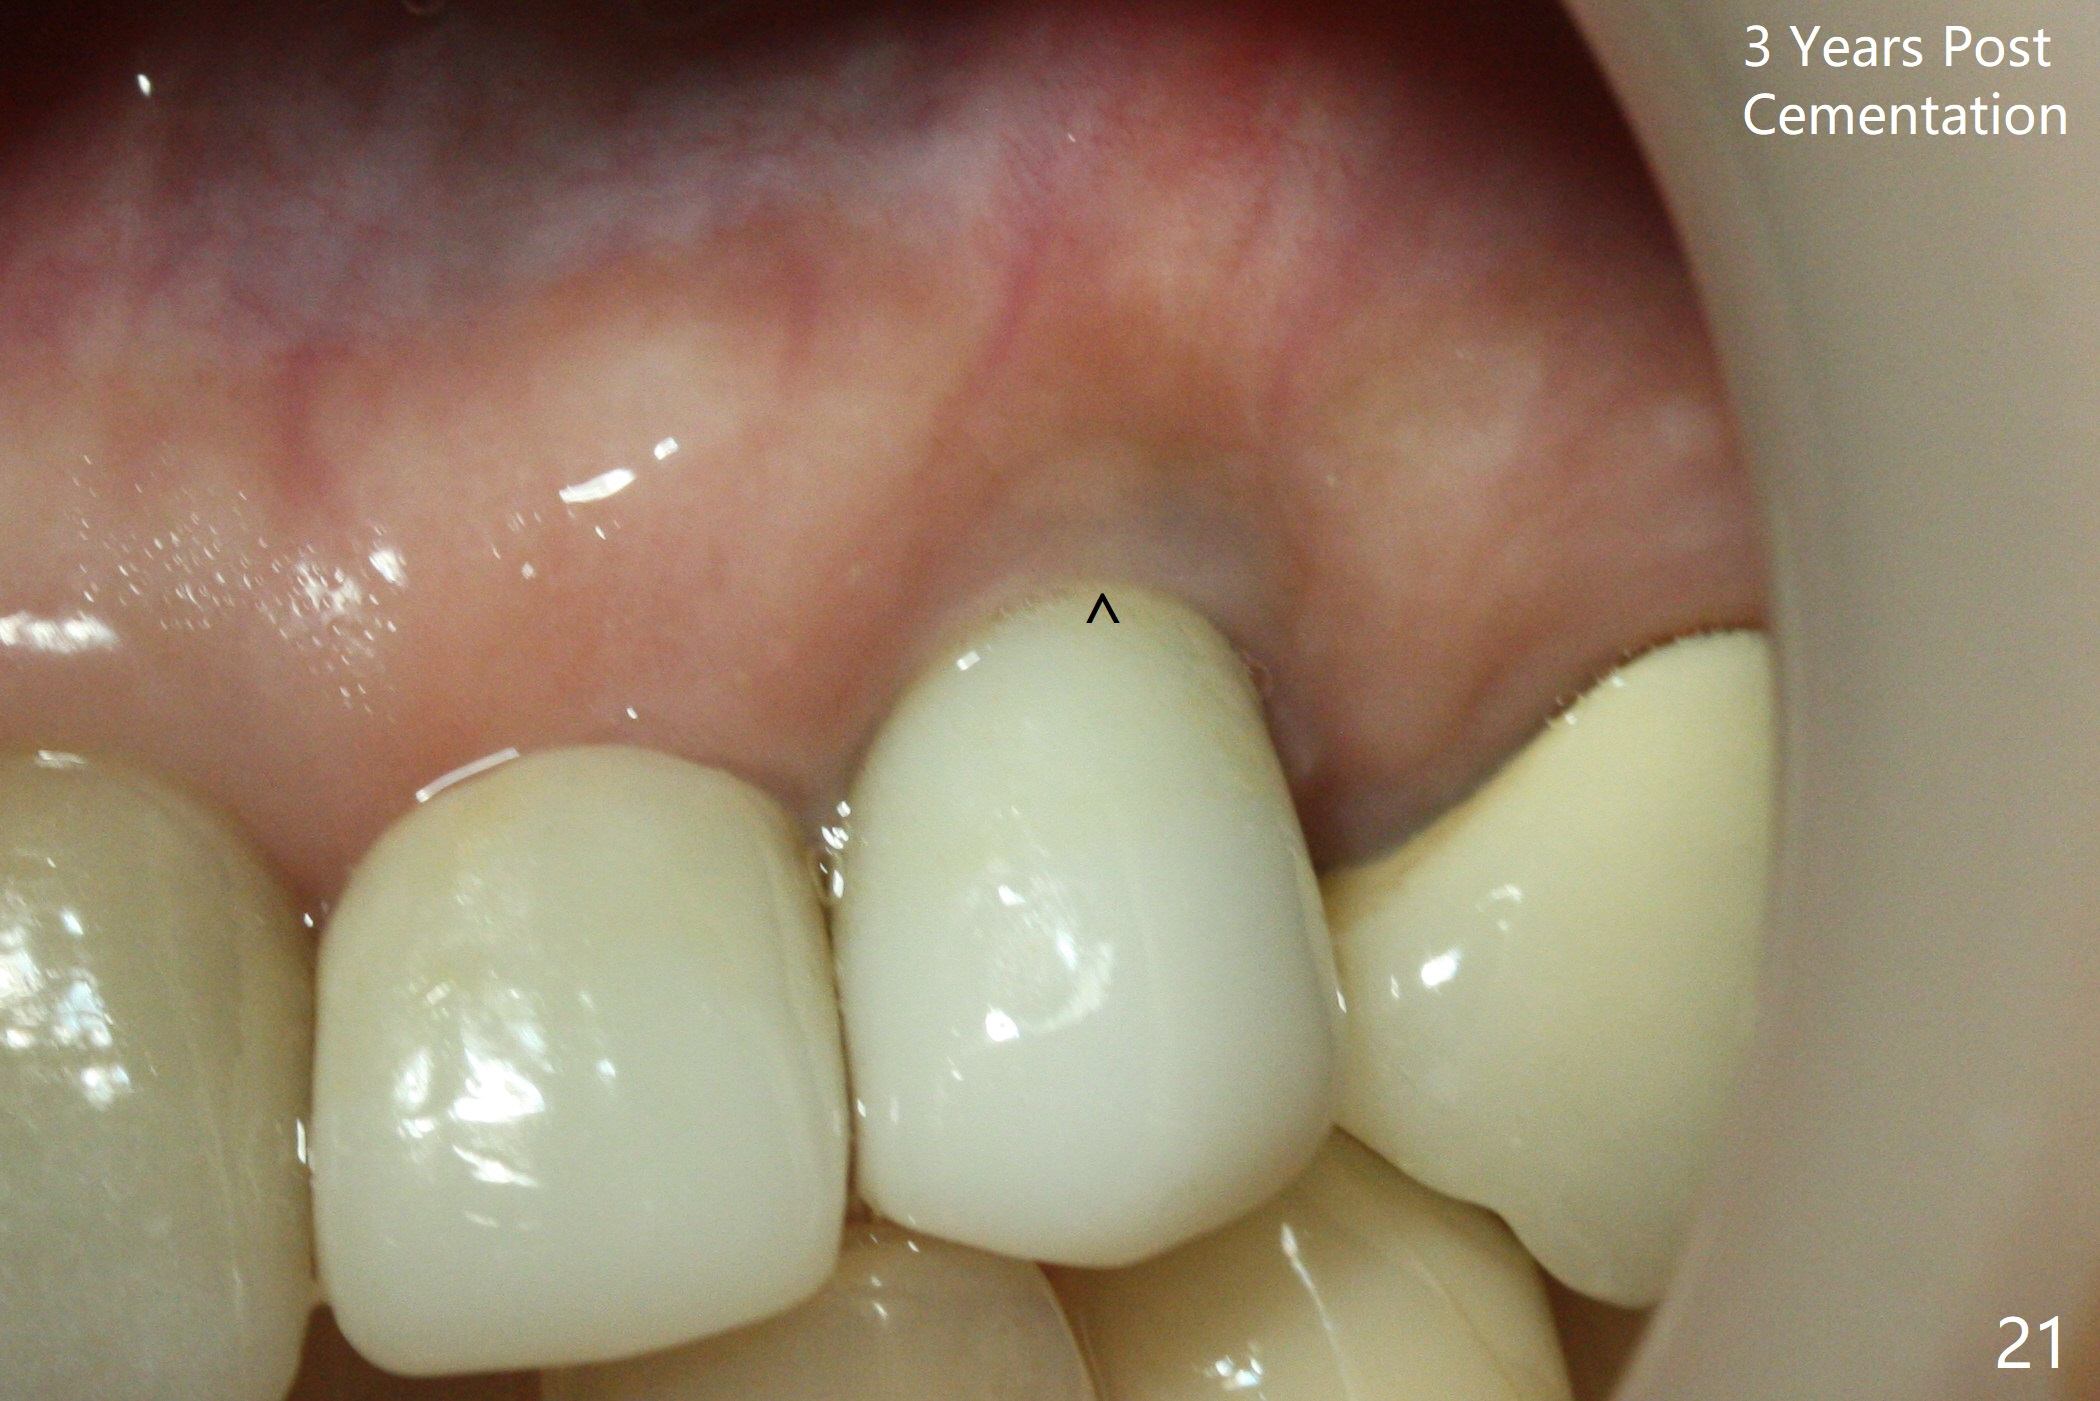
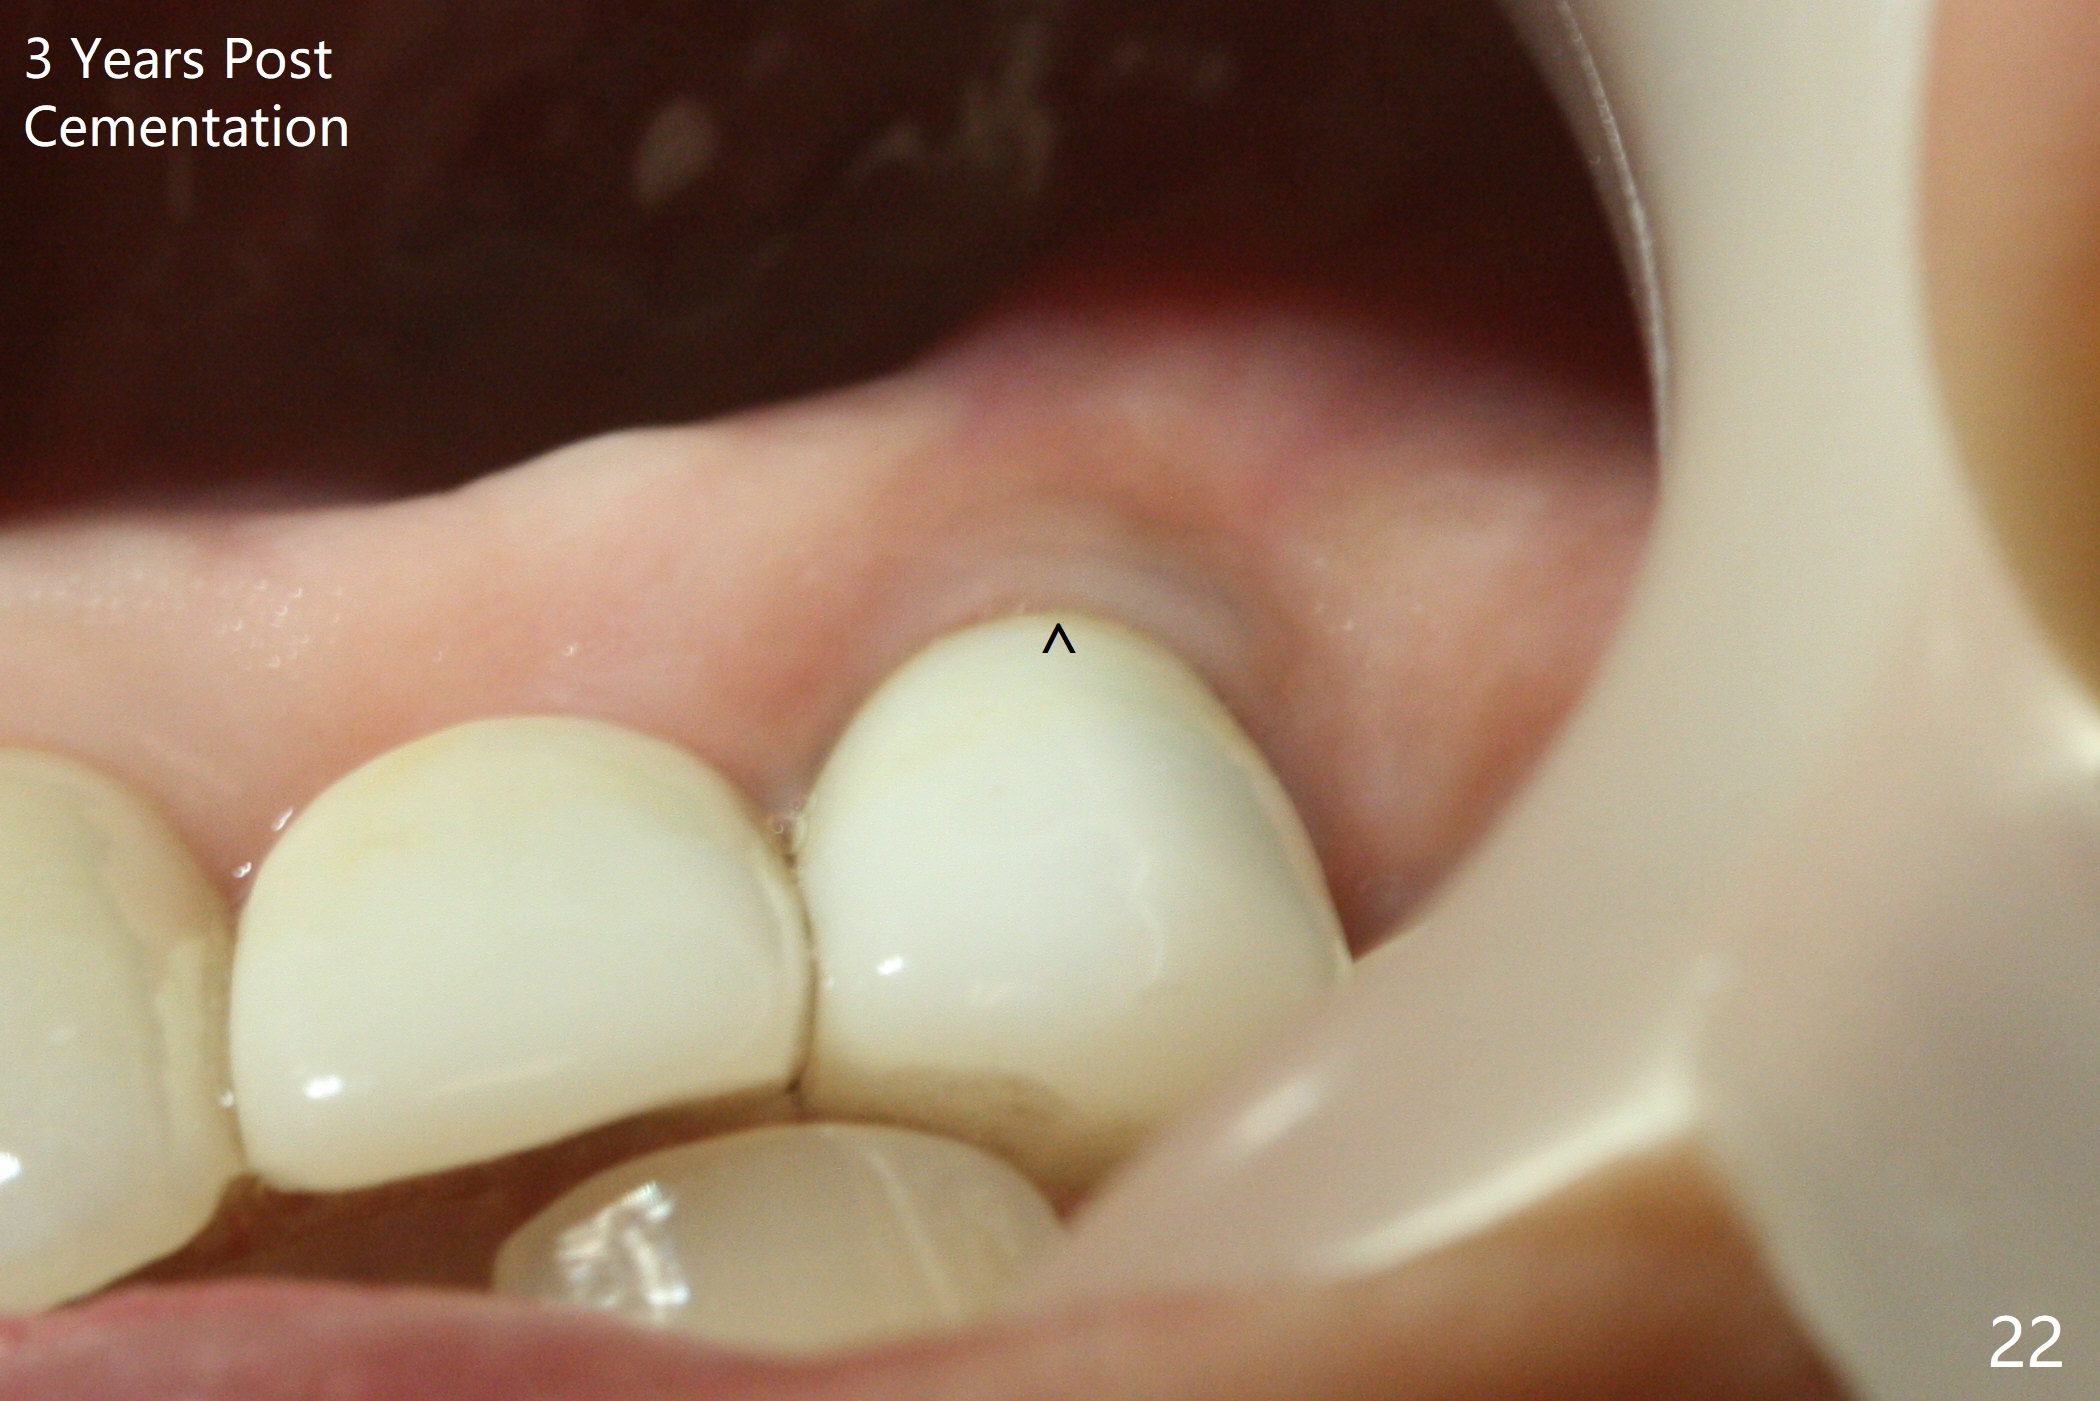
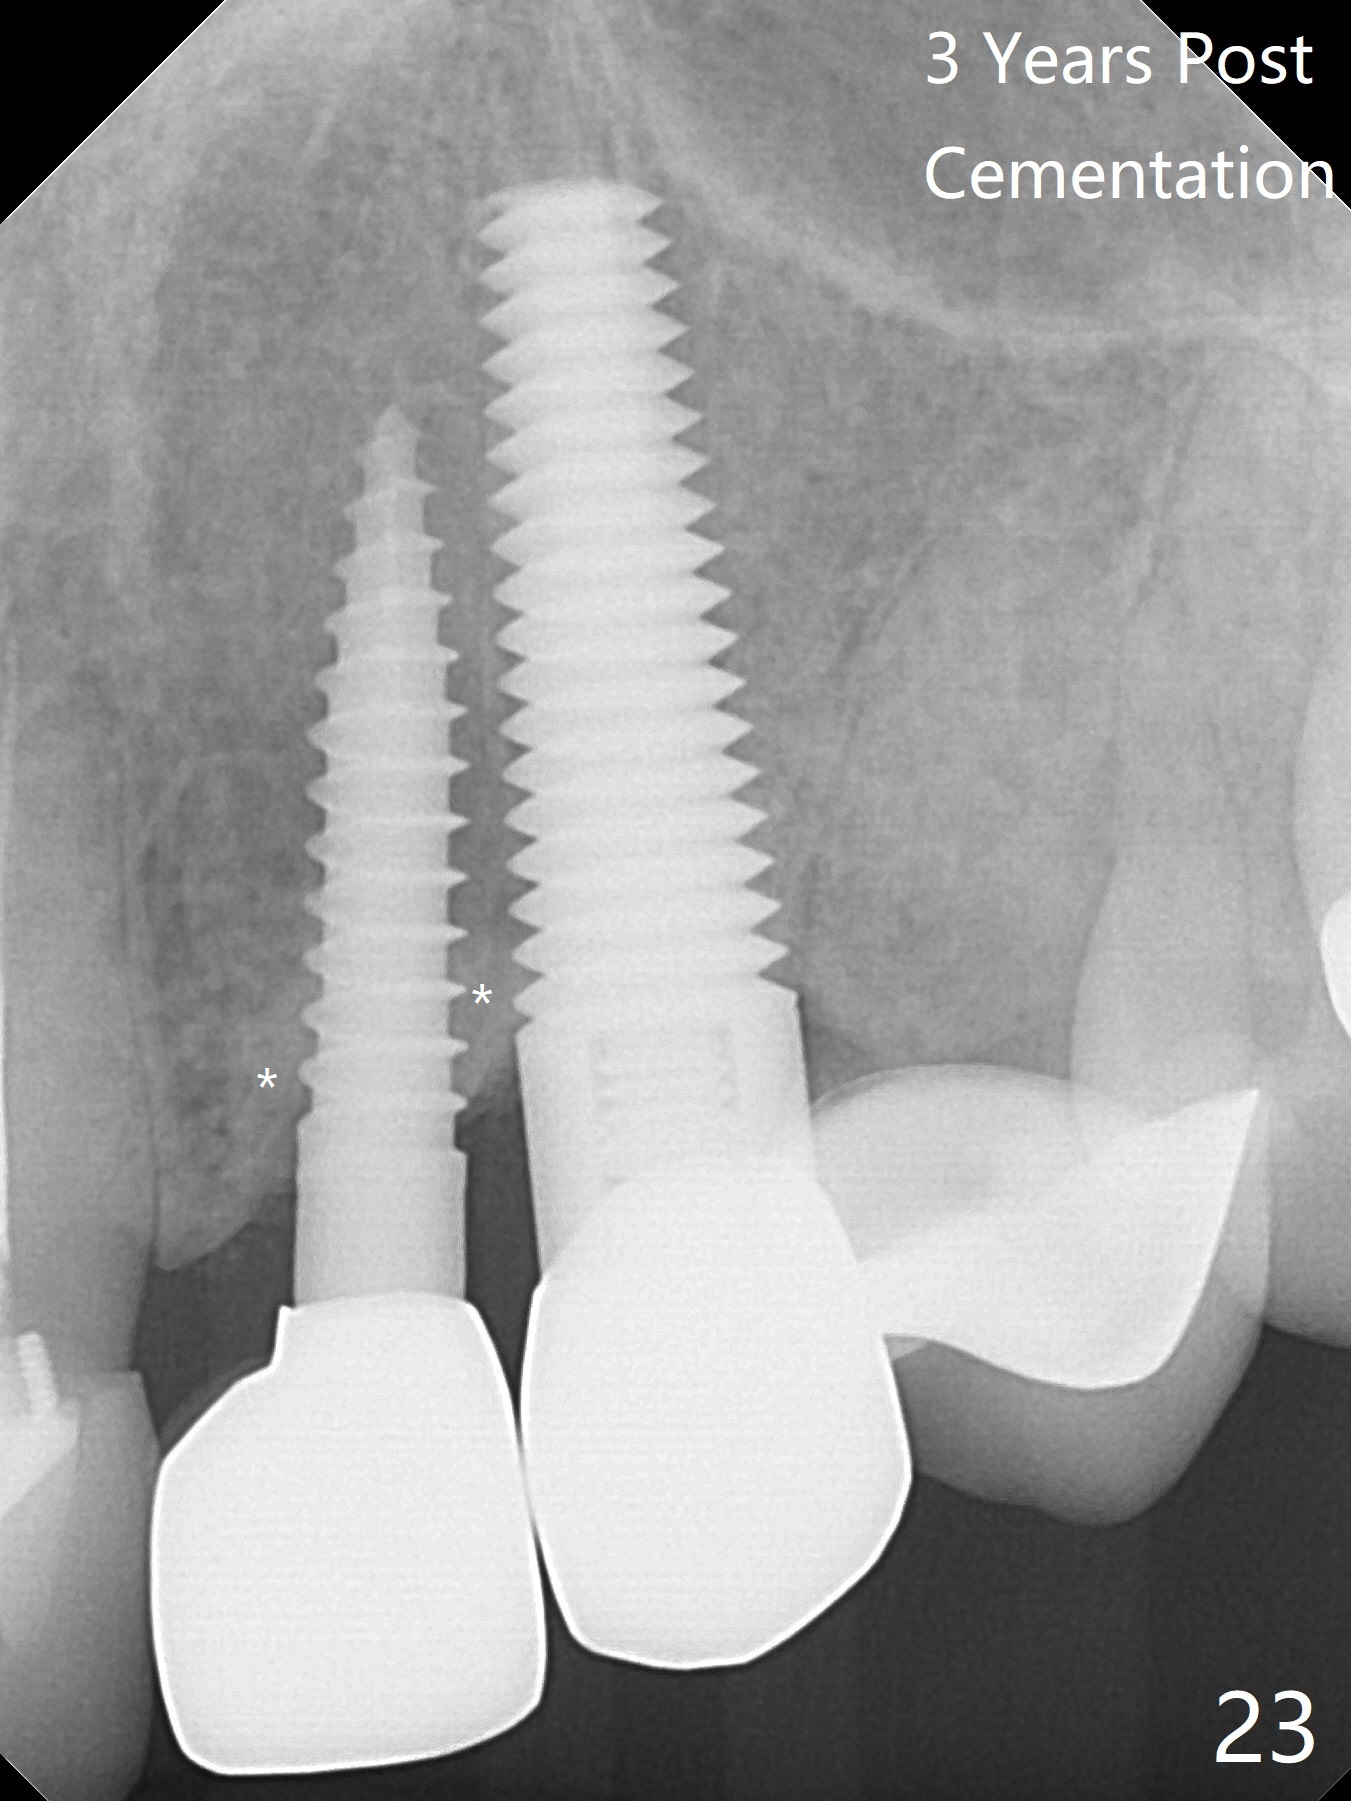
Less than 4 months postop (3 months after last provisional revision), the distobuccal gingiva has grown coronally (Fig.18 arrow) with formation of papillae between the adjacent teeth (*). There is mild oblique bone resorption between the implants (Fig.19 arrowhead). Clinically these two implants do not look so close to each other. There is no further bone loss 22 months post cementation (Fig.20). The gingiva at #11 looks greyish (Fig.21,22 ^), although there is no bone loss 3 years post cementation (Fig.23). To reduce discoloration, the diameter of the implant should be smaller than 5 mm with more palatal placement. The bone-level one with a gold-coated abutment is preferable.
Since the repeated failure of the anterior restoration, an implant is to be placed at the site of #2 for posterior support.
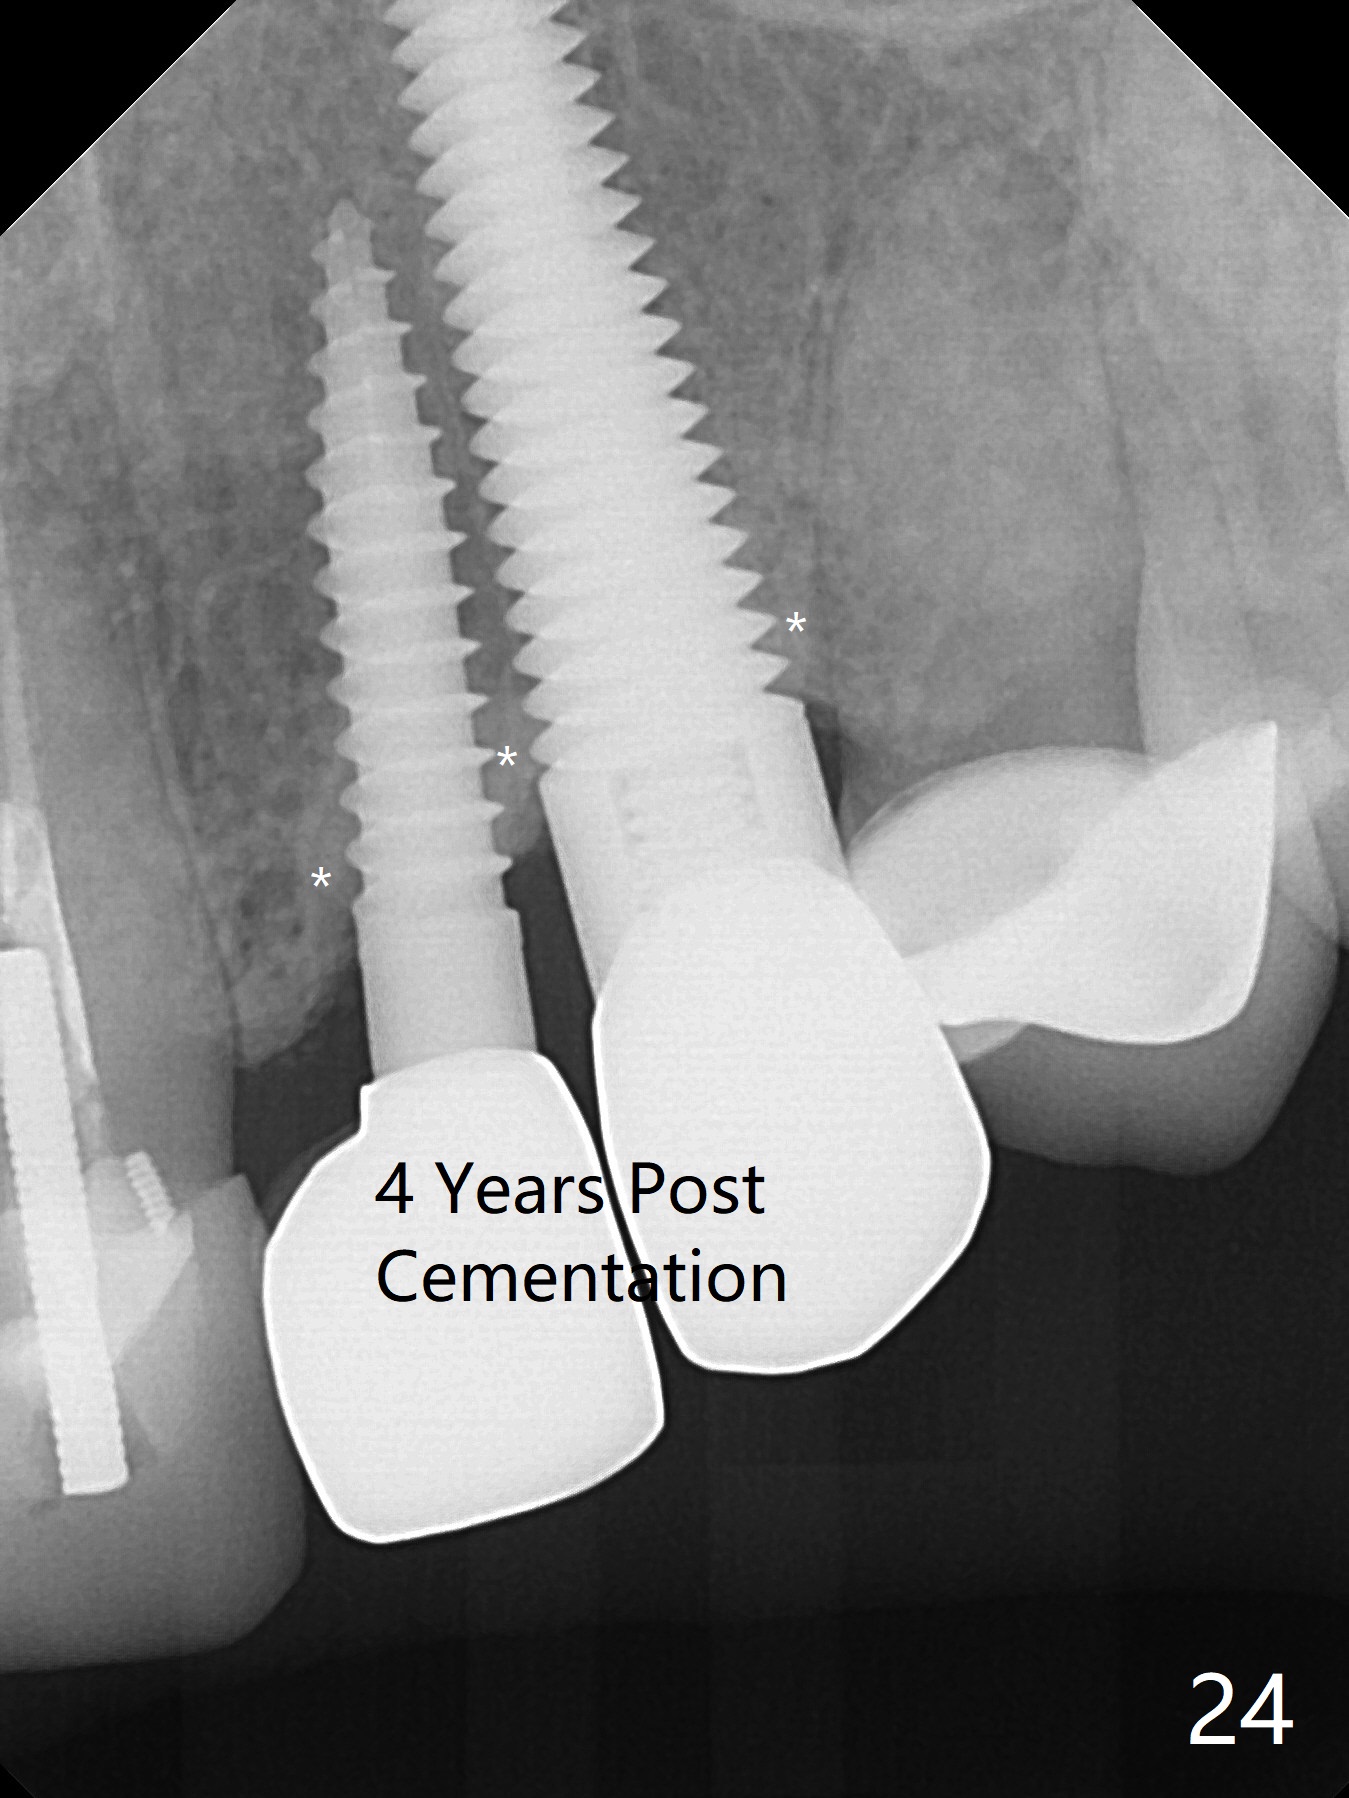
The bone density around the most coronal threads remains high 4 years post cementation (Fig.24 * (bruxism)). The patient feels that the tooth #9 is mobile.
Return to Upper Canine Immediate Implant, Dr. Wu, Atrophic Ridge Xin Wei, DDS, PhD, MS 1st edition 12/02/2014, last revision 05/25/2019