|
|
|
|
|
|
|
|
|
|
Depth Adjustment with Guide
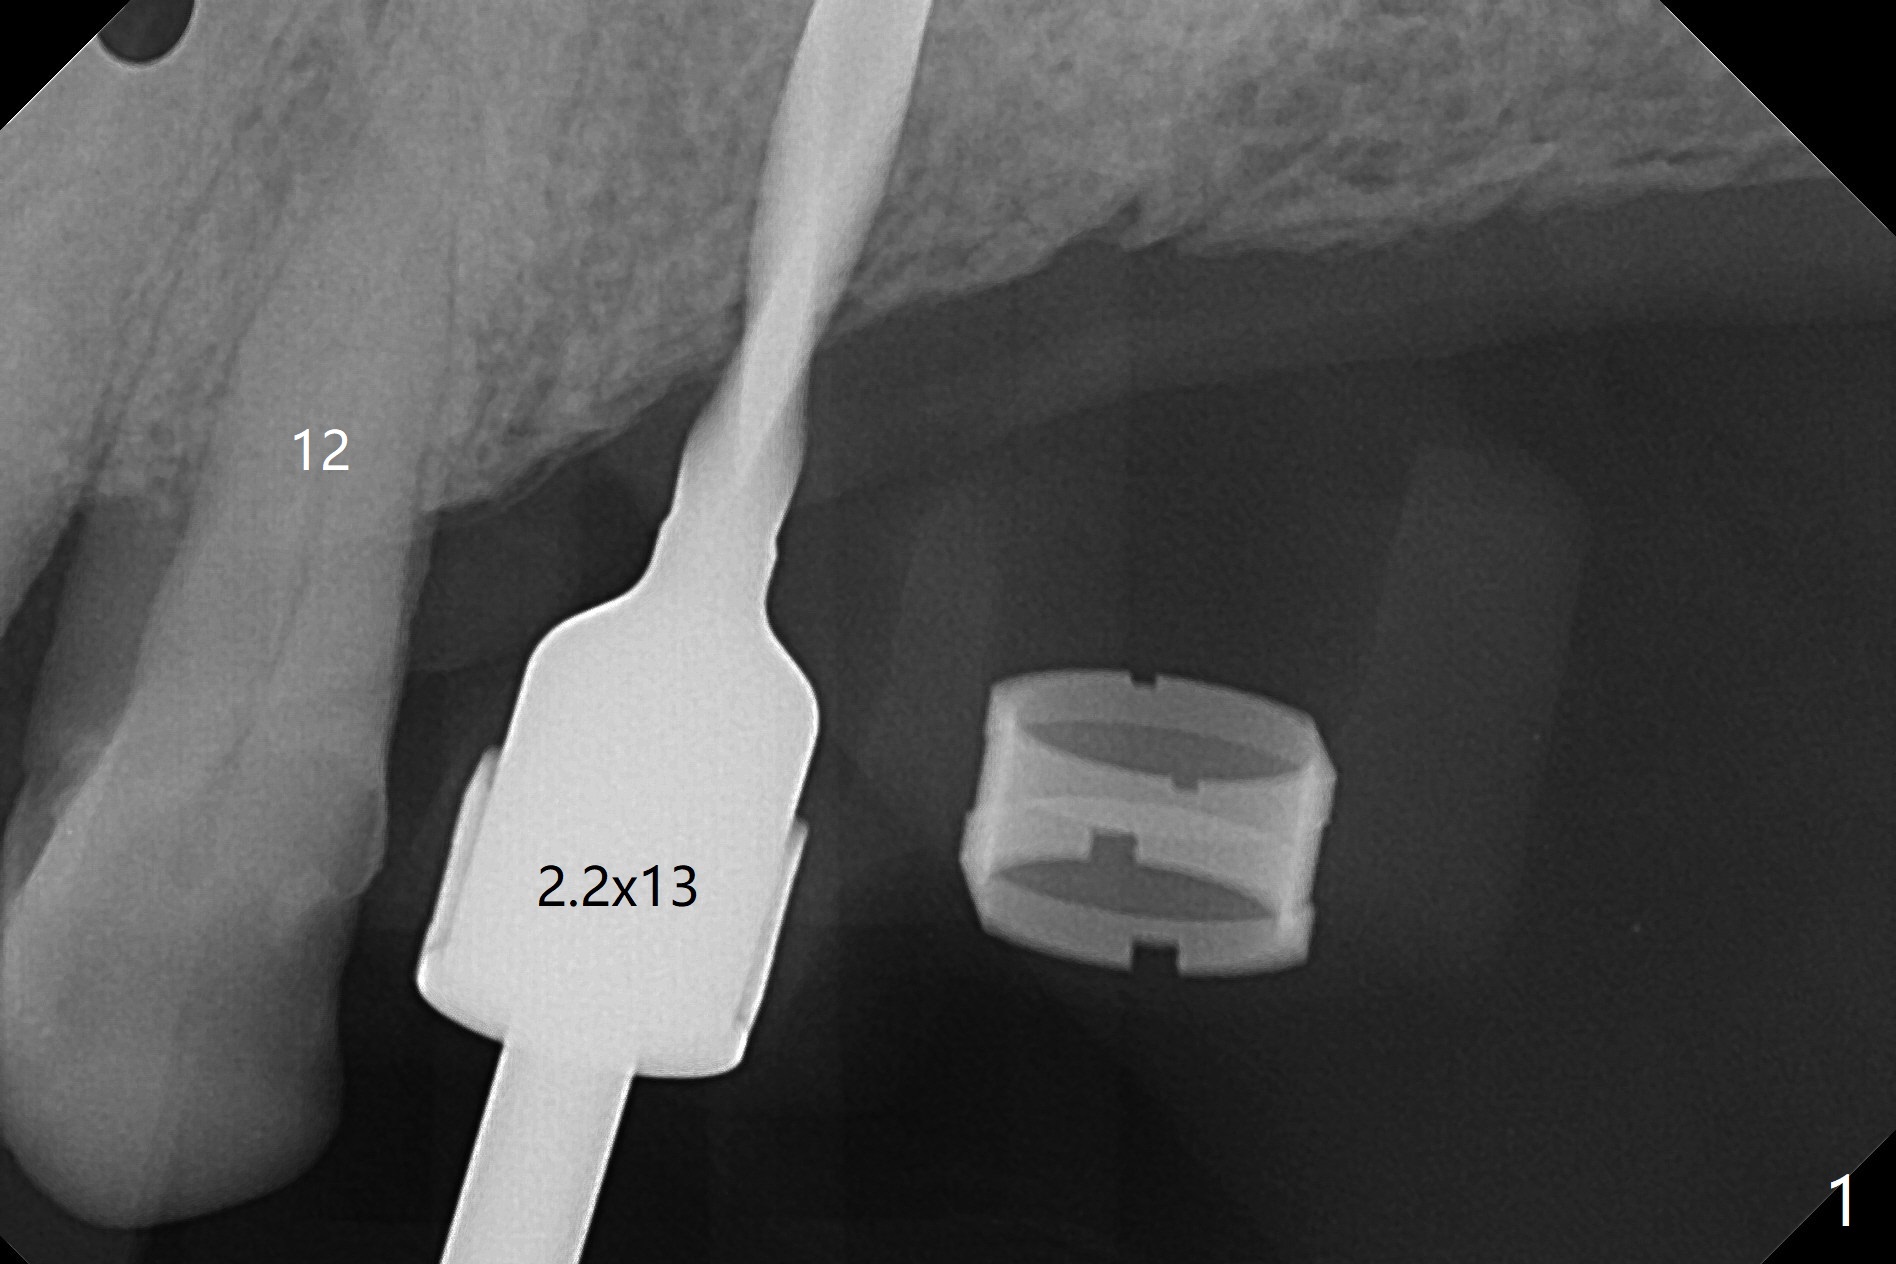
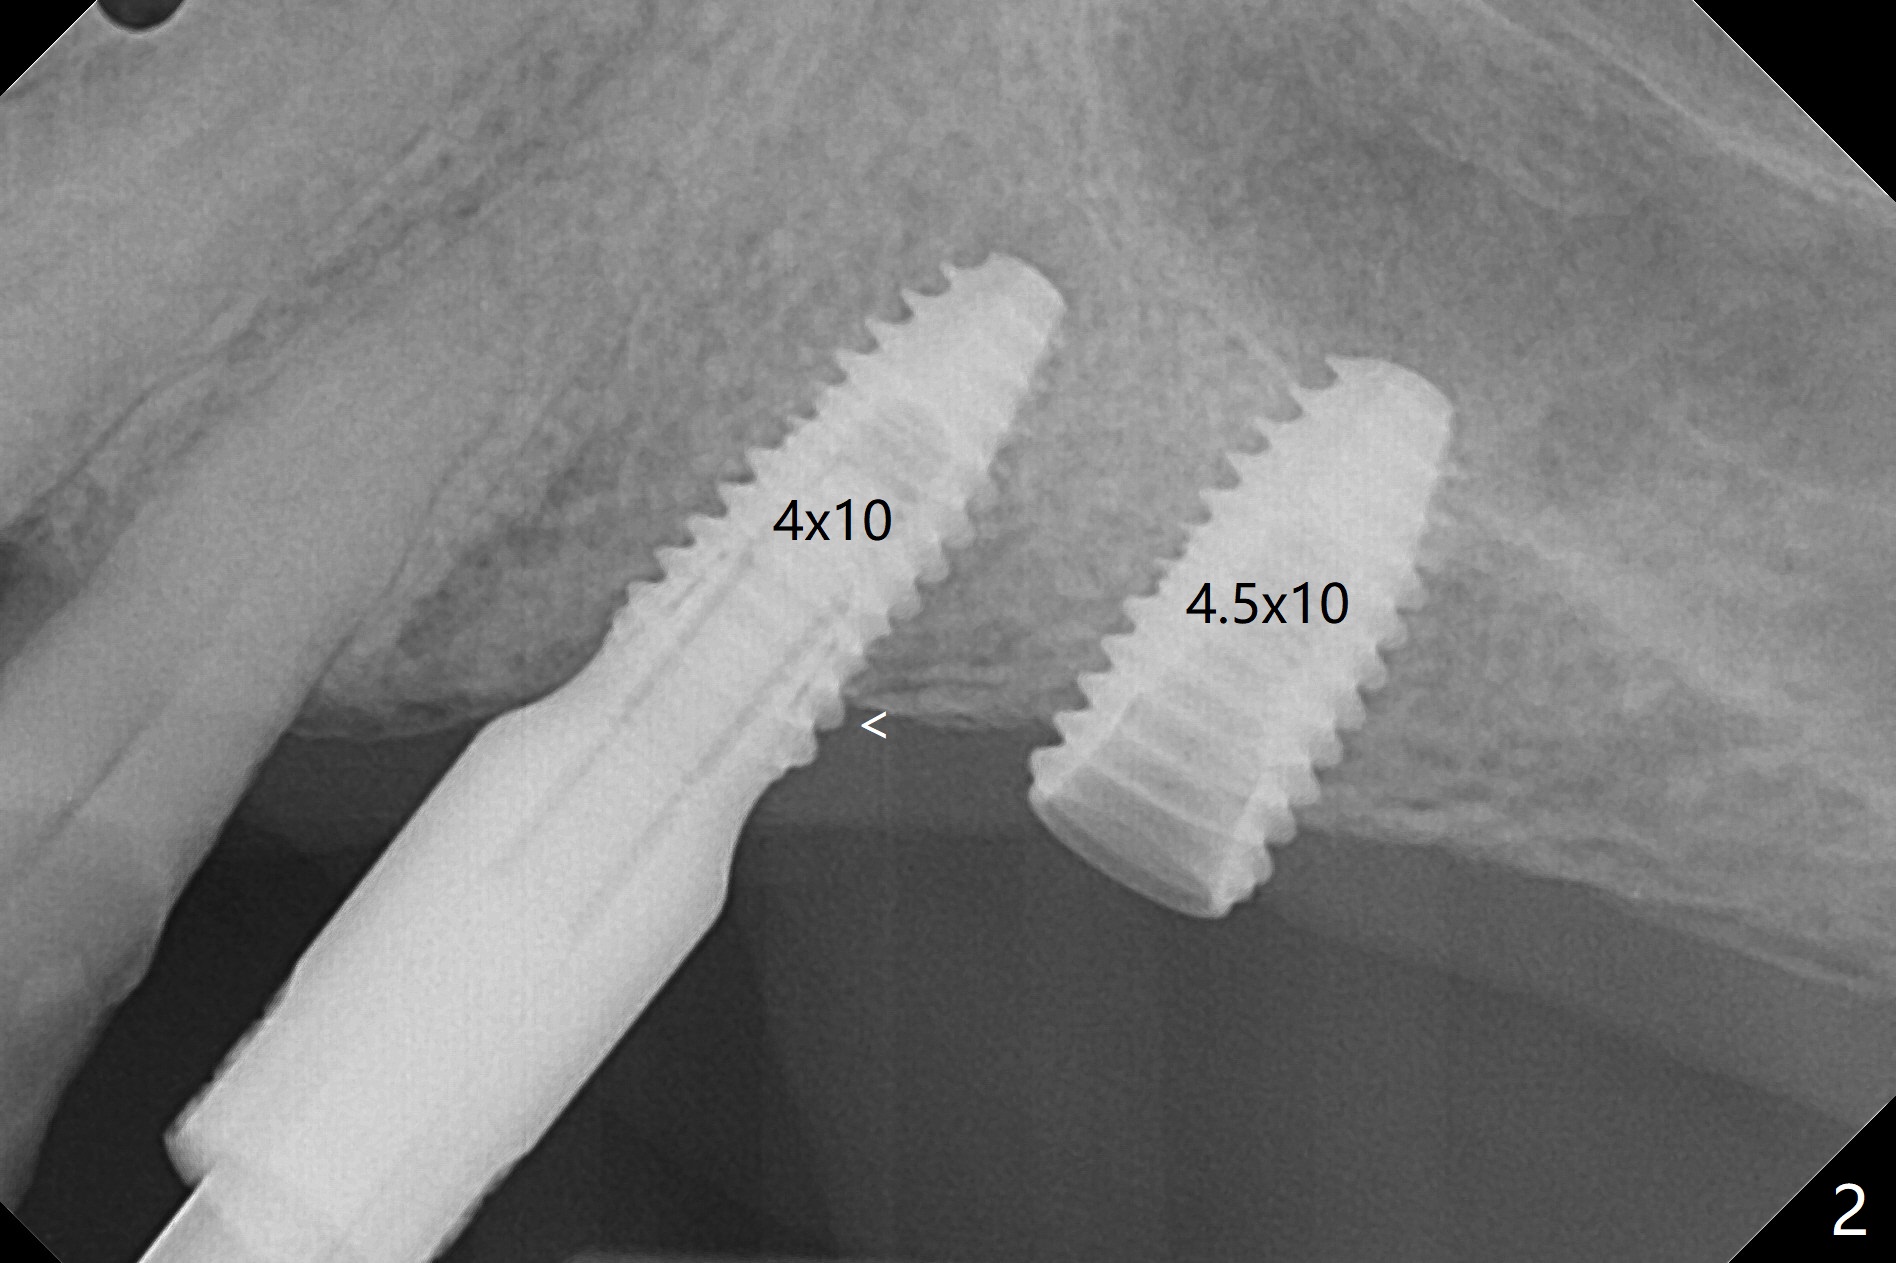
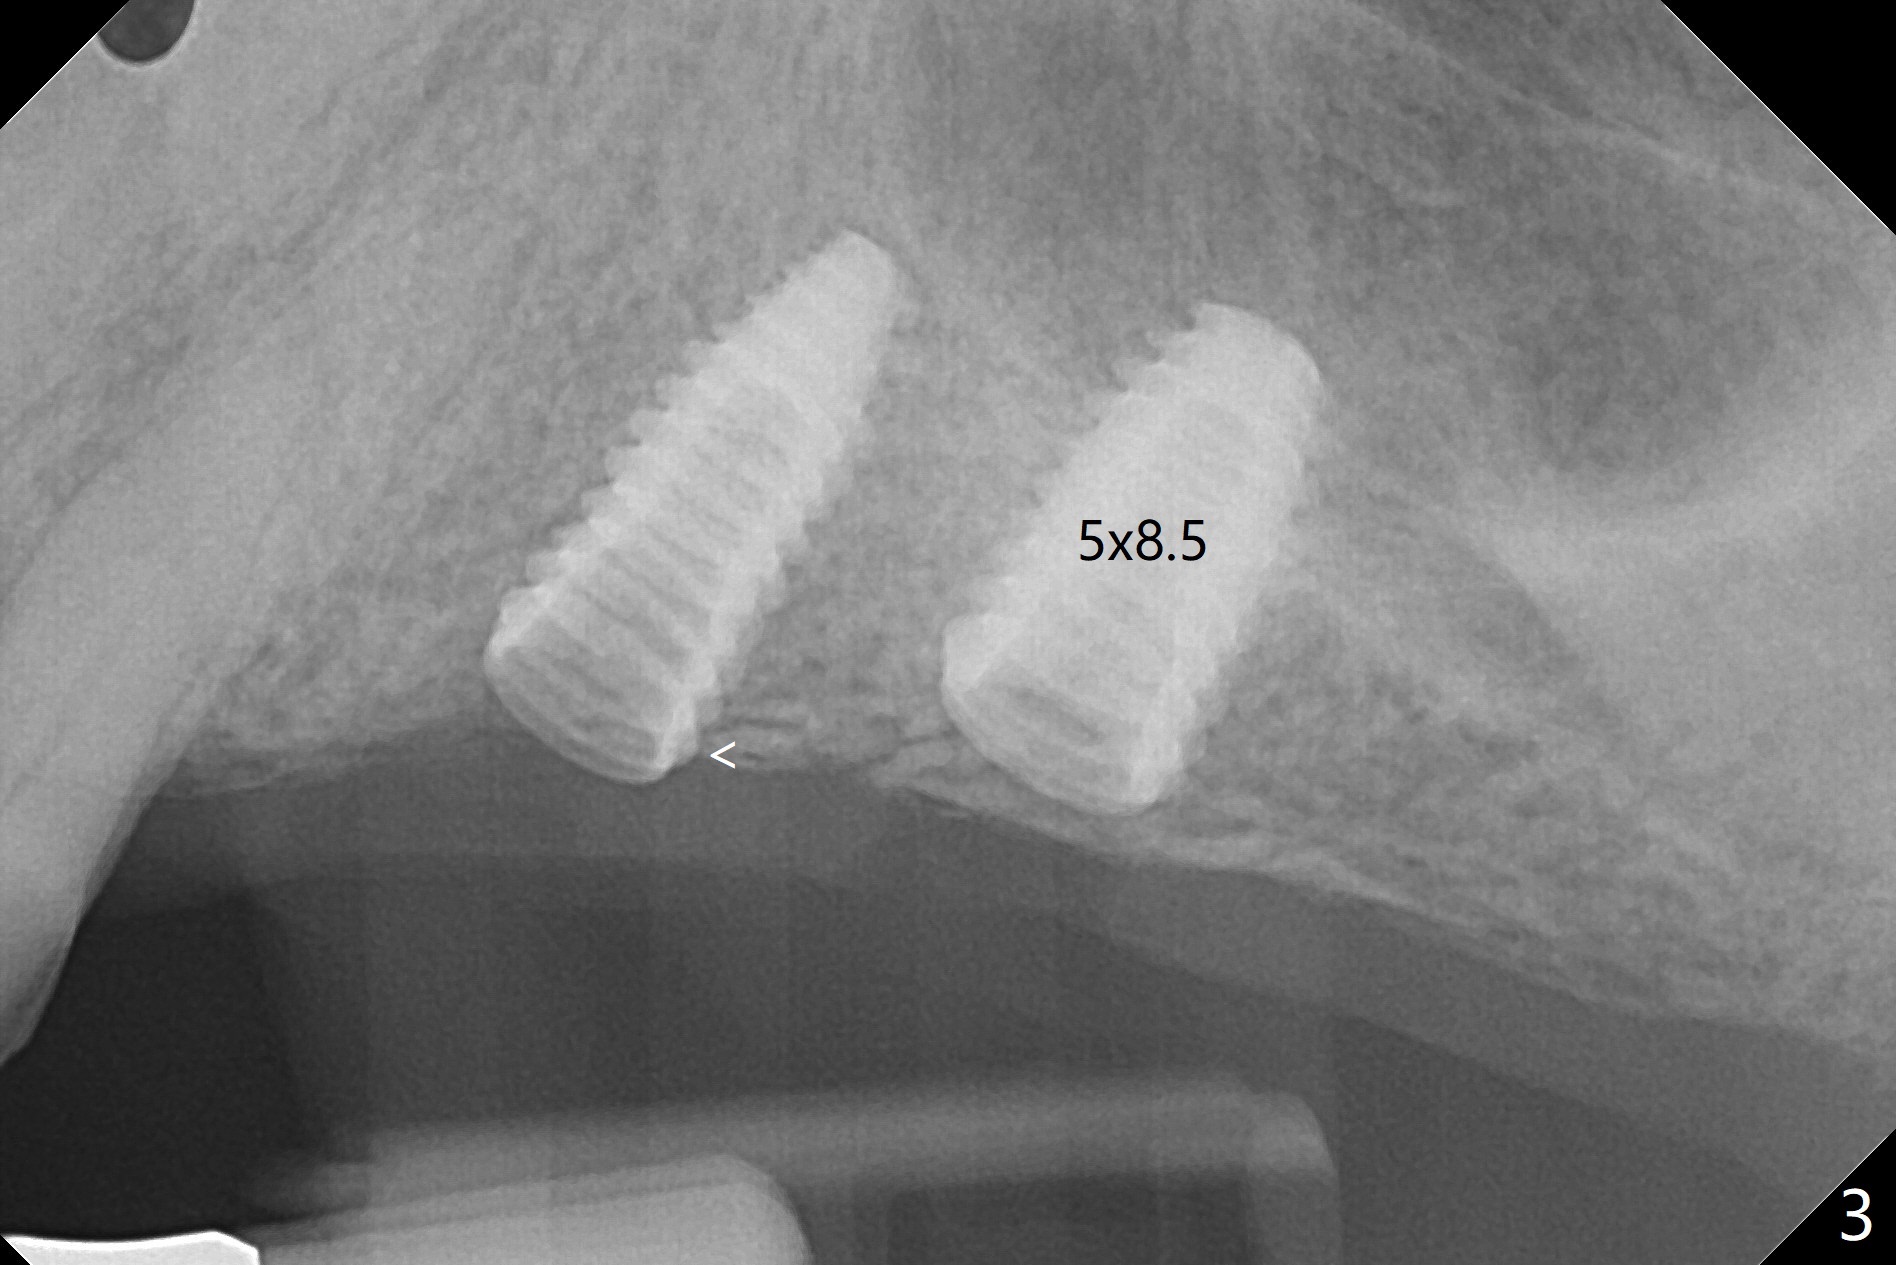
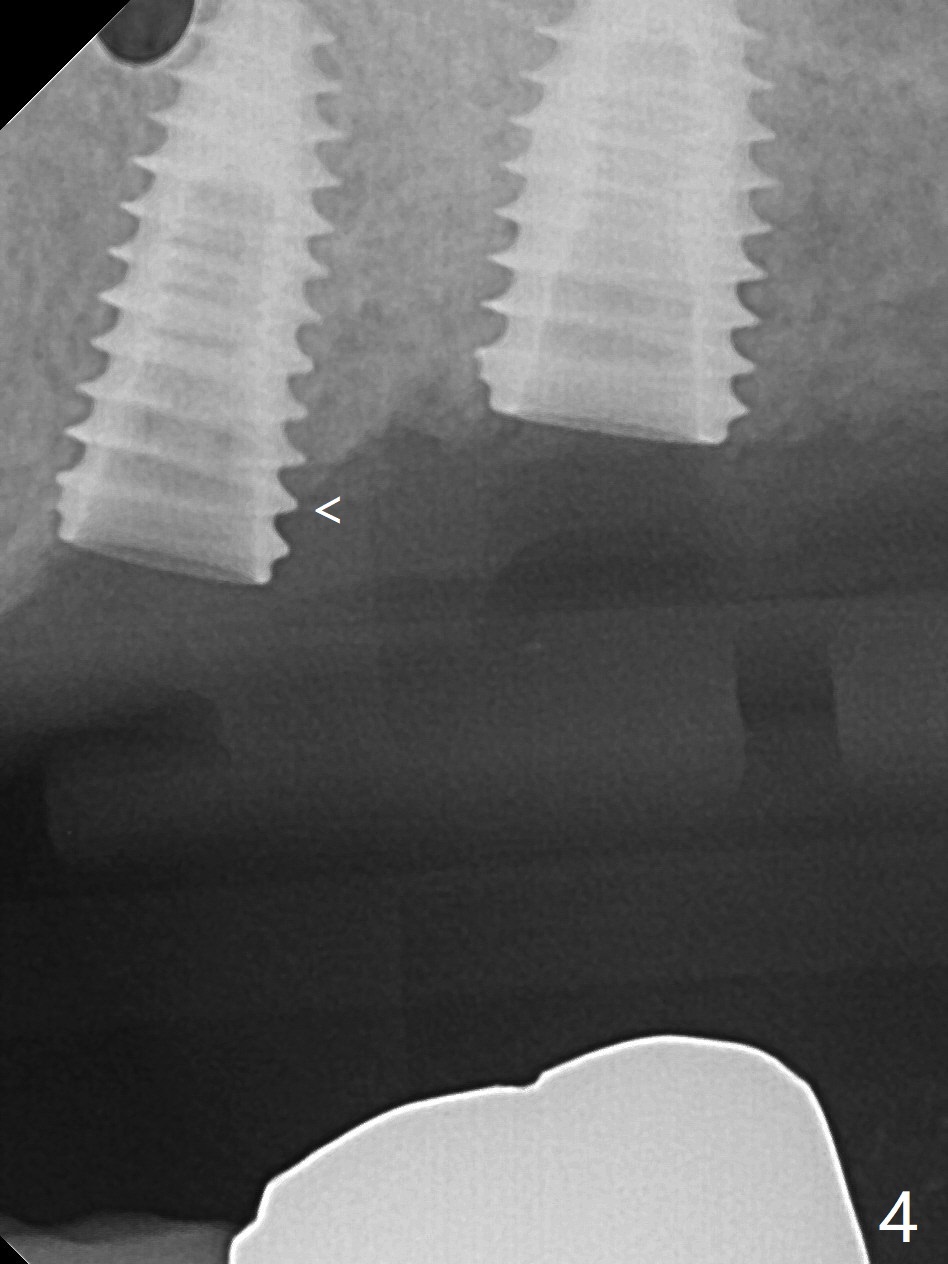
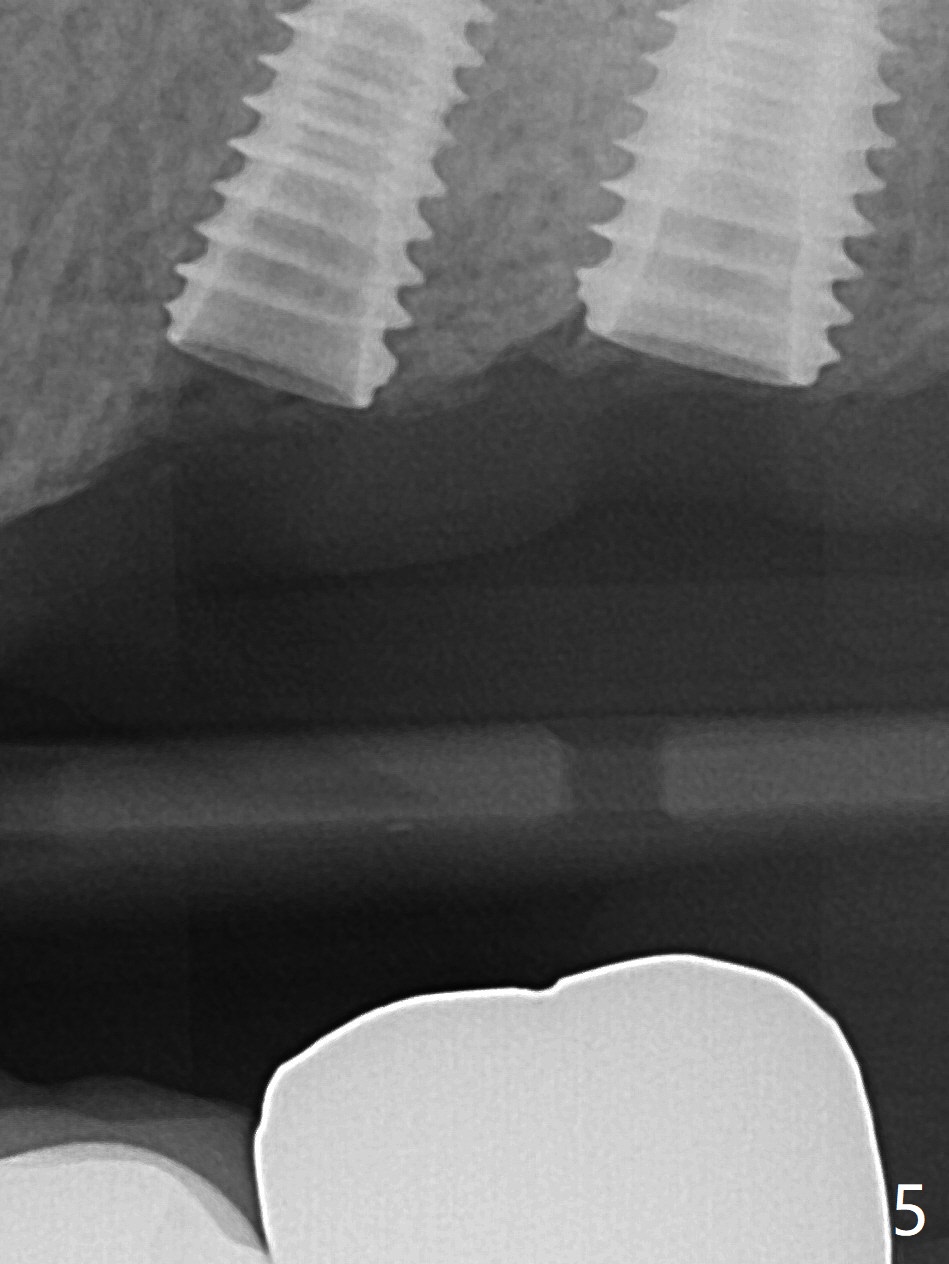
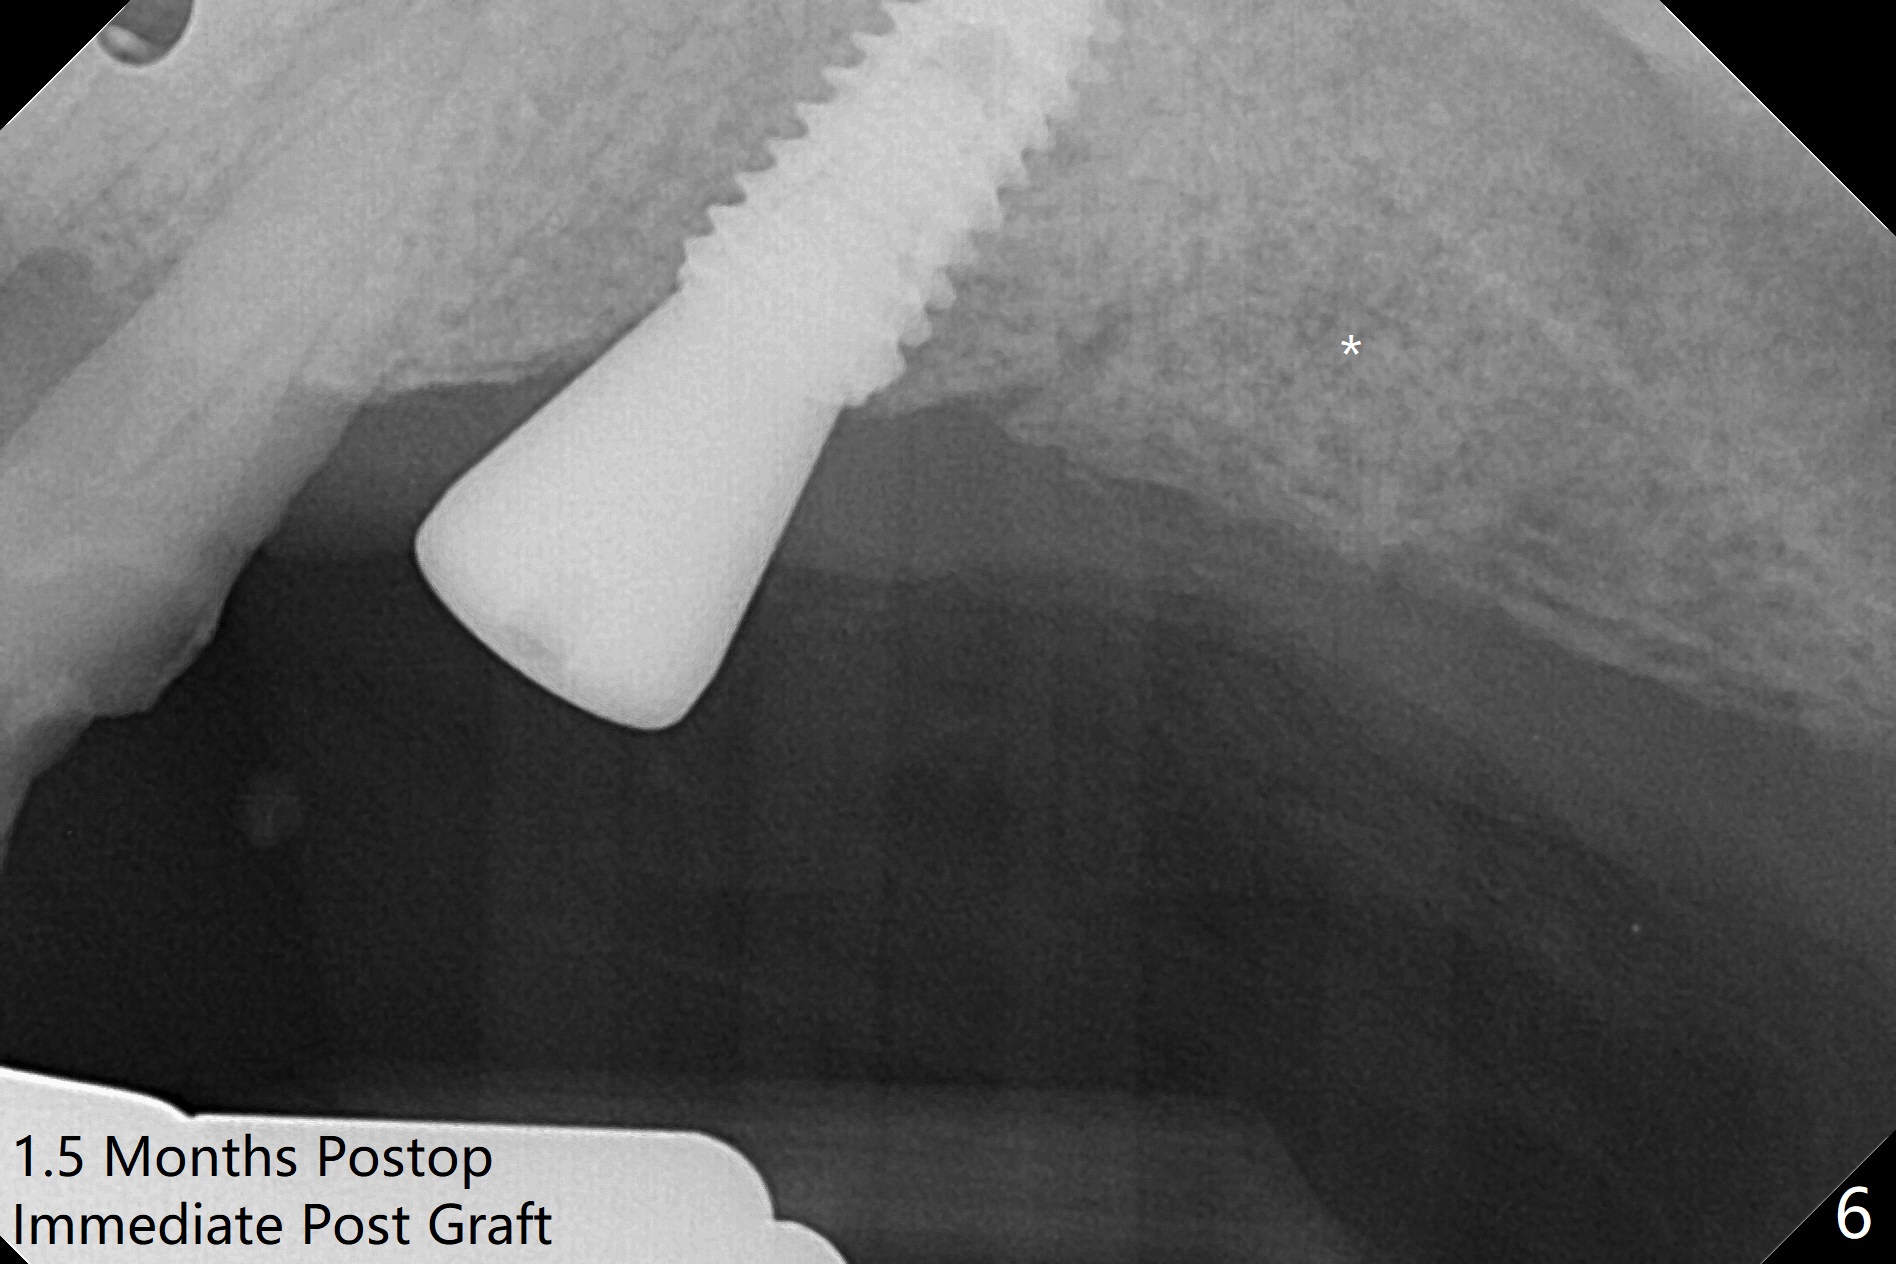
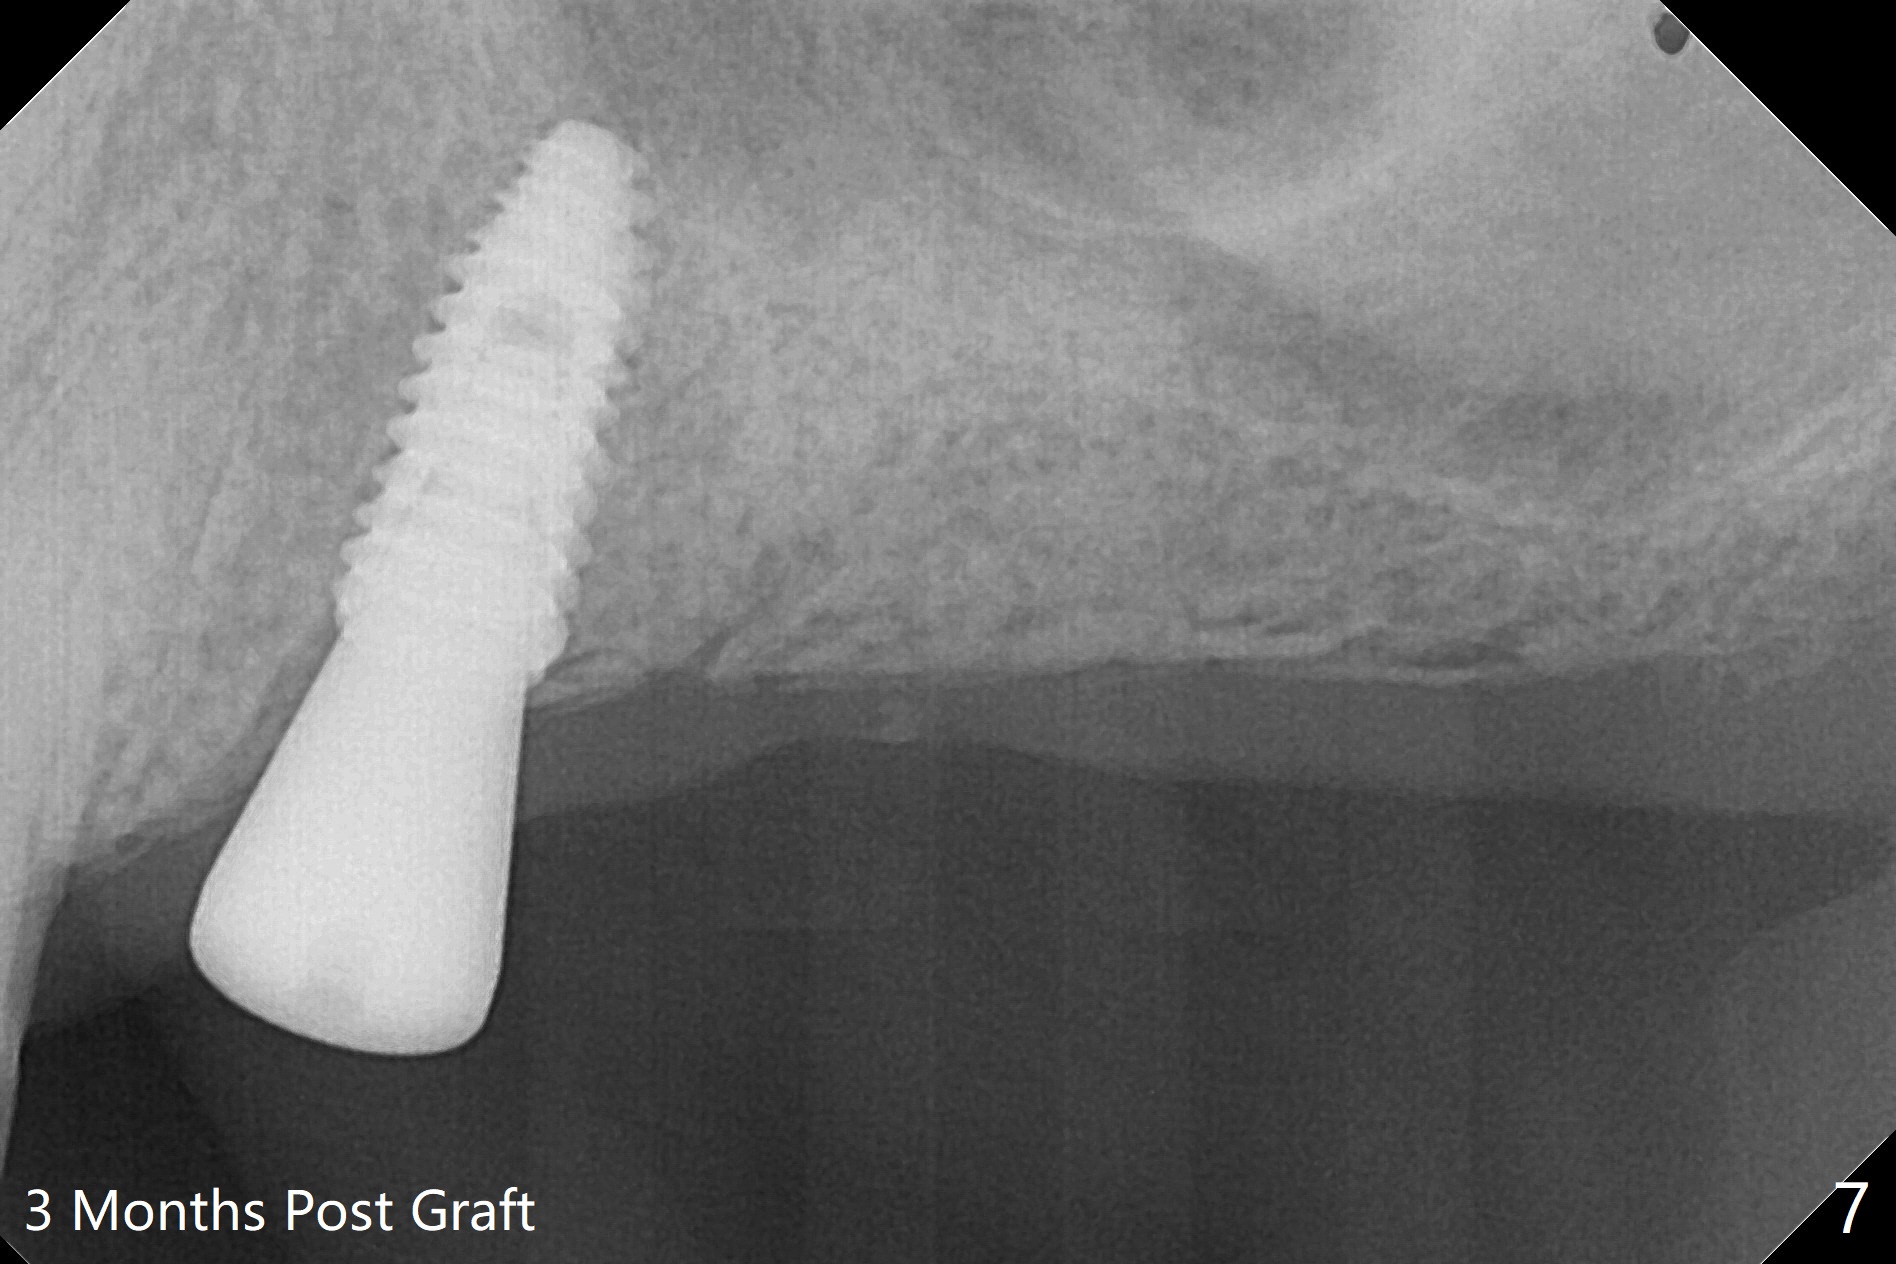
PA is taken after 2.2 mm drill reaches the depth at #13 to confirm that the osteotomy is parallel to the long axis of the tooth #12 (Fig.1). Fixture mount is used to place a 4x10 mm implant at #13 and stays as an anchor pin while osteotomy and sinus lift are being conducted at #14 (Fig.2). In fact there is discrepancy in depth using the guide. For example the last drill for osteotomy is 4.5x7.3 mm according to design, whereas 4.5x11.5 mm drill has to be used before the sinus floor has small area of perforation without sinus membrane breakage. Autogenous bone harvested from the osteotomy, PRF membrane and a 4.5x10 mm dummy implant are used for sinus lift (Fig.2). The placement depth of the implant at #13 has to be adjusted multiple times until satisfaction (Fig.2-5). The implant at #14 is infected and loosened 1.5 months postop; after its removal, the sinus floor is absent without membrane perforation; the large defect with basically intact buccal and palatal walls is grafted (Fig.6 *). Four to five months later, use the same guide and drill sequence until 3.5x7.3 mm drill. Insert a 4x10 mm dummy implant to the 2nd line of 12 mm offset and take 5x5 cm CT to determine the diameter and depth of a final implant. Use healing screw. The pattern of bone graft changes 3 months postop (Fig.7, as compared to Fig.6). Return to Upper Arch Immediate Implant, Trajectory II 矫正,糖尿病,种植水平 Xin Wei, DDS, PhD, MS 1st edition 08/06/2019, last revision 12/06/2020