
.jpg)
|
|
|
|
|
|
|
|
|
Implant Redo with Existing Guide I
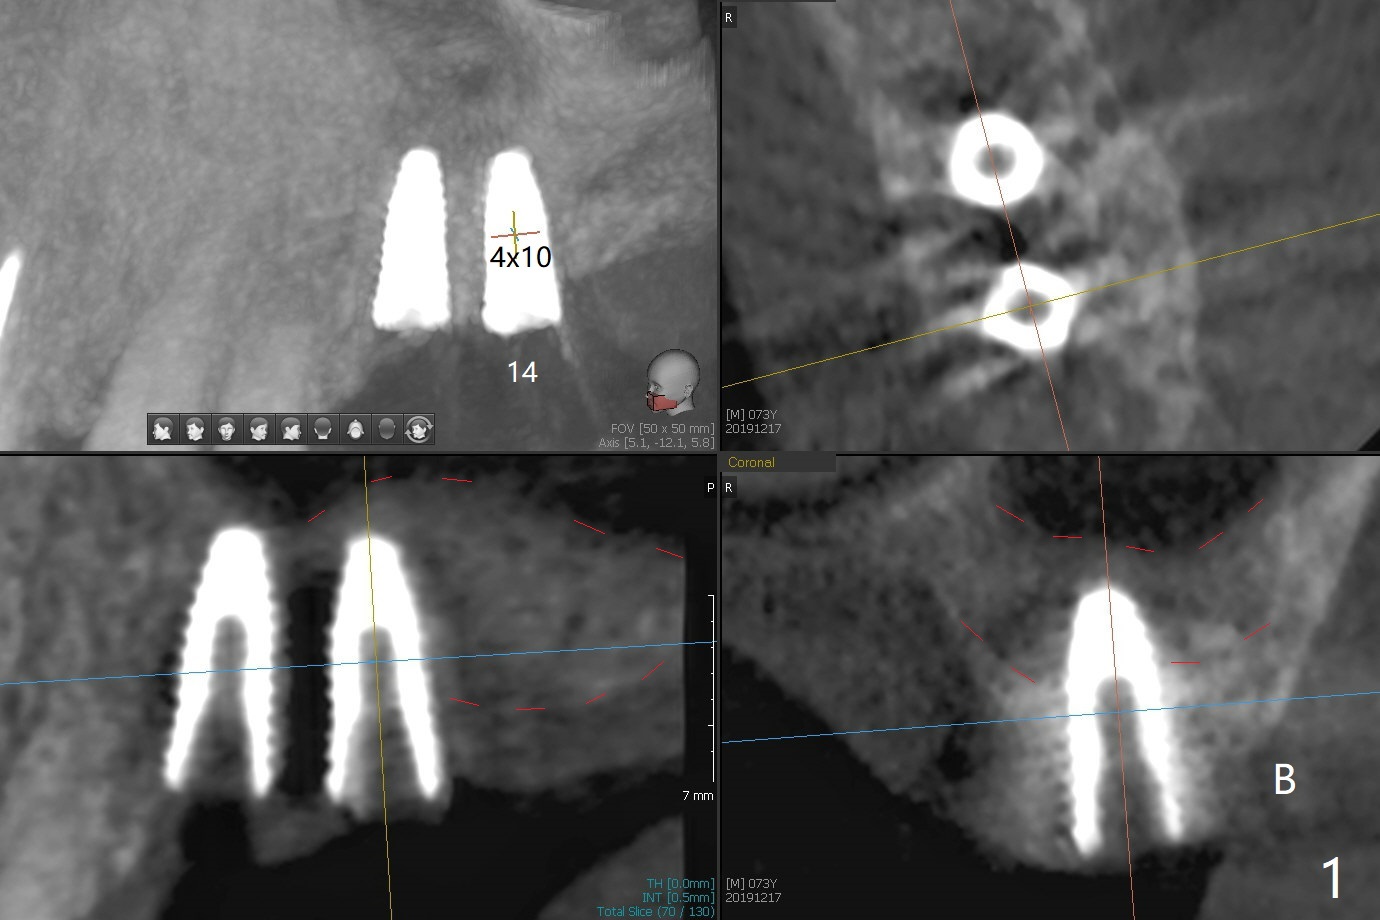
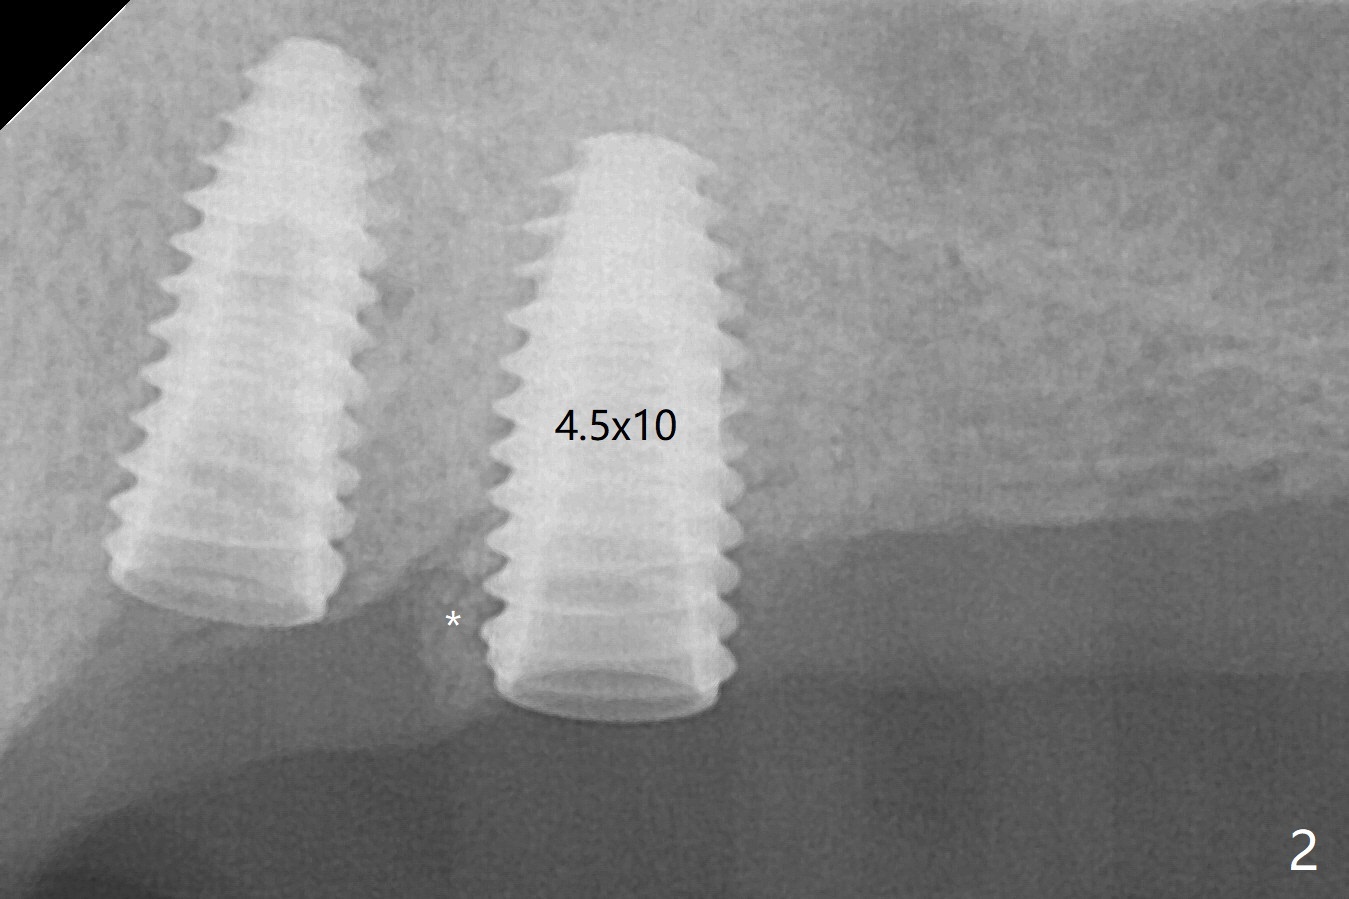
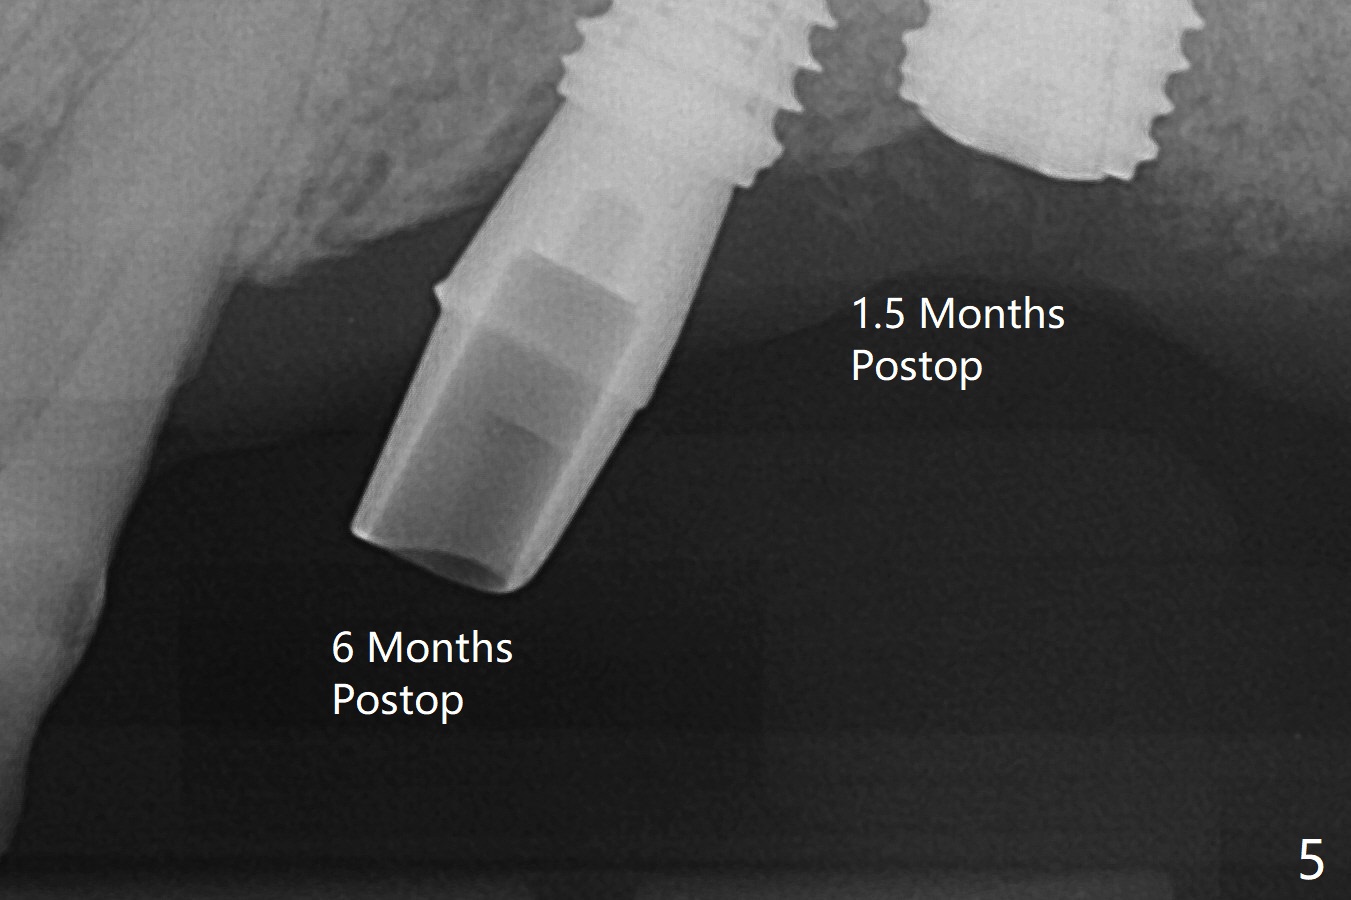
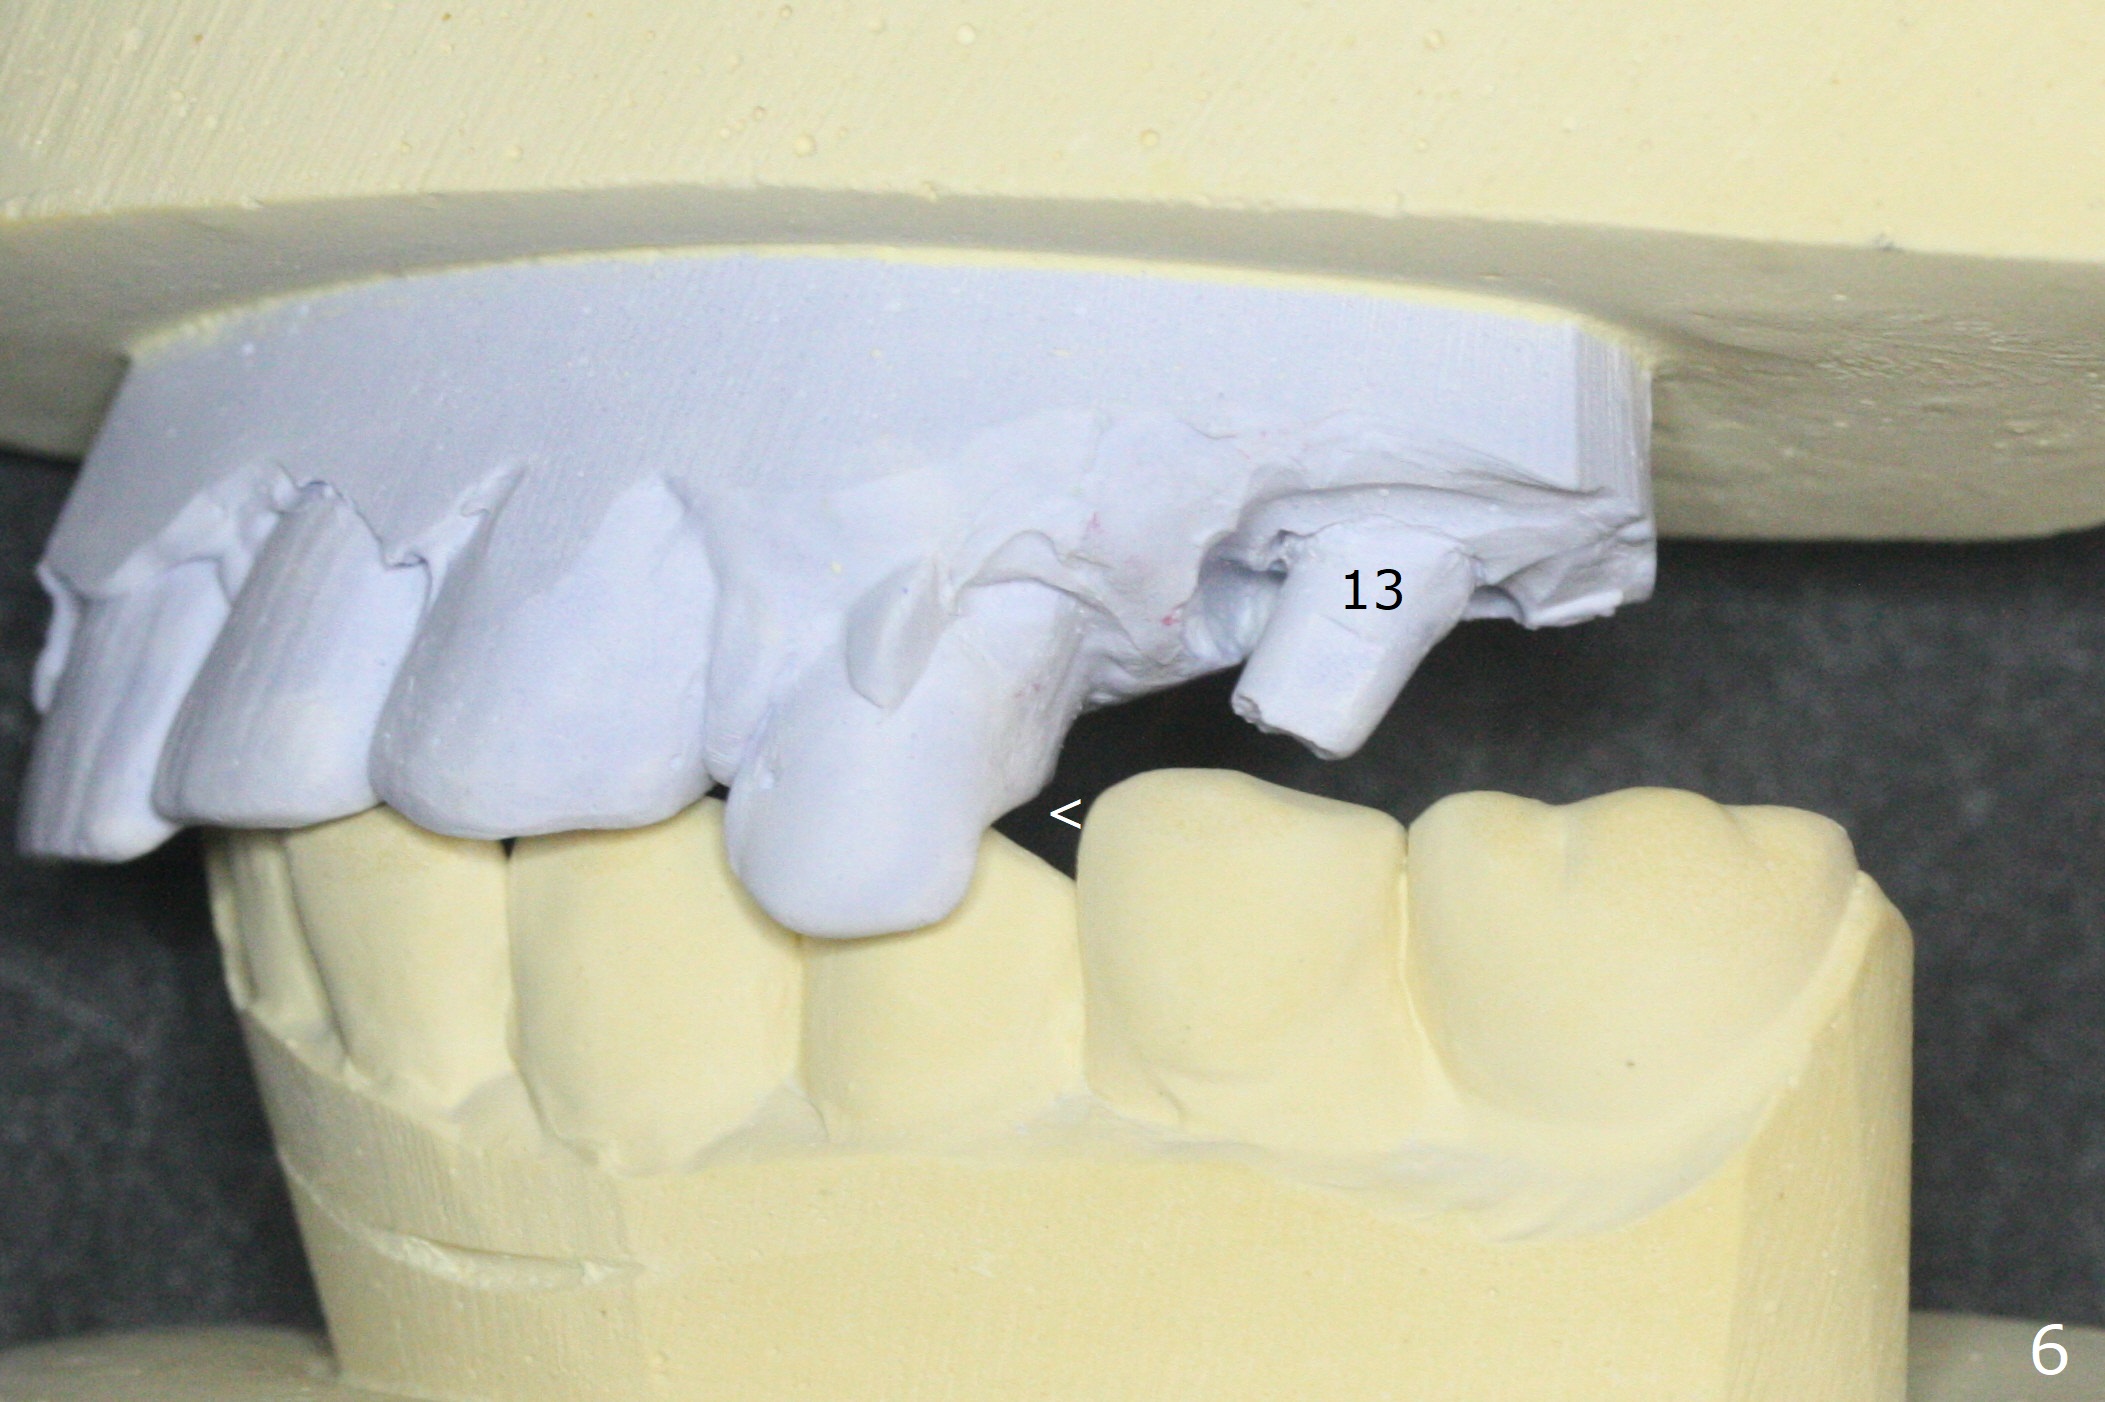
Three months post #14 implant removal and bone graft, the existing guide is reused, but no stop fixture mount cannot be inserted into #13 implant as an anchor. After 3.5x7.3 mm drill with 12 mm offset, the bottom of the osteotomy is not so hard; therefore sinus lift is conducted with allograft and 4x10 mm dummy implant (Fig.1). The lifted sinus floor is in fact not noted during the surgery (Fig.1 dashed red line). Sinus lift continues with bone graft and 4.5x10 mm (Fig.2); bone graft is squeezed out (*). The final implant (5x8.5 mm) is not seated until use of 4.5x7.3 and 4.0x10 mm drills (Fig.3). The implant is further placed free hand until subcrestal distal; since the torque is not high, a healing screw (S) is placed with packing allograft around the plateau of the implant (*). By placing a 4.5x4.5(4) mm cemented abutment at #13, a provisional is fabricated with extension to cover the bone graft at #14. When the provisional dislodges 1.5 months postop, #14 wound does not heal with the erythematous gingiva and exposed healing screw (Fig.5). Diabetes is not well controlled (HbA1c >6% (normal 4-5.6%)). After cleaning and torque 30 Ncm of the abutment at #13, impression is taken. In fact the tooth #12 has lost the palatal cusp (Fig.6 <); a crown will be fabricated at #12 when the implant at #14 osteointegrates.
Return to Upper Molar Immediate Implant Trajectory II Xin Wei, DDS, PhD, MS 1st edition 12/17/2019, last revision 03/15/2020