.jpg)
,%2013%203.5x8.5,%204.5x4(3).jpg)
|
|
|
|
|
|
|
|
|
|
|
|
|
|
|
|
|
|
|
|
|
|
|
|
Setback of Sinus Lift Using
Guide
M
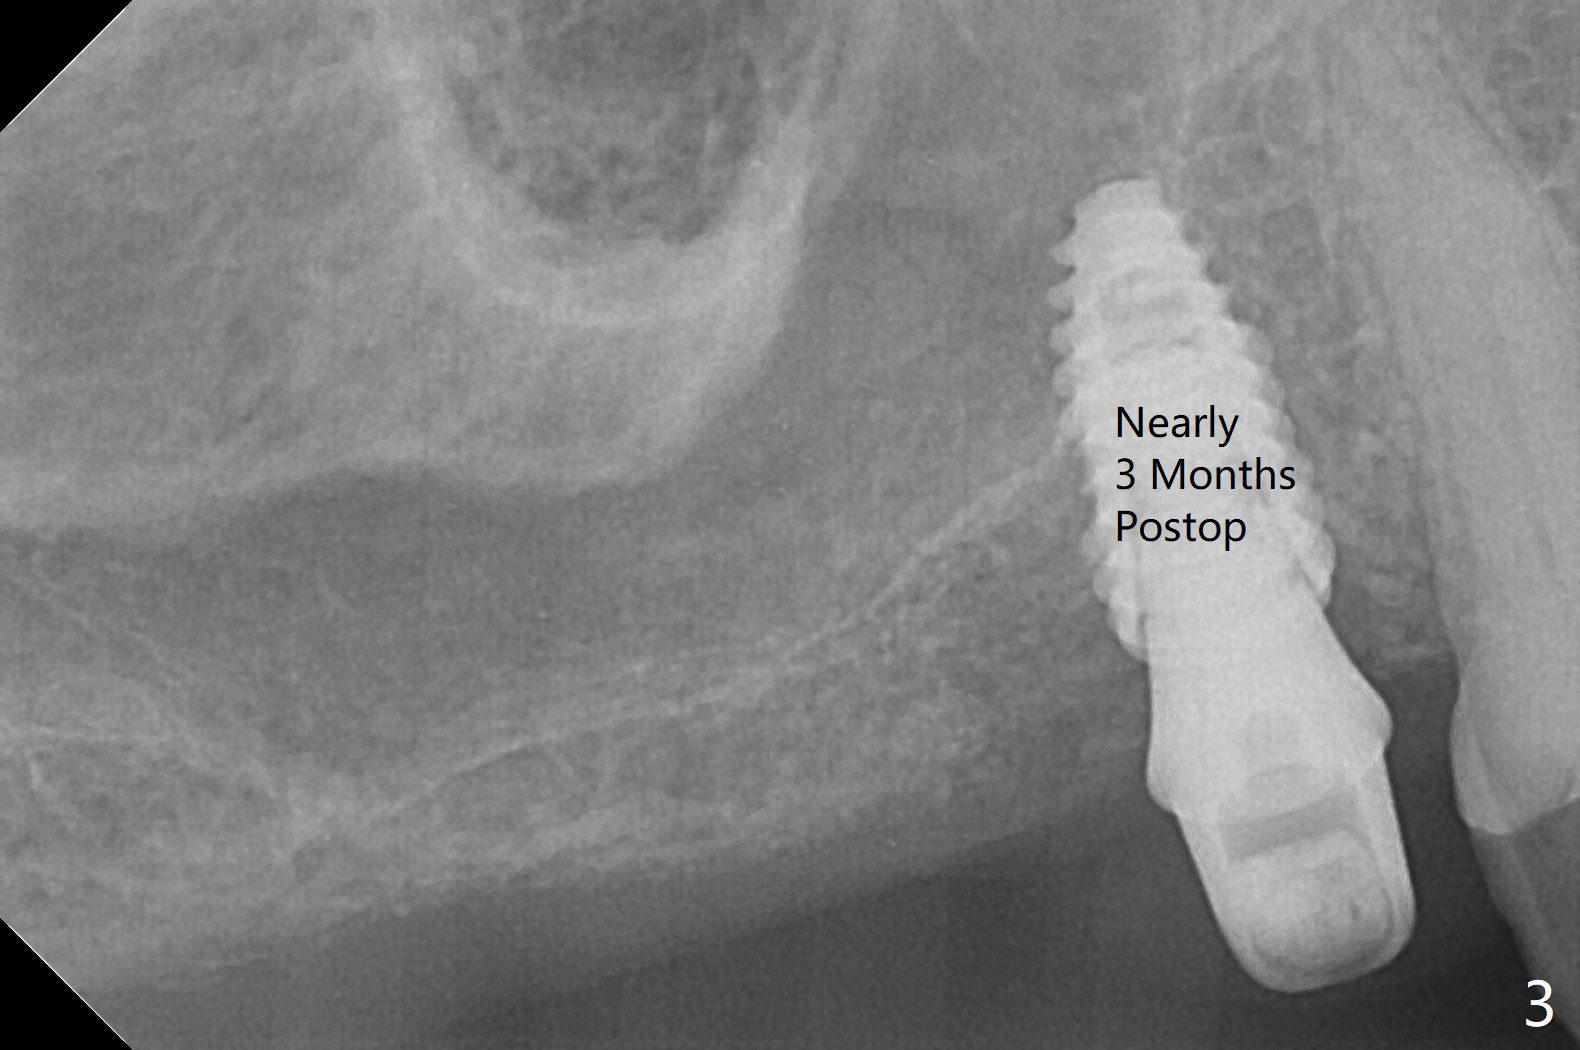
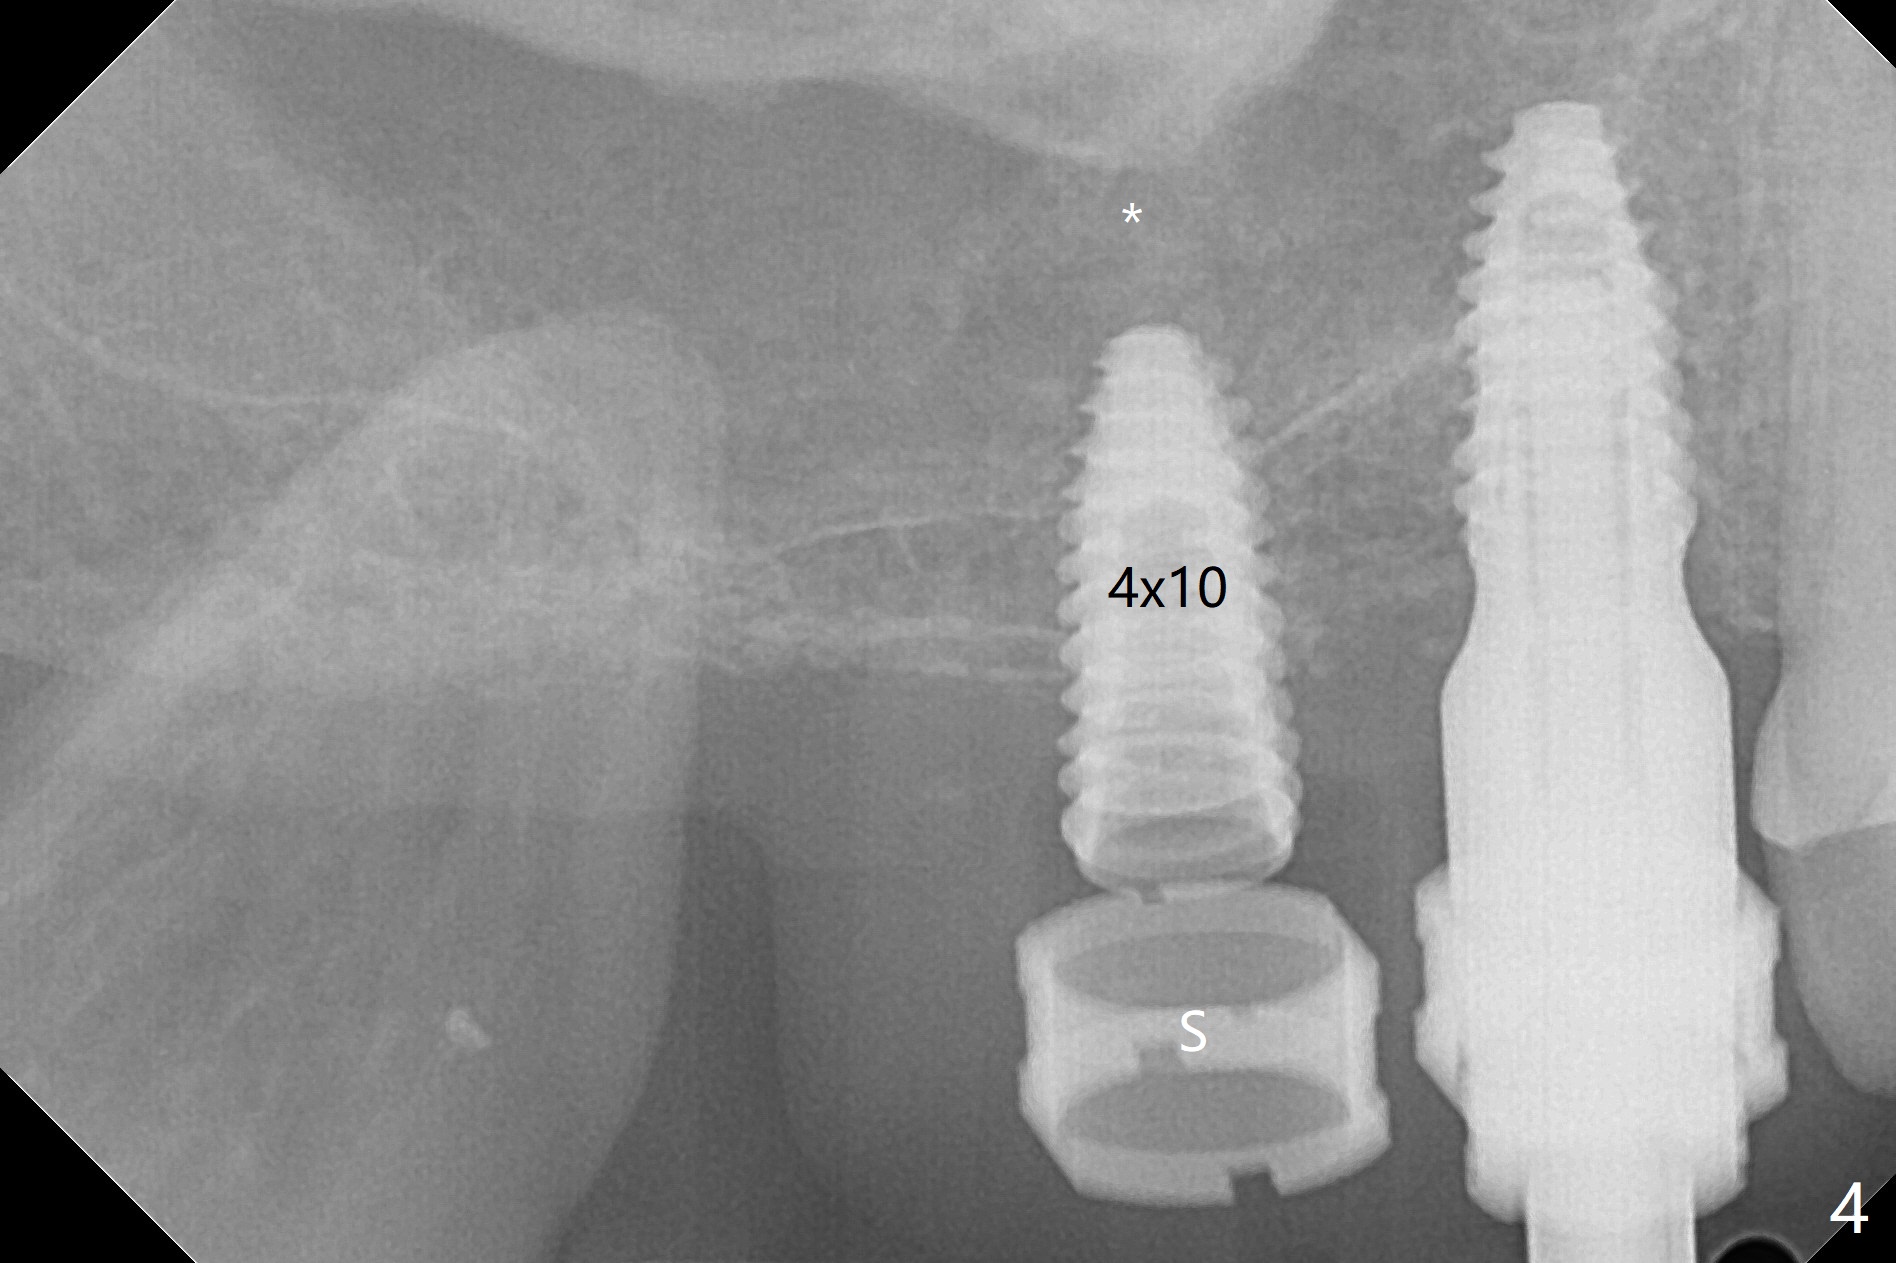
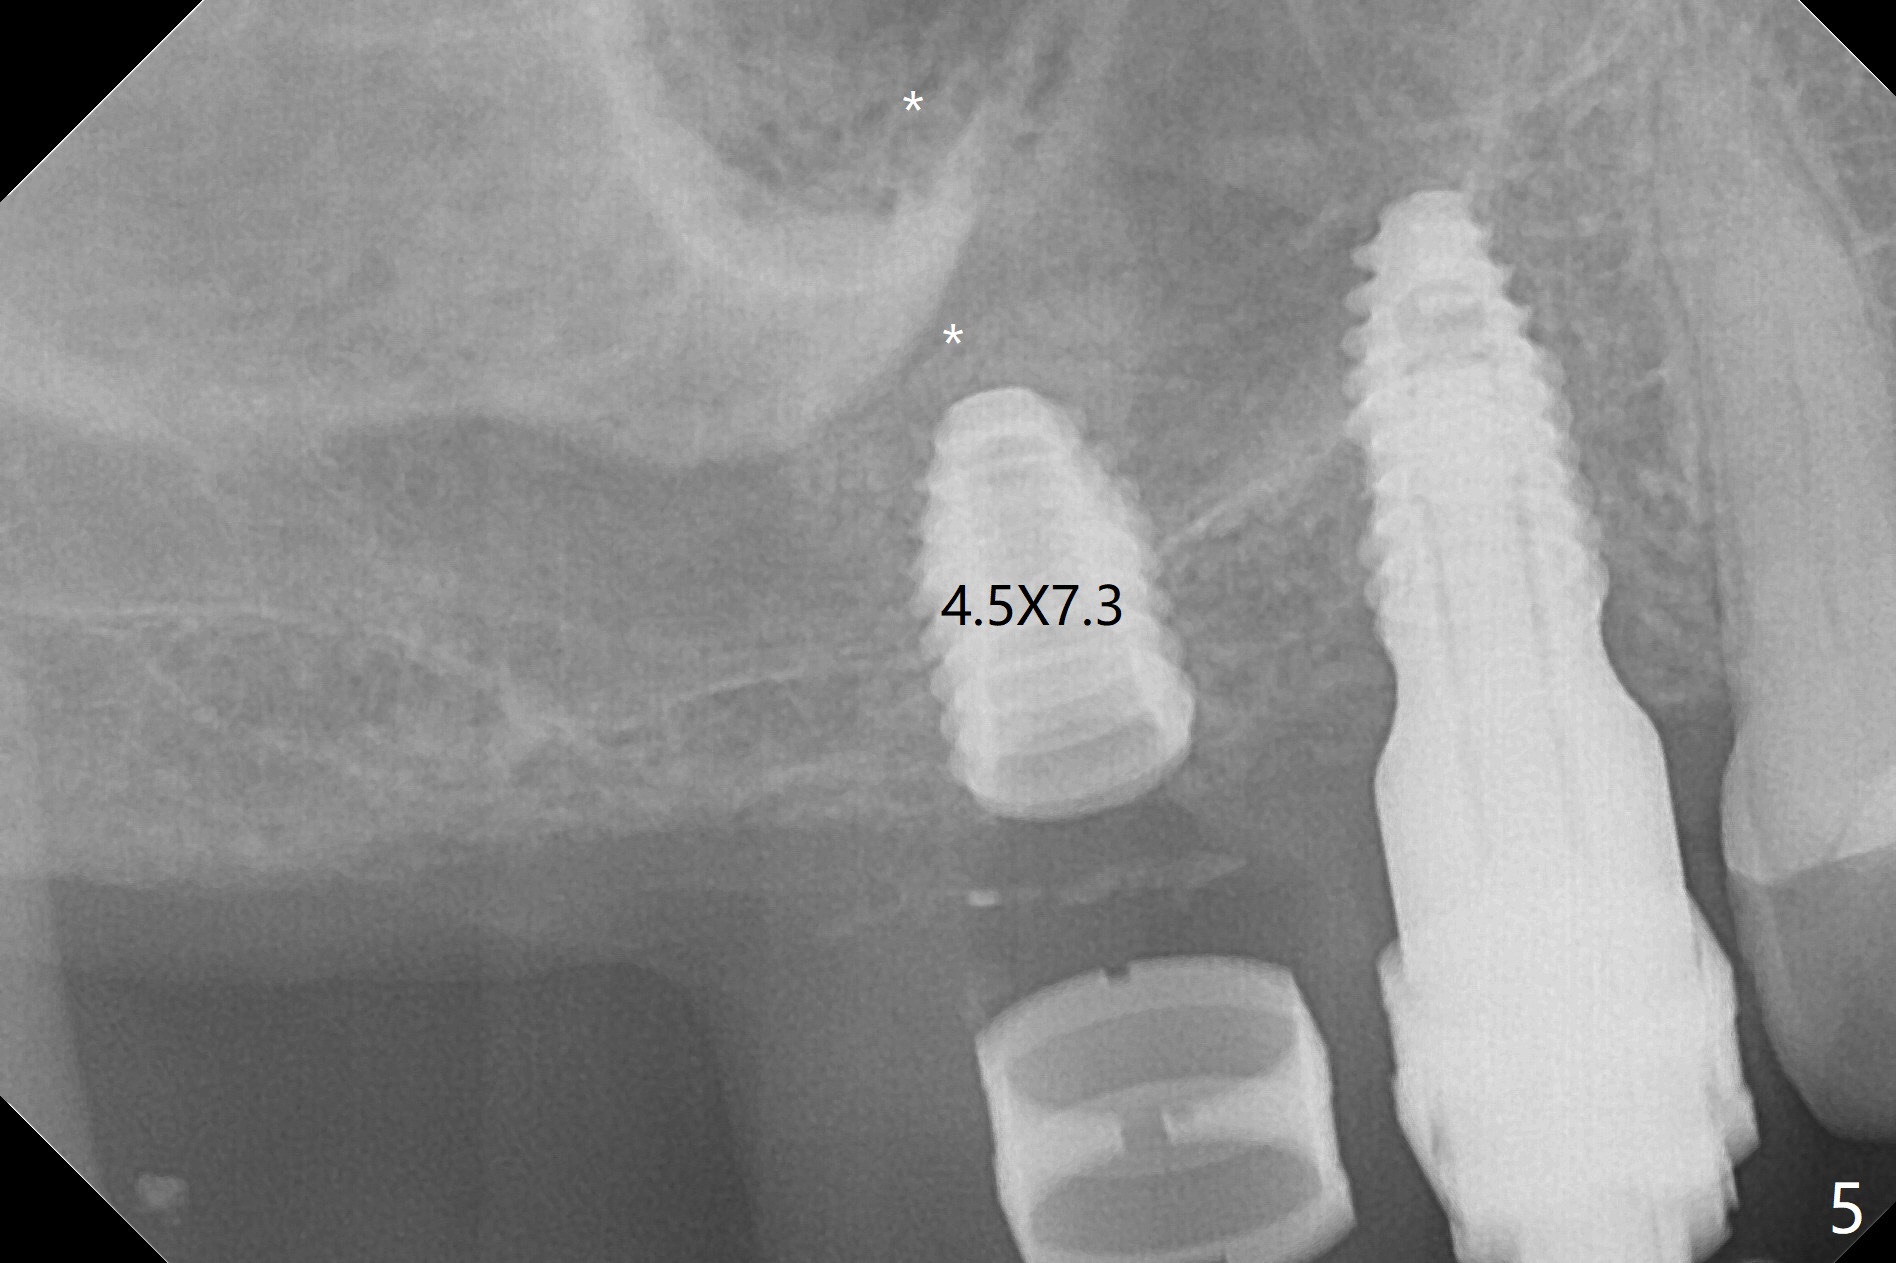
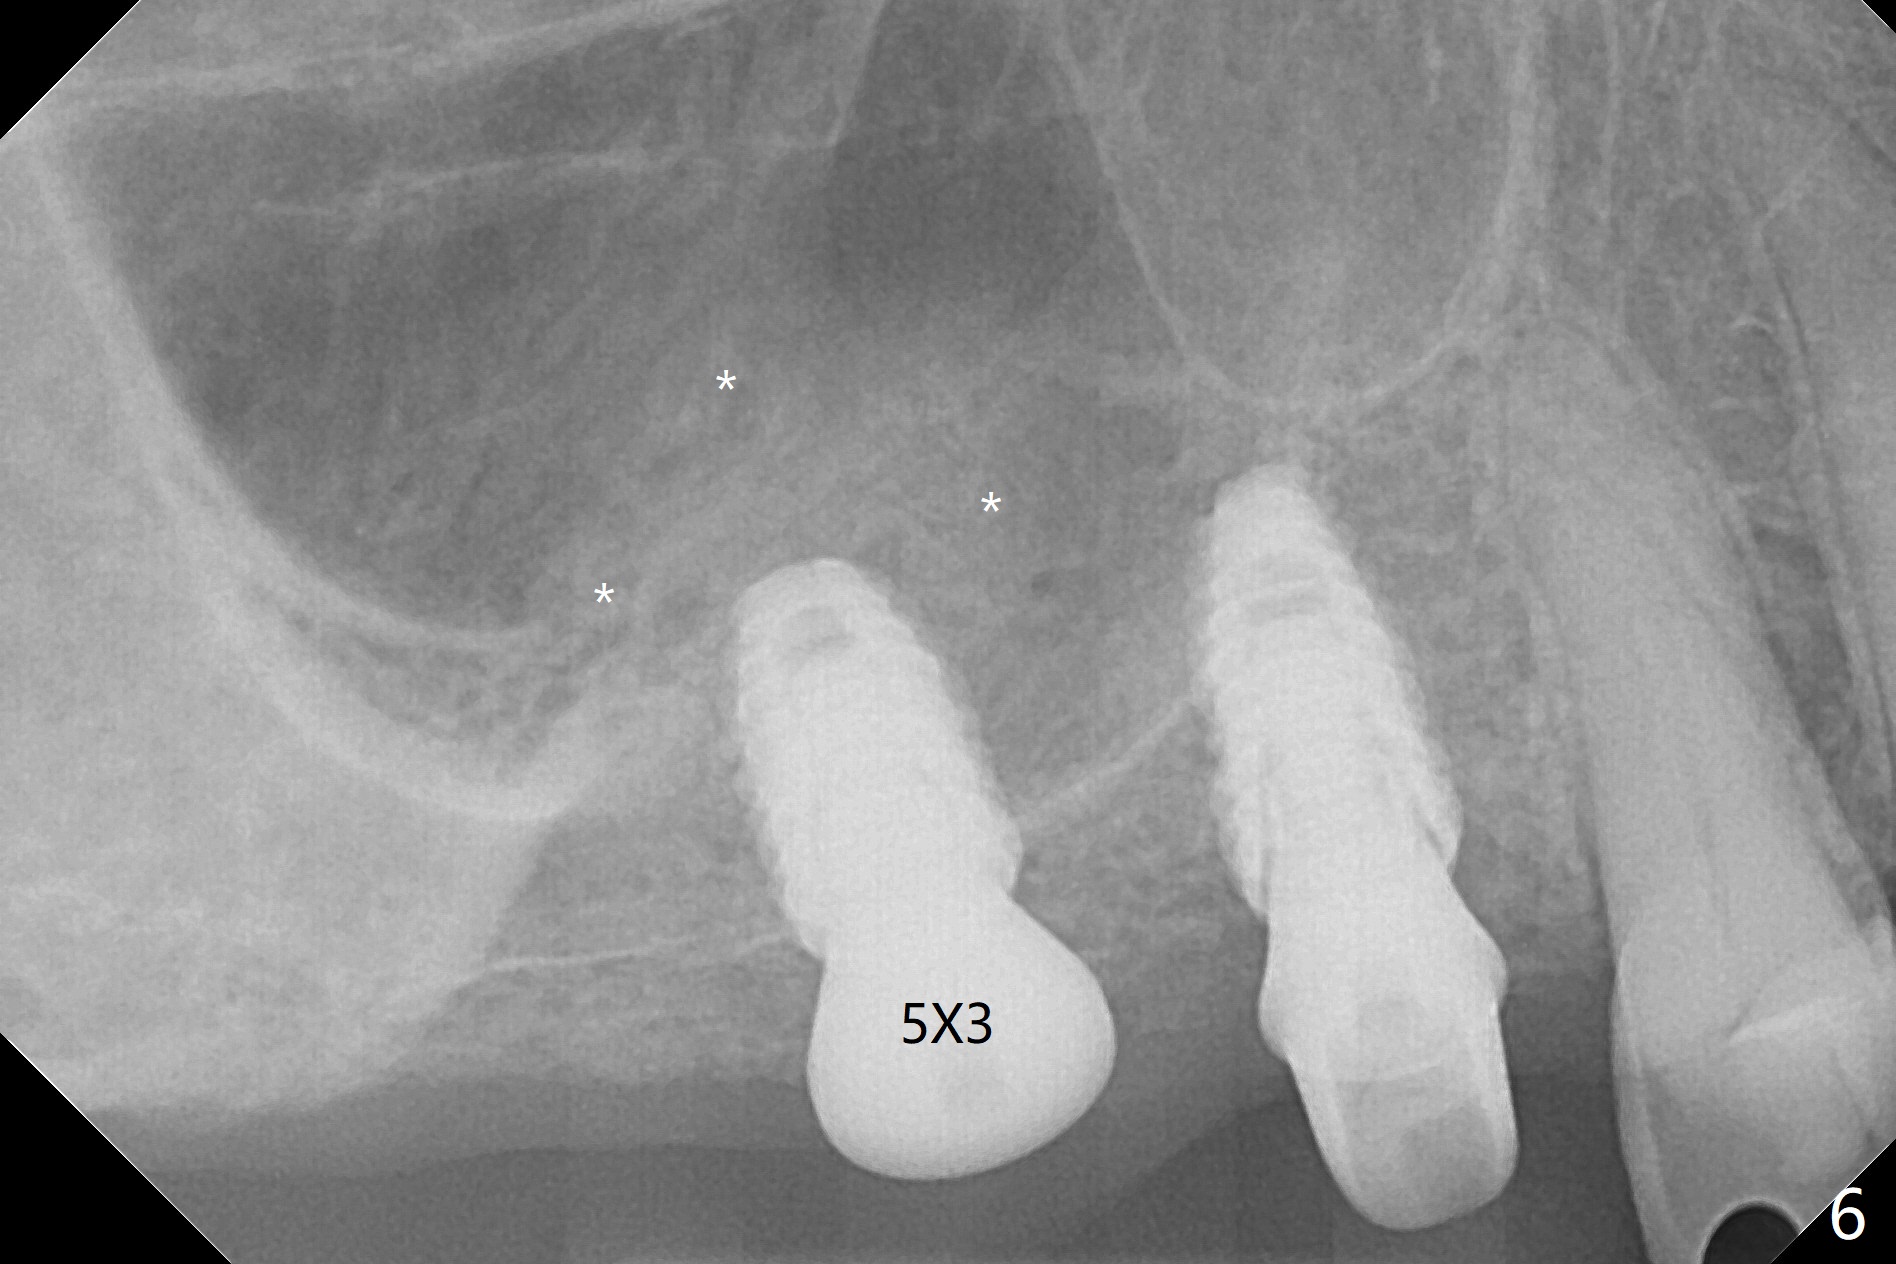
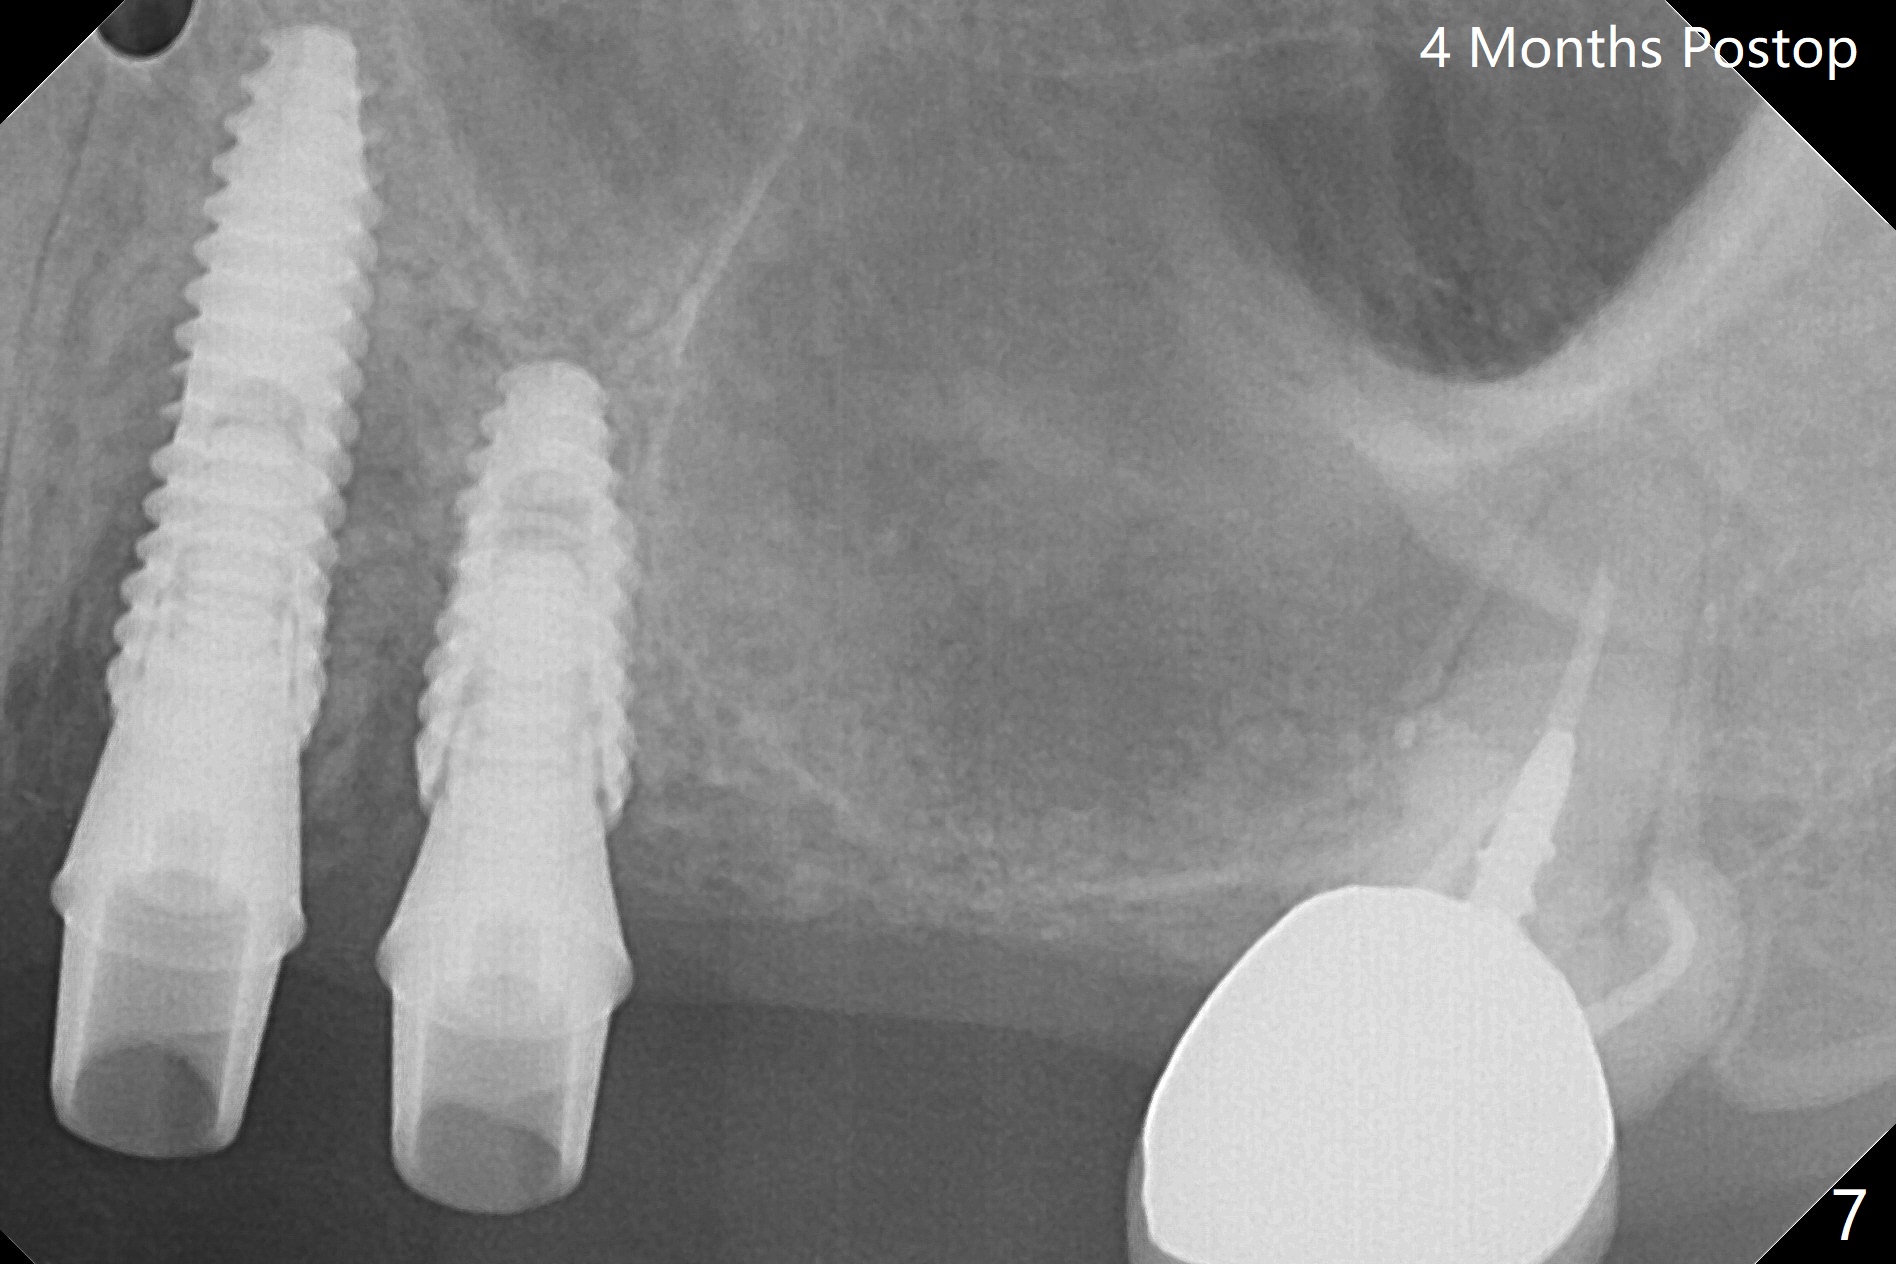
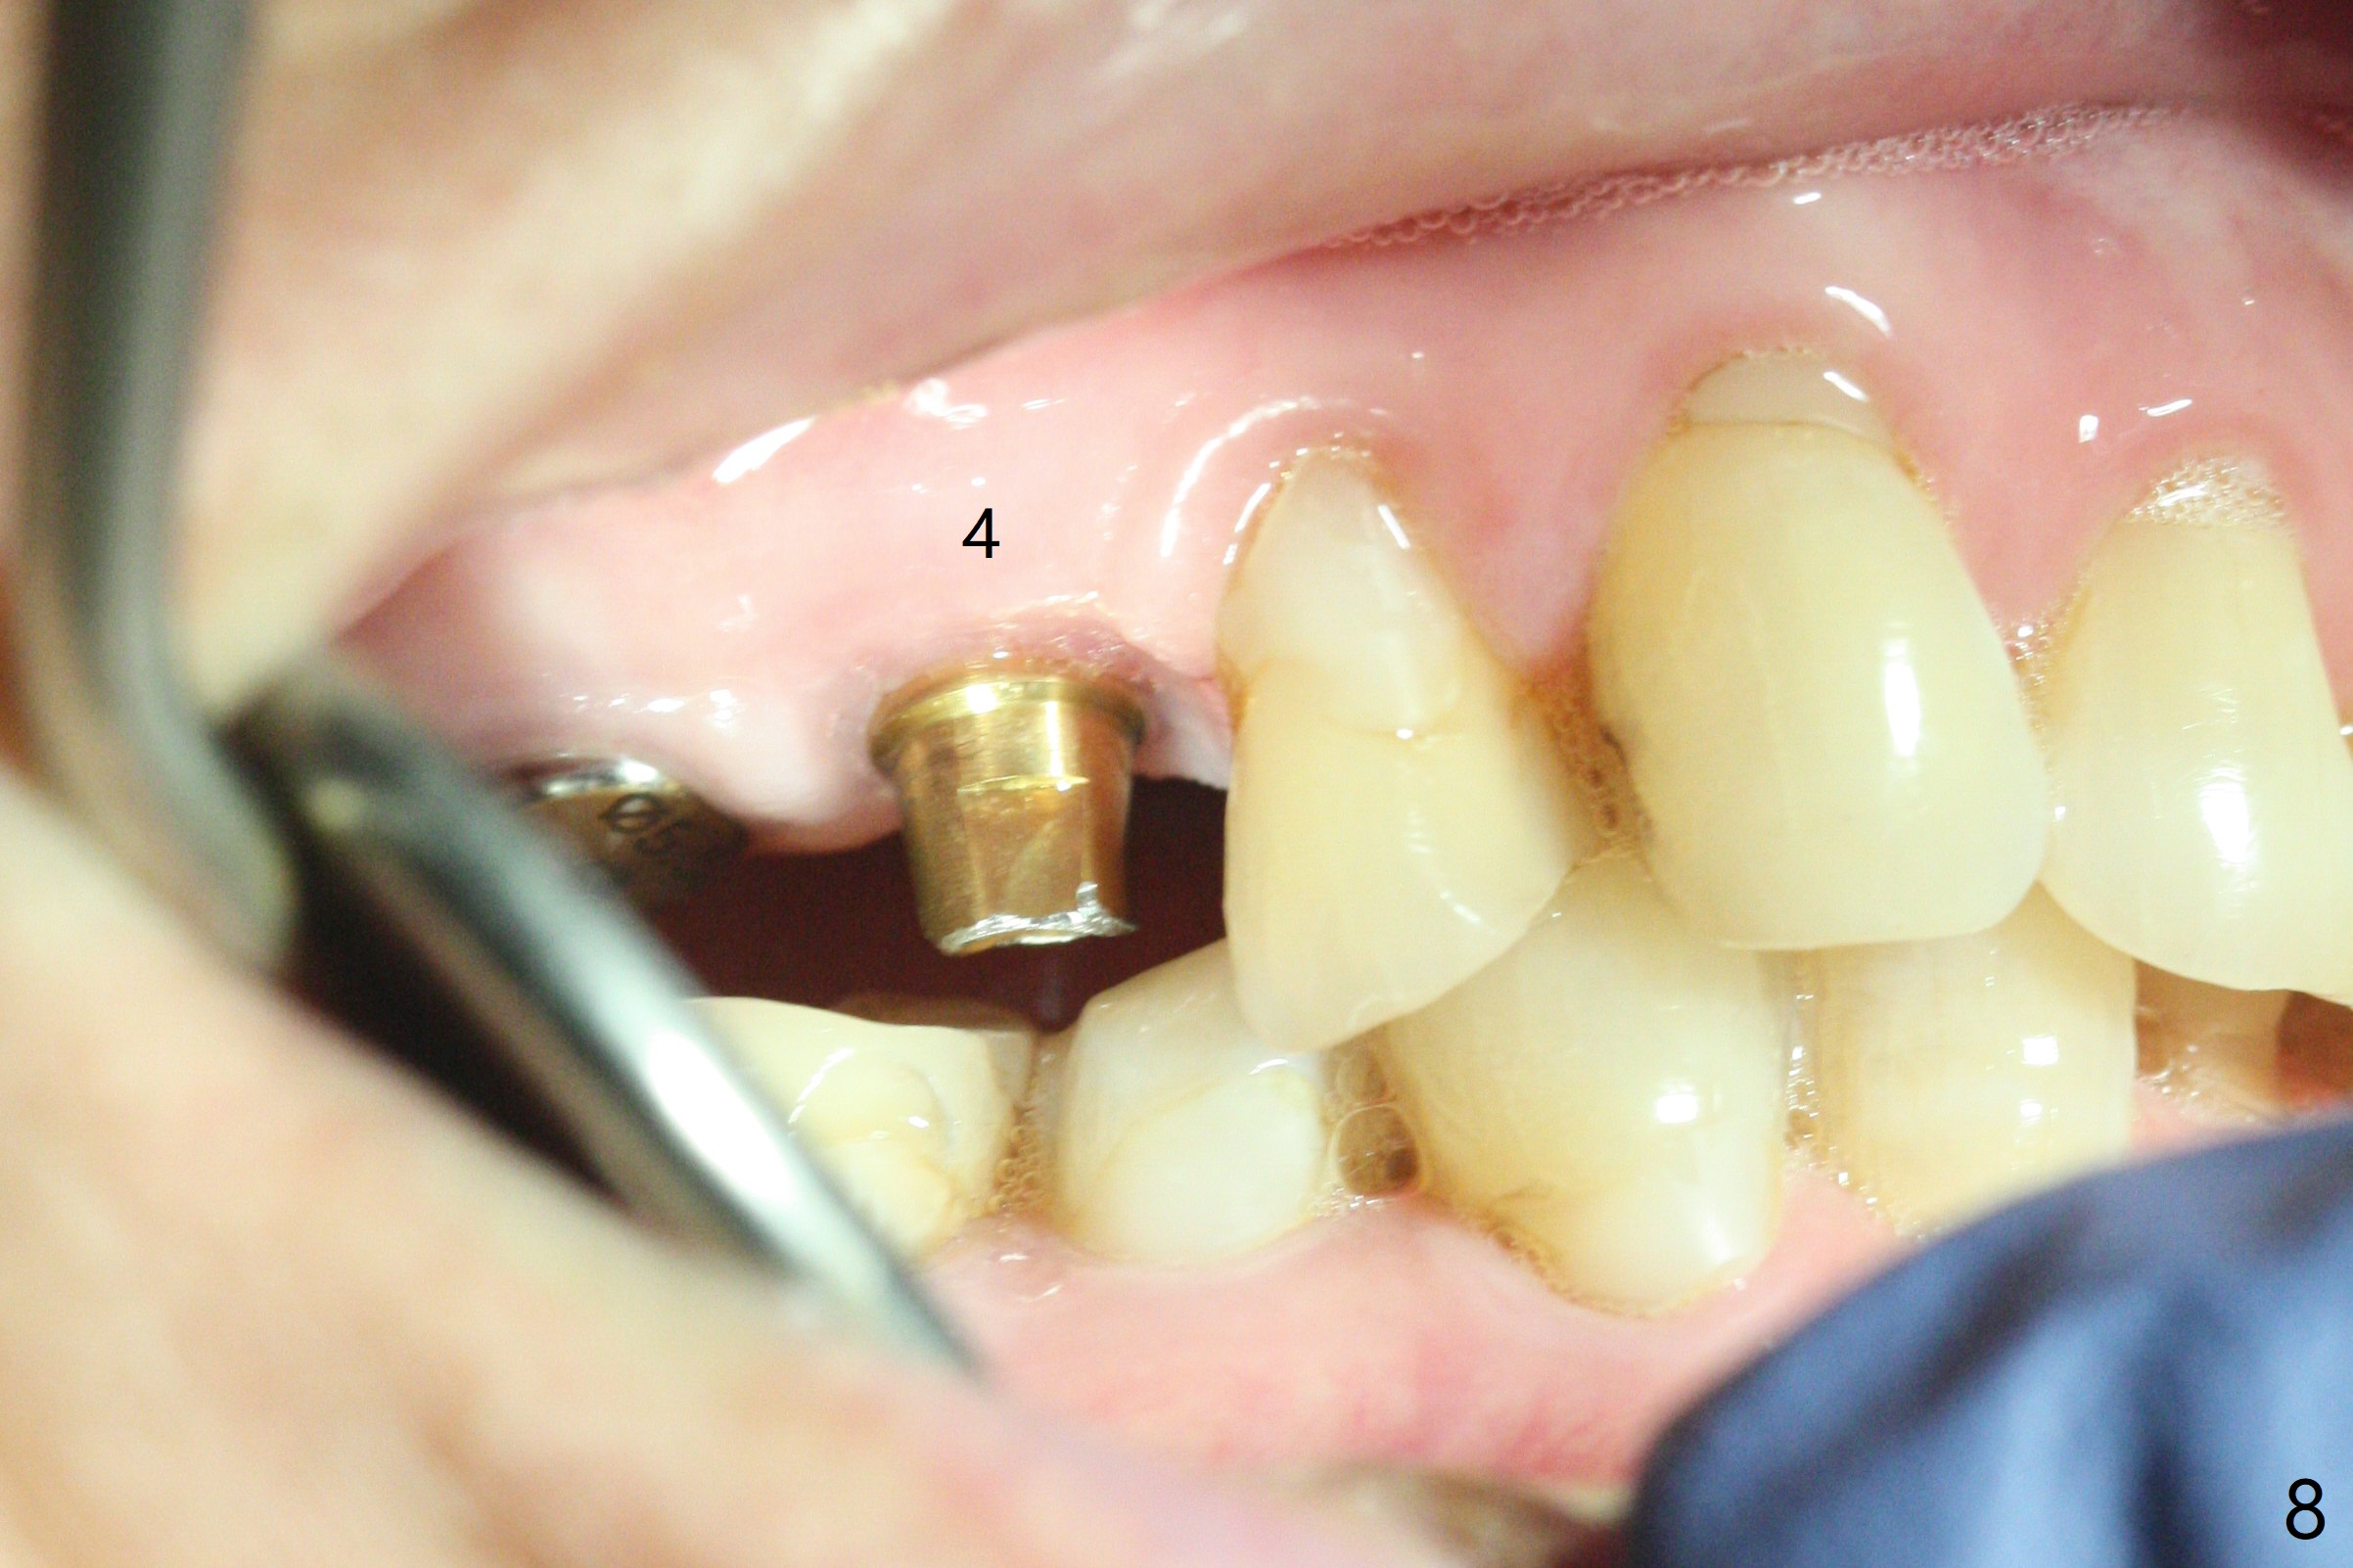
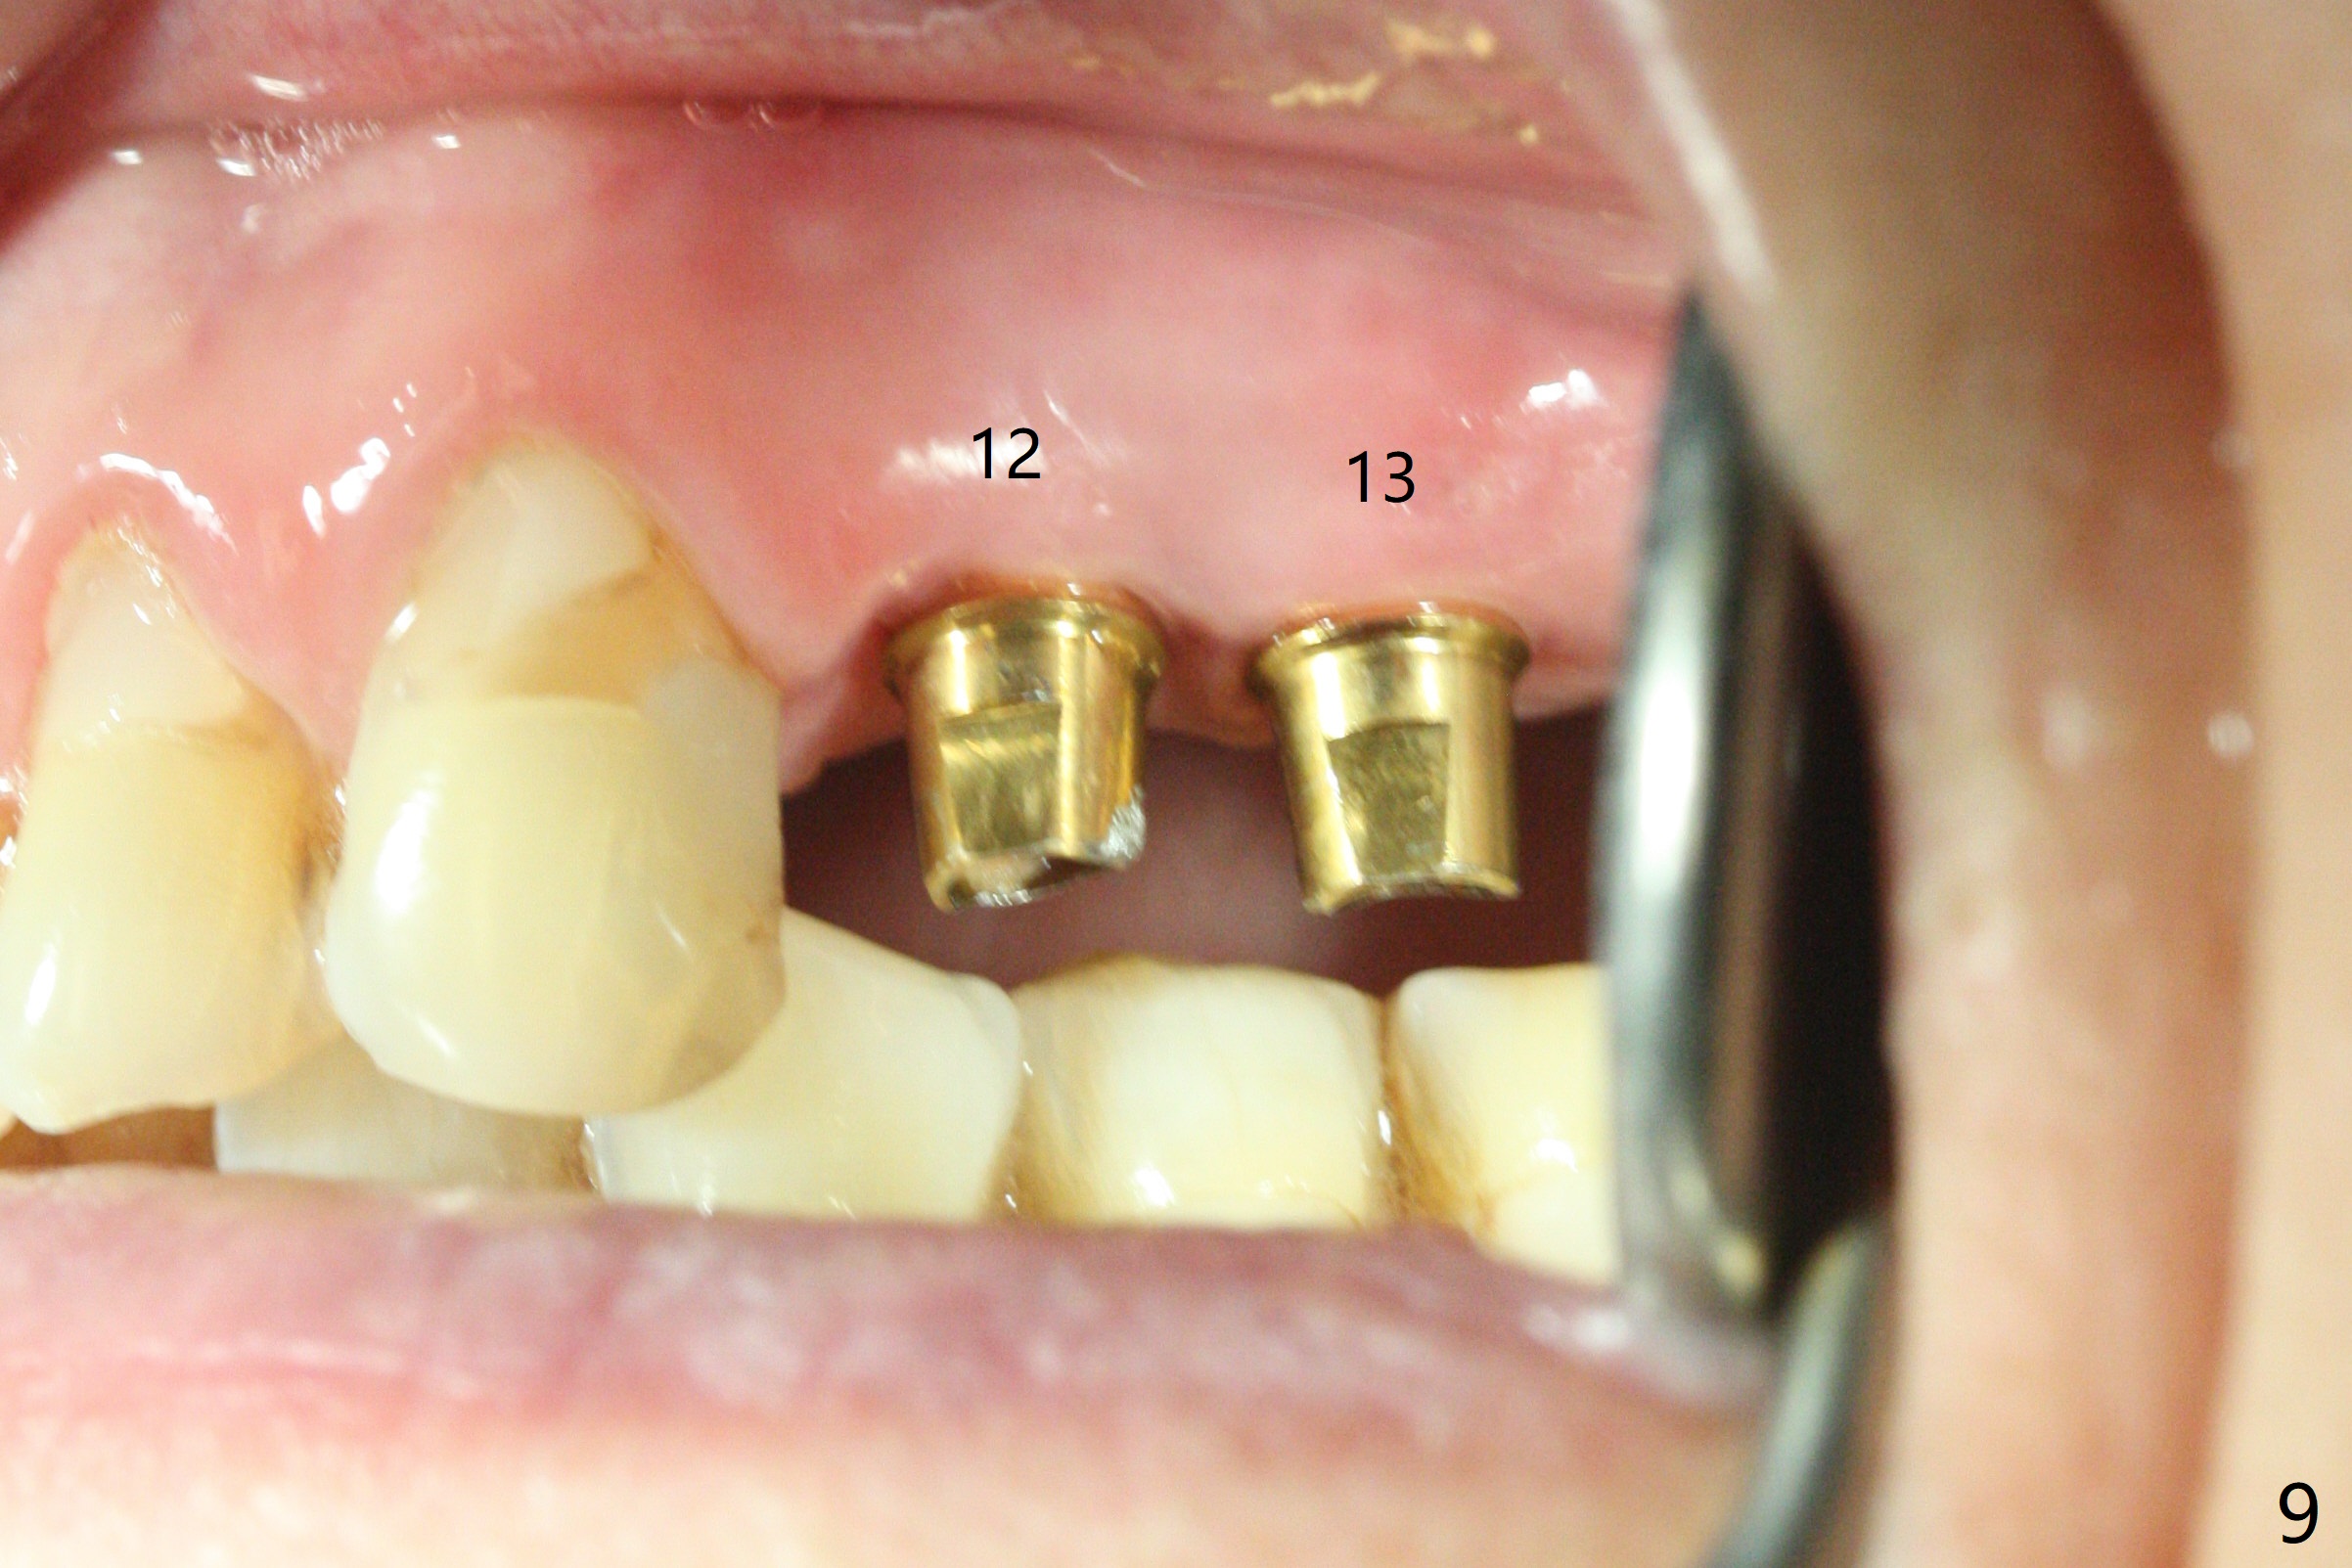
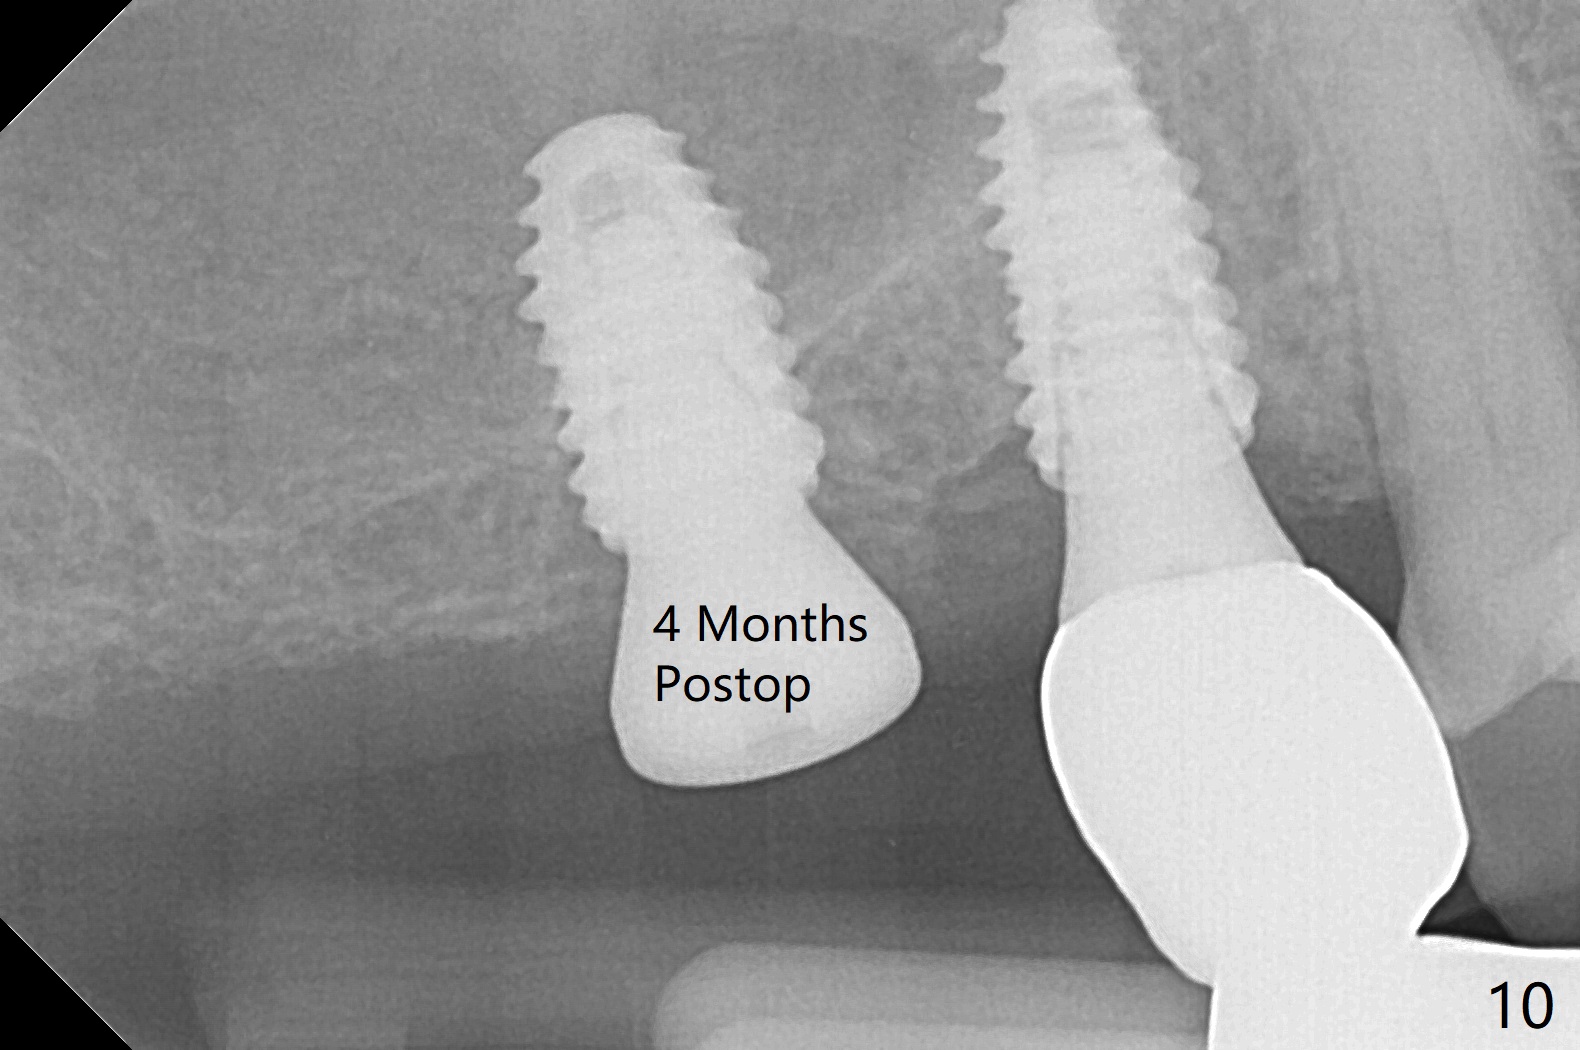
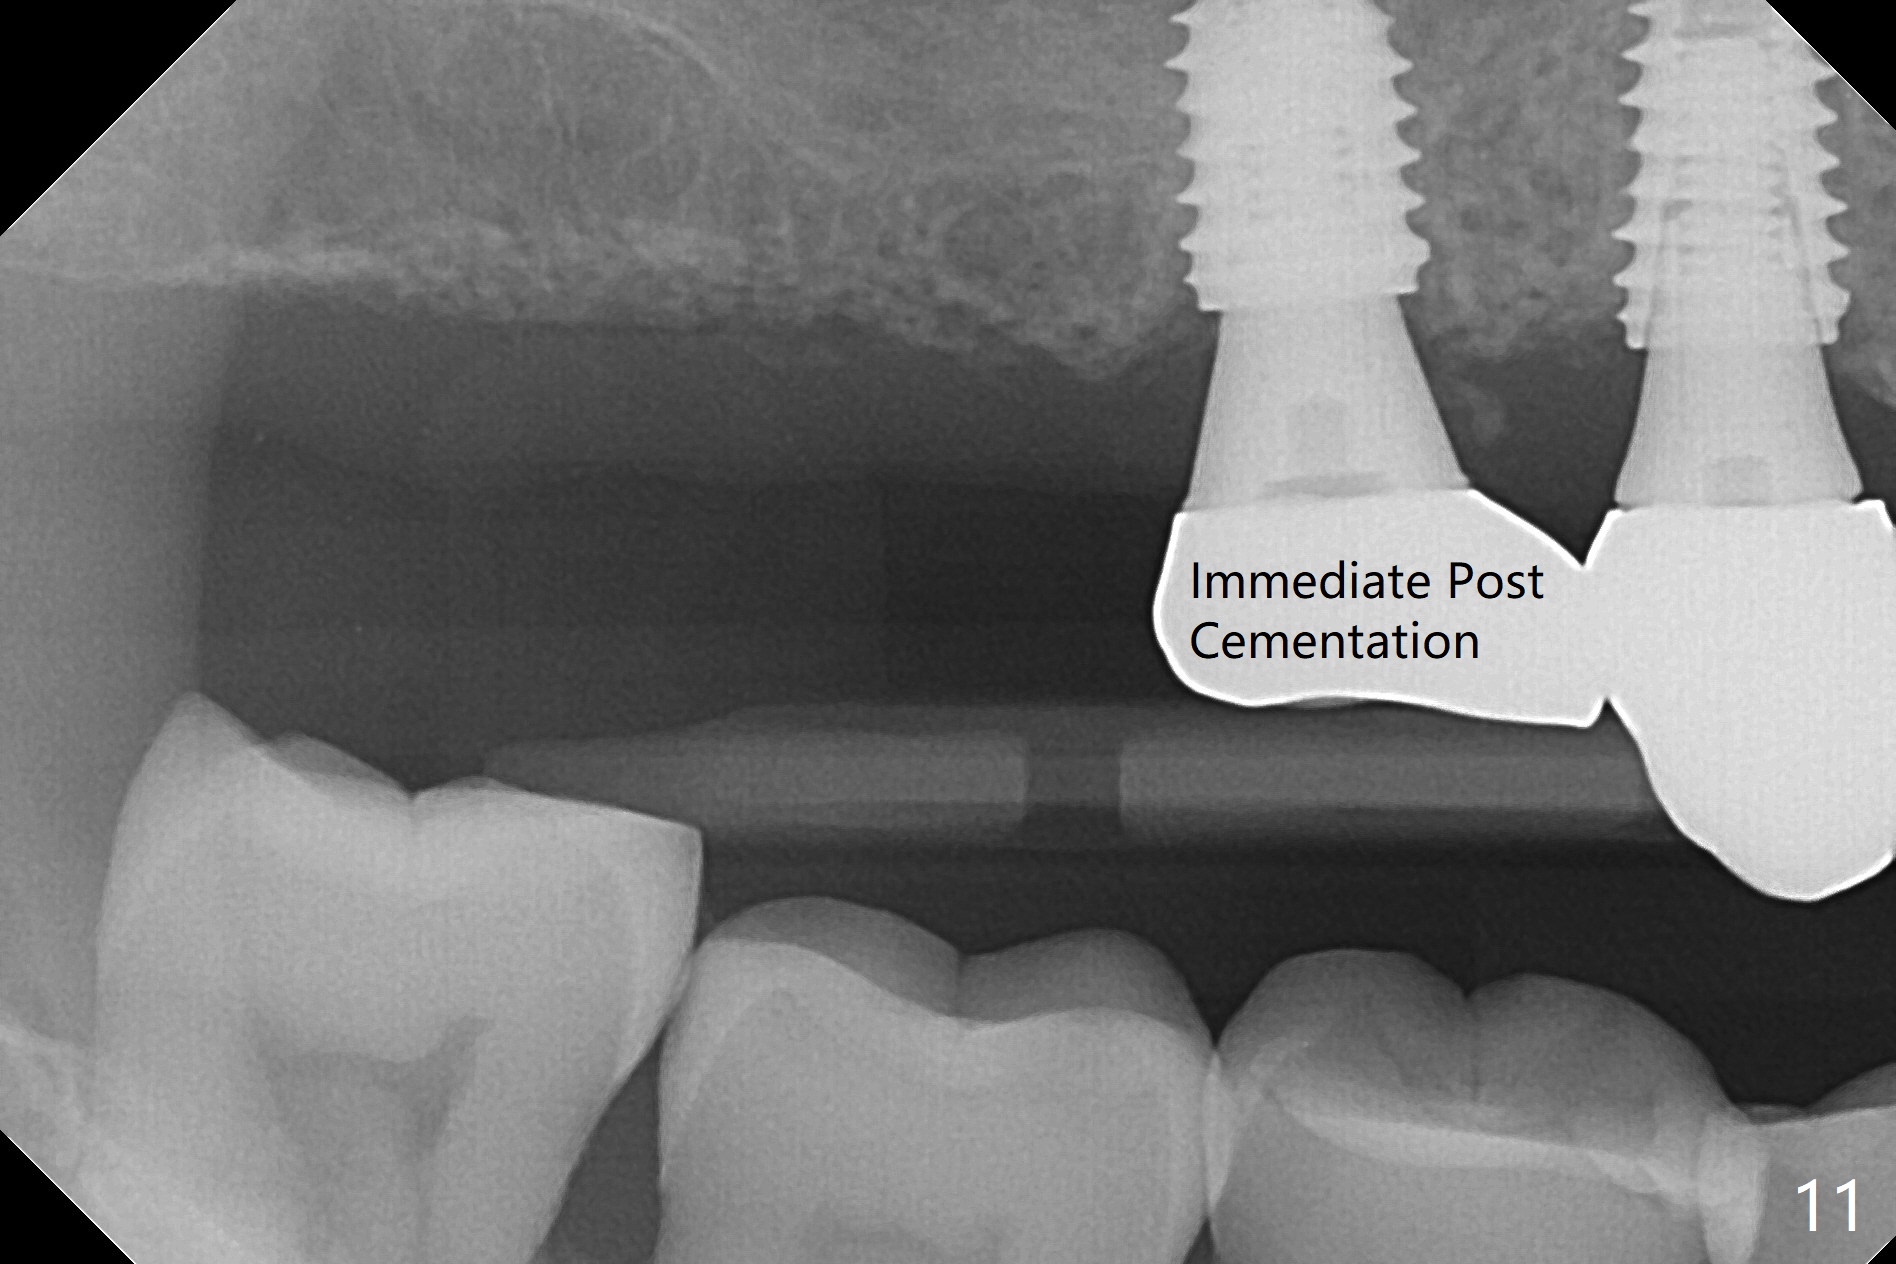
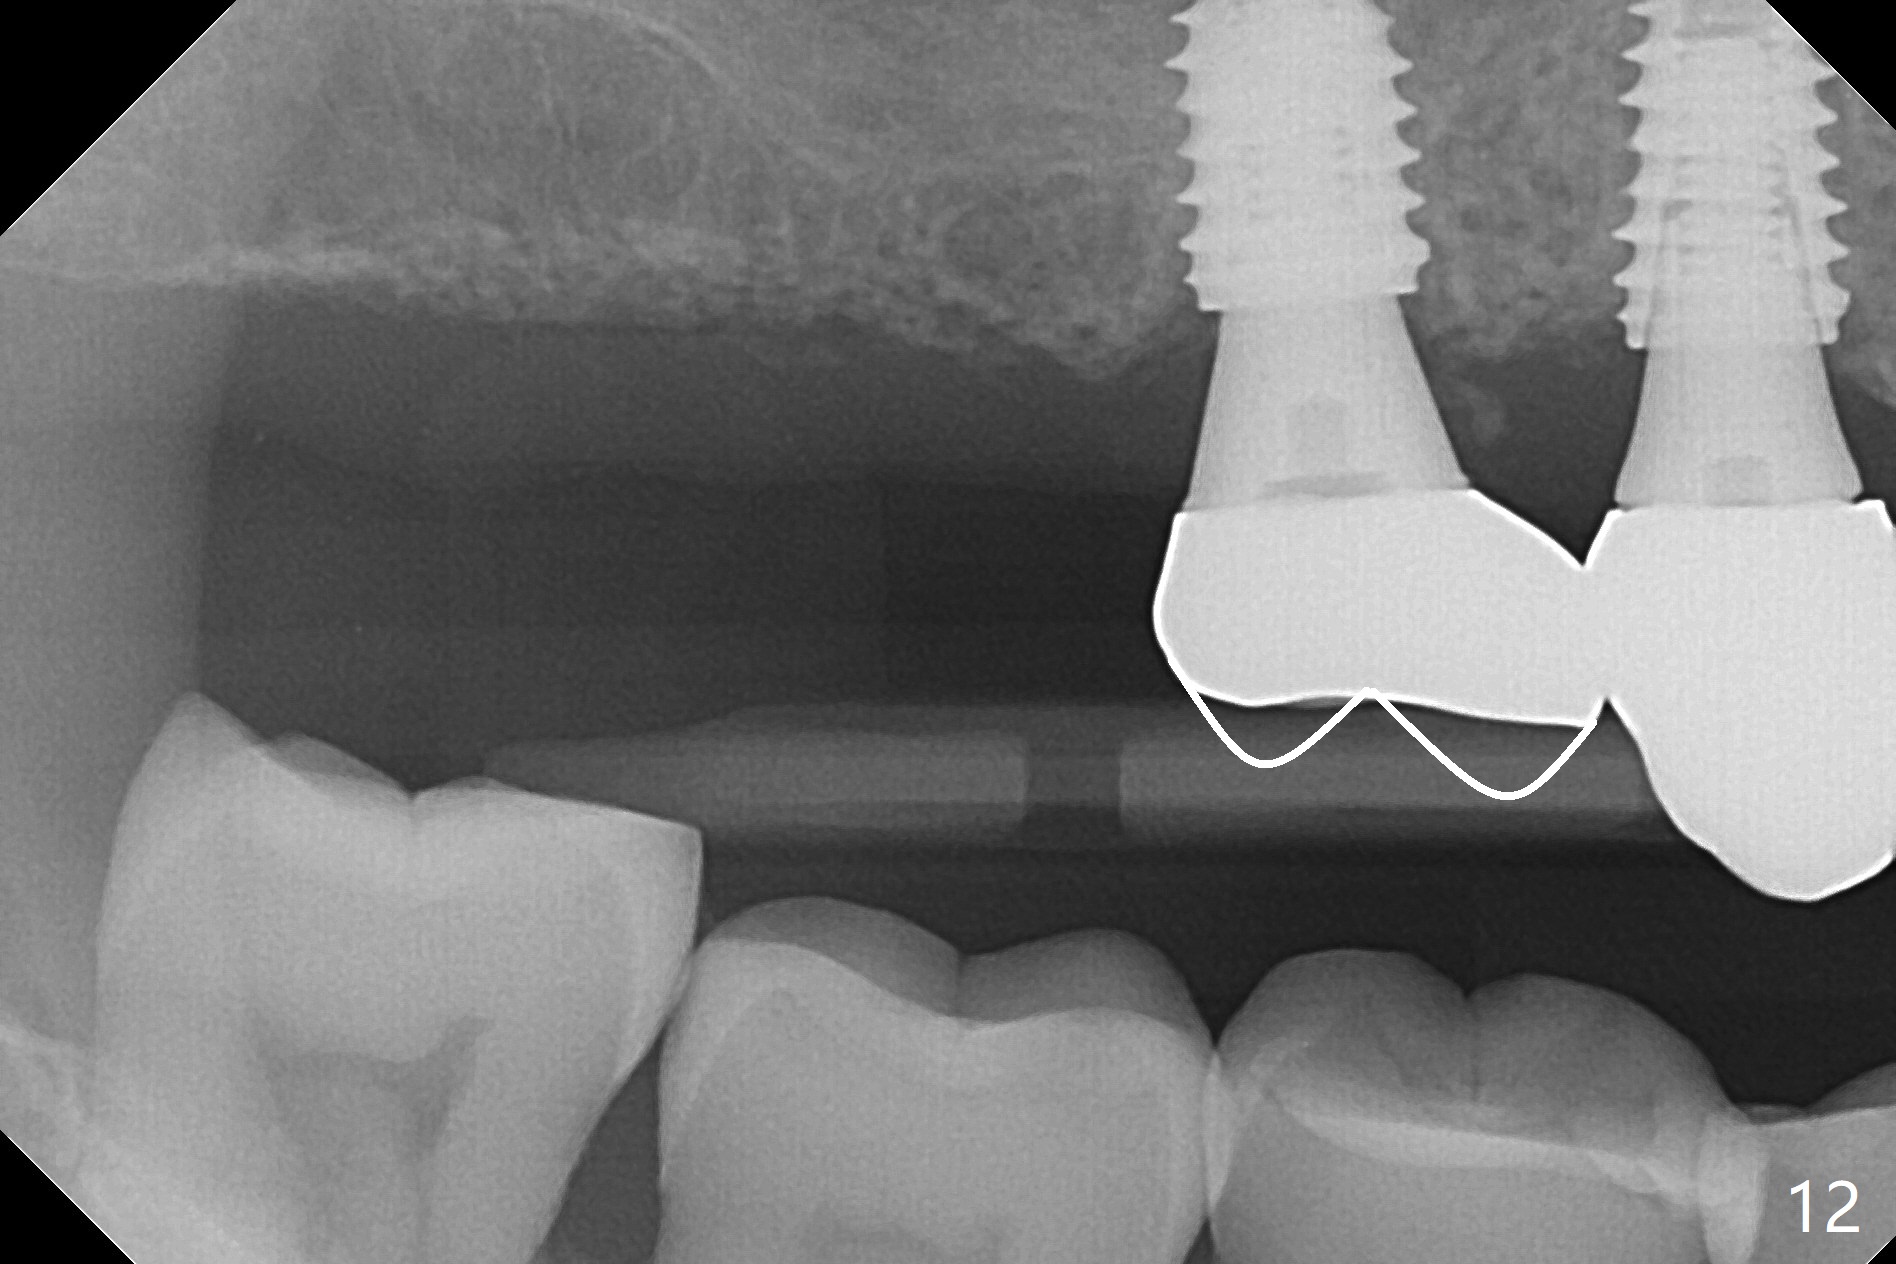
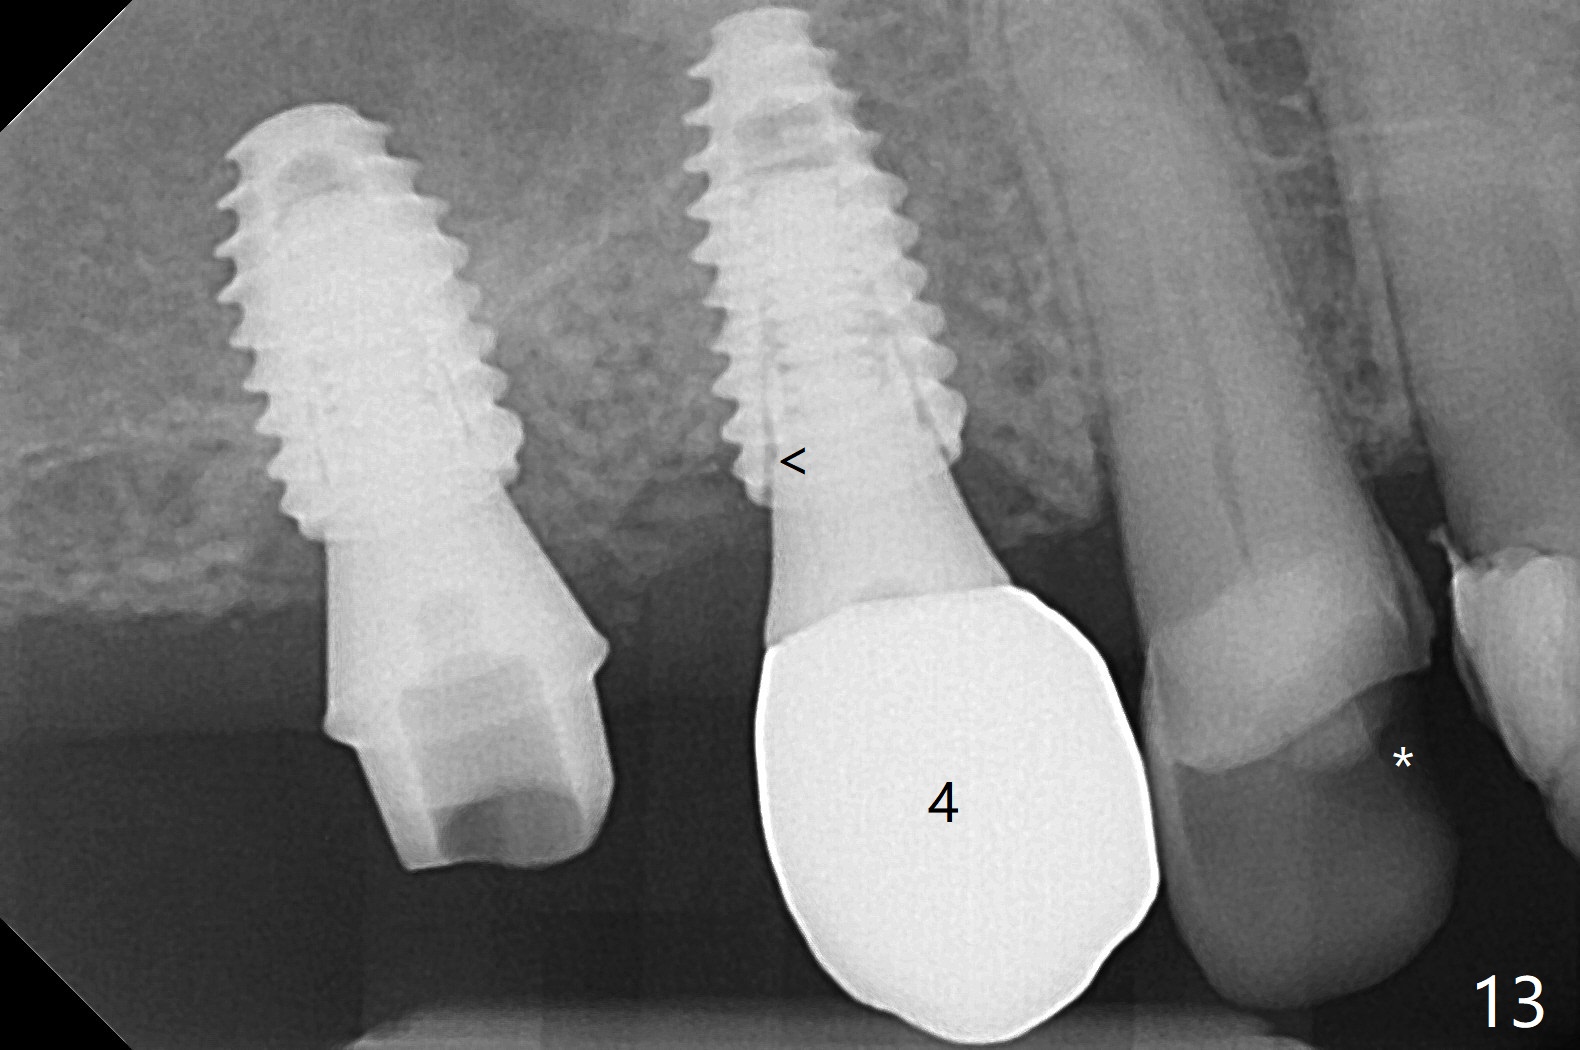
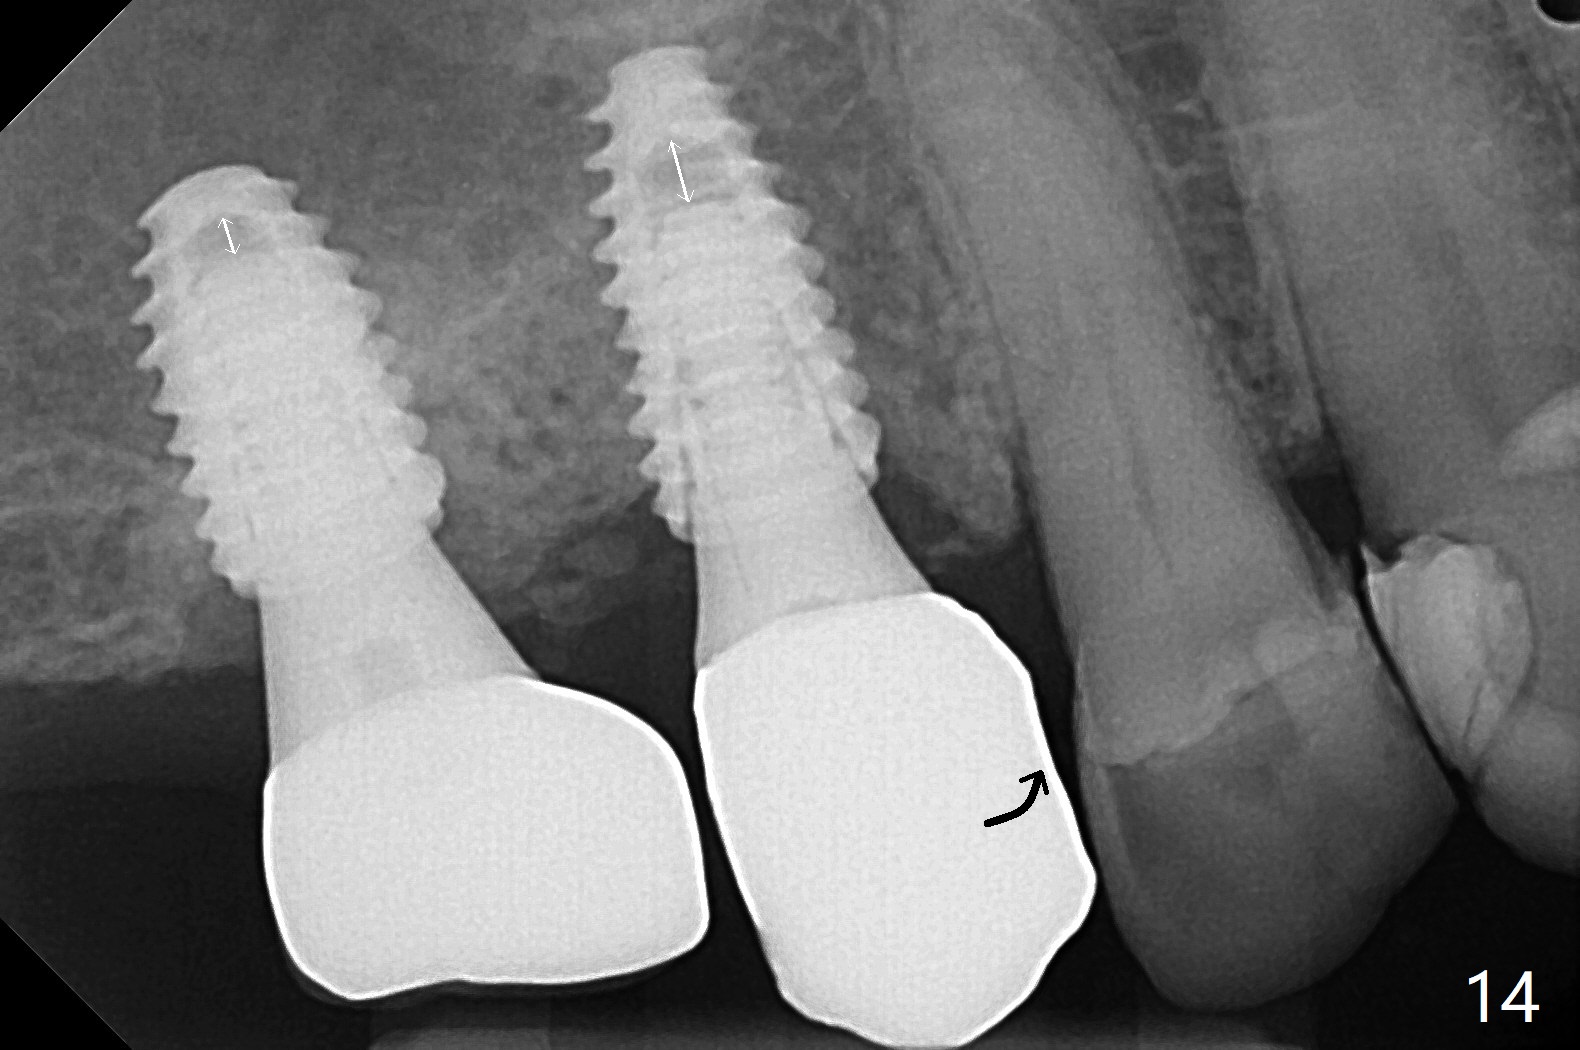
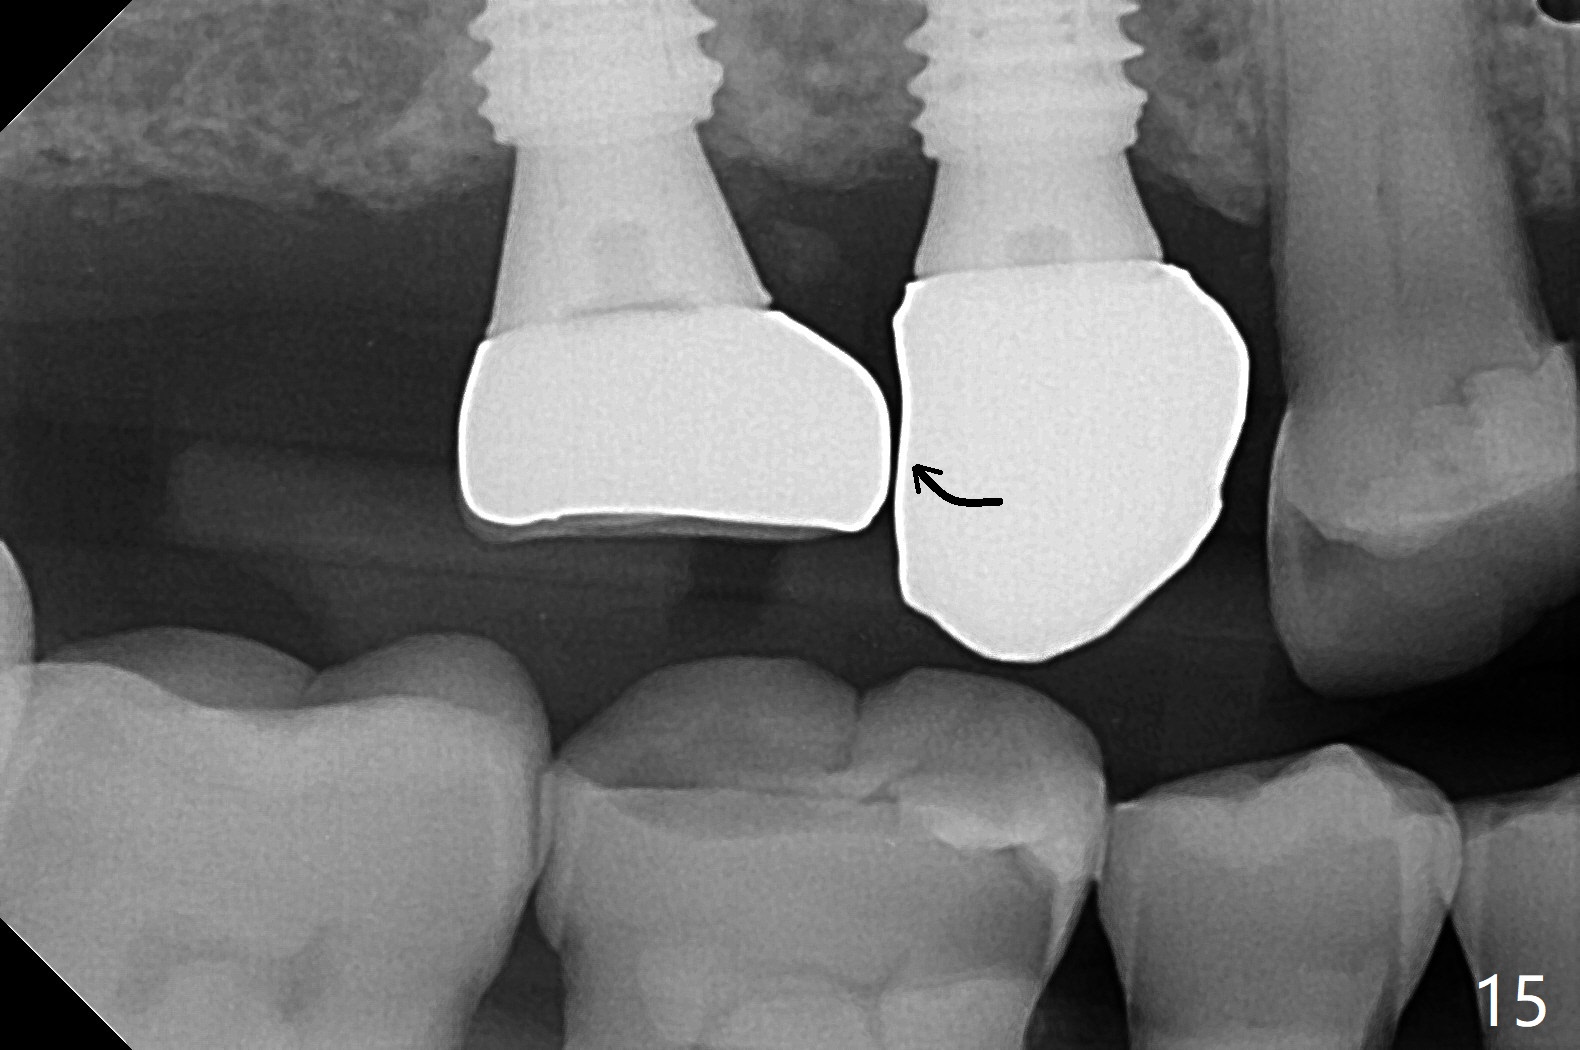
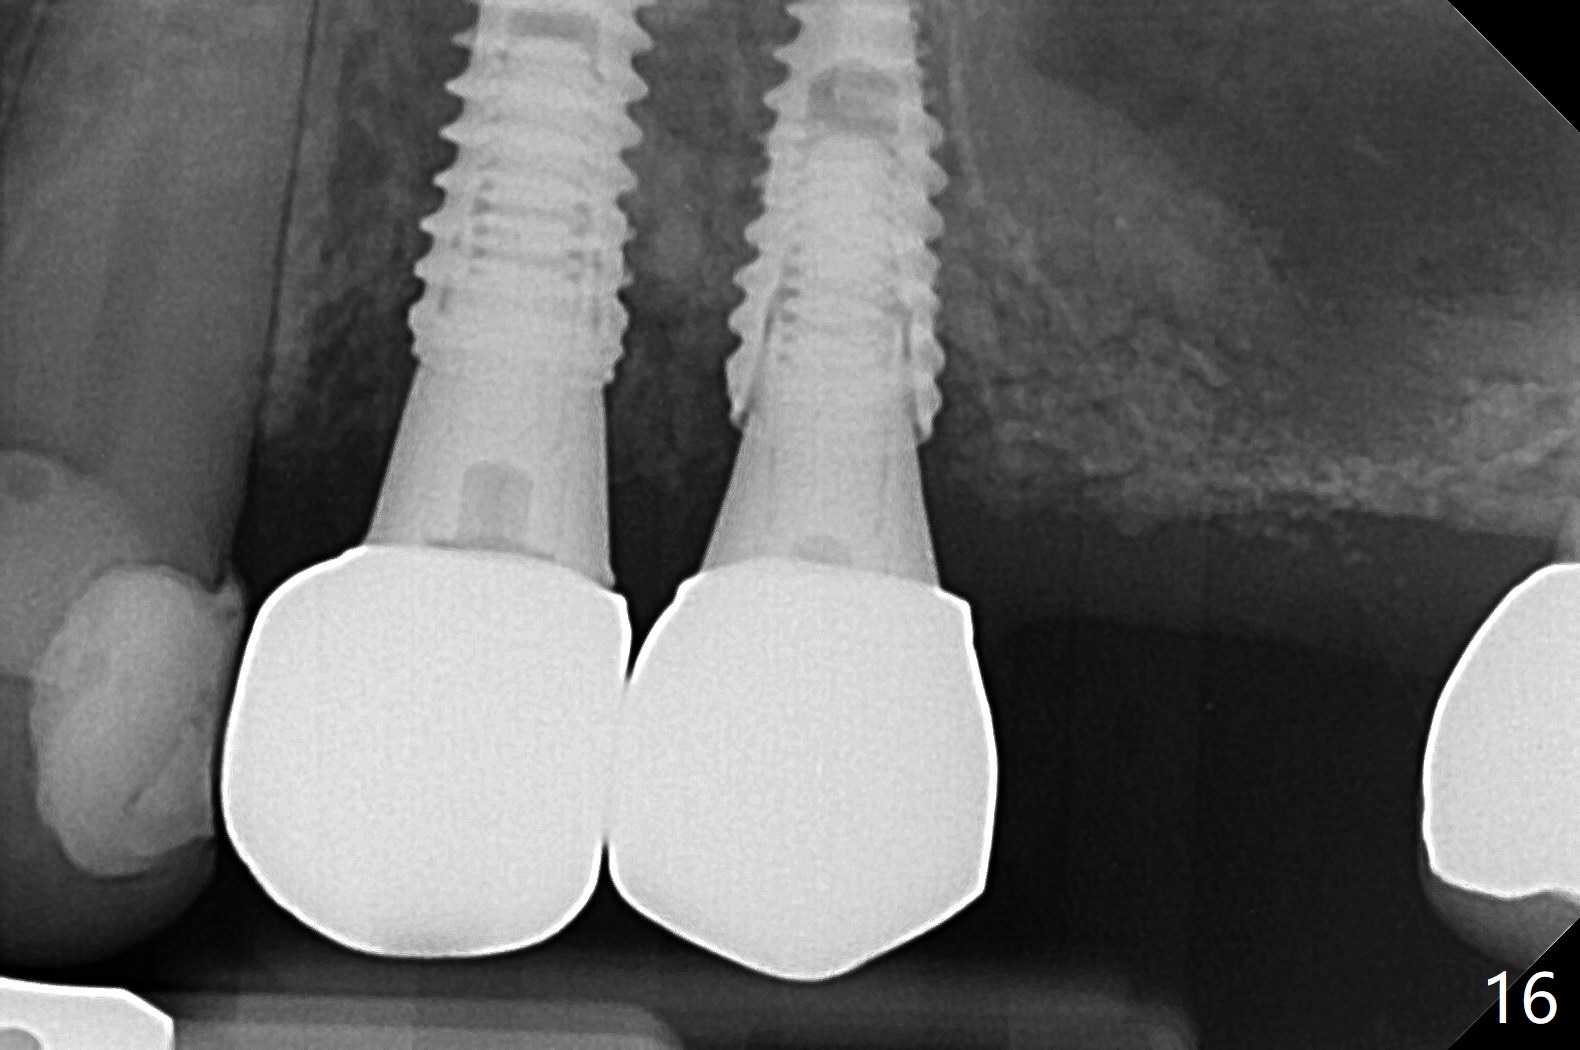
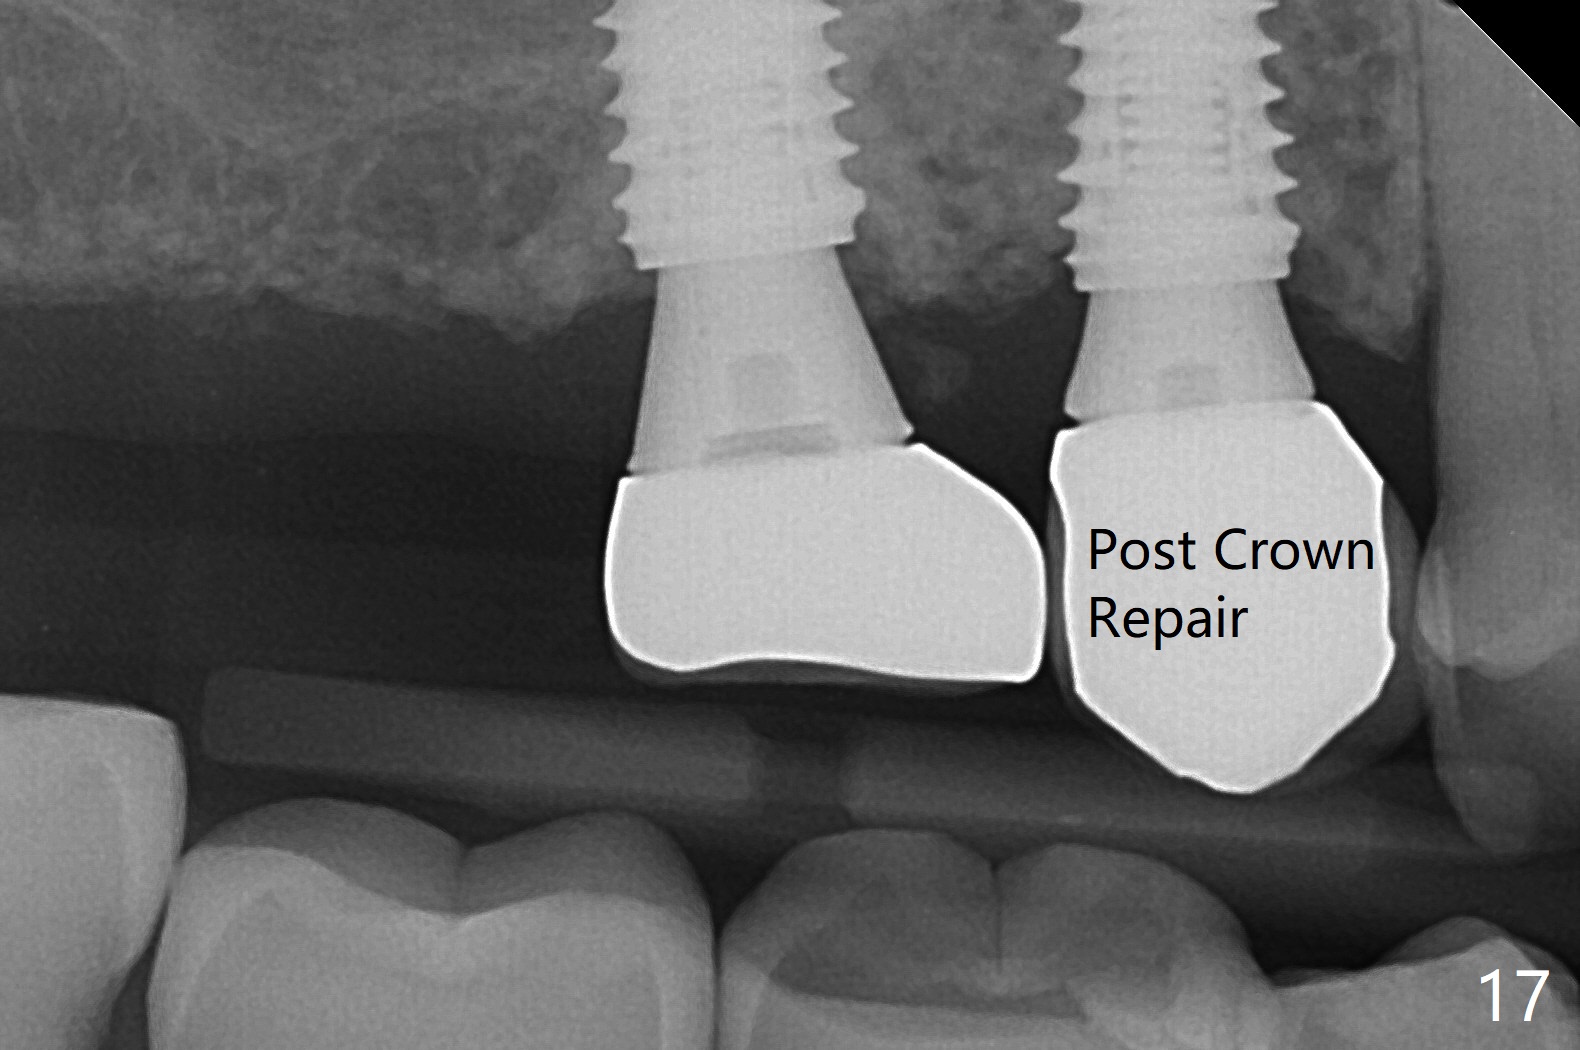
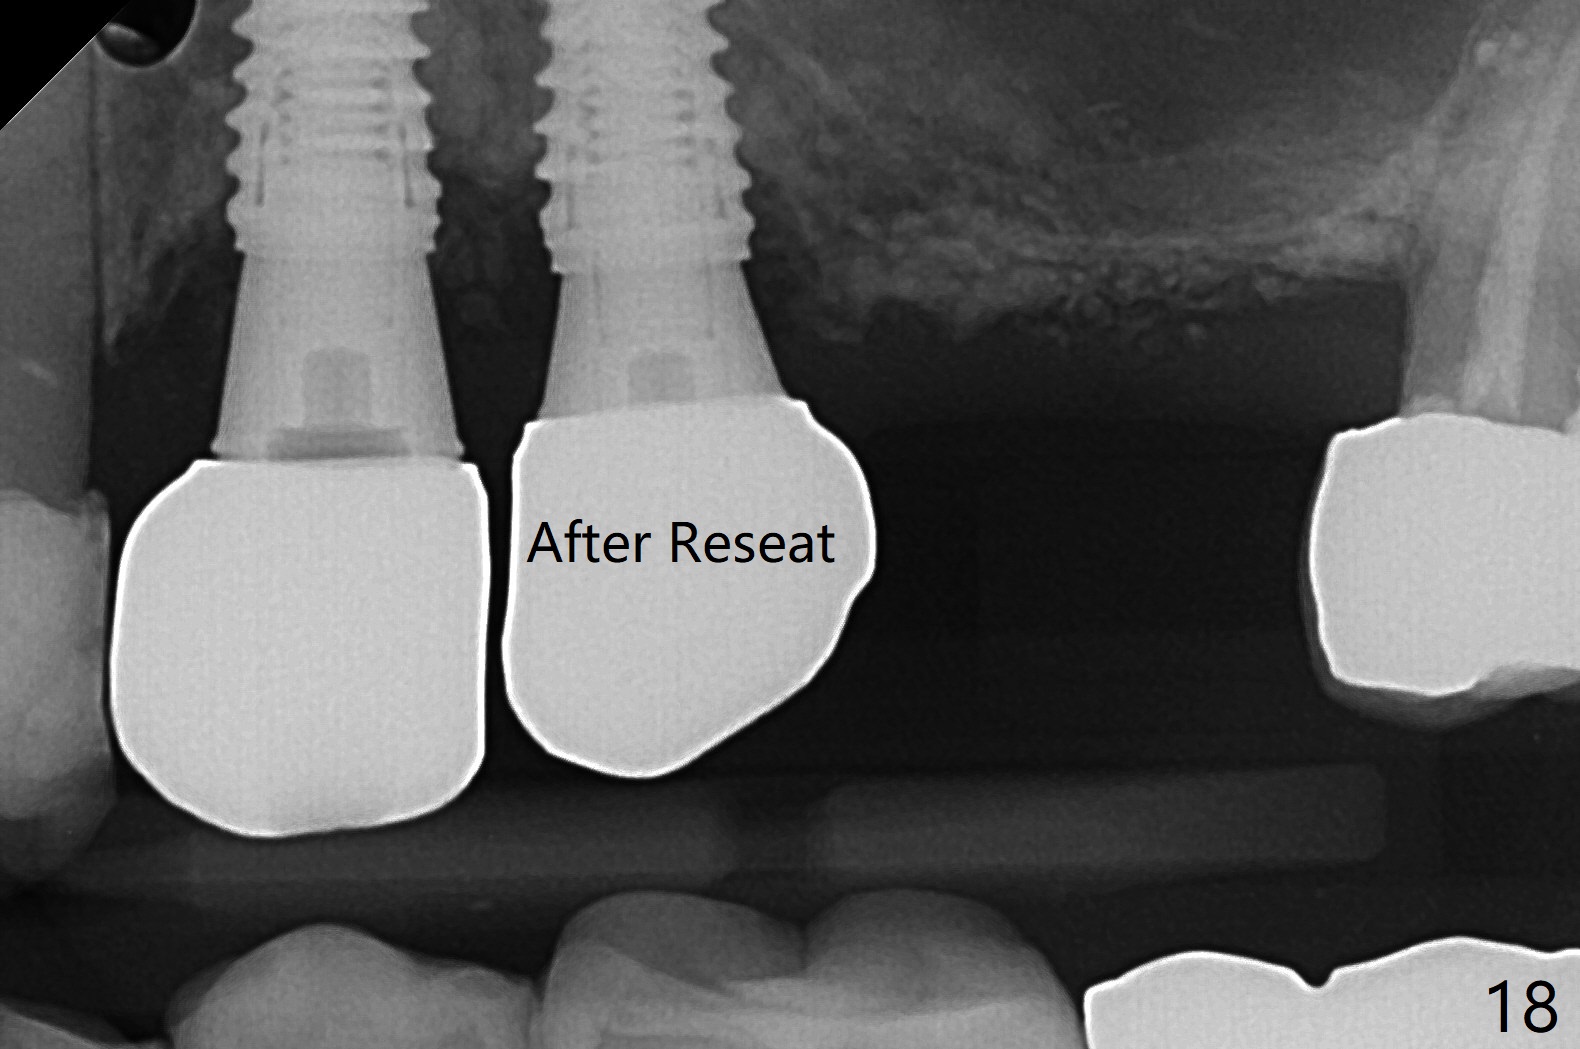
Osteotomy at #3 is performed last (Fig.1,2); as planned, a 4 mm cortical tap is used with guide for sinus lift. Unfortunately the sinus membrane is perforated. Implant placement is aborted. Instead Osteogen plug is inserted into the osteotomy, which is fixed in place by acrylic extending from the provisional at #4. Osteotomy for #3 implant will be attempted with control of the depth in 4 months. The patient has allergy to Amoxicillin (rash). When switching to Clindamycin, she develops diarrhea and loses 10 pounds. There is no abnormality at the site of #3 or 4 nearly 3 months postop (Fig.3). The next surgery will be most likely conducted without antibiotic 4 months postop. Try to draw blood for PRF. Take PA for #12 and 13 for possible impression. Remove the 3 temporary crowns, seat the guide across the arch and use no-stop fixture mounts at #4, and possibly 12 and 13. Follow the original drill sequence (check perforation after each drill, Fig.11) and use DIONavi sinus approach kit. Also load an appropriate stop for the round bur for sinus lift before hand. Mixture allograft with Metronidazole and PRF. In fact everything goes on as smoothly as planned. Osteotomy at #3 is underprep (3.5 mm in diameter drill instead of 4.0). The sinus floor appears to remain to be absent; 3.2 mm round bur is used for lift, alternating with water pumping. Following insertion of 3 pieces of PRF membranes and Vanilla Graft (Fig.4 *), a 4x10 mm dummy implant is placed. After additional bone graft (Fig.5 *), a final 4.5x7.3 mm implant is placed ~10 Ncm. The implant is placed deeper ~ 1 mm, followed by a 5.5x3 mm healing abutment (Fig.6). The implants at #12 and 13 seem to have osteointegrated (Fig.7). Impression is taken for #4, 12 and 13 with limited vertical space (Fig.8,9). An implant at #14 is being considered. There is faint bone graft around the apex of the implant 4 months postop (Fig.10). The implant sustains 25-30 Ncm torque when a 5.2x4(3) mm cemented abutment is placed. A permanent crown is cemented nearly 5 months postop (Fig.11). For the best cosmetic and masticating results, the occlusal surface should have certain degree of morphology, such as the buccal cusps (Fig.12 white curved lines). The abutment at #3 is placed and torqued to 30 Ncm before re-cementation of the repaired crown (increased occlusal surface contact). In fact the abutment at #4 is incompletely seated with a gap (Fig.13 <). The composite at #5 is dislodged while #3 crown is being repaired (*). The abutment at #4 is loose >1 year post cementation. The abutment remains incompletely seated (gap and longer apical space (double arrows)) when the abutment/crown complex rotates lingual mesiobuccal (Fig.14 curved arrow). Further proximal reduction and lingual rotation distobuccal leads to complete seating (Fig.15). It appears that incomplete seating at #13 is associated with hex mismatch (Fig.16, large apical space), which will be fixed next visit. One week later, the crown and abutment of #4 are seated together after crown repair (Fig.17). Since the abutment margin is subgingival, the crown is cemented, removed with abutment for residual cement removal and reseated with the abutment with torque at 30 Ncm. After this, the crown and abutment of #13 is reseated after mesiobuccal surface is trimmed (Fig.18), followed by pick up impression. A few days later, the crown/abutment are inserted together smoothly, the former cemented and the complex unscrewed for residual cement removal and last torqued at 30 Ncm without any X-ray confirmation.
Return to Upper Arch Immediate Implant, Trajectory 14 导板与提升 螺丝松动 Torque
Xin Wei, DDS, PhD, MS 1st edition 03/05/2019, last revision 03/27/2021