|
|
|
|
|
|
|
|
||
Tatum Tapered Implant and Abutment (Unipost)
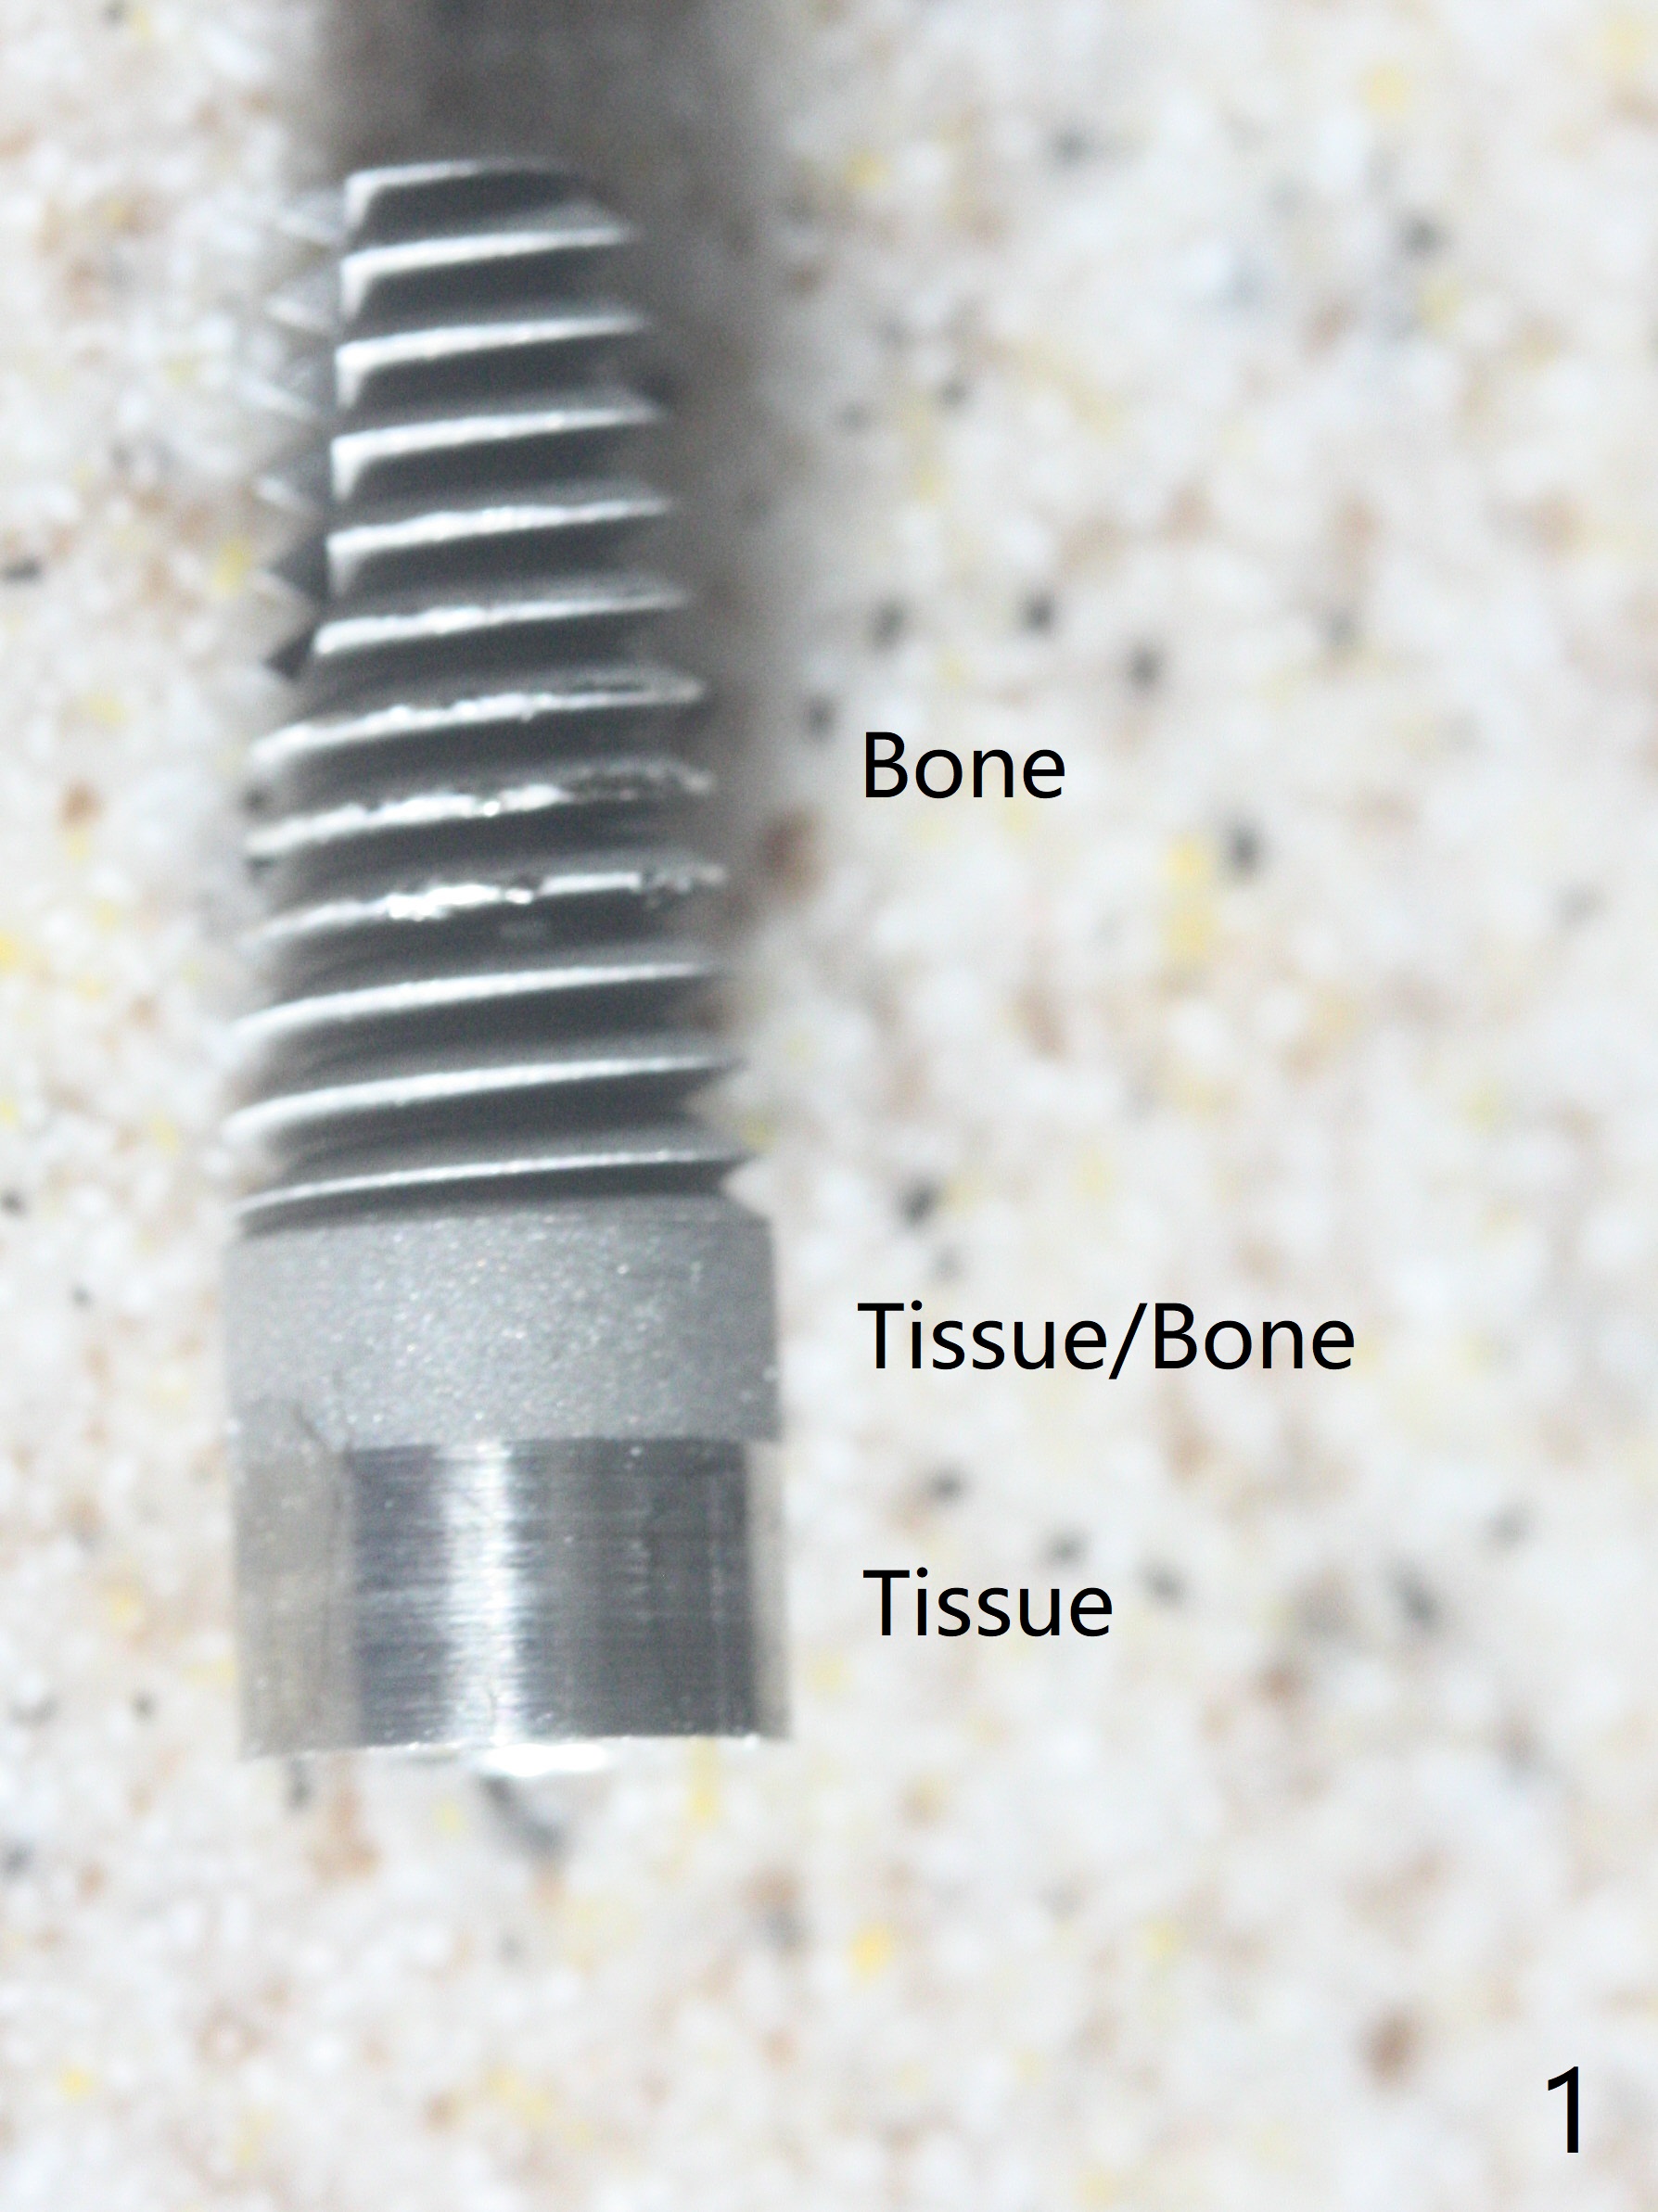
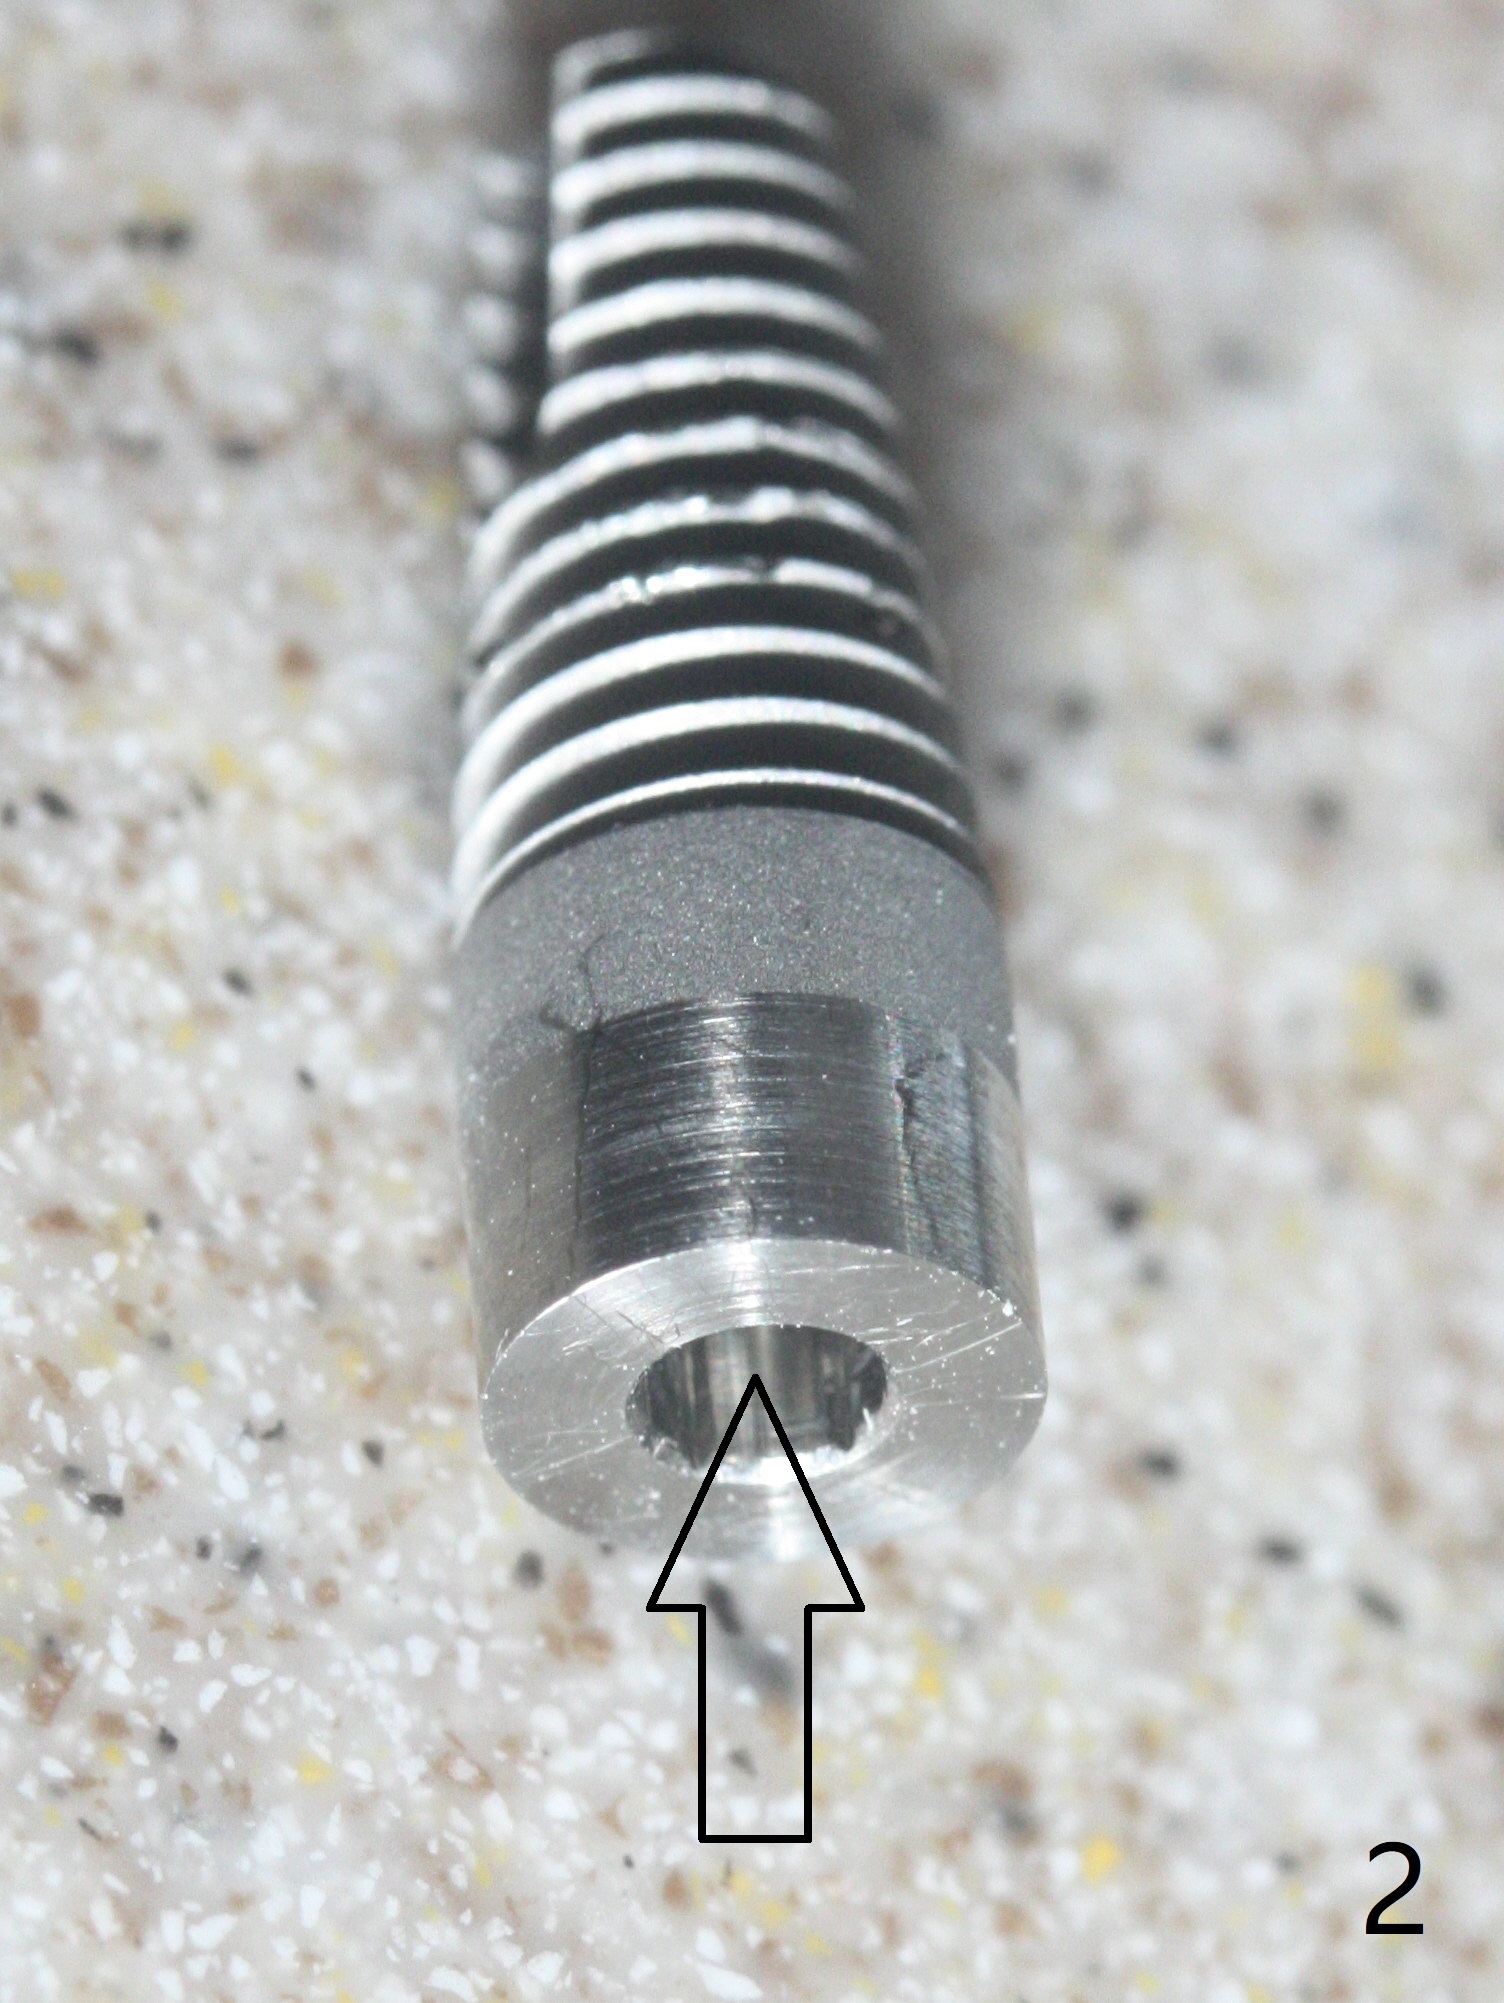
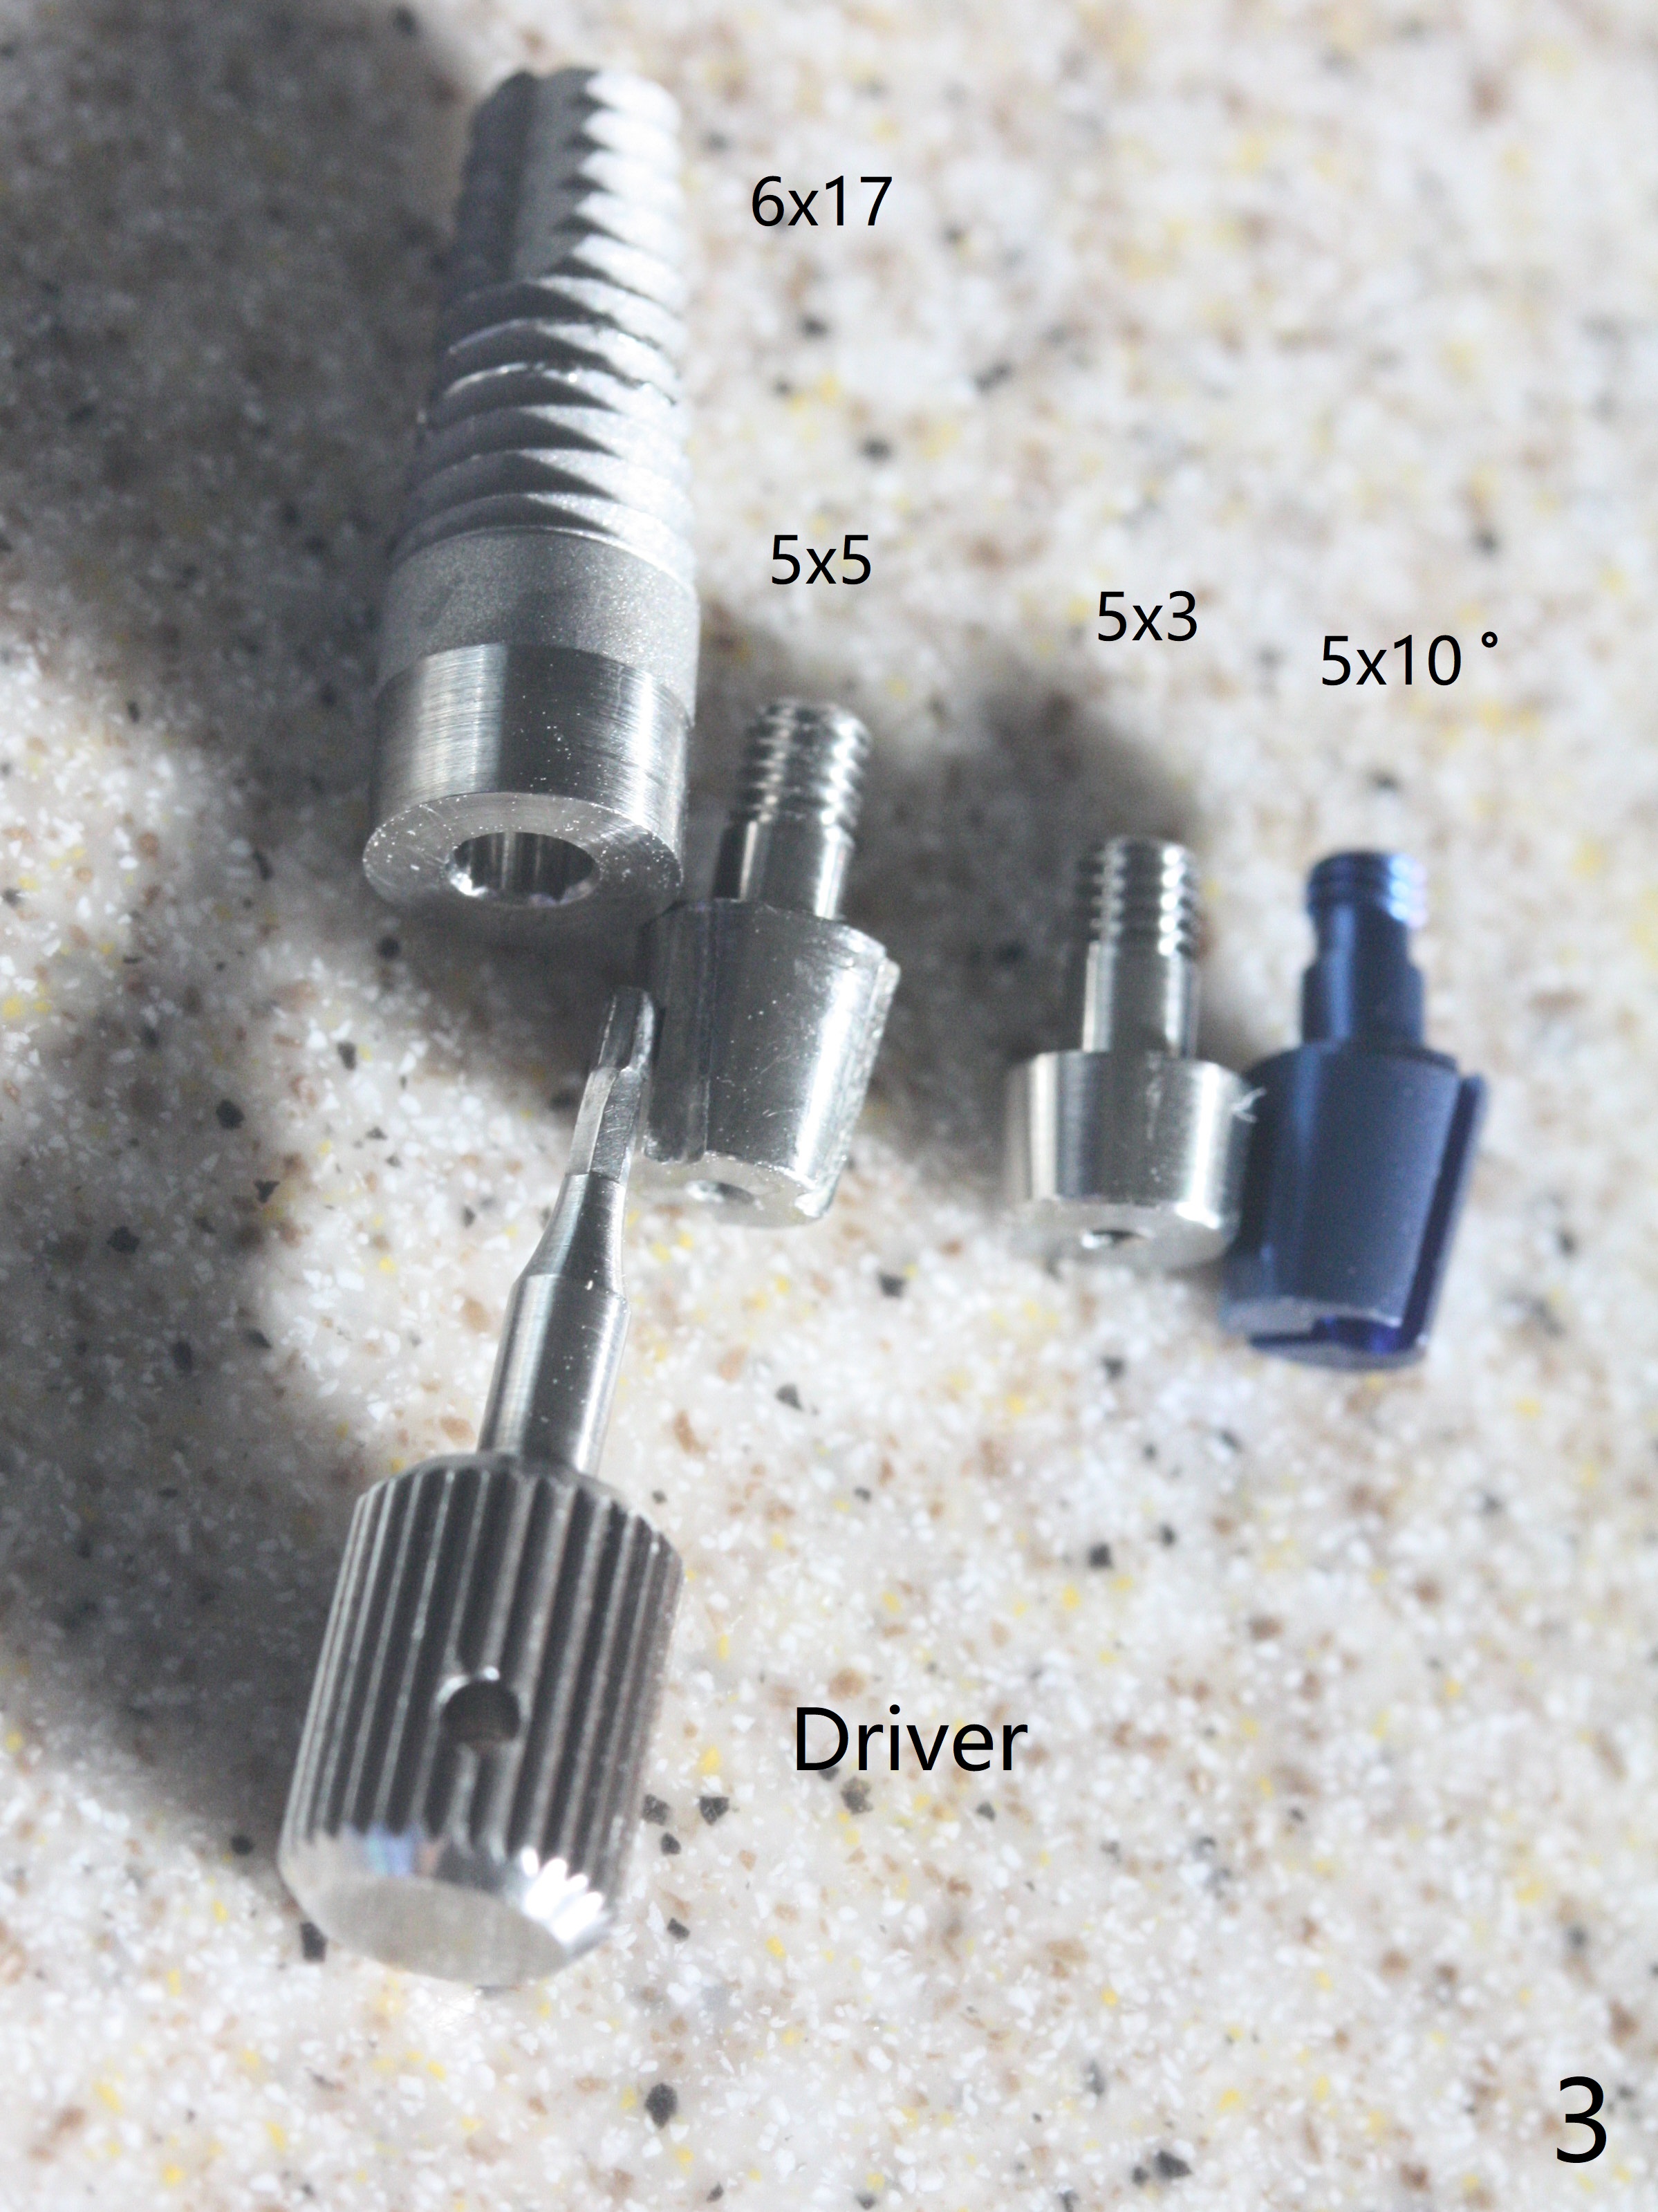
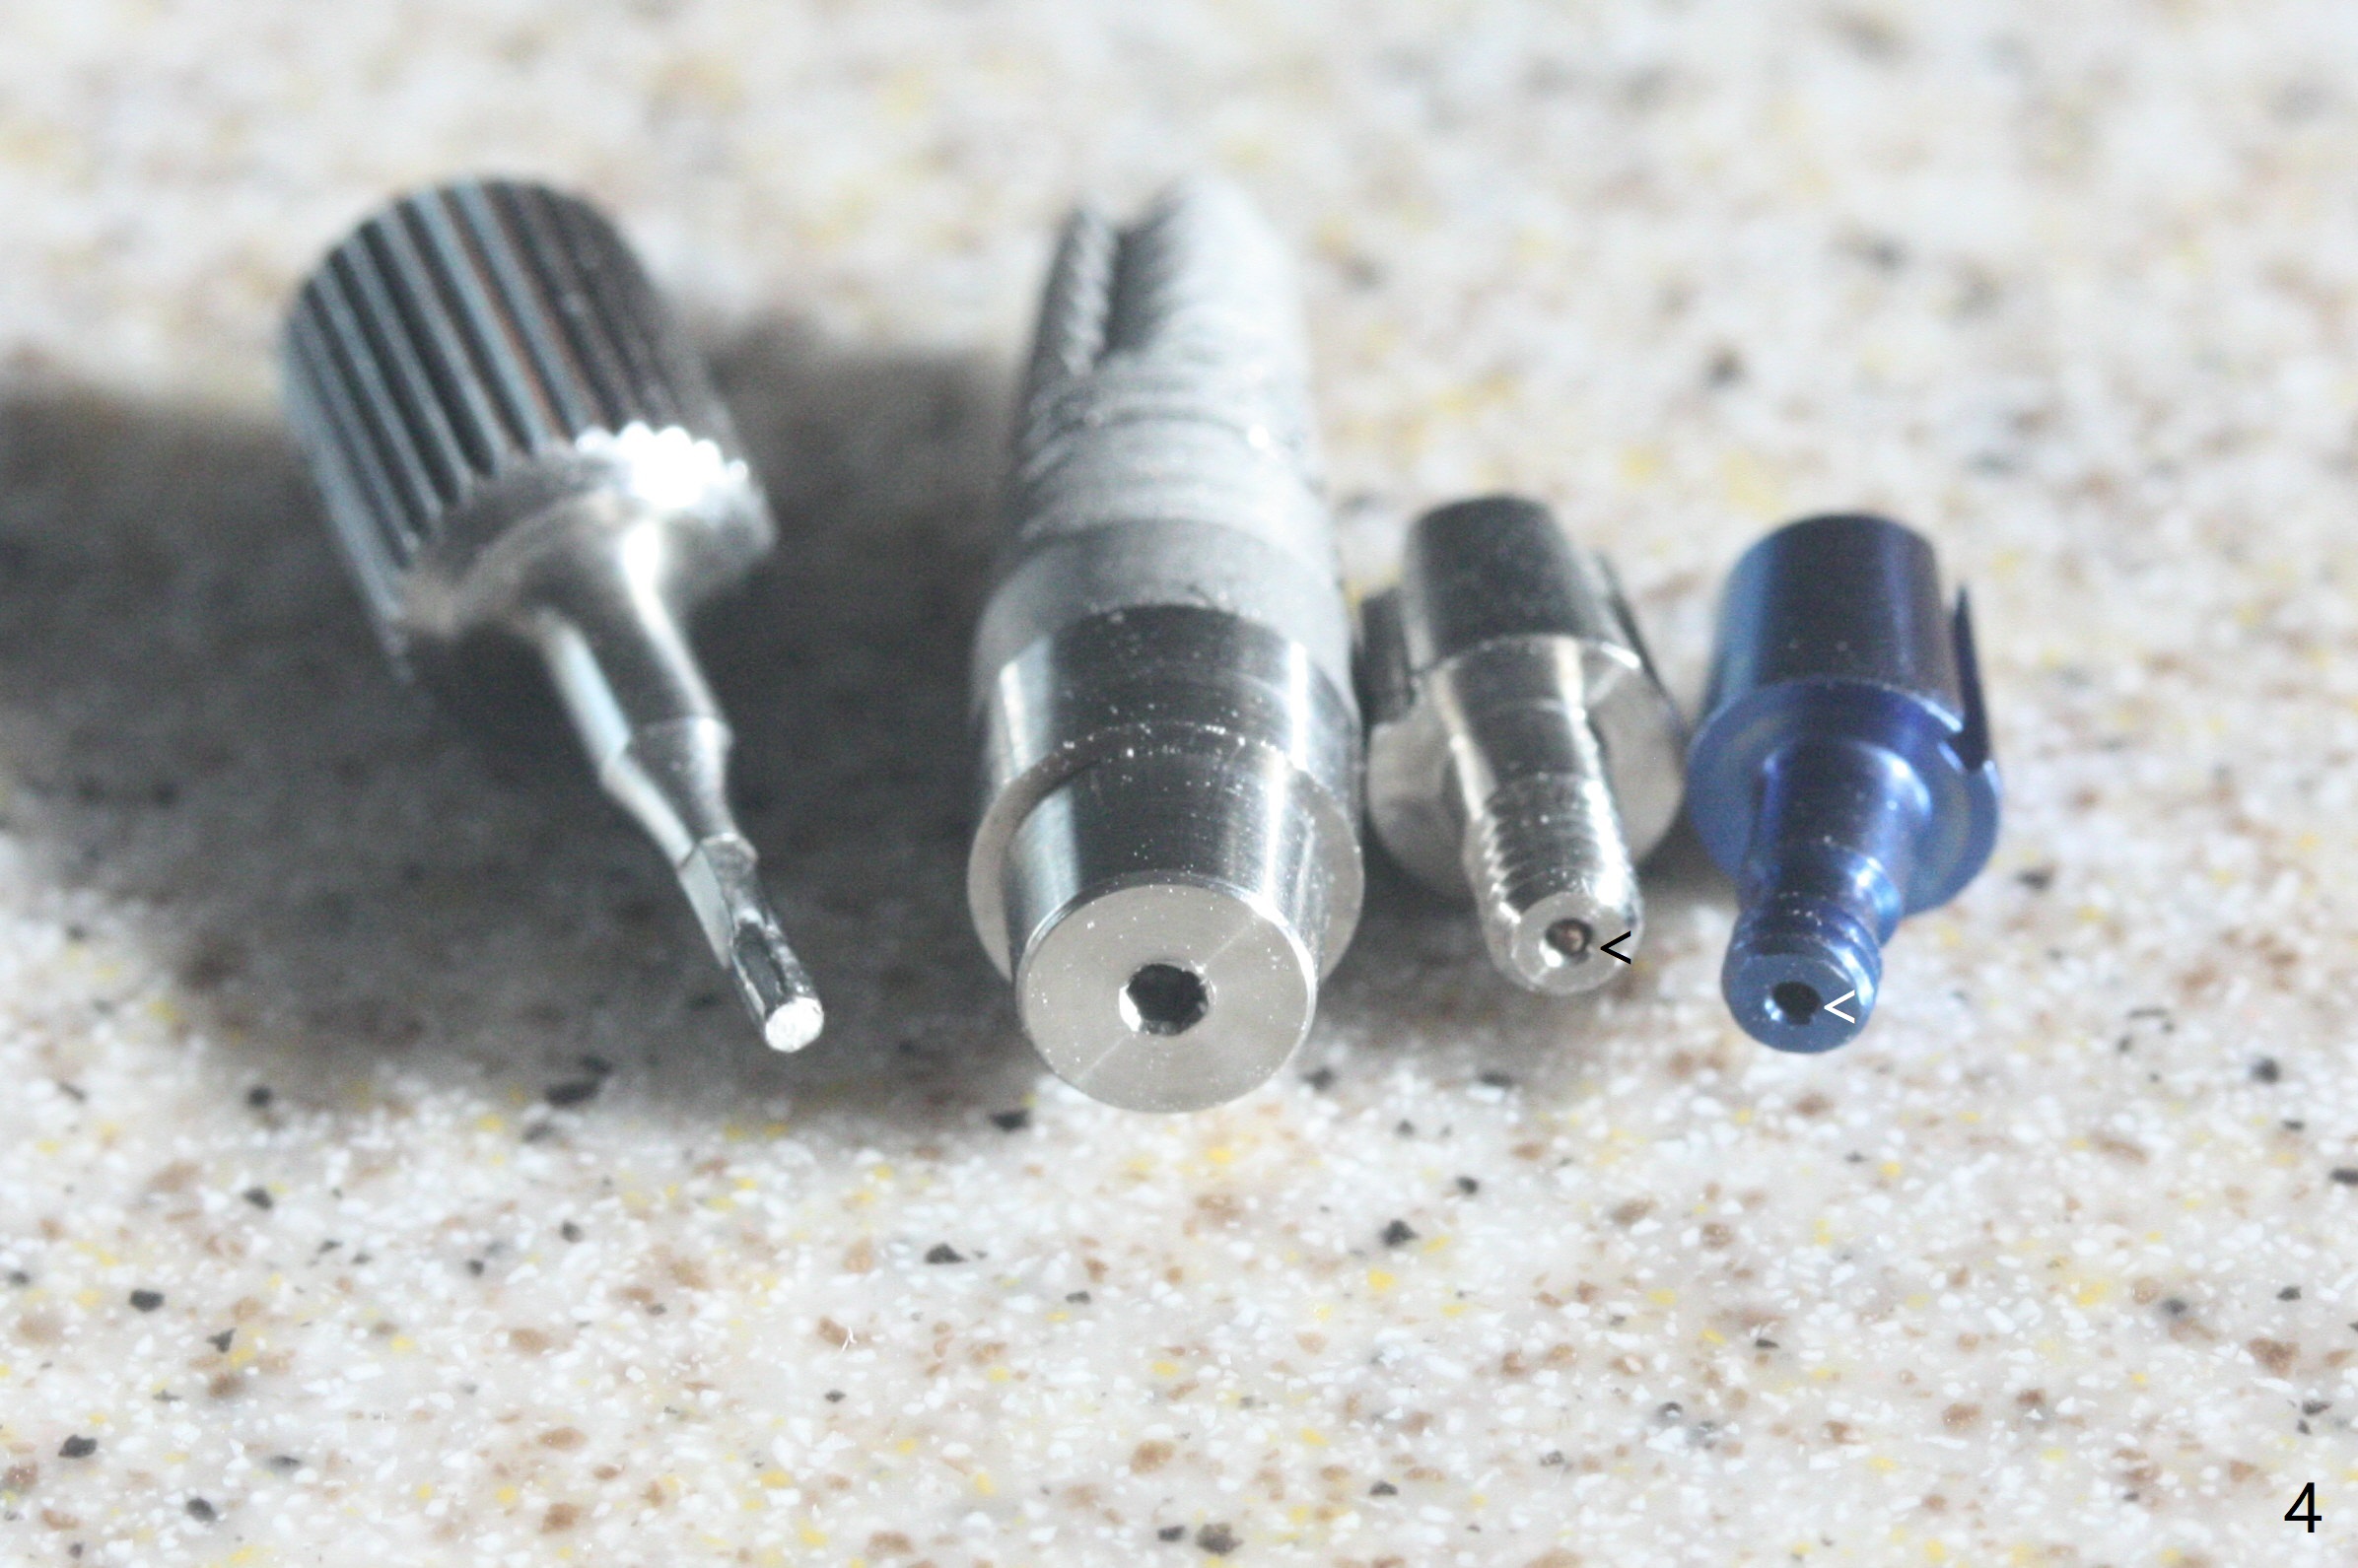
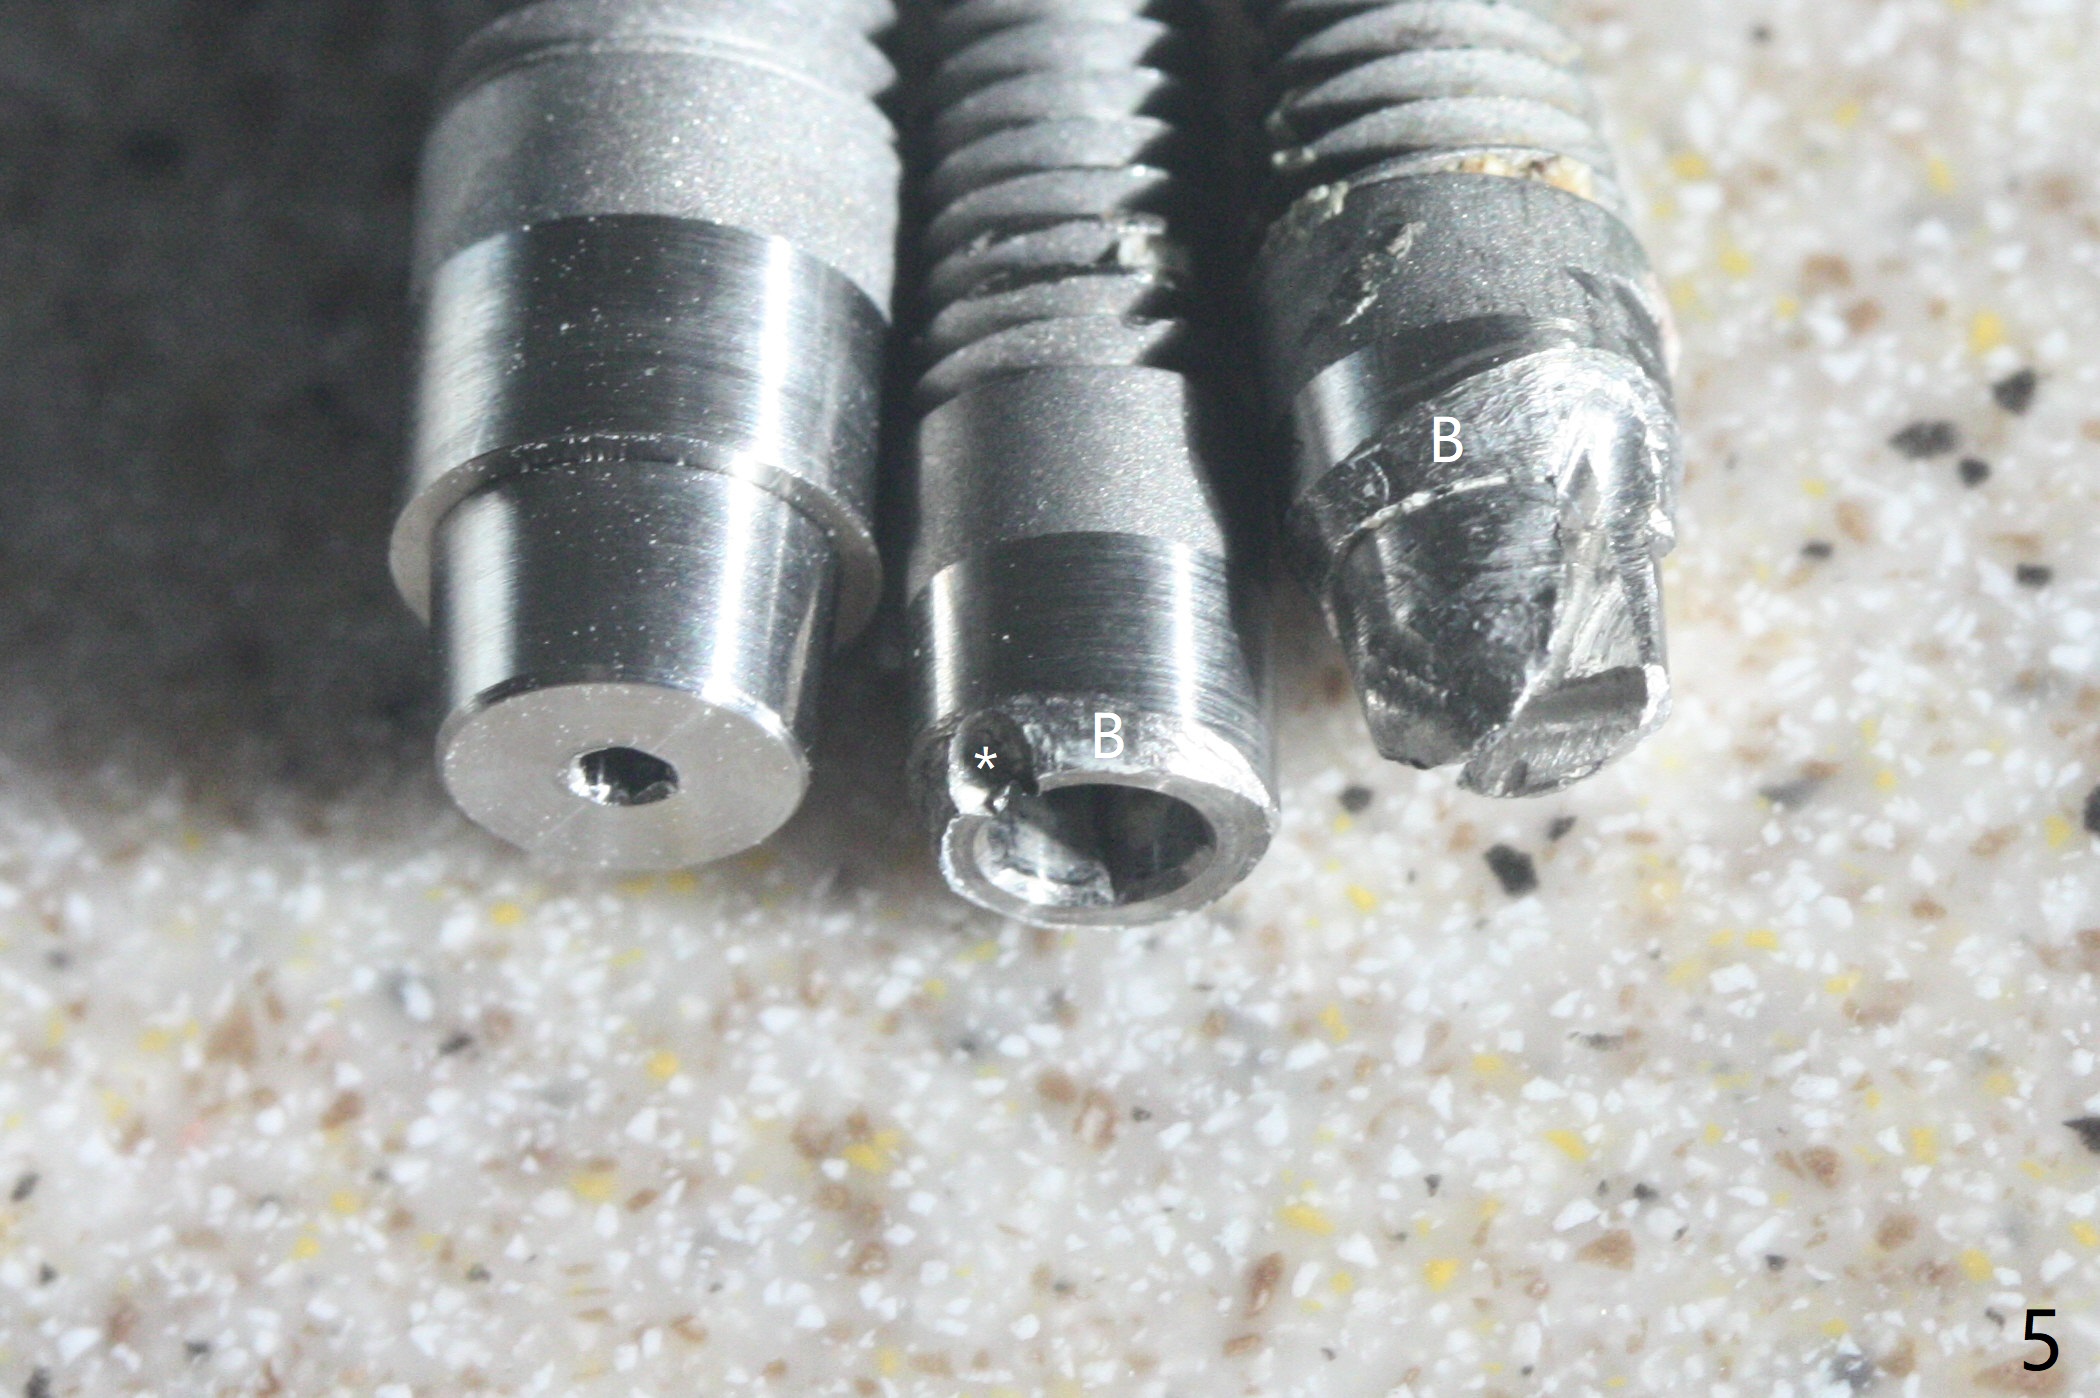
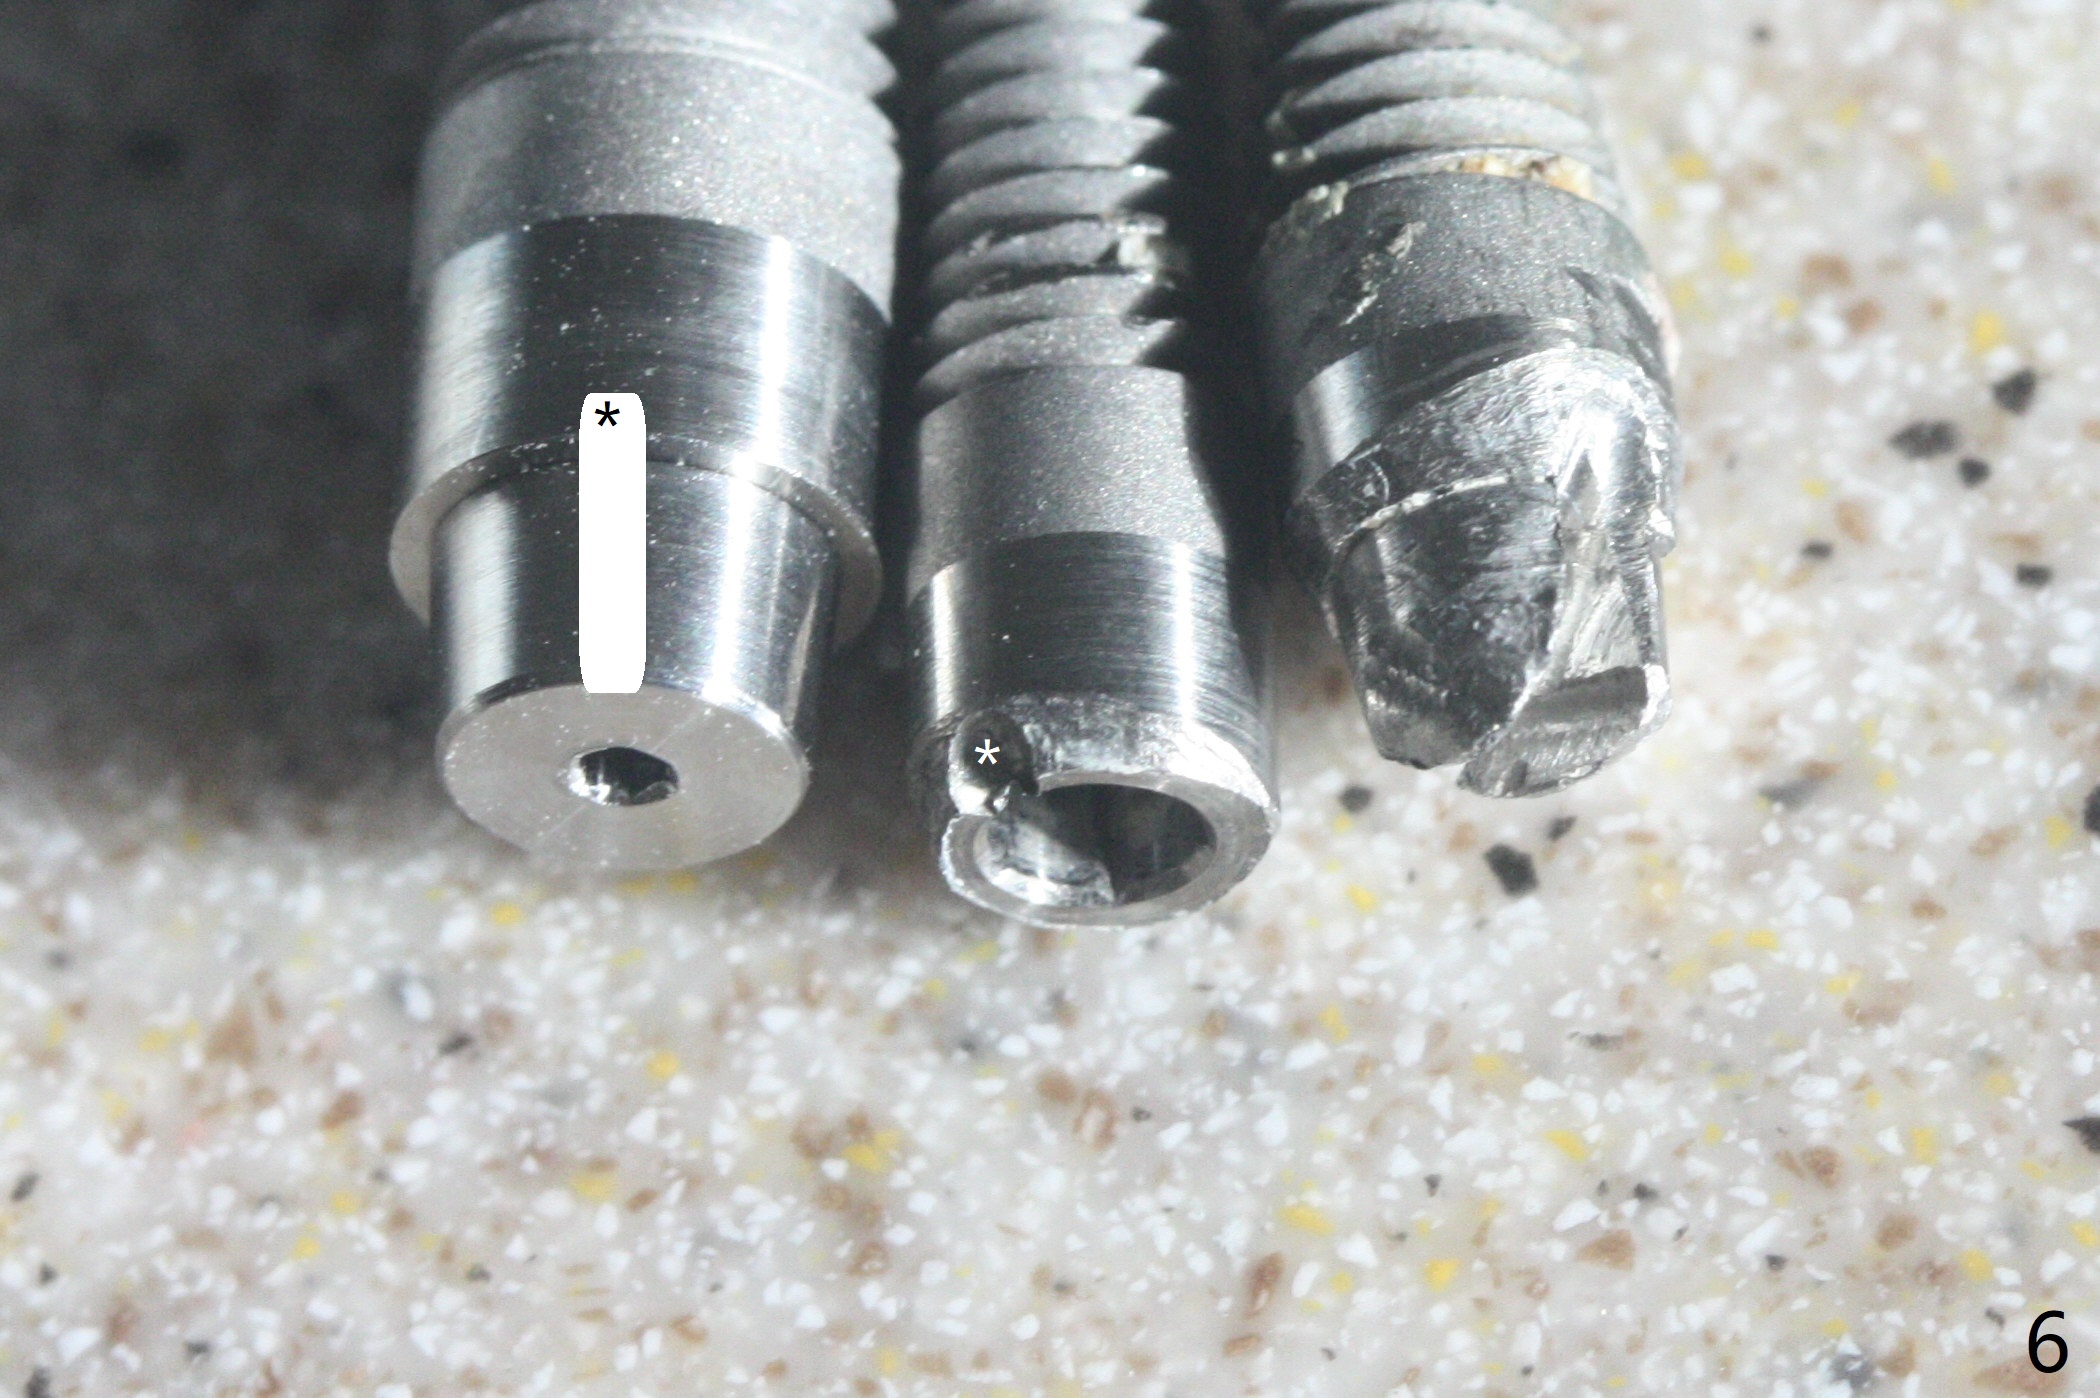
The original version of a Tatum tapered tissue-level implant has 3 portions: thread, rough surface and smooth surface, corresponding to contact with the bone, bone and/or tissue and tissue (Fig.1). Tilt the lower end up and you can see the implant well (abutment seating area, Fig.2 arrow). The abutment should be one size smaller than the implant so that the crown margin can be seated on the implant (Fig.3 (3 abutments: 5x5 mm, 5x3 mm (straight), 5x10 degree (angled, blue)). The hole of the angled abutment for the abutment driver is off center. Tighten the abutment counterclockwise; to loosen it clockwise (Fig.4). It should be done with the fingers. To loosen the angled abutment, slightly drag the abutment from the implant using the driver. In Fig.4, the 5x3 mm abutment is seated in the implant well, while the other abutments turn upside down to show the escape holes (<). Choose the longer abutment for better retention. Excess length could be trimmed next. Apply a cement (better Calibra, Paneveria or RelyX Ultimate Adhesive Resin Cement, syringe) into the implant well (half full). Turn the preferred abutment counterclockwise until it is tight for the straight one (abutment). For an angled abutment, turn it into the desired position/angle and cure 5 second. Remove excess cement and cure another 20 second, as instructed by manufacture. When a straight abutment is turning tight, excess cement escapes between the space between the implant and abutment. Sometimes the excess cement enters the escape hole and channel and push the abutment driver out of the coronal end of the abutment into the oral cavity. It is the best to tie a piece of dental floss to the driver hole (Fig.3 *). The connection between the angled abutment and implant is looser (cement is critical. Adhesive one is required). Dislodgement of the abutment driver is rare. After cementation, apply Cetacaine (a liquid topical) with an explorer or syringe into the space between the gingiva and the implant (or local anesthetic) and pack 2 gingival retraction cords. It is the best to use water pik to clean the region daily preop to keep the gingiva healthy. Use a bevel diamond bur to prepare a bevel or chamfer margin in the implant in situ (Fig.5 B). Choose the widest bevel region to create a retention groove (using a carbide bur) in the abutment and into the implant bevel margin (Fig.6 white area and *). The inner surface of the future crown will have a retention slot, which will lock the abutment and the implant. Also prepare for parallelism (crown seating direction) and occlusal clearance (diamond bur). It is beneficial to ask the lab to make the smallest escape hole in the occlusal surface of the crown so that excess cement for the crown will not enter the gingival crevice.
Return to
Implant & Ortho
Professionals
14
Abutment Placement
Xin Wei,
DDS, PhD, MS 1st edition 07/11/2020, last revision
07/17/2020