|
|
|
|
|
|
|
|
|
|
|
|
|
|
|
|
Trajectory for Anterior Implants
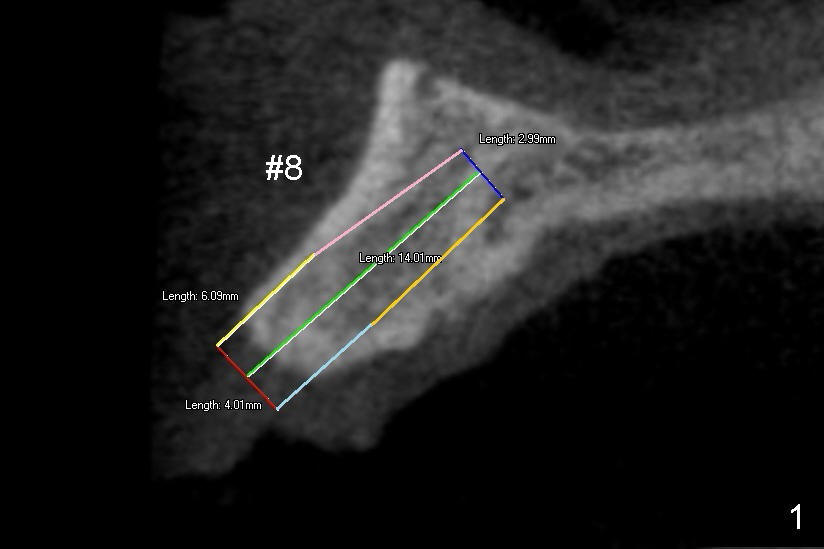
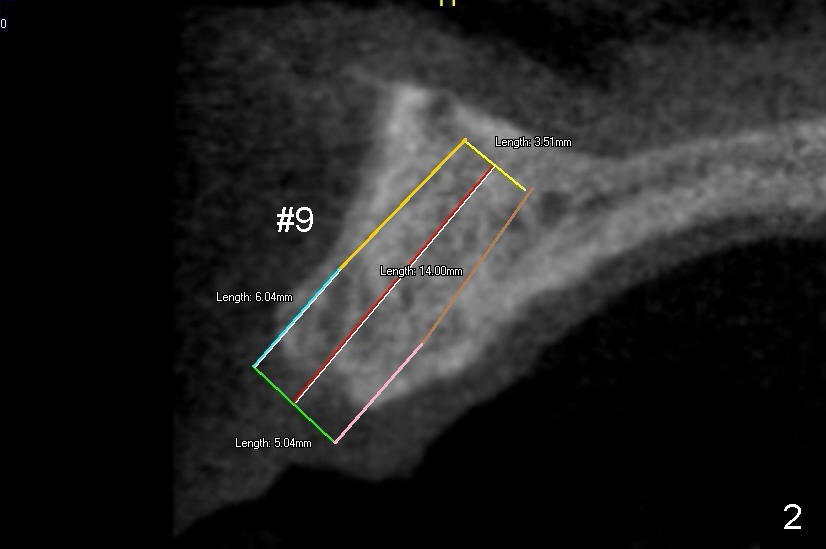
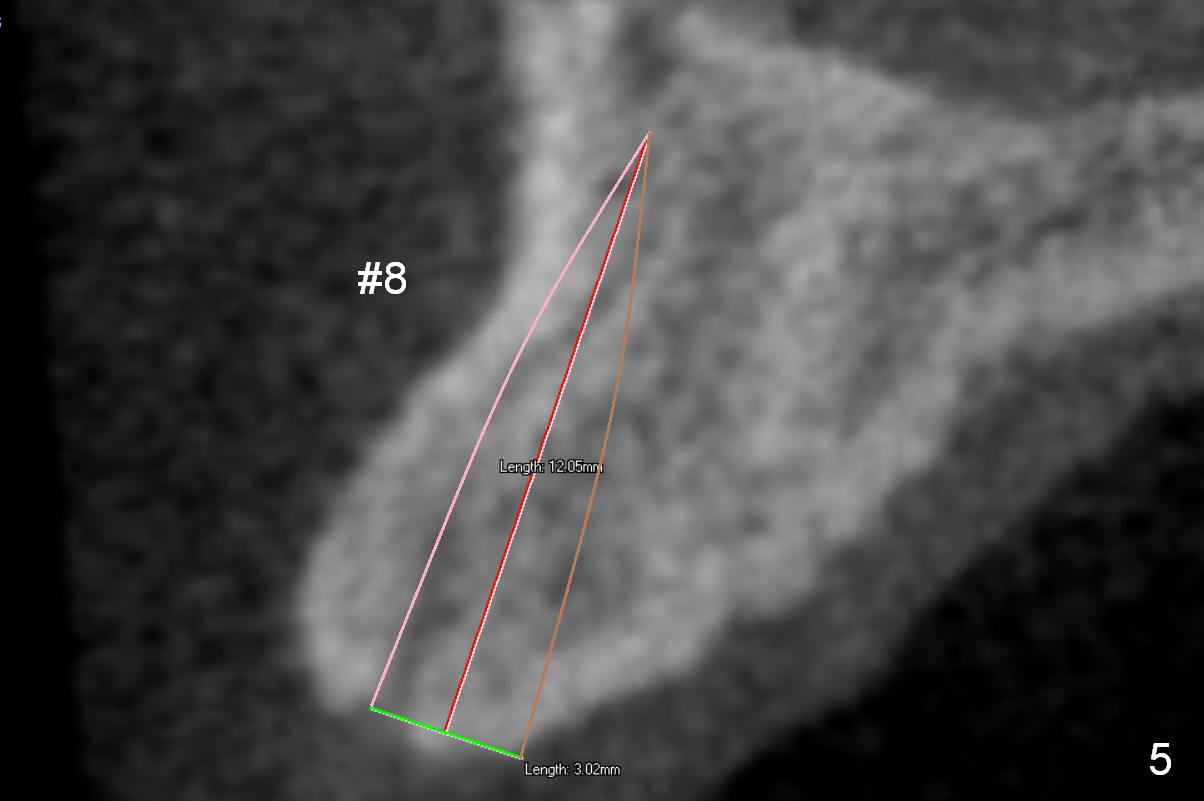
There are two types of implant design for the upper central incisors. The first one is to place implants as large as possible (Fig.1,2), i.e., place the implants in the middle of the alveolar bone, irrespective of the occlusion with the opposing.
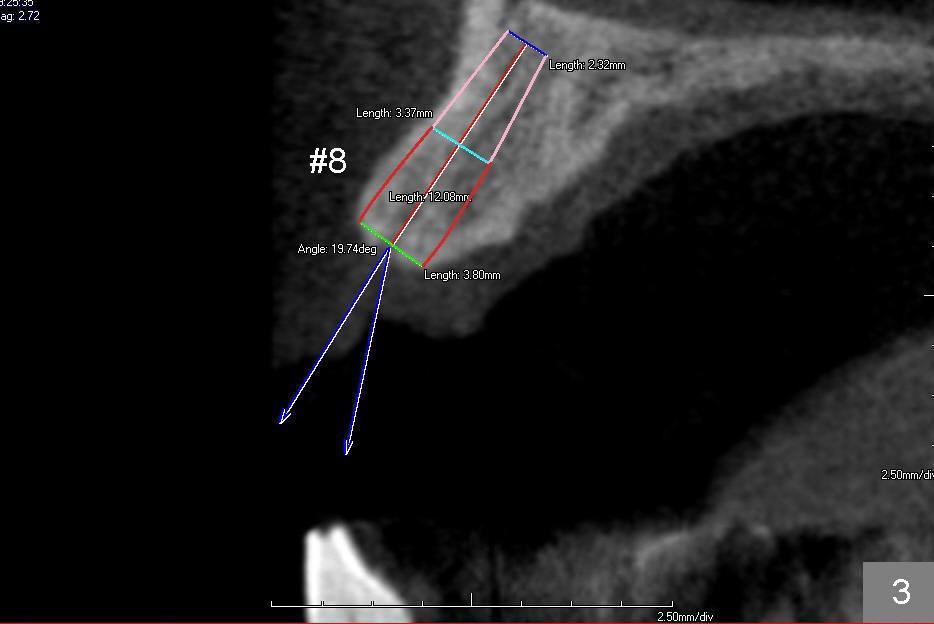
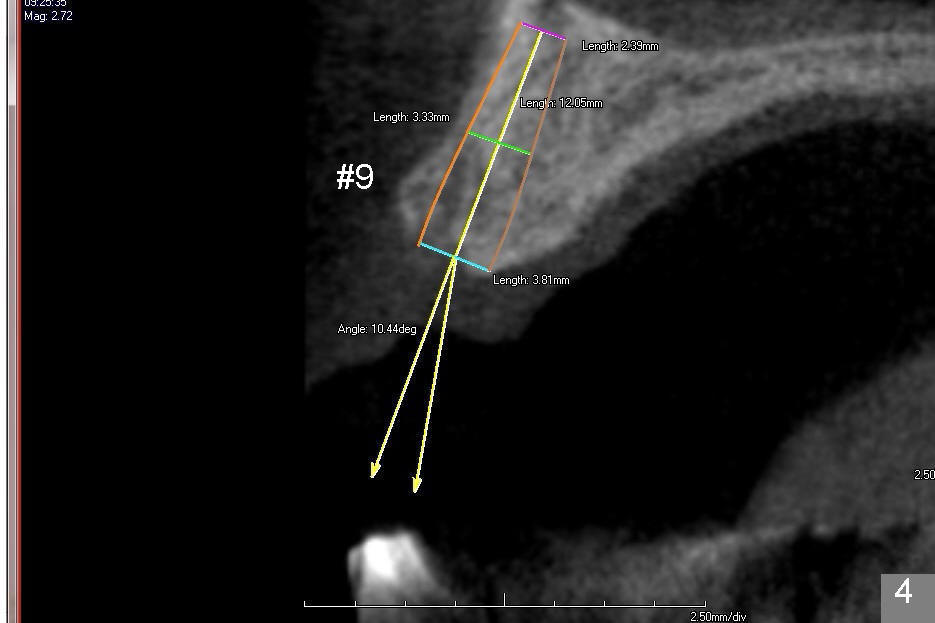
The second design is to place relatively smaller implants with the occlusion in mind (Fig.3,4). The starting point for the osteotomy will be as lingual as possible (especially Fig.4). The axis of the implant will be more parallel to the buccal plate. The angles of the angled abutments will be less (Fig.1 vs. 3; Fig.2 vs. 4). The cosmetic result may be better.
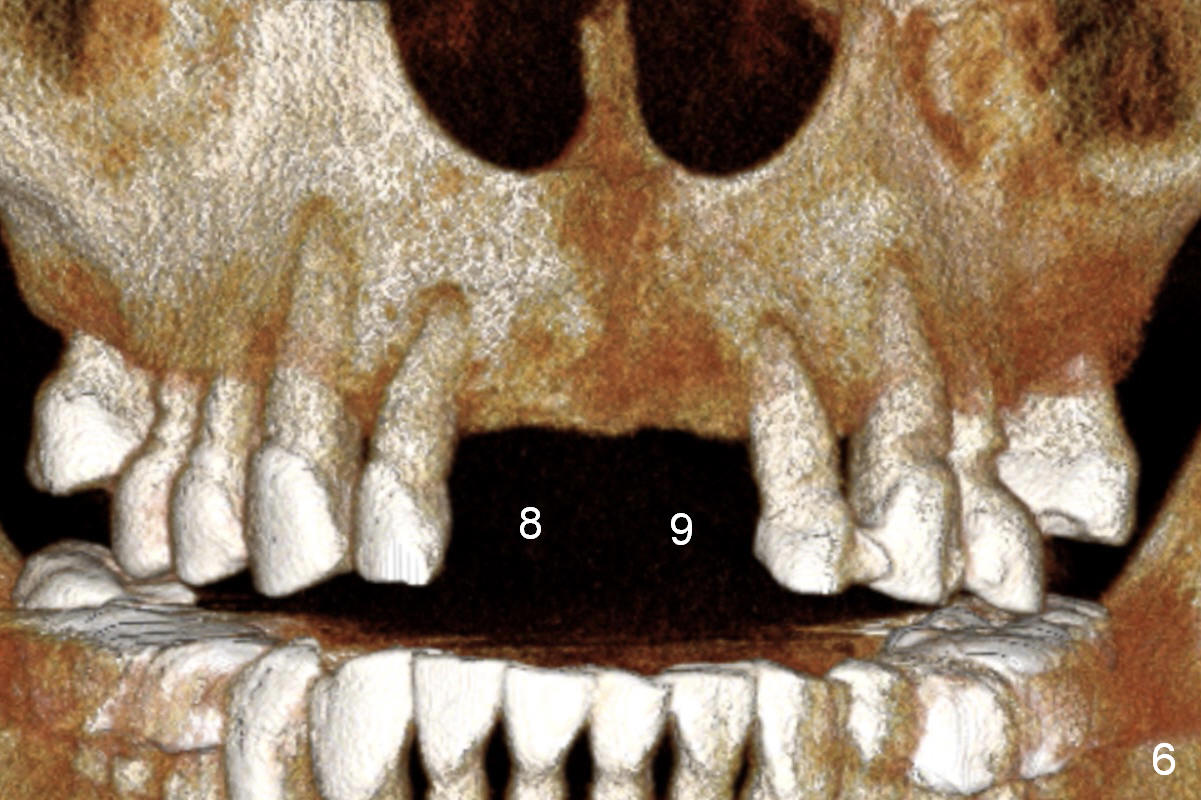
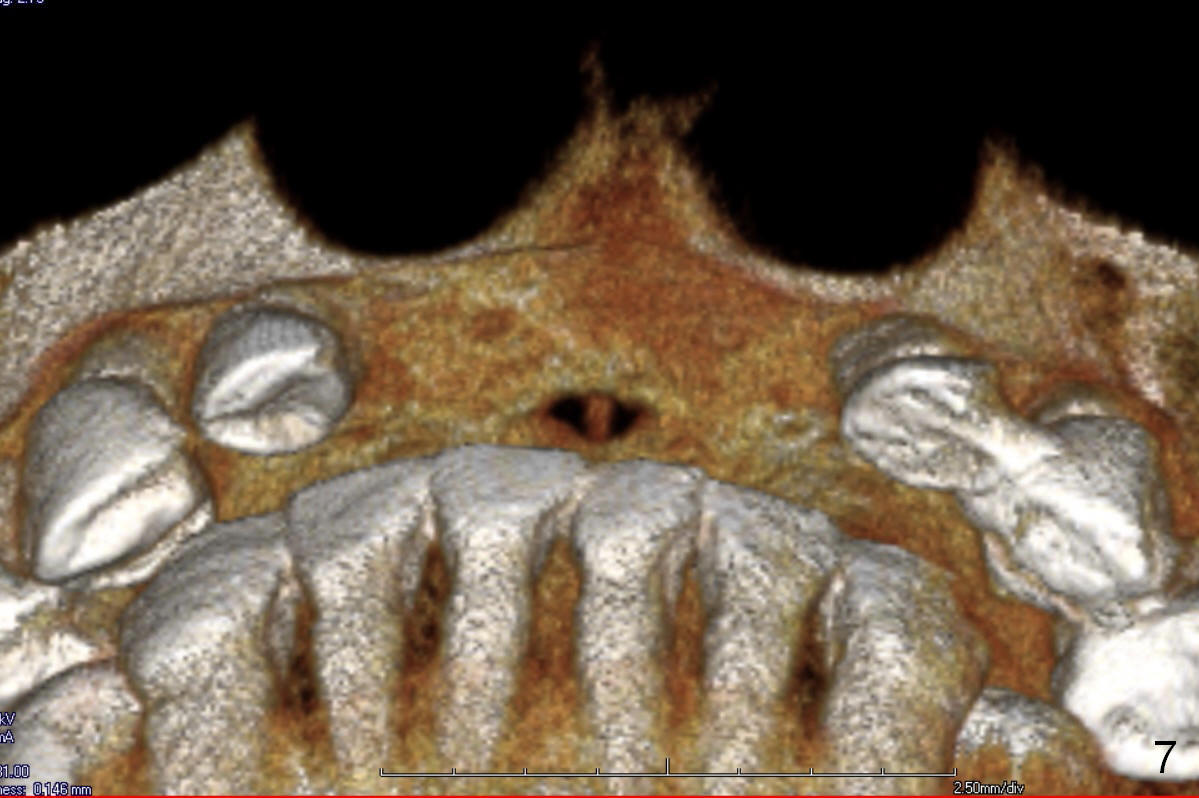
Since previous surgeries have demonstrated dense bone, bone expansion will be not used. Regular drills or reamers will be used for osteotomy. Pay attention to the Incisive Foramen while starting osteotomy (Fig.6,7).
One piece implants (3 (angled or not, Fig.5) or 3.5 mm) may be tried (1,2,3). If SM (having gold coated abutment) or UF implants are selected, temporary abutments may be used for better adjustment of the gingival tissue around the provisional crowns.
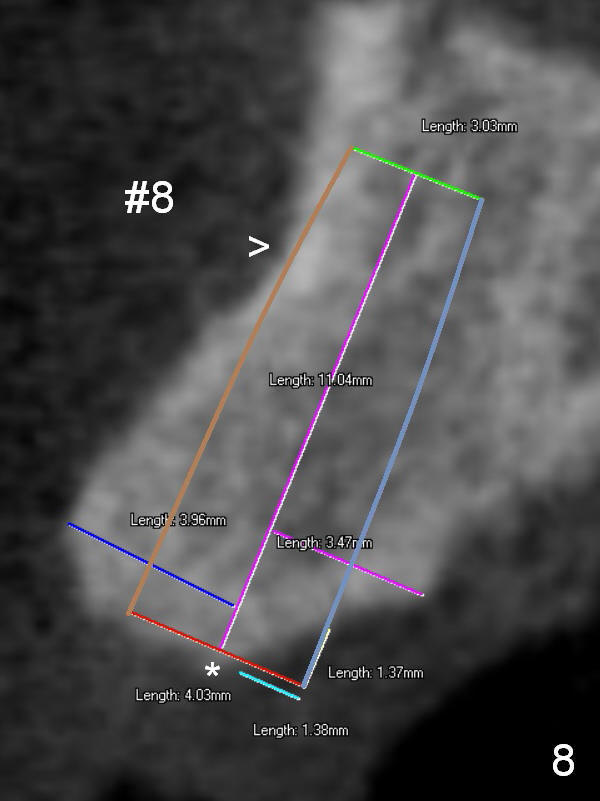
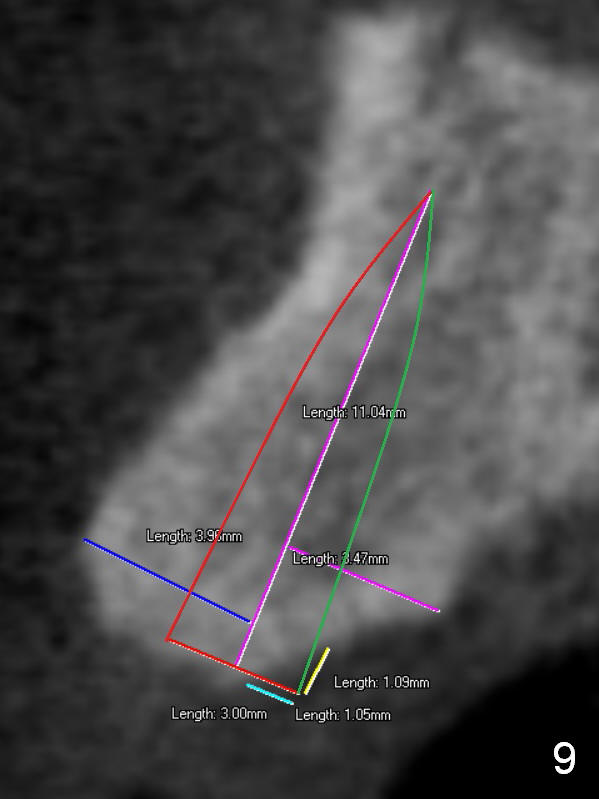
For the best trajectory, osteotomy at #8 should be initiated as palatally as possible (Fig.8 *). When a 4x11 mm 2-piece implant is placed, there is possibility that the apical buccal plate may be perforated (>). In contrast, a 3x11 mm 1-piece implant is more skinny with less coronal palatal thread exposure (Fig.9). The latter will be covered with bone graft and collagen dressing.
Return to
Upper Incisor Immediate
Implant,
IBS
Xin Wei, DDS, PhD, MS 1st edition 08/13/2014, last revision 09/29/2018