
%20mobility,%203%20m%20postop.jpg)
,%20trimmed,%20temp.jpg)
|
|
|
|
|
|
|
|
|
|
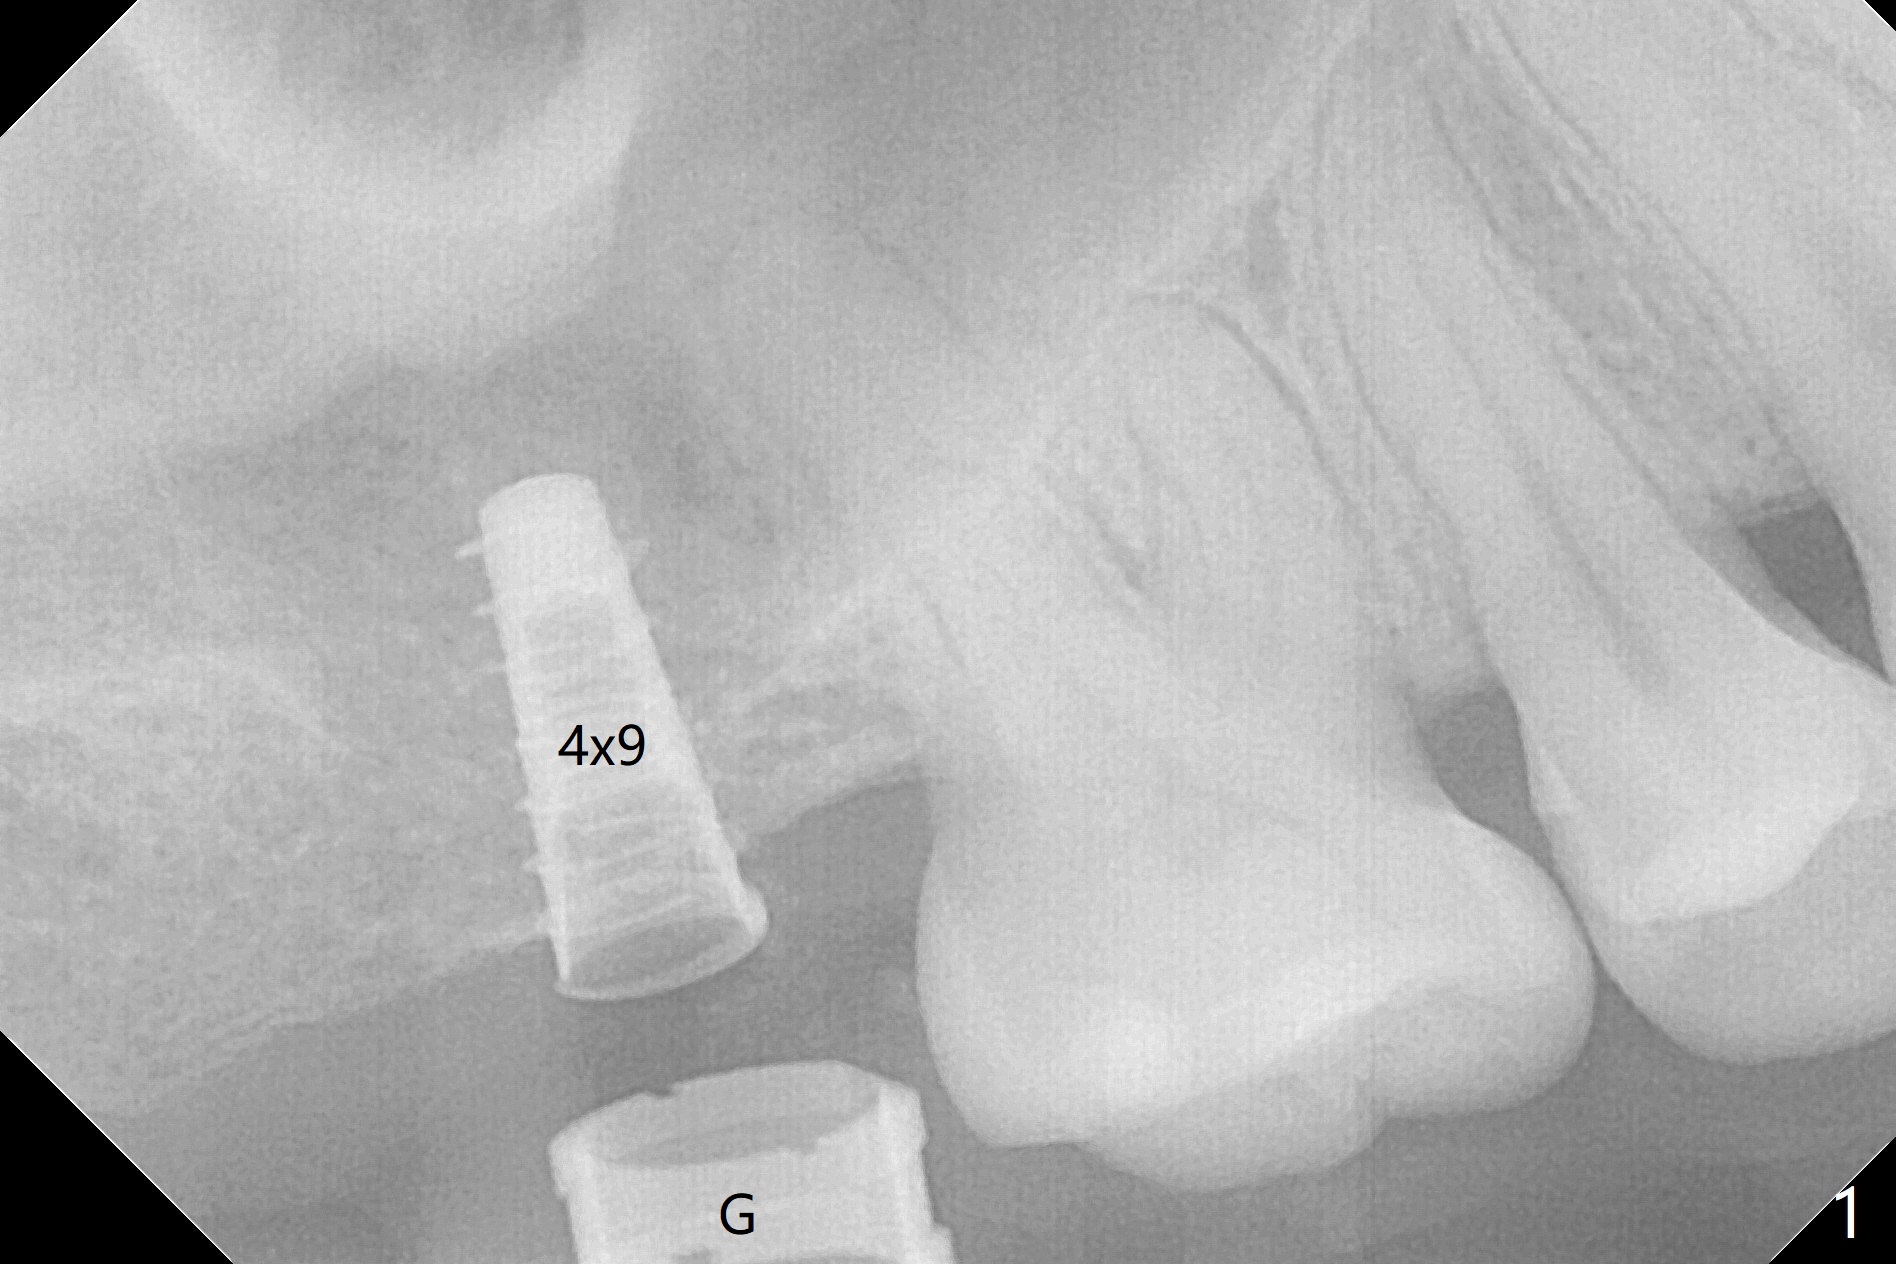
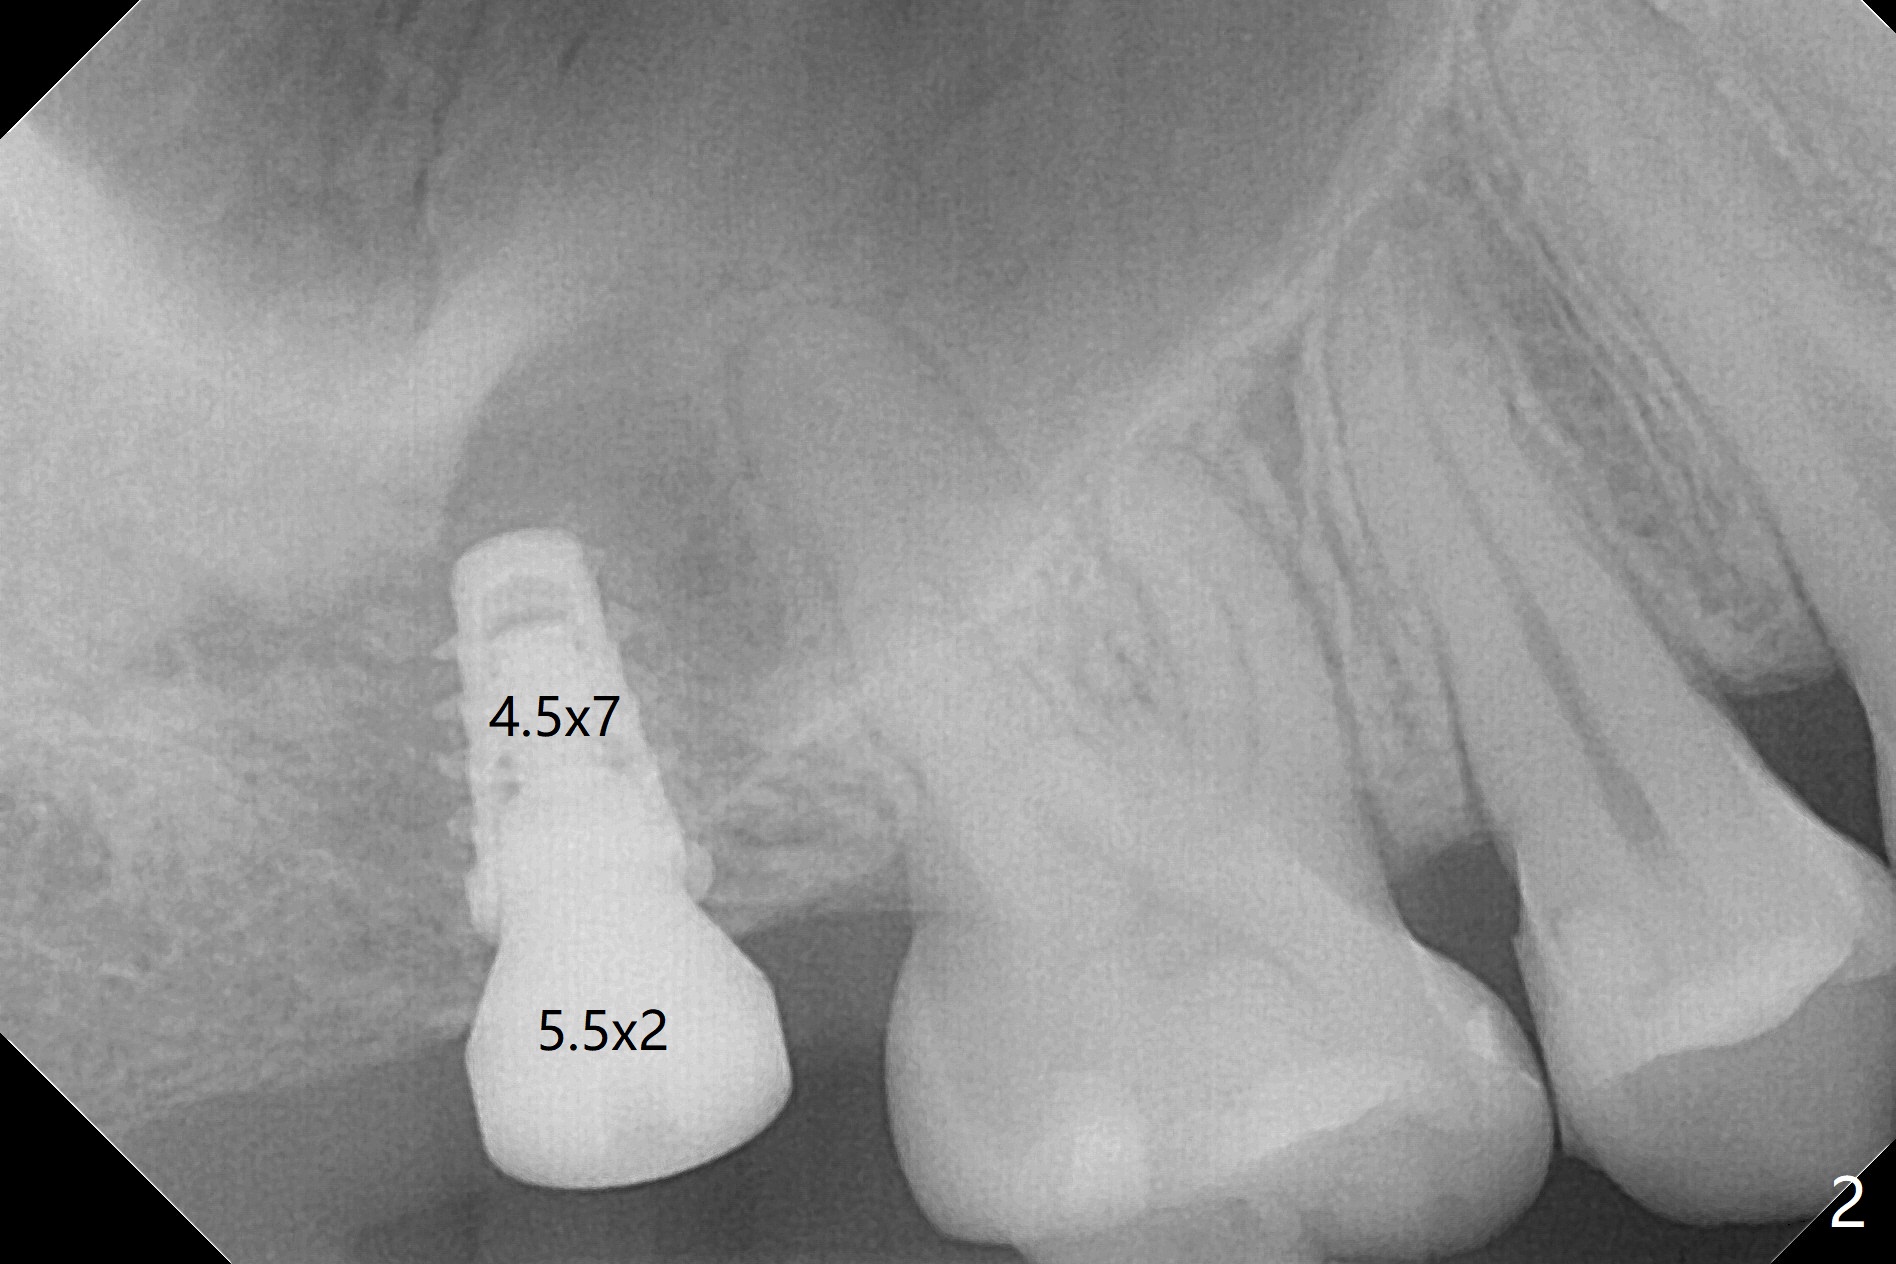
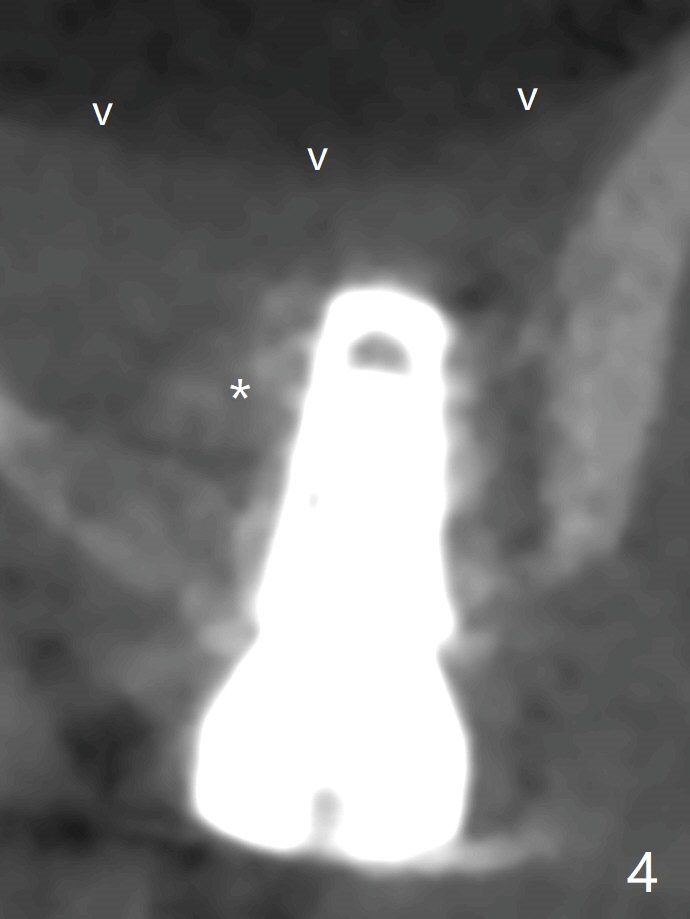
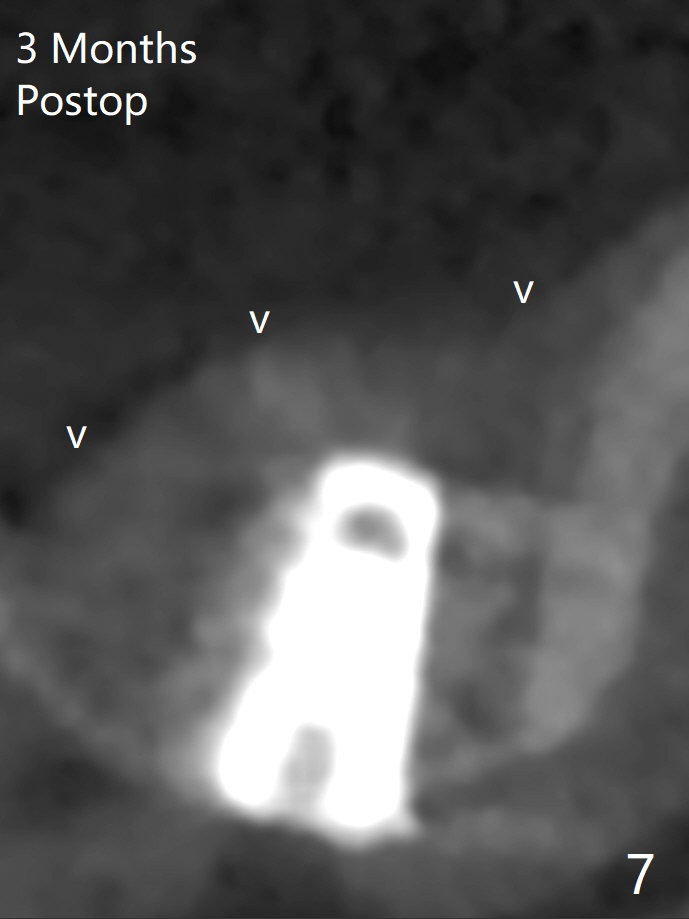
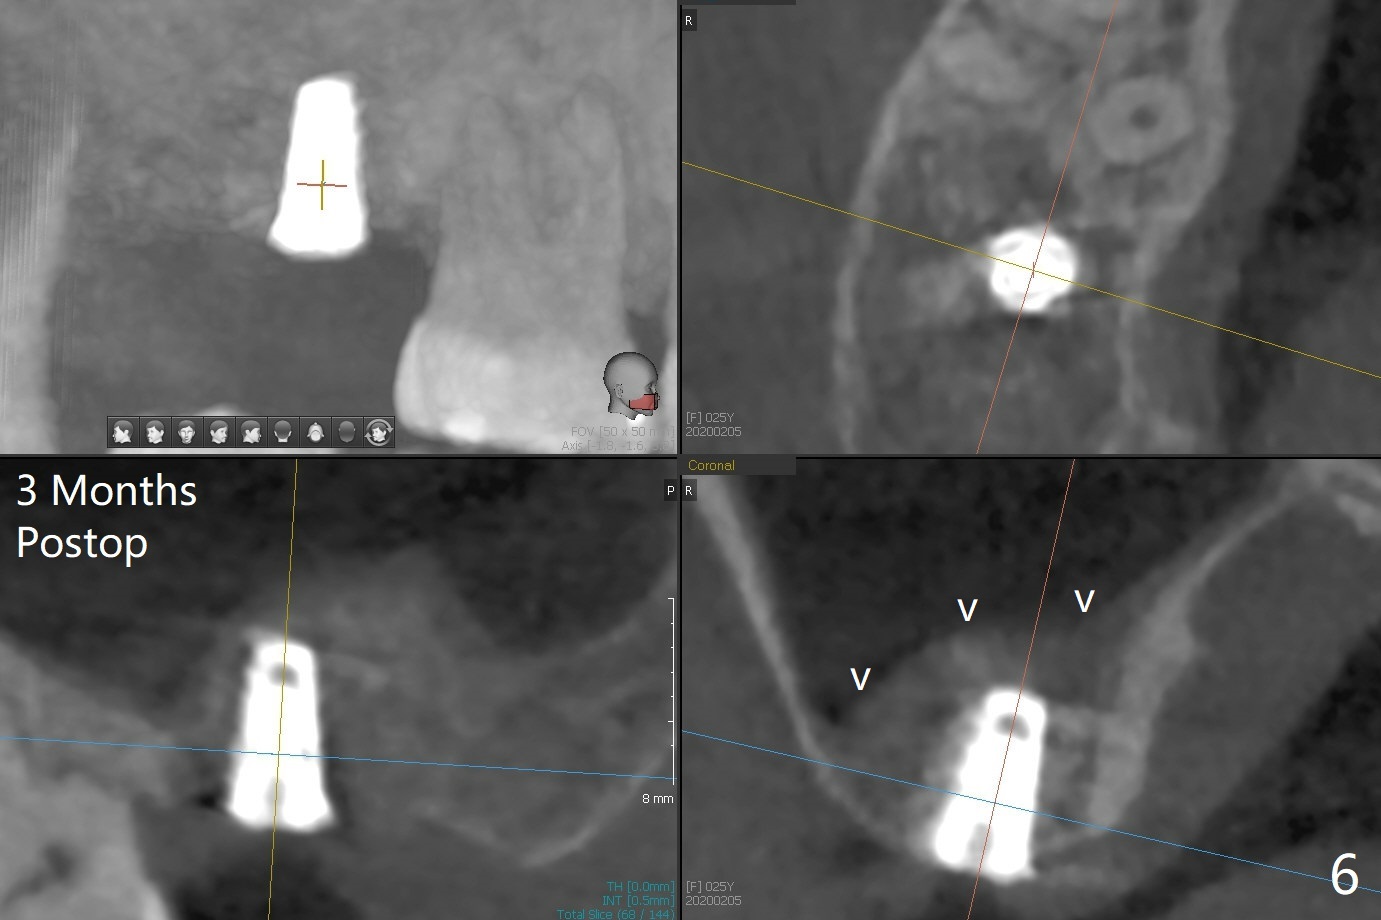
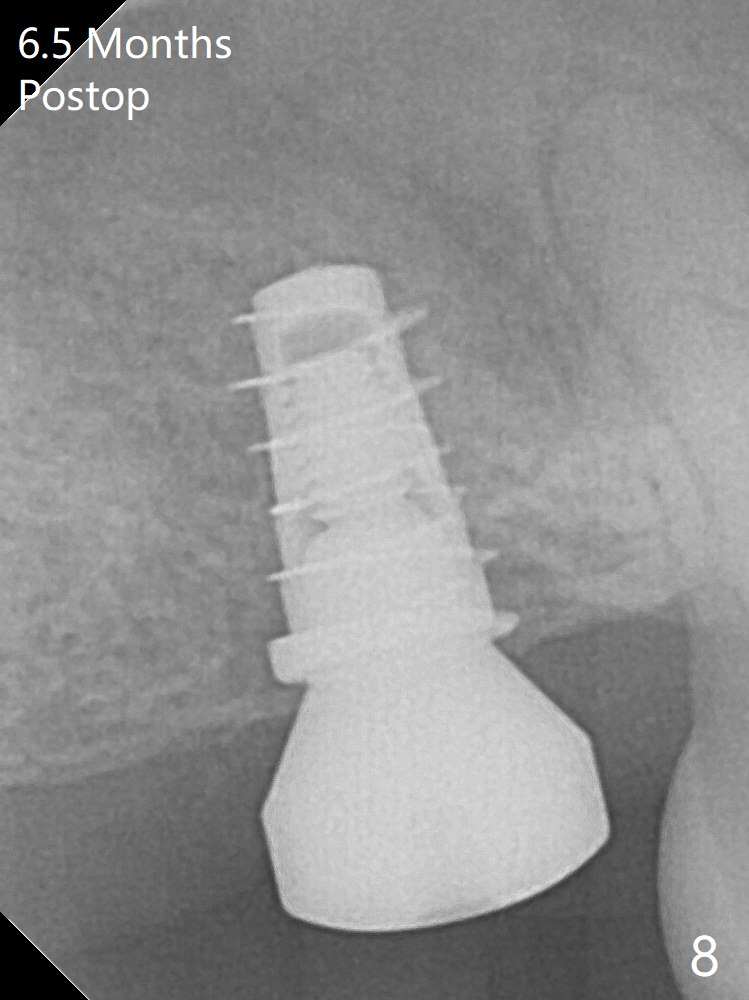
With 4-5 mm remaining bone at #2, the initial osteotomy is 4.0x3.5 mm with regular drills with sharp end. After using 3.6 mm sinus drill with round end for ~ 4 mm in depth, water lifting is conducted smoothly. After use of the same safe drill for ~ 5 mm, water lifting is done. Nose blowing indicates possible sinus membrane perforation. With insertion of collagen plug (PRF is not prepared because of thin vein), mixture of autogenous bone and allograft is lifted with 4x9 mm dummy implant with a guide (Fig.1 G). With placement of more of bone graft, a 4.5x7 mm definitive implant is placed with ~ 25 Ncm (Fig.2). Although bone graft around the implant is limited (Fig.3,4 *), the sinus membrane is lifted (in fact expanded by water) substantially (arrowheads, as compared to preop CT). The healing abutment is dislodged 1 month postop. Before impression, use sensor 1 to take PA to determine whether the abutment contacts the crestal bone or not. Take 5x5 cm CT for sinus membrane thickness. Although the bone graft surrounds the implant 3 months postop, the implant is tender when a 4.5x4(2) mm cemented abutment is being placed (Fig.5). Later a healing screw is placed (Fig.6,7). The sinus membrane has shrunk (arrowheads). Progressive loading is mandatory. The implant is uncovered with a 6x2 mm healing abutment 6.5 months postop (Fig.8). A 5.5x4(2) mm pair abutment is placed and torqued at ~20 Ncm with mild tenderness 7 months postop (Fig.9 BW). A provisional is fabricated for progressive loading because of mild crestal bone loss (*). The abutment is able to be torqued at 35 Ncm 9 months postop. Impression is taken. Return to Upper Molar Immediate Implant Trajectory II 18 Next Case with 3-4 mm Bone Screw Xin Wei, DDS, PhD, MS 1st edition 10/29/2019, last revision 02/23/2021