
|
|
|
|
|
|
|
|
|
|
|
|
Sinus Lift From Crestal Approach to Lateral Window Approach
This section is written in honor of my assistants Carmen Tran and Suniti Upadhyay in preparation for the surgery, which will be presented later.
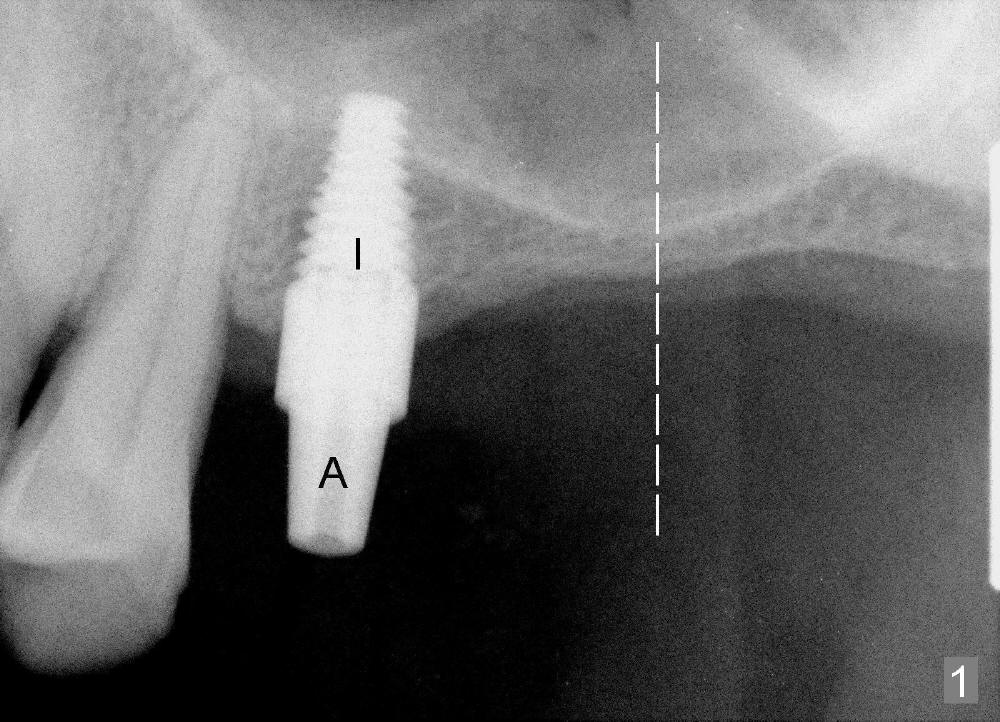
A 53-year-old man is afraid of pain. It is hard for him to have the first implant (Fig.1 I: 4.5x11 mm) placed at the site of #13 with sinus lift from the crestal approach. An abutment is placed immediately (A: 3.5 mm 0º), followed by an immediate provisional. The 2nd implant to be placed is at the site of #14 with 2 mm bone height (Fig.1 dashed line area). It appears that sinus lift should be done with lateral window approach.
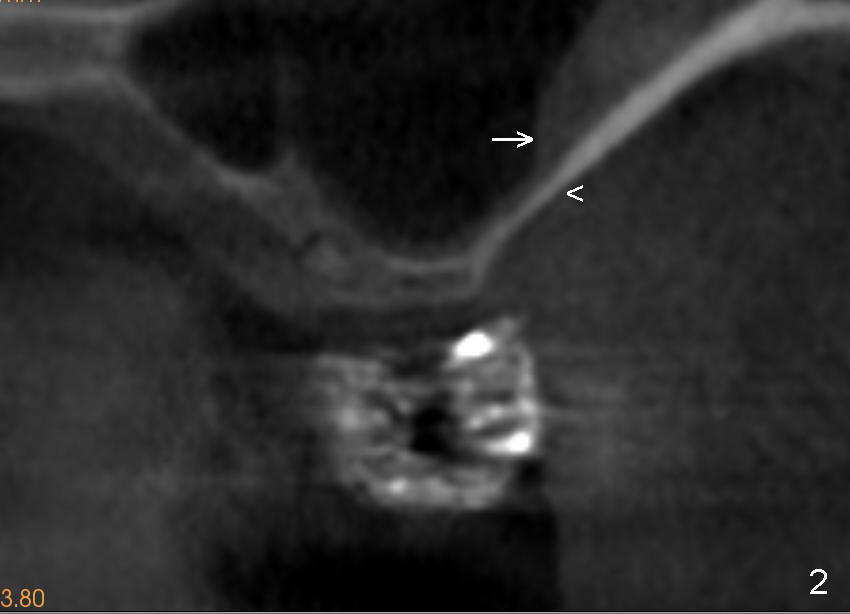
Fig.2 is a CBCT coronal section at the site of #14, as indicated by the dashed line in Fig.1. The arrowhead (<) denotes the anterior bony wall of the maxillary sinus, whereas the arrow (->) the sinus membrane.
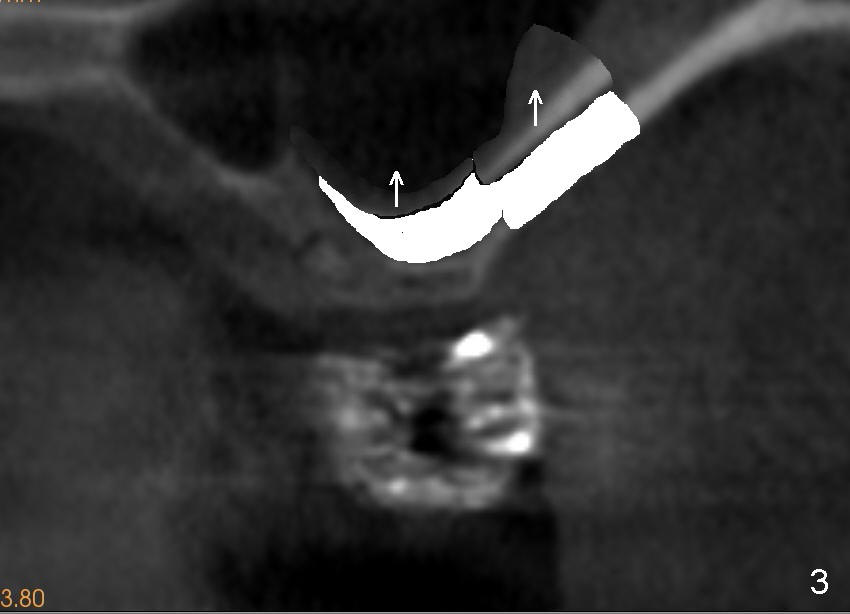
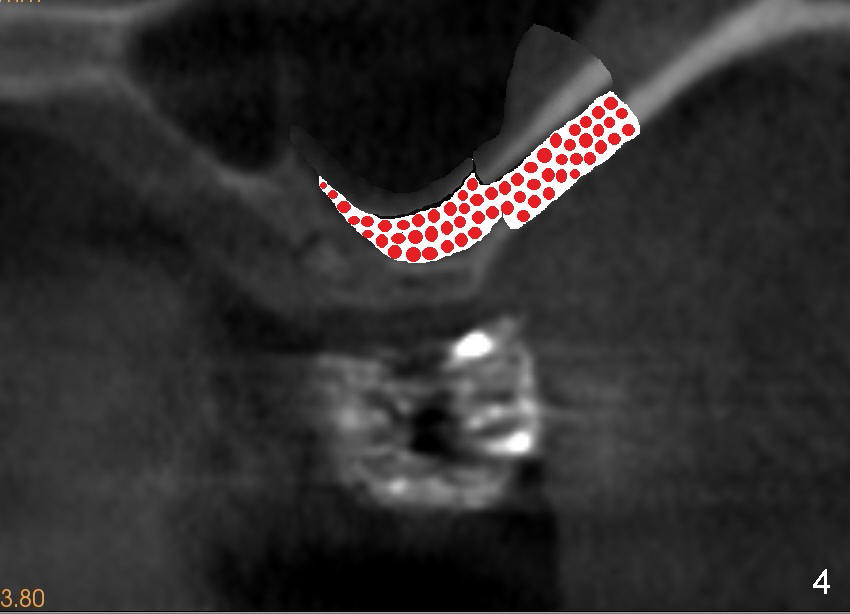
These two structure will be lift from the lateral window (arrows in Fig.3) and kept in place with bone graft (red circles in Fig.4).
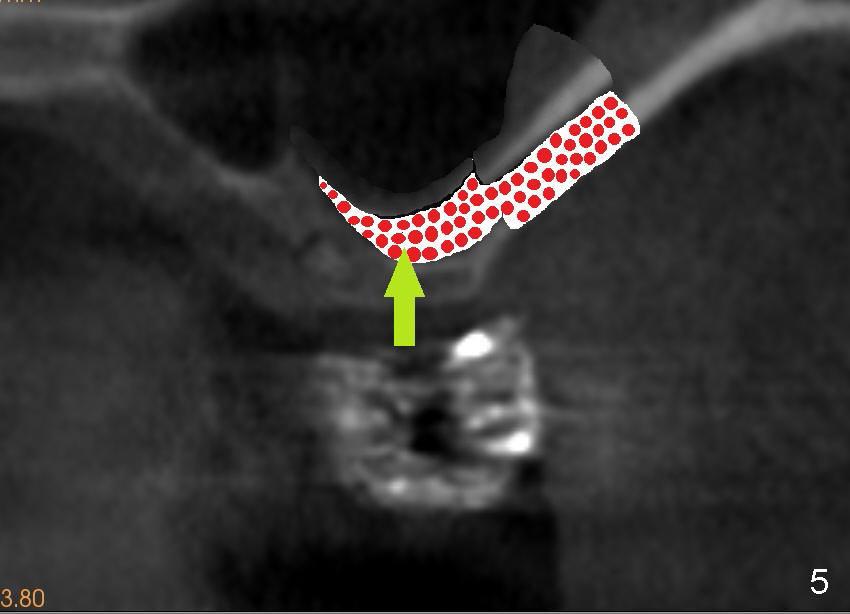
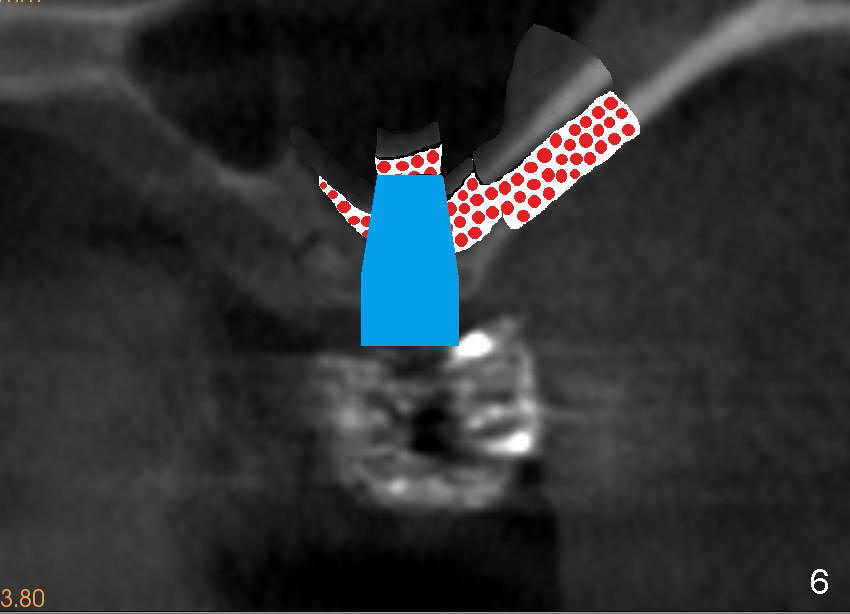
Once the sinus membrane is elevated, it is safe to initiate osteotomy from the crest (Fig.5 arrow). The sinus membrane can be also kept upstairs with gauze while the osteotomy is initiated. An appropriately sized implant can be placed at the same procedure (Fig.6 blue area).
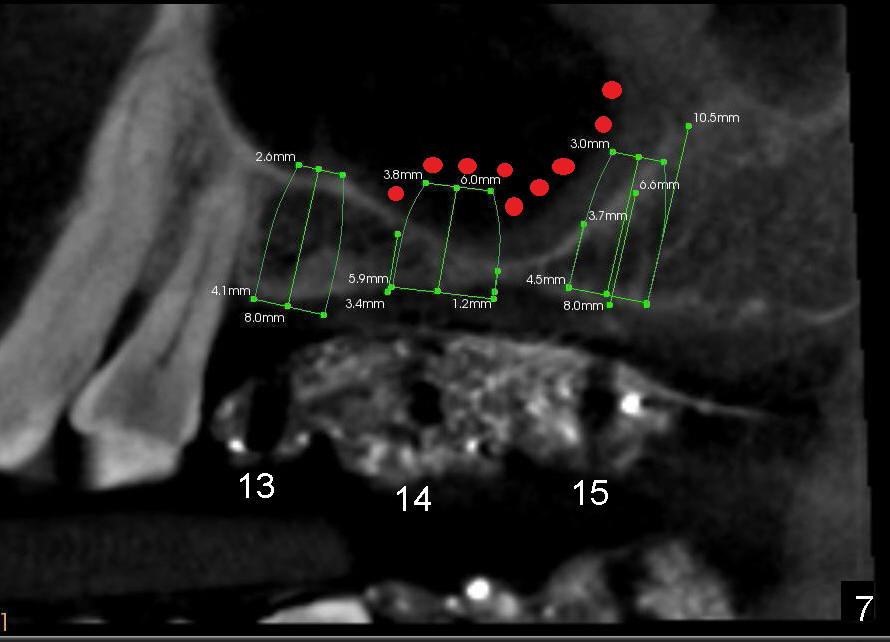
Fig.7 is a CBCT sagittal section through the edentulous area from #13 to #15 with implant design. Bone graft (red circles) is not only placed around the implant at the site of #14, but also mesial to the future implant at the site of #15.
Fig.8 is a CBCT coronal section at the site of #14, in which a 5x11 mm tissue level implant is to be placed.
Return to Lateral Window Sinus Lift
Xin Wei, DDS, PhD, MS 1st edition 04/18/2014, last revision 04/20/2014