.jpg)
|
|
|
|
|
|
|
|
|
|
|
|
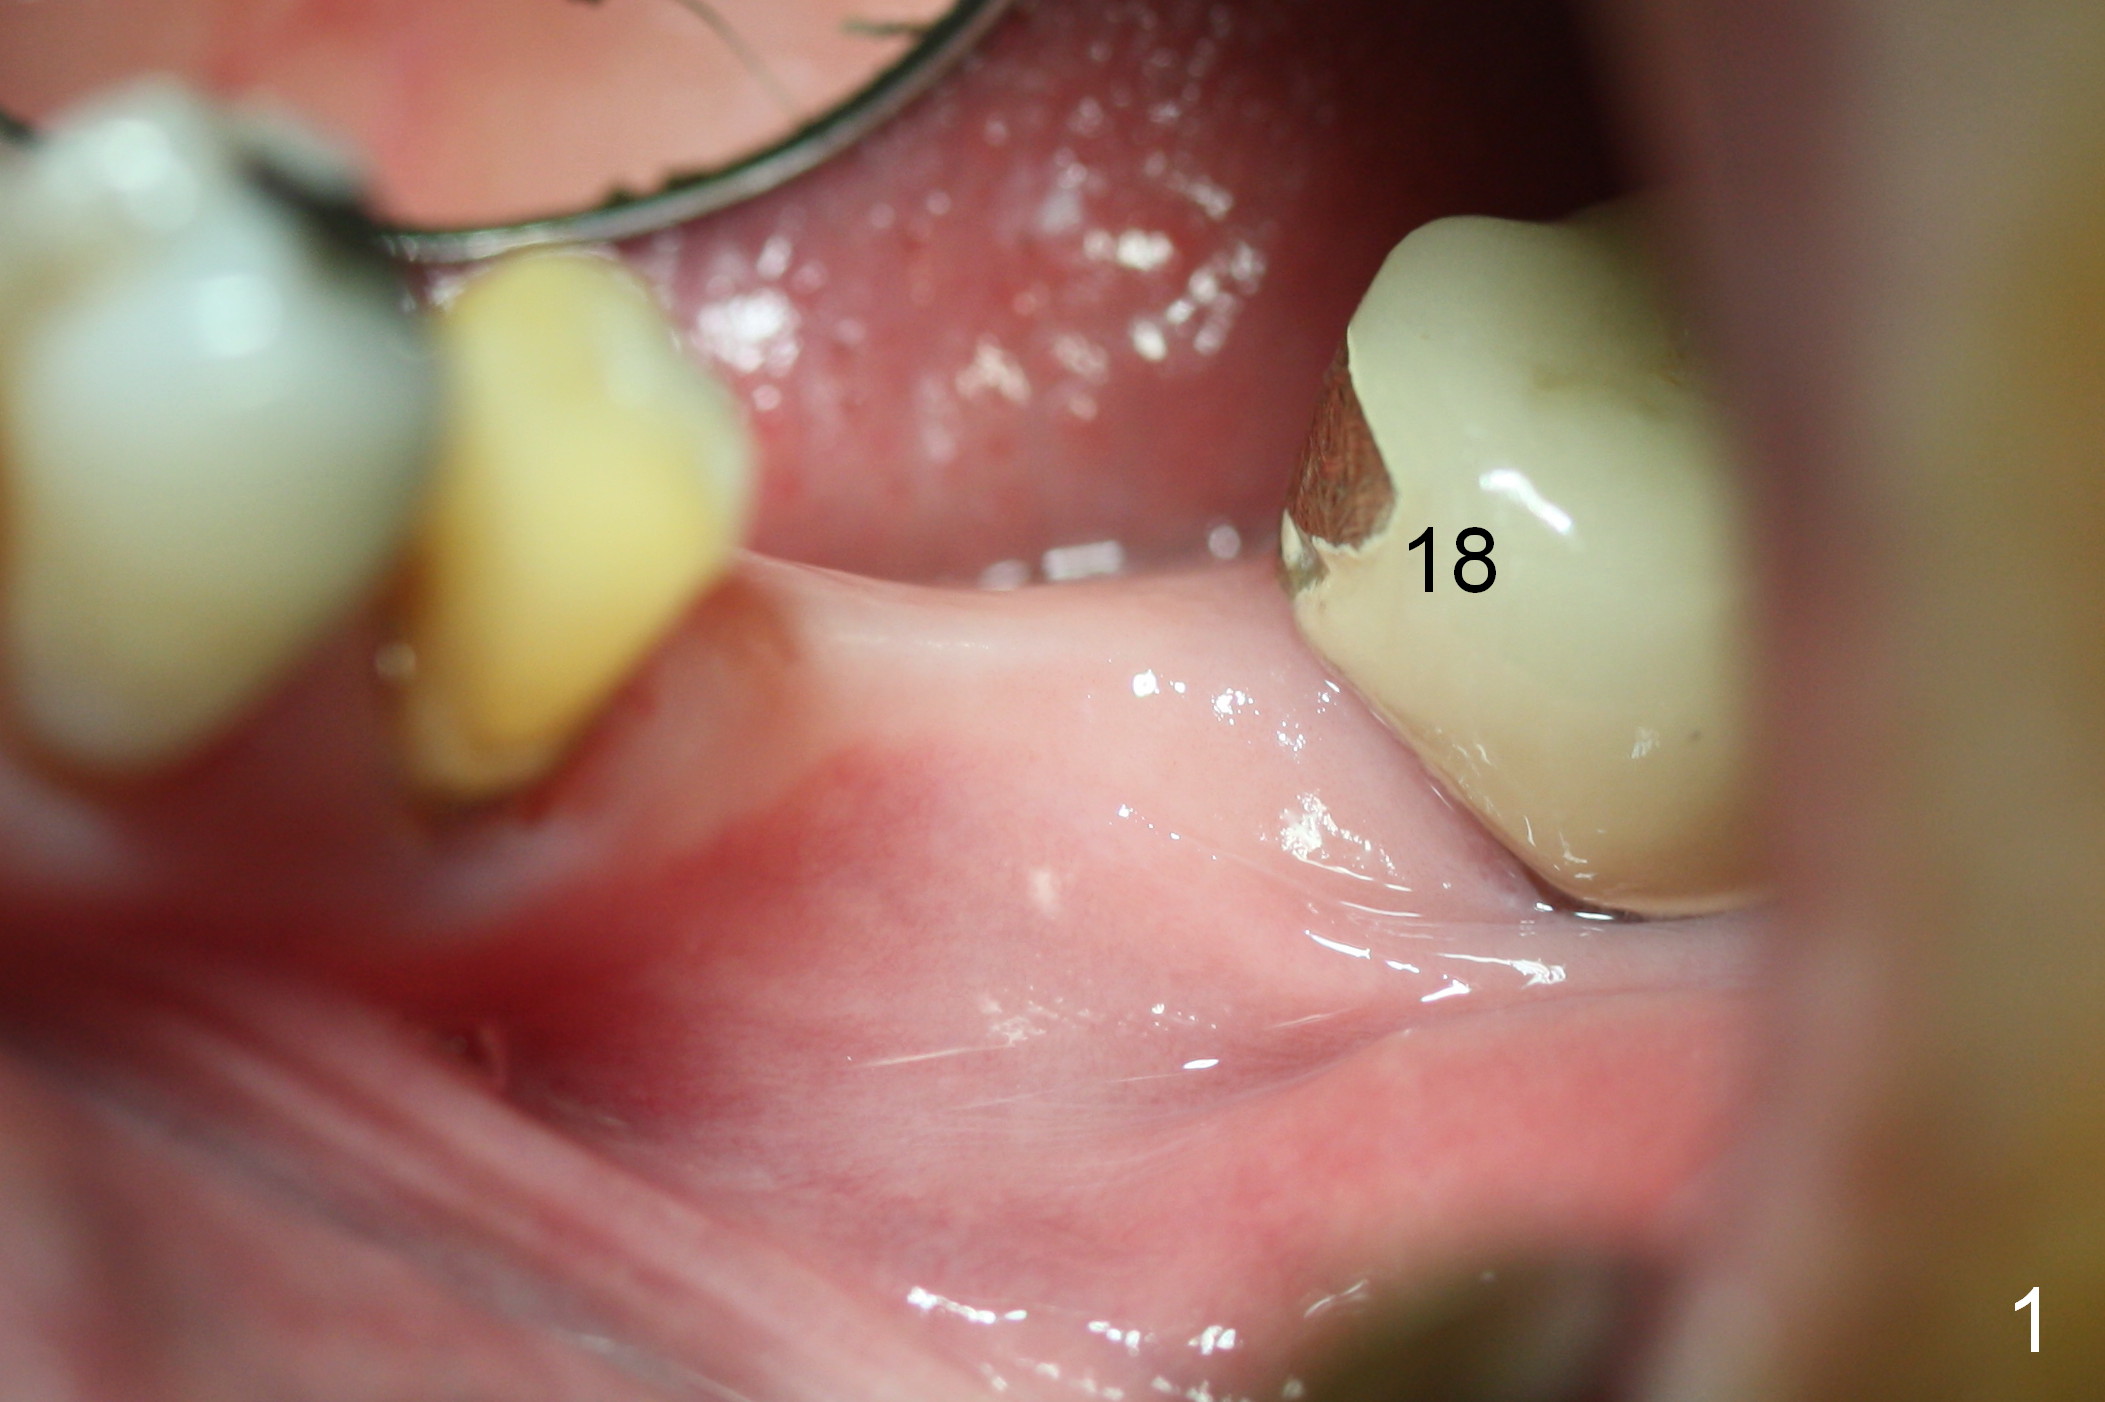
Osteotomy in Healed Site
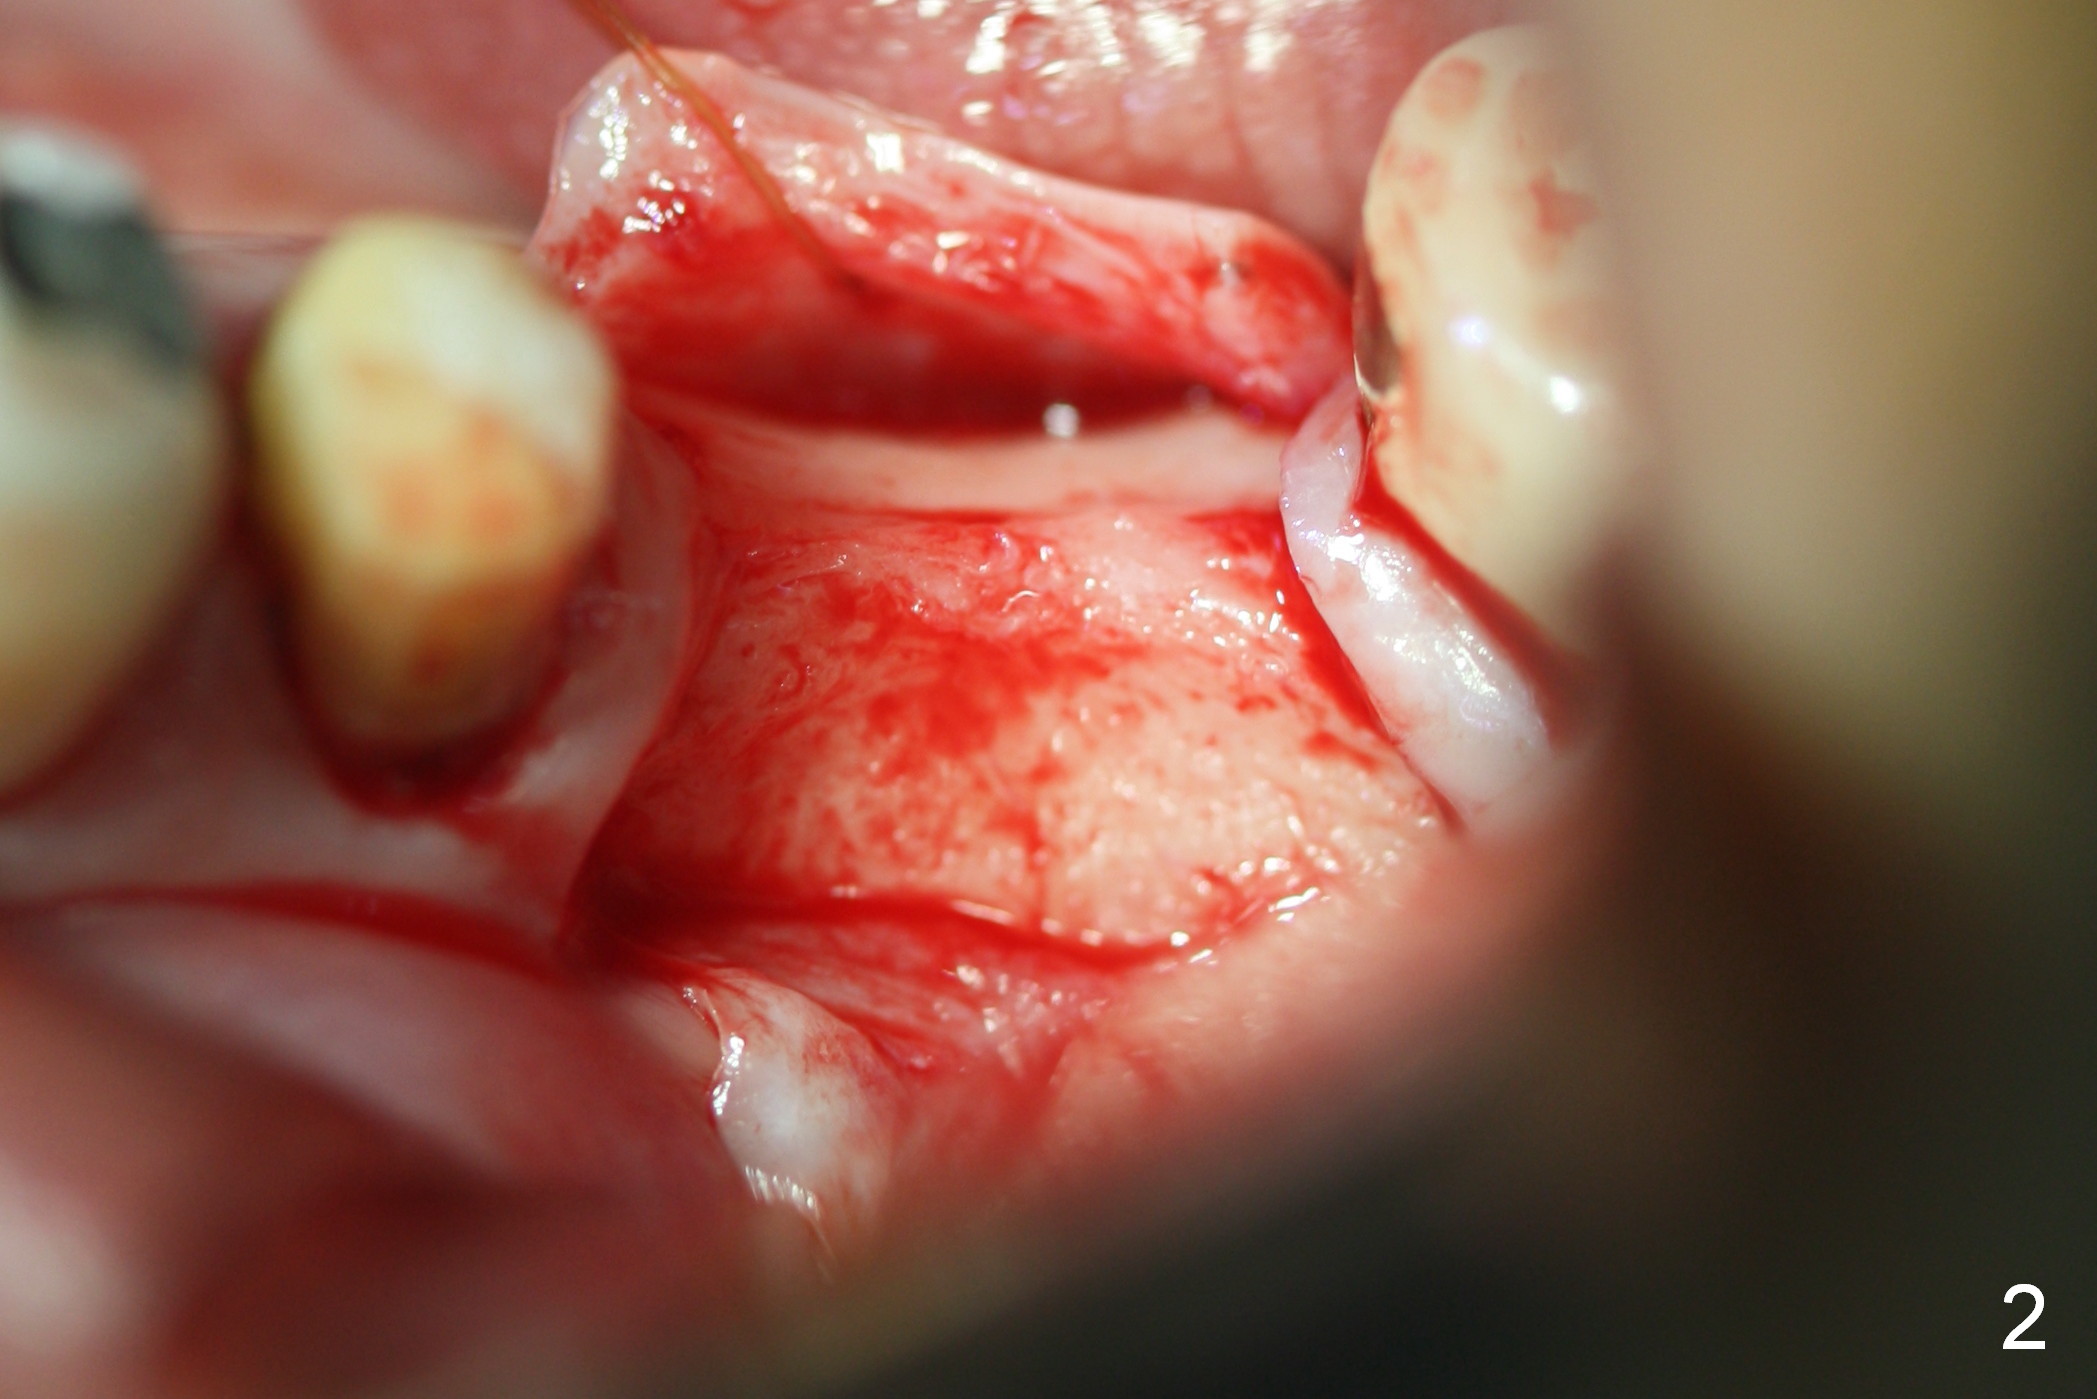
Fig.1 shows the narrow ridge at the site of #19 ten years post extraction. When the ridge is exposed, the crest is so dense that it is difficult to be expanded (Fig.2). Drills are going to be used to form osteotomy 2 mm deeper than the expected implant to reduce the amount of thread exposure.
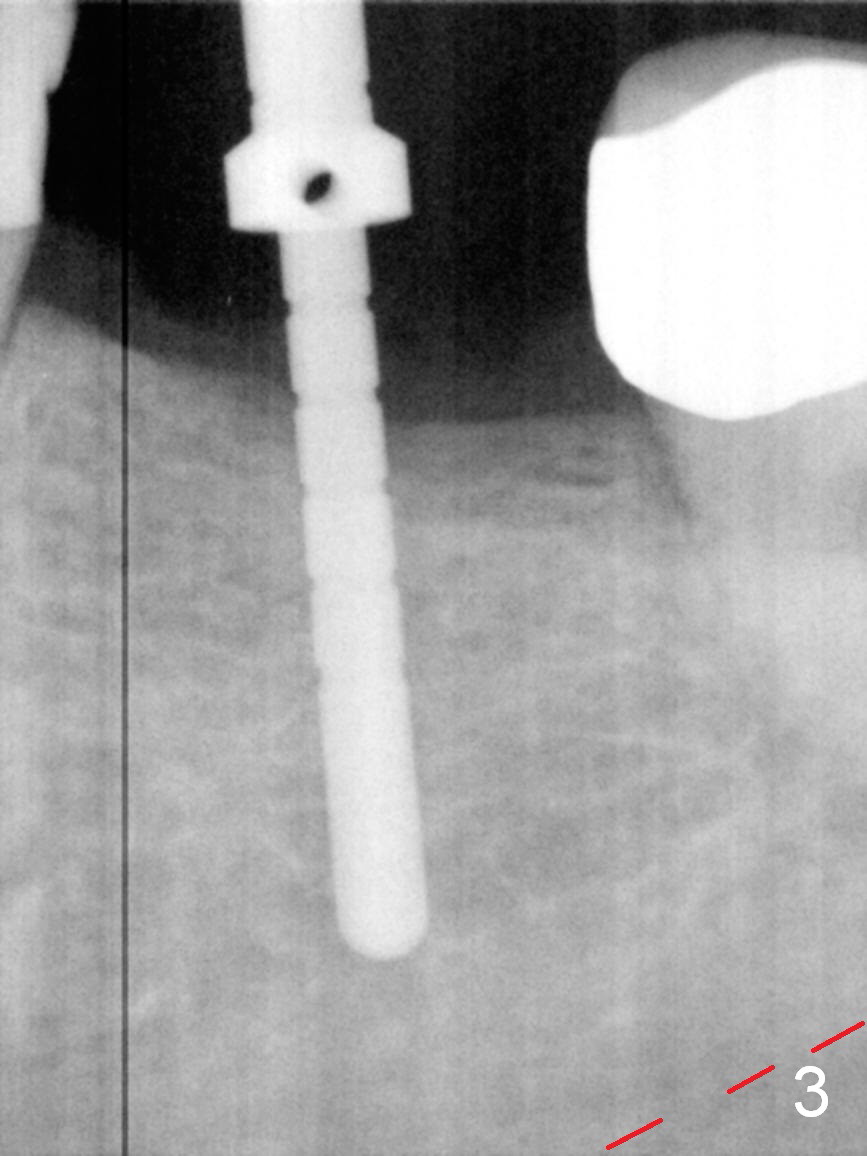
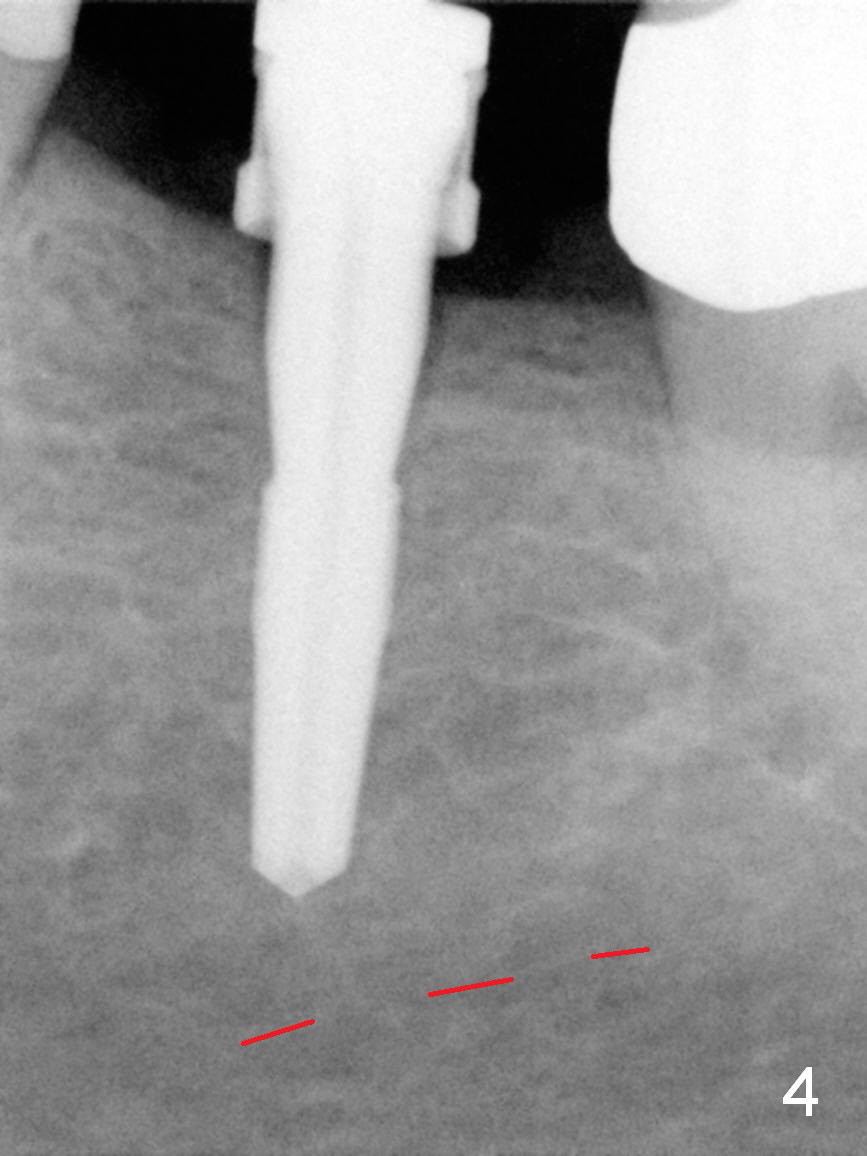
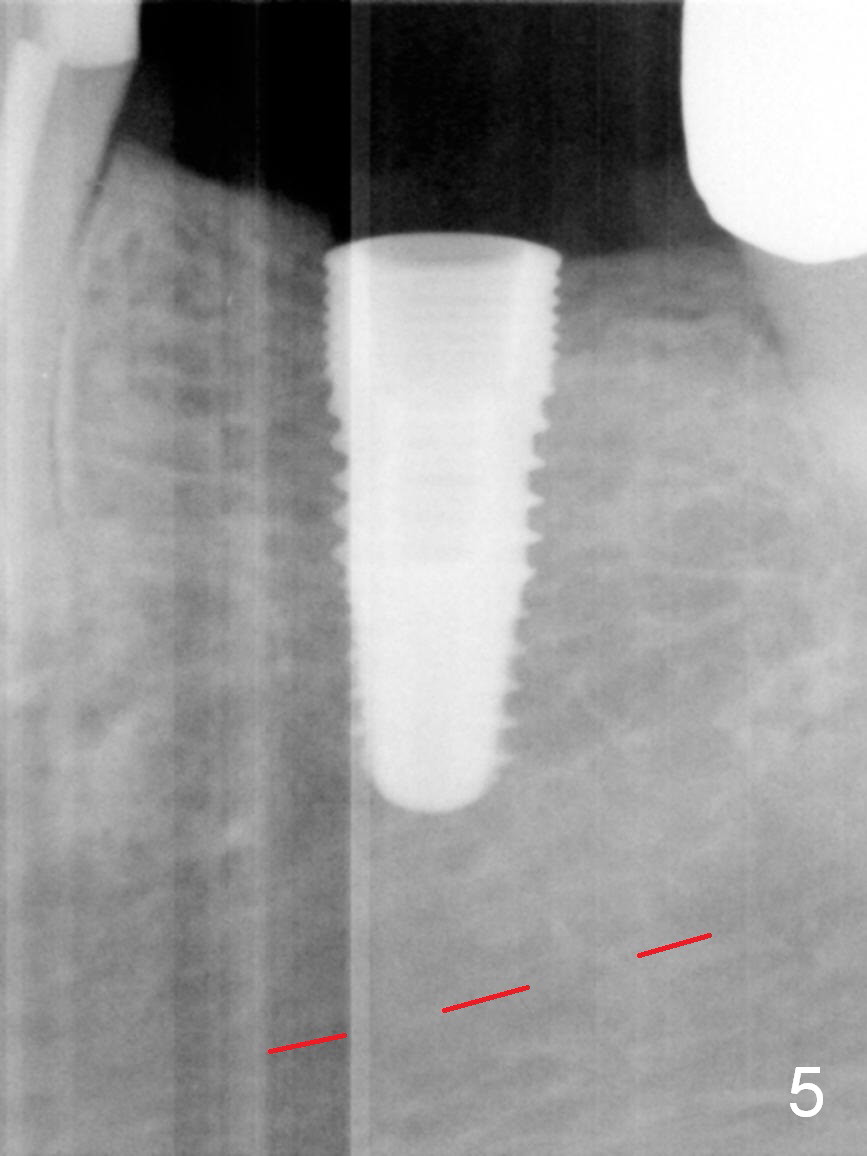
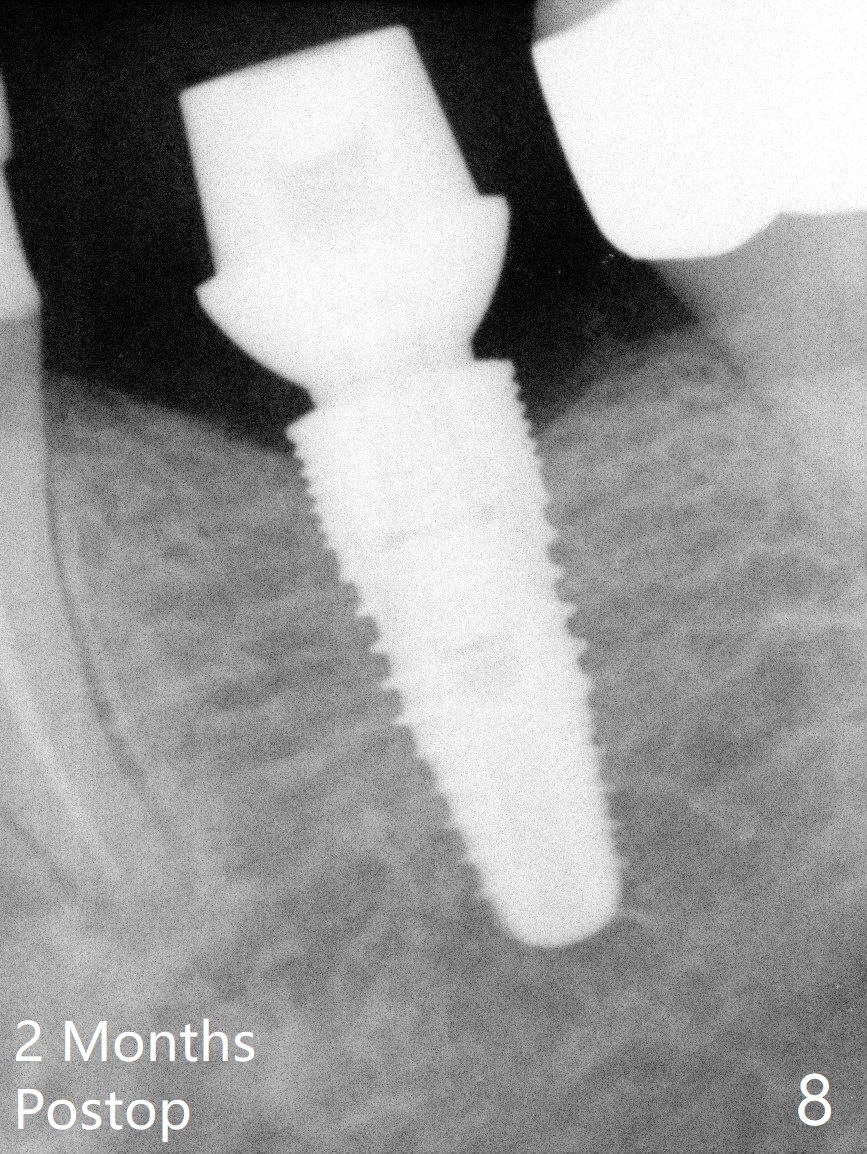
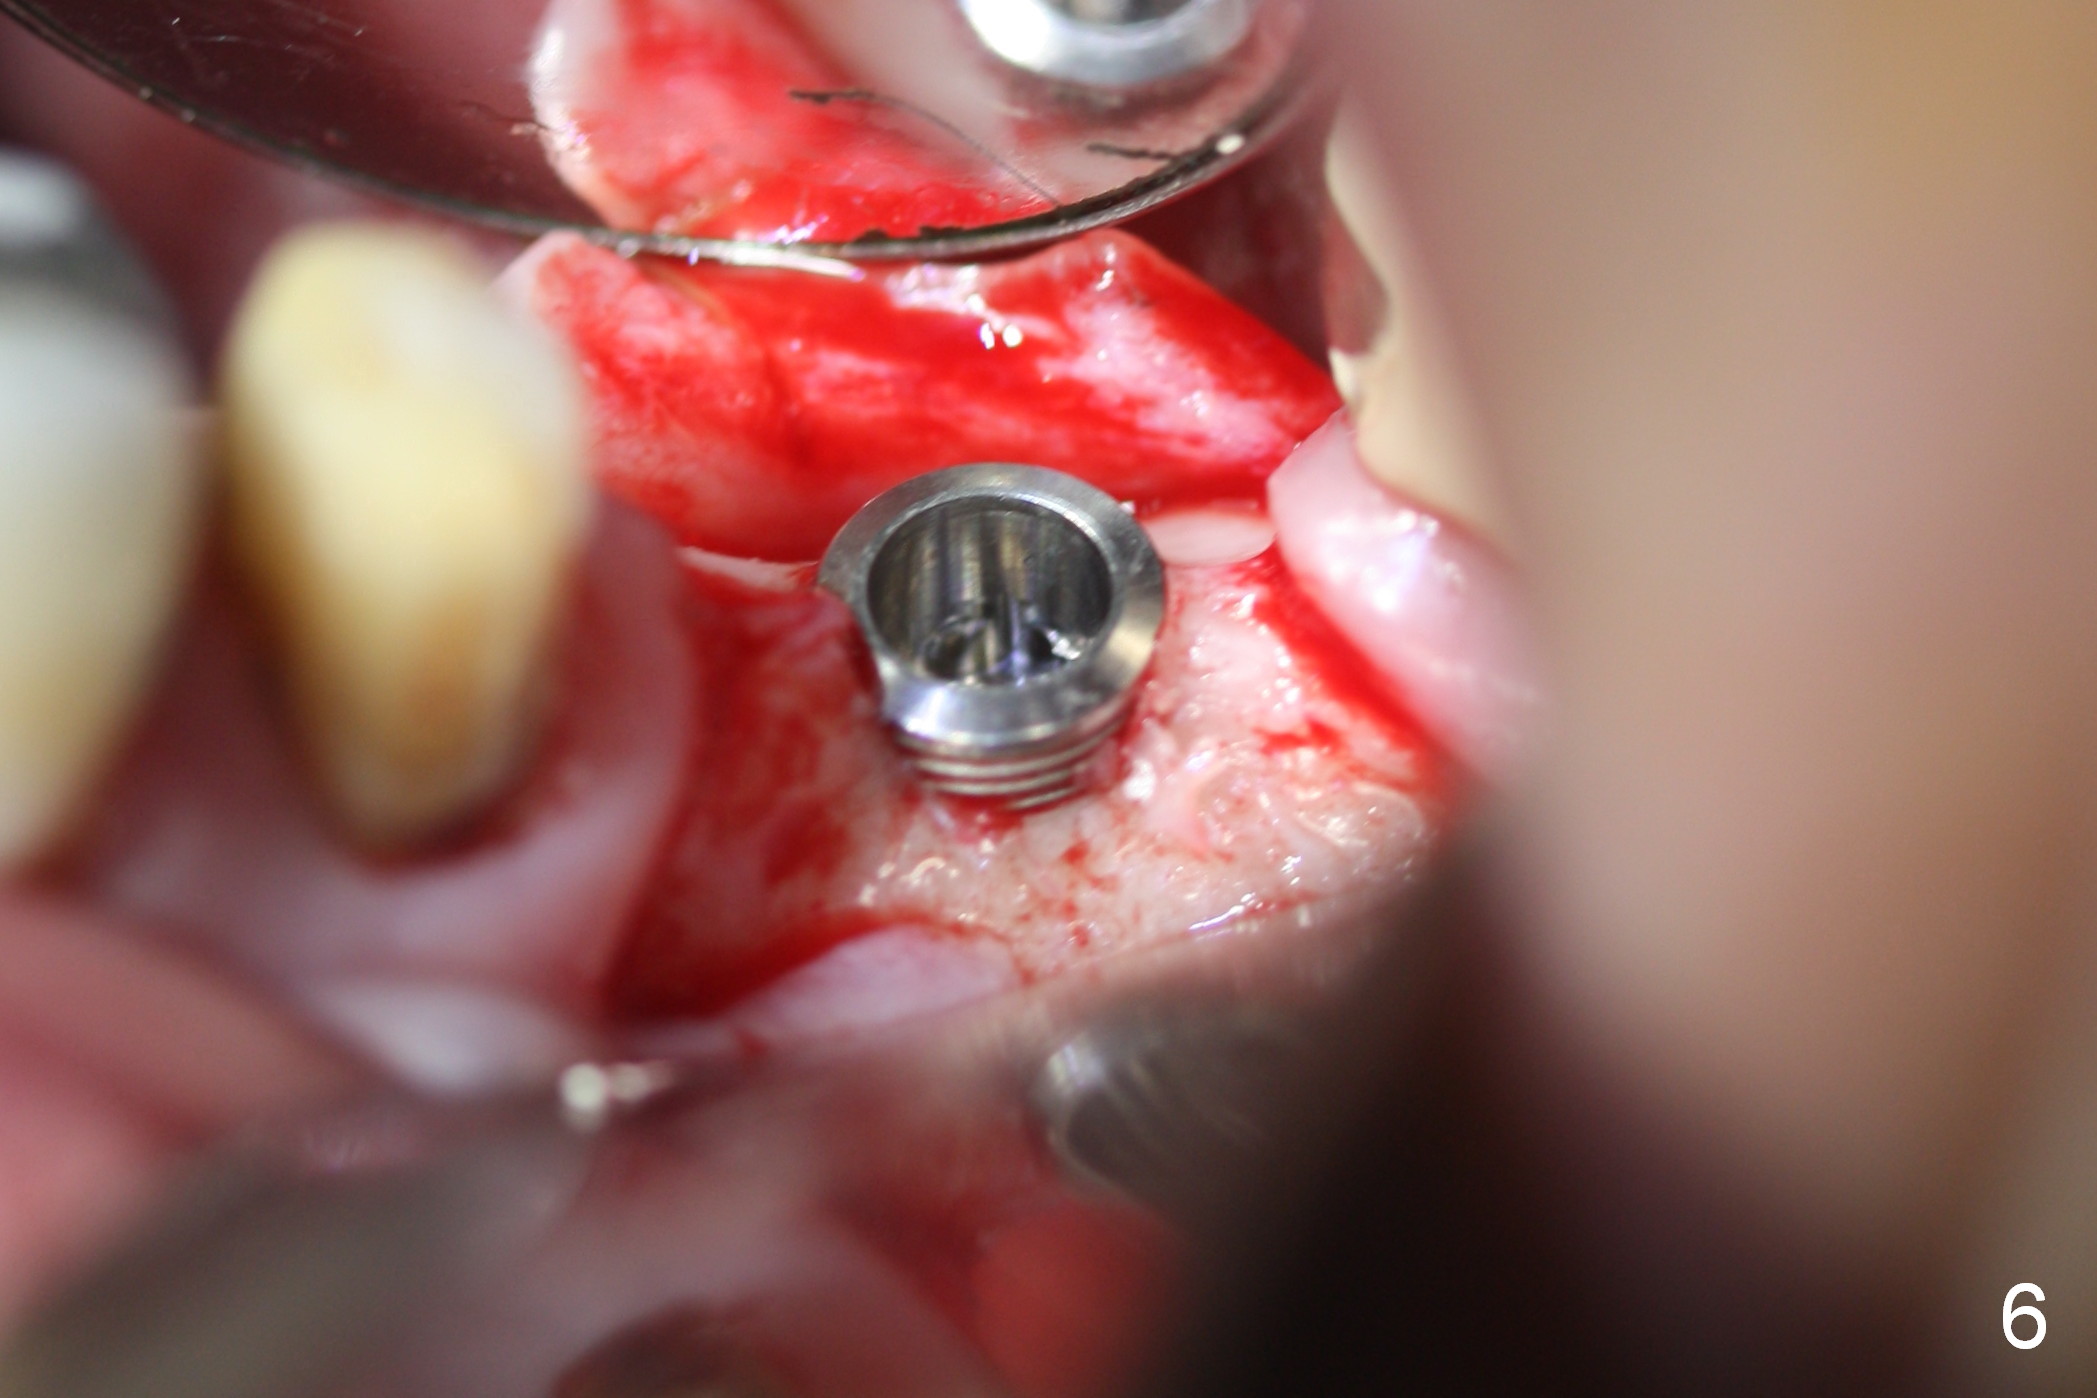
Fig.3 shows a parallel pin at the depth of 12 mm, more than 4 mm from the superior border of the Inferior Alveolar Canal (red dashed line). Bone density at the medulla is felt to be low upon drilling. Sequential osteotomy is carried out until 4.5x14 mm (Fig.4). A 5x8 mm drill is used before placement of a 5x12 mm implant with insertion torque >50 Ncm (Fig.5). The implant is placed ~ 1 mm subcrestal mesially and equicrestal distally (Fig.5). As expected, there is ~ 2 mm microthread exposure buccally and lingually (Fig.6, which does not happen associated with immediate implant at #30 of the same patient). After placement of a 6.8x4(3) mm abutment (Fig.7 A), autogenous bone is placed over the exposed threads, followed by insertion of collagen dressing and suturing. A splinted provisional is fabricated for #19 and 20. There is microthread exposure 2 months postop (Fig.8). Microthread exposure remains in CT nearly 2 years post cementation, although there is no sign of periimplantitis.
Return to Lower Molar Immediate Implant 14, 30 Xin Wei, DDS, PhD, MS 1st edition 09/30/2015, last revision 02/23/2018