.jpg)
|
|
|
|
||
|
|
|
|
||
|
|
|
|
|
|
|
|
||||
A More Secure Method for Osteotomy Depth
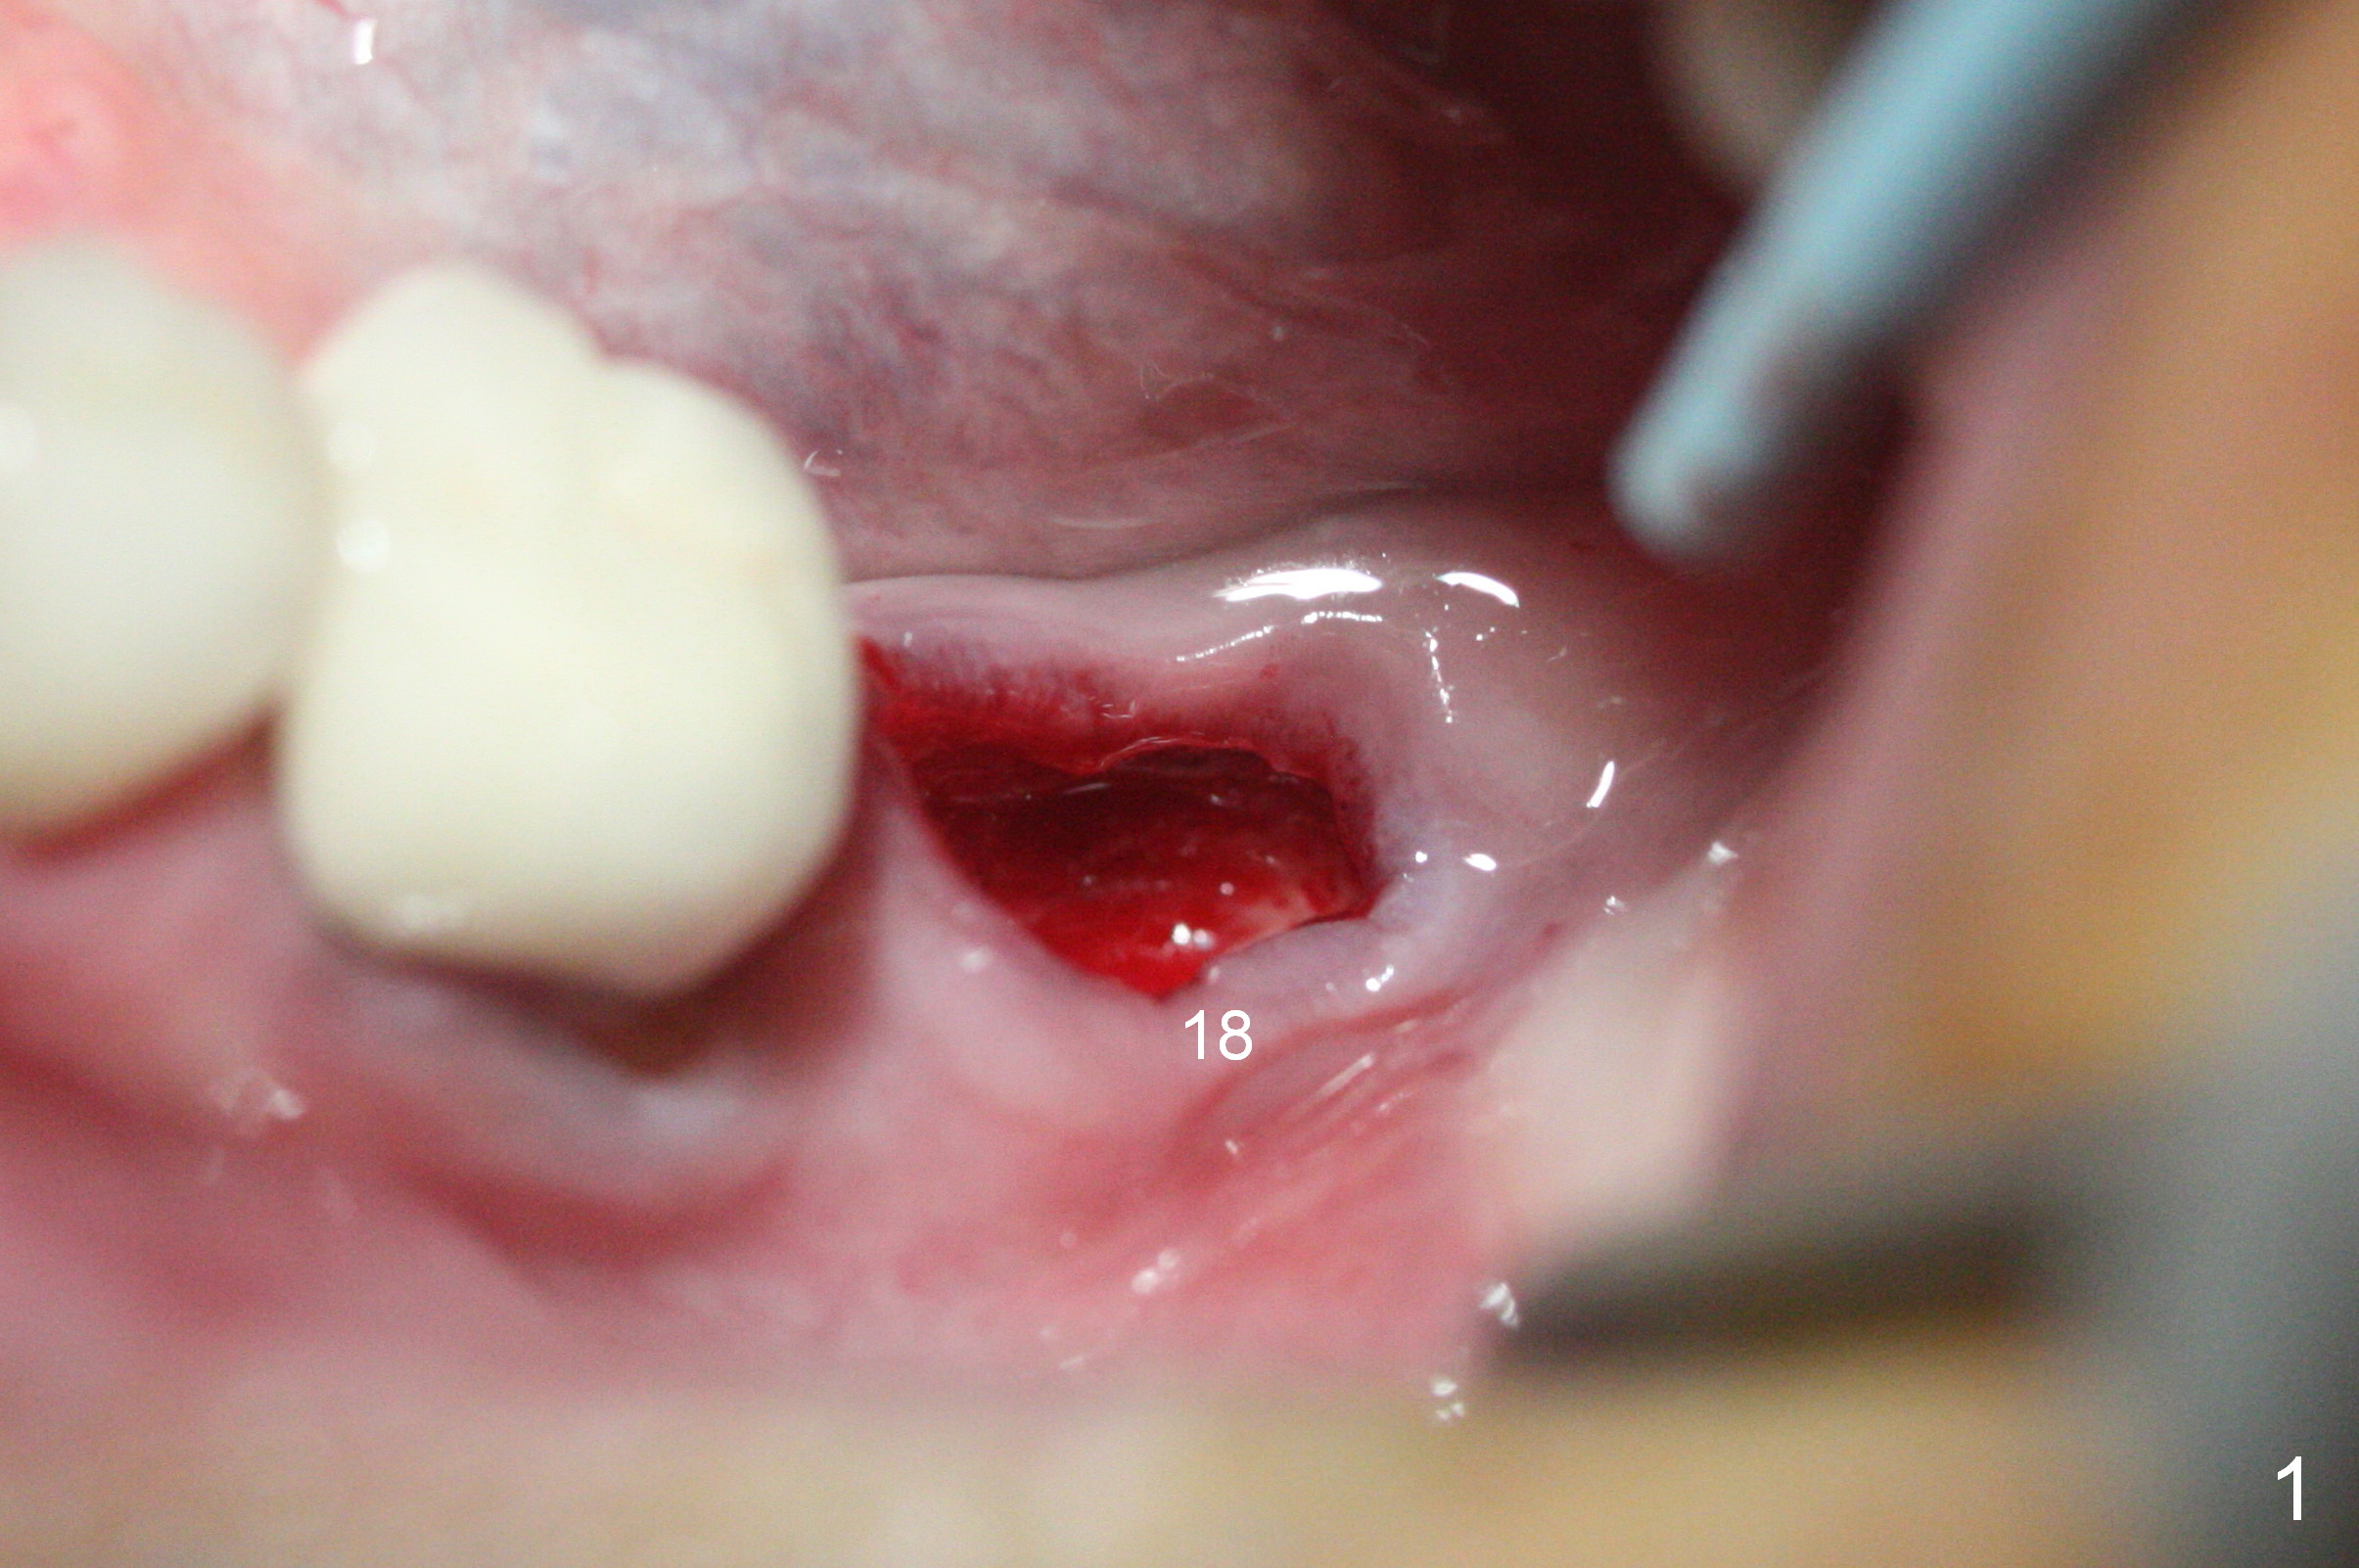
One method to control osteotomy depth for immediate implant is to use the gingival margin. As Fig.1 indicates, the gingival margin is uneven at the site of #18. Since the osteotomy in this case is established mesially, large drills and implants may distort the gingiva so that the gingival margin is an unreliable landmark. Infiltration anesthesia does not produce profound pain control. When the patient reports discomfort during the osteotomy, it may be regarded as violation of the Inferior Alveolar Canal. Therefore osteotomy depth control is quite difficult. With shallow depth and soft bone, implants easily lose stability.
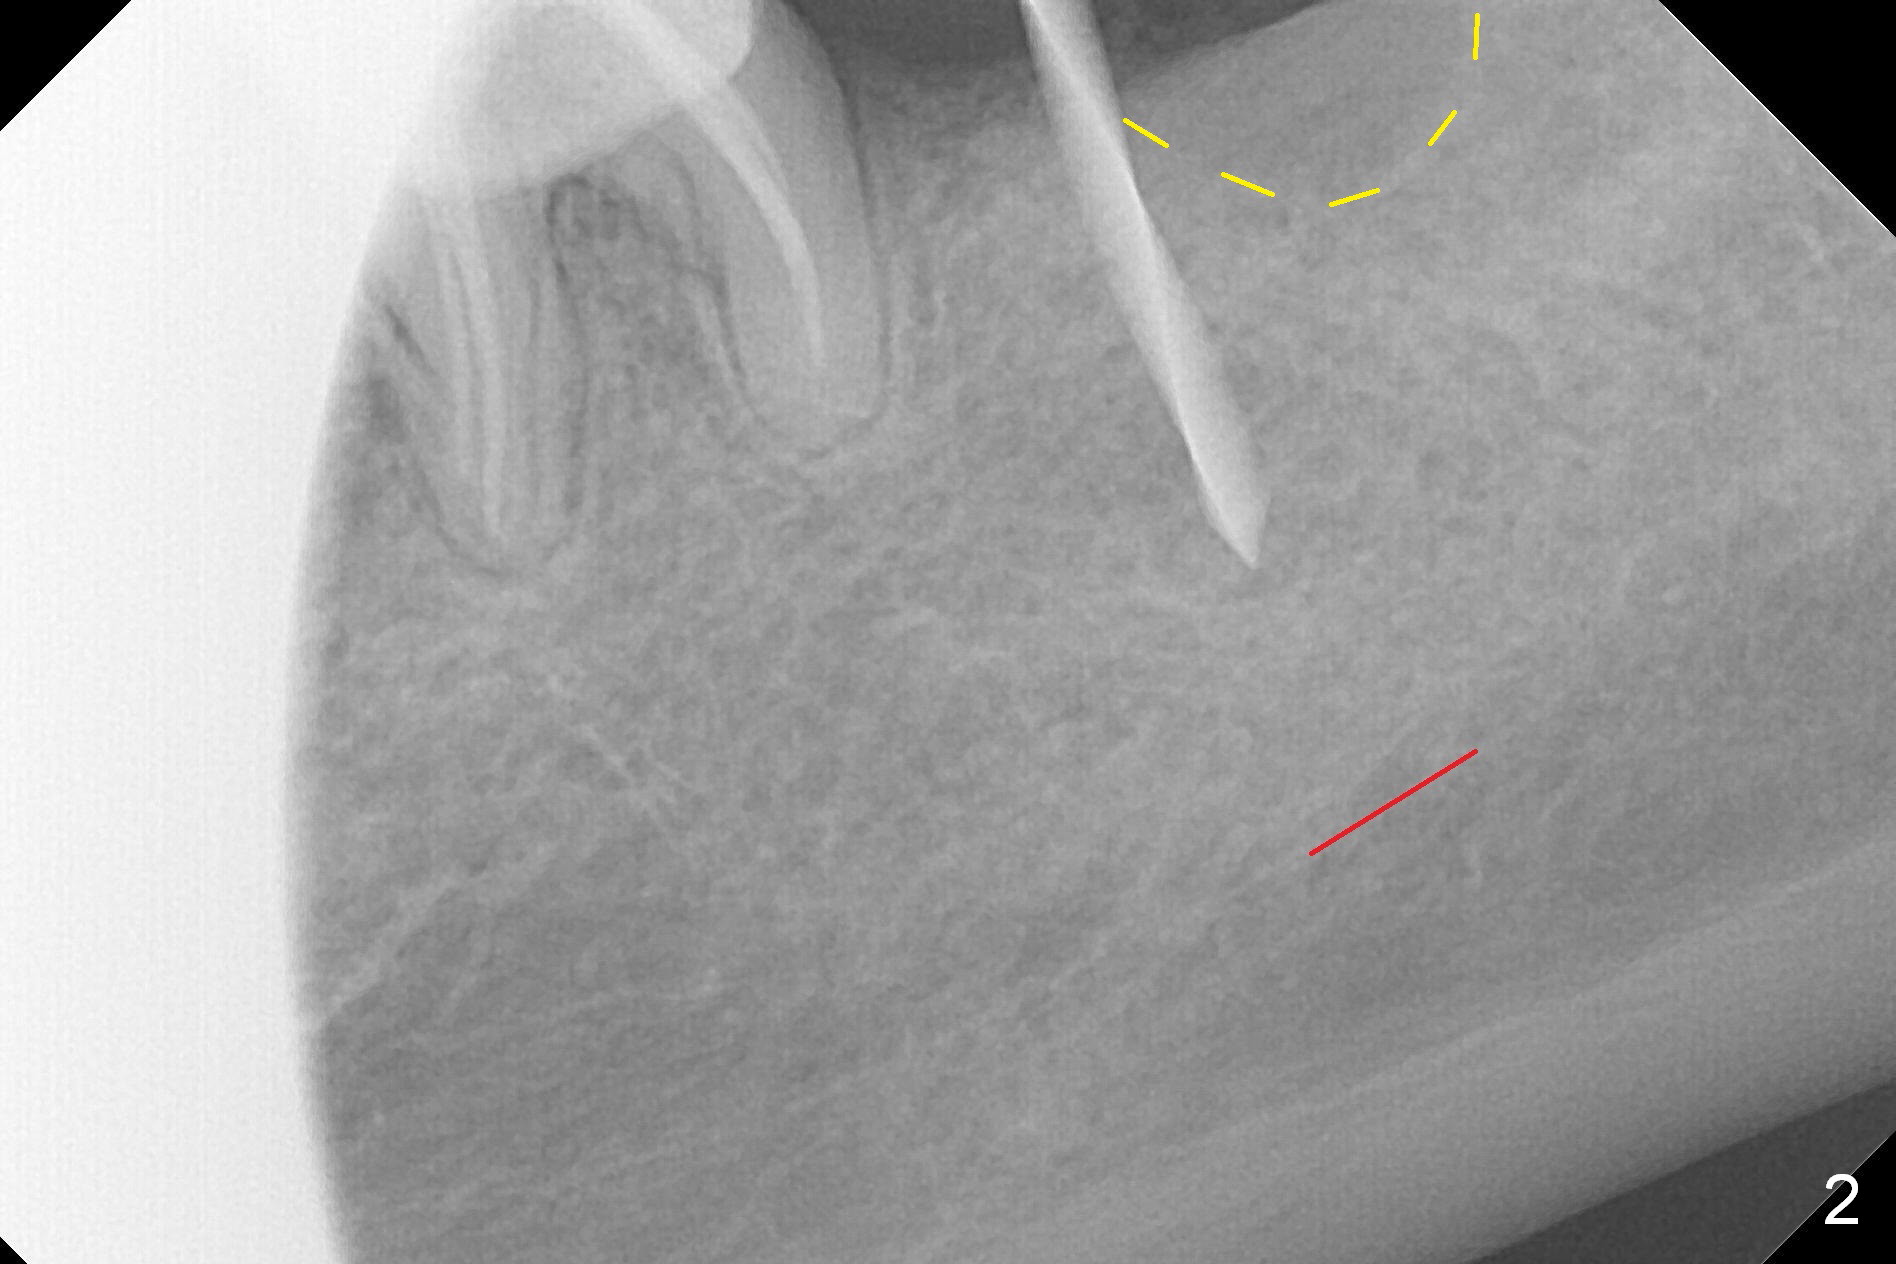
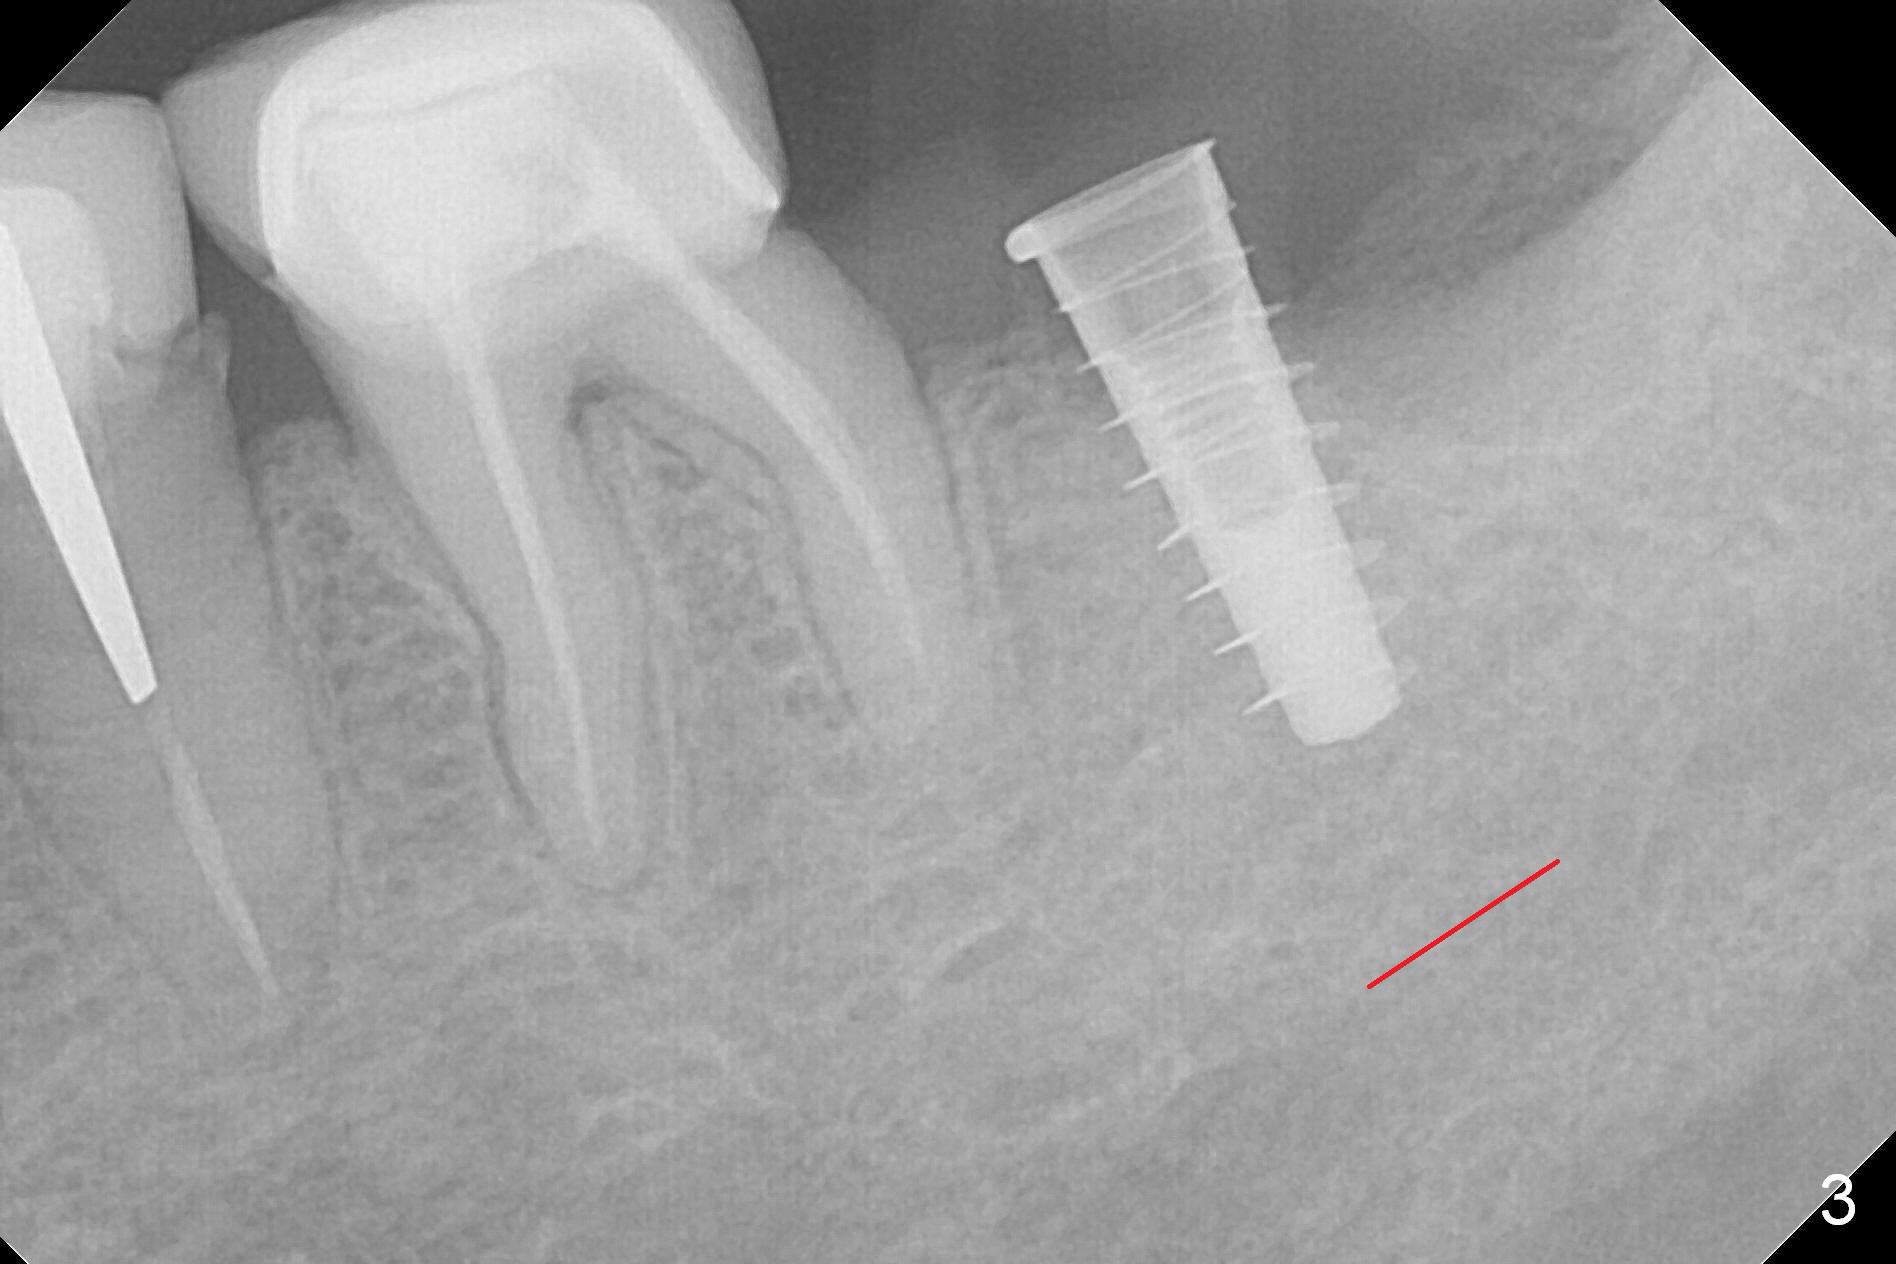
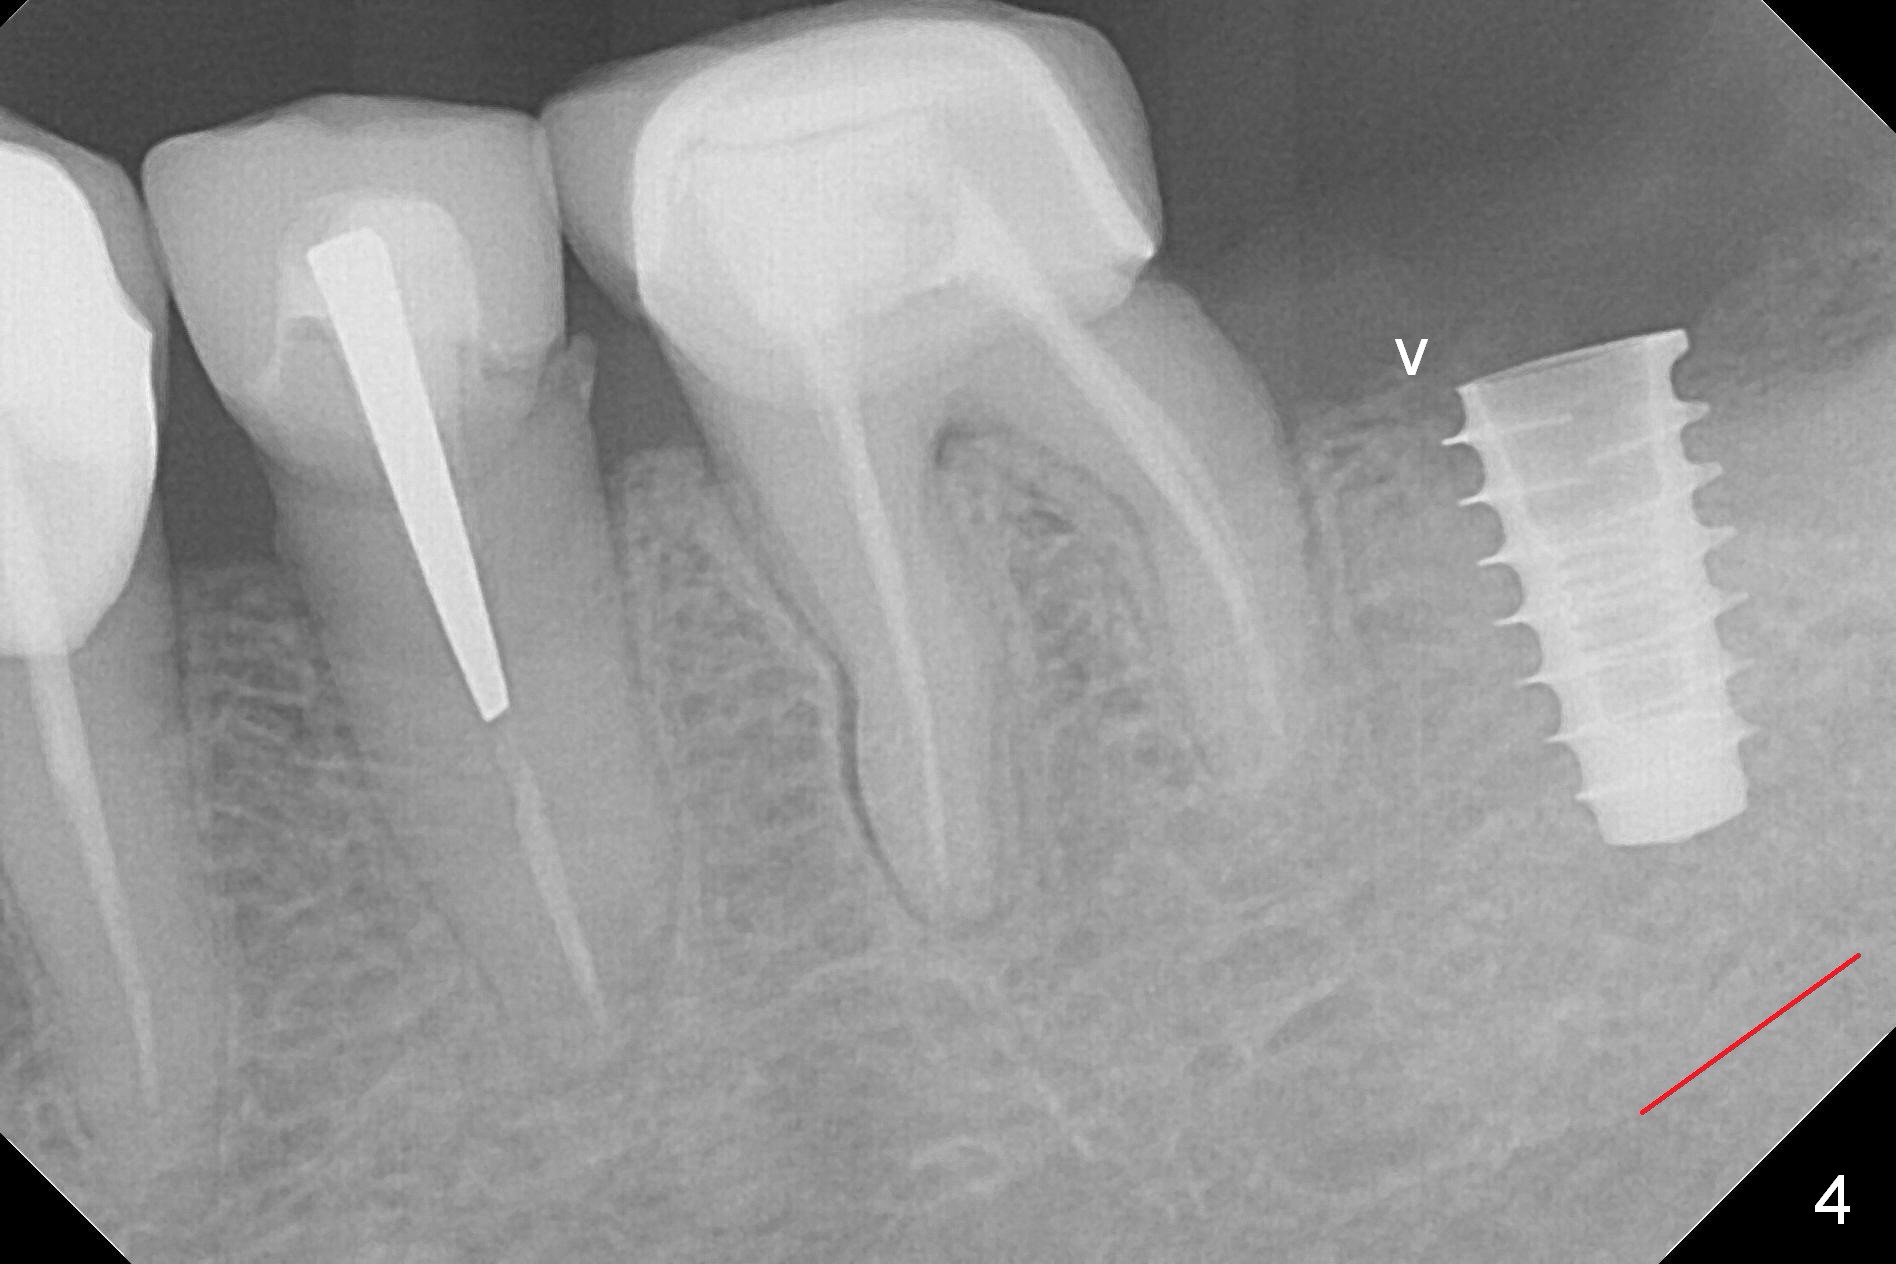
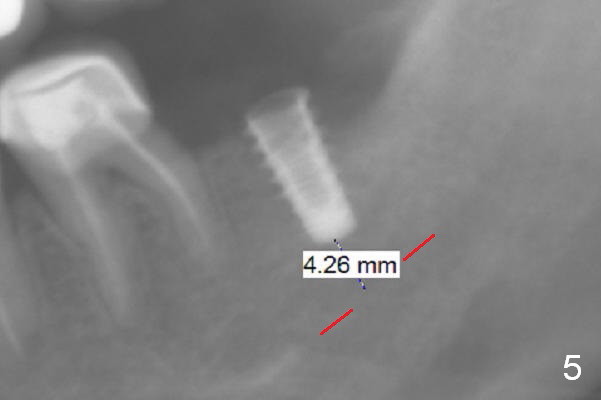
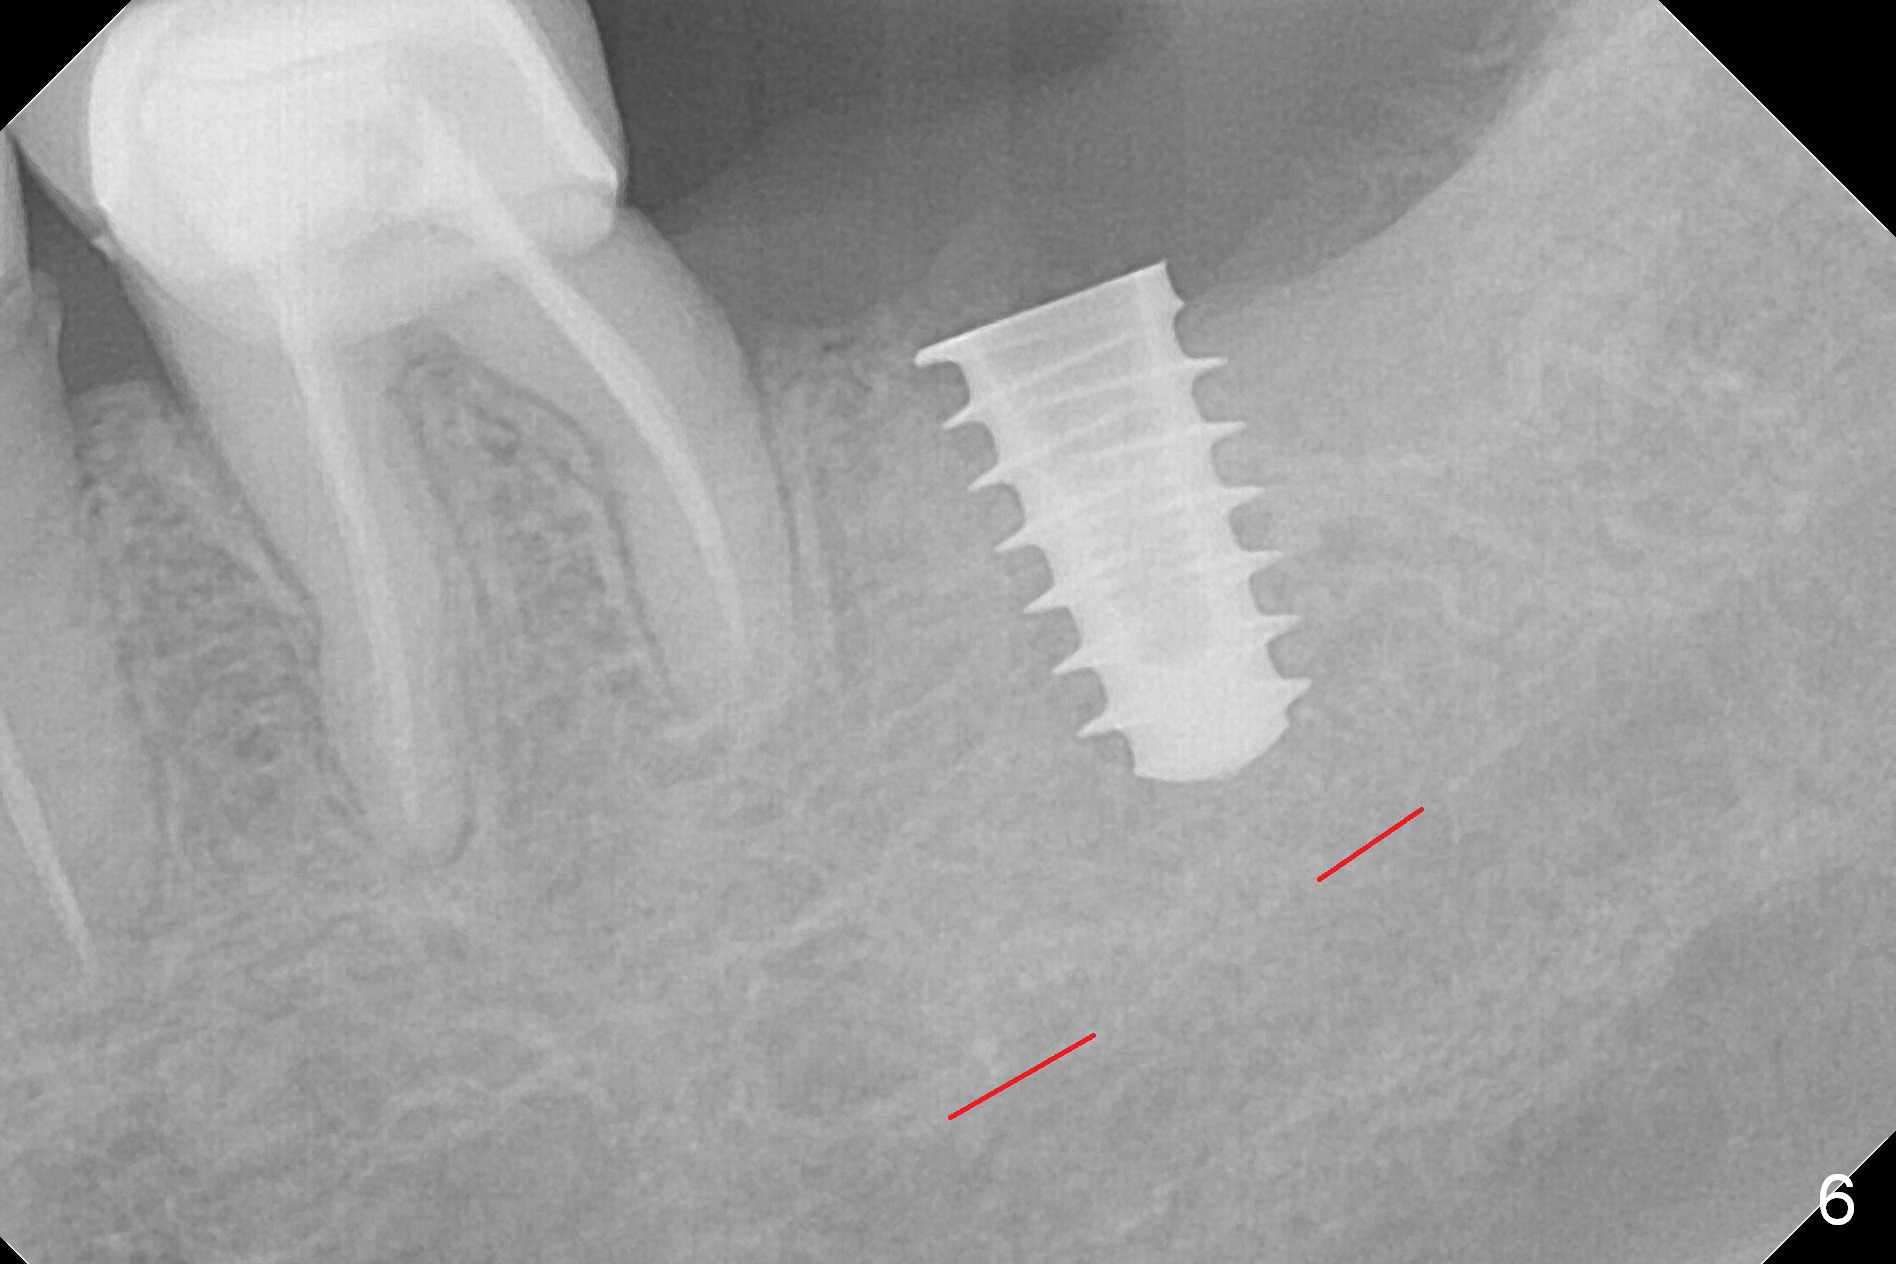
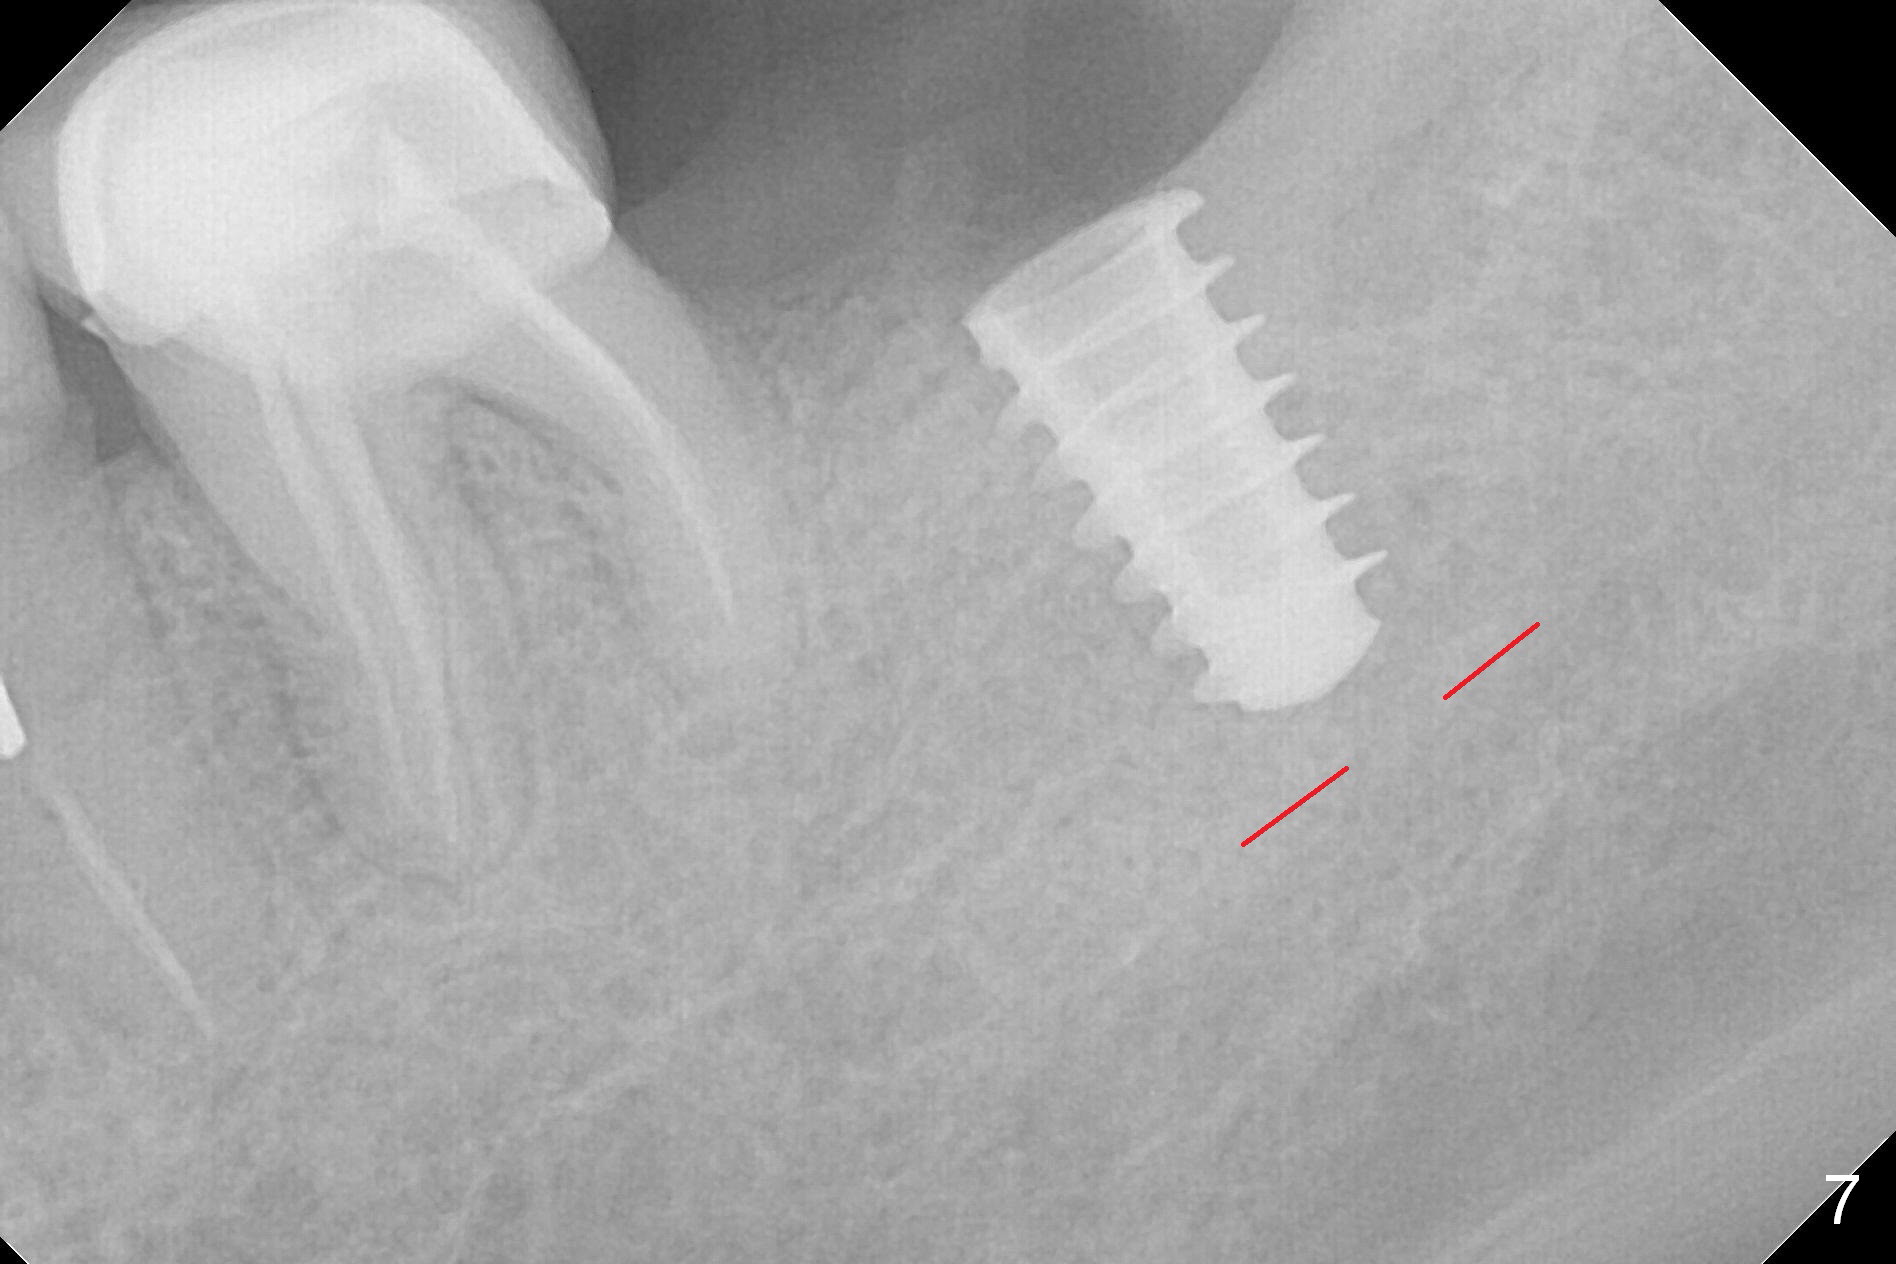
After 1.6 mm pilot drill (Fig.2) and 4.3 mm Magic Drill for 11 mm (gingival margin), a 4.5x11 mm dummy implant is placed with stability (Fig.3). Following Final Drill for 12/13 mm and 4.3 mm MD mesially, a 5x9 mm IBS implant is placed with 40 Ncm (Fig.4). Panoramic X-ray shows the placement is slightly supracrestal (Fig.5). In fact the implant is also placed slightly lingually. When the trajectory is changed, the implant loses stability. When a 5.5x9 mm implant is placed, no stability is achieved (Fig.6). After increase in osteotomy depth for 1-2 mm with MD 4.3 mm, the 5.5x9 mm implant barely obtains stability (~ 10 Ncm, Fig.7). Healing screw is placed. Osteogen plug is inserted in the distal portion of the socket; autogenous bone around the implant and Collagen plug to close the socket opening. Last suture and periodontal dressing are applied.
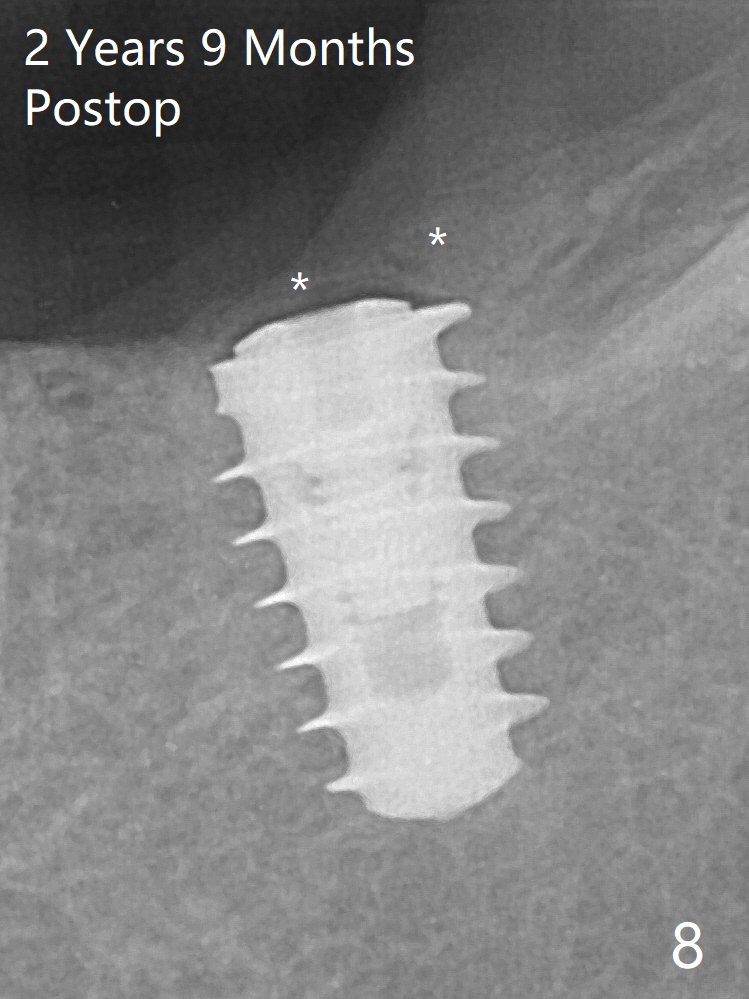
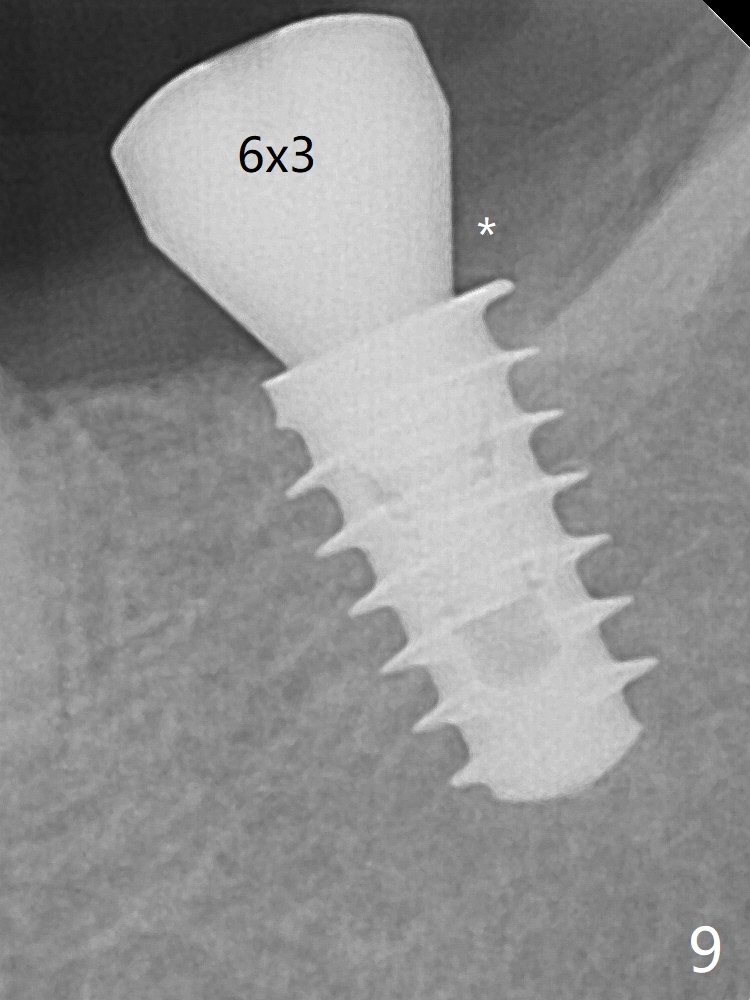
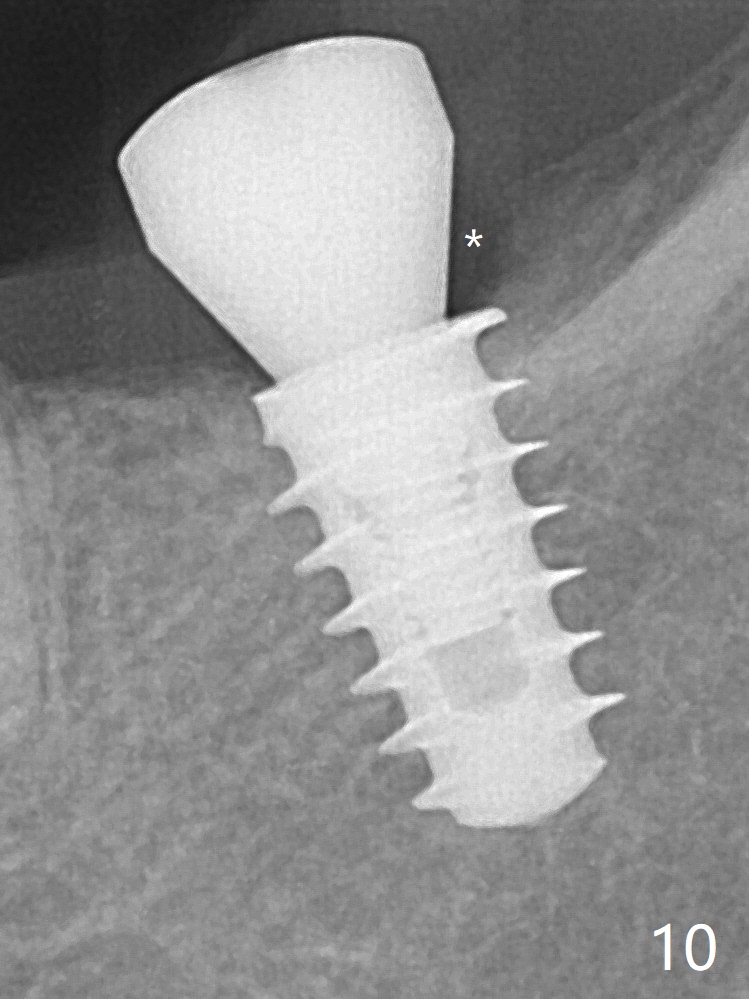
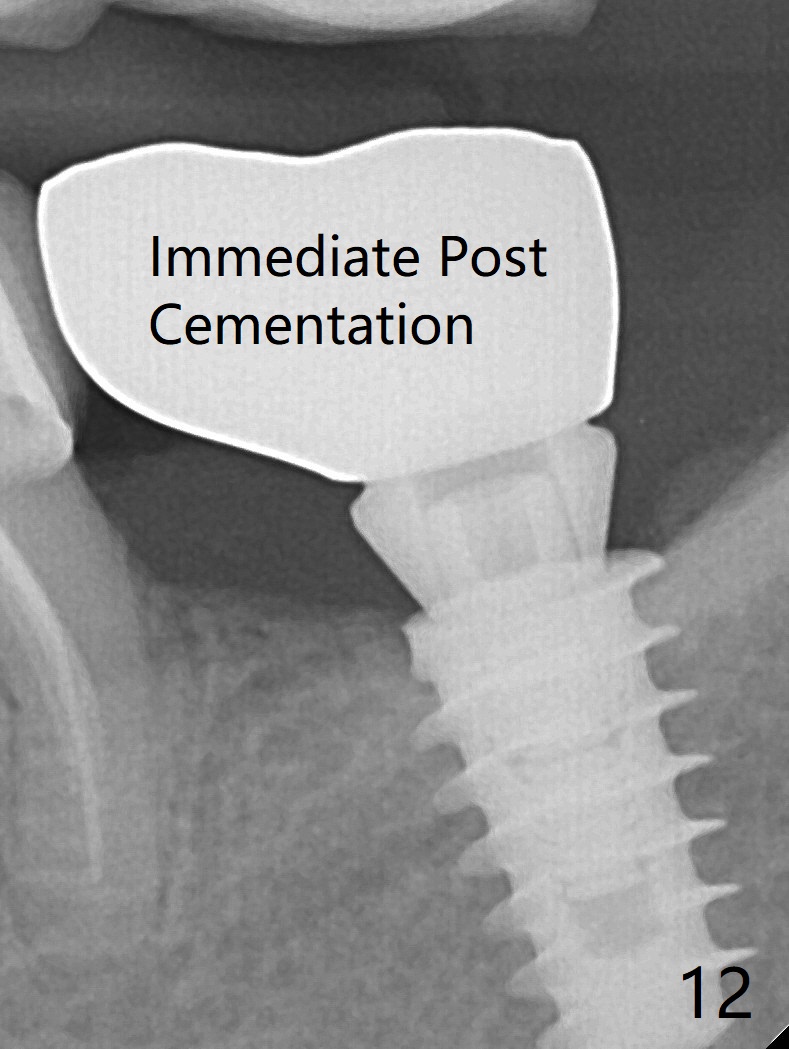
In fact, the mesial crest of the socket could be used as a more secure landmark (bony vs. soft tissue) for osteotomy depth (Fig.4 arrowhead) with drill stopper. To place the implant subcrestal, the initial osteotomy should be 1-2 mm deeper. When she returns 2 years 9 months postop, the wound has healed. The implant needs to be uncovered. Make sure to have clearance for a healing abutment. Use sensor 1 for PAs before and after uncover. The implant appears to be tilted distal. An angled abutment may be required. Take PA for seating confirmation. Guided surgery is preferable. The implant plateau is covered by the bone 2 years 9 months postop (Fig.8 *). The healing screw is removed with difficulty, while a 6x3 mm healing abutment is placed with resistance, probably related to interference from the distal crest (Fig.9 *). It is much easier with removal of the crest bone using surgical bur, because of clearance (Fig.10 *). It is the best to have a particular drill to remove the excess bone. There is no interference to insert and torque a 5x4(2) mm pair abutment 2 weeks post uncover (Fig.11). Due to poor trajectory (guide necessity) and tight proximal contact, the crown is not completely seated (Fig.12). However, the abutment screw is unlikely to get loose in the future.
Return to
Lower
Molar Immediate Implant, Prevent
Molar Periimplantitis (Protocols,
Table),
IBS (47),
1st
Year,
No Deviation,
Prevent
Screw Loosening
Xin Wei, DDS, PhD, MS 1st edition 03/20/2017, last revision 02/02/2020