
|
|
|
|
|||
|
|
|
|
|
|
|
|
|
|
|
|||
Sinus Lift Master Kit
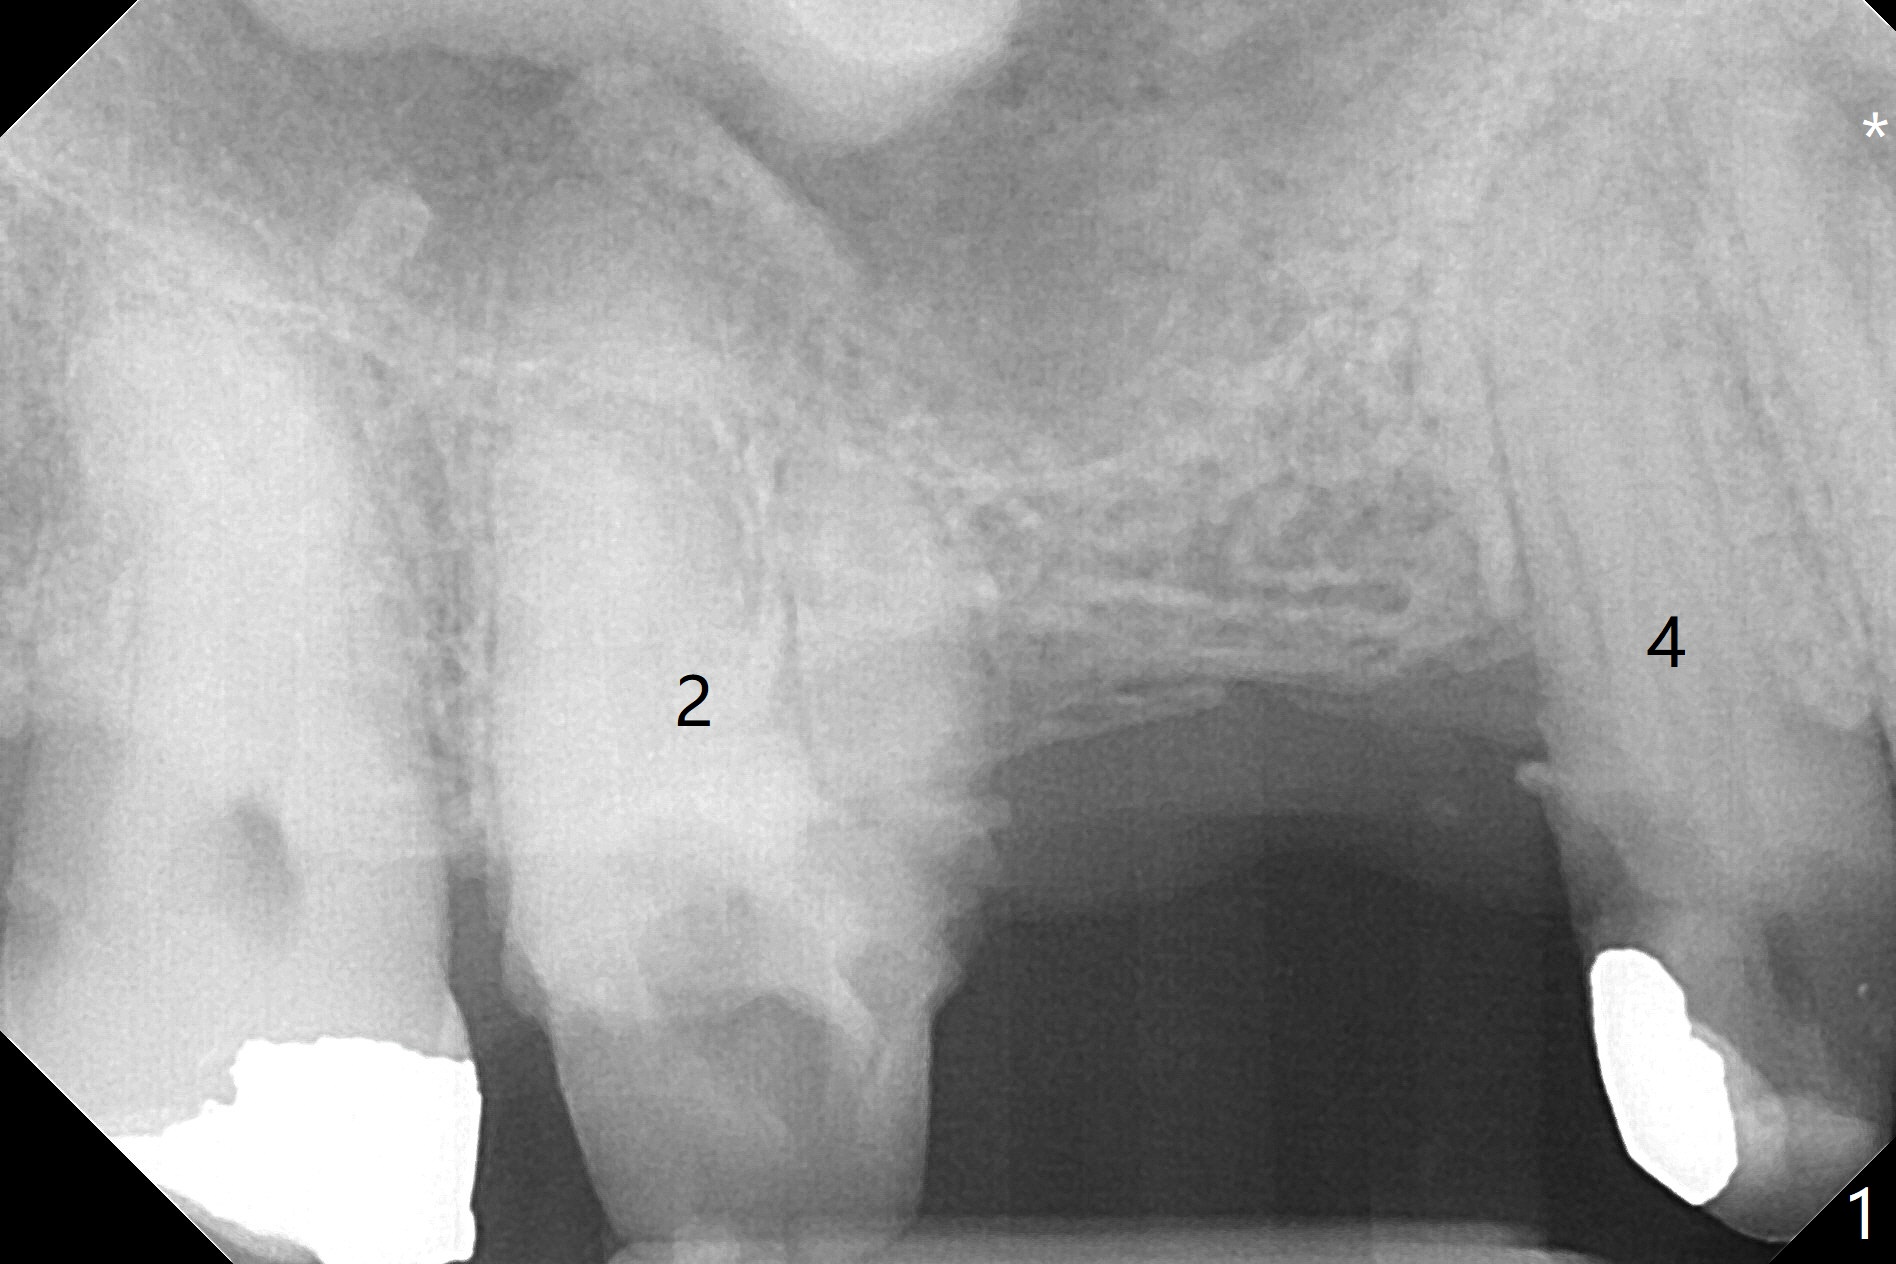
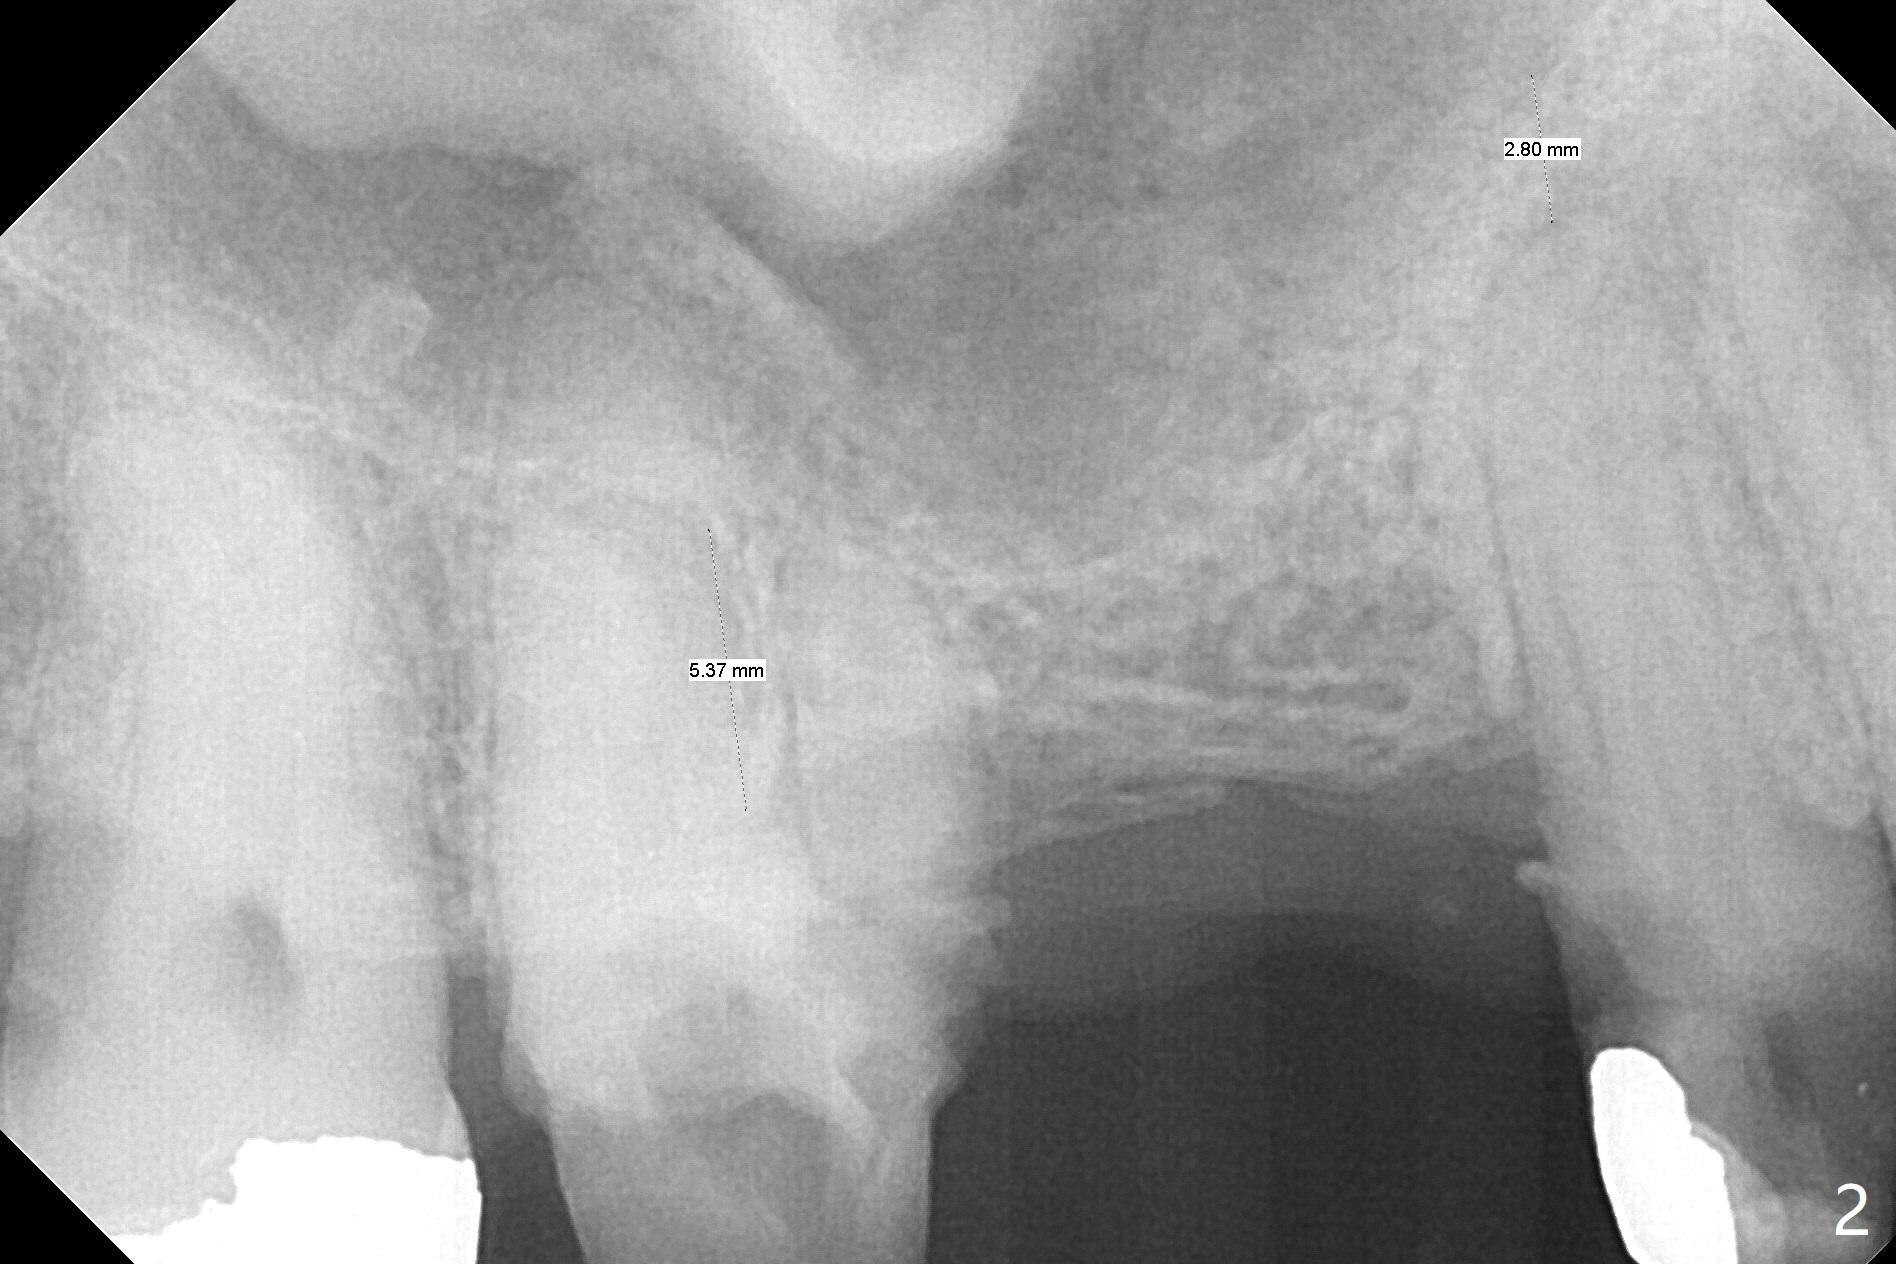
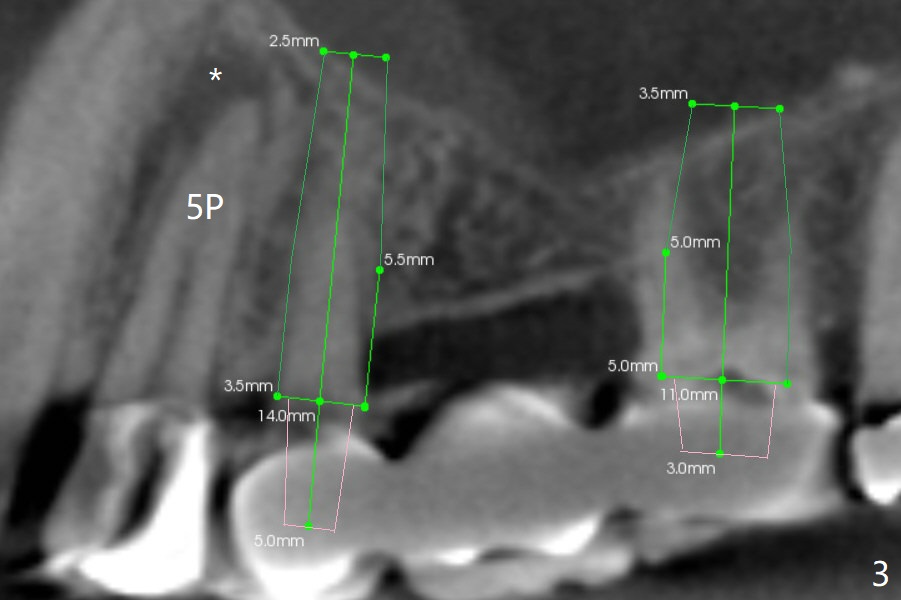
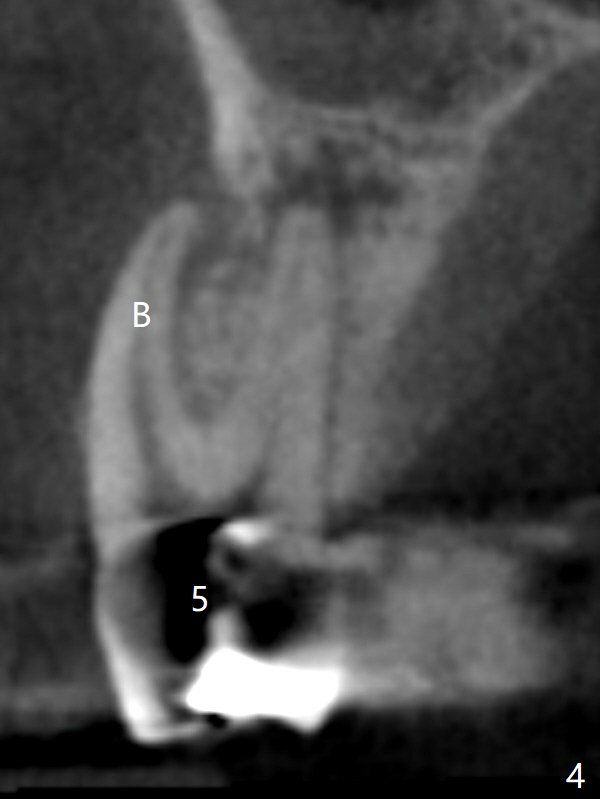
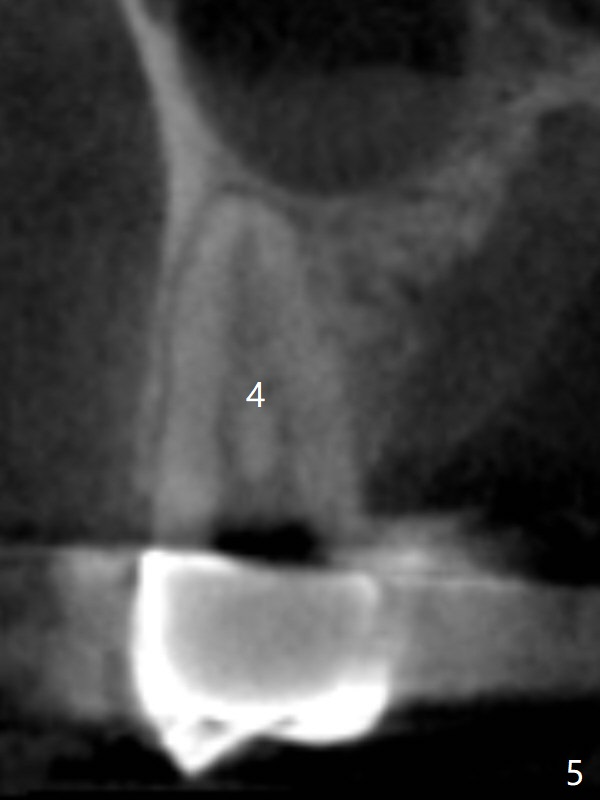
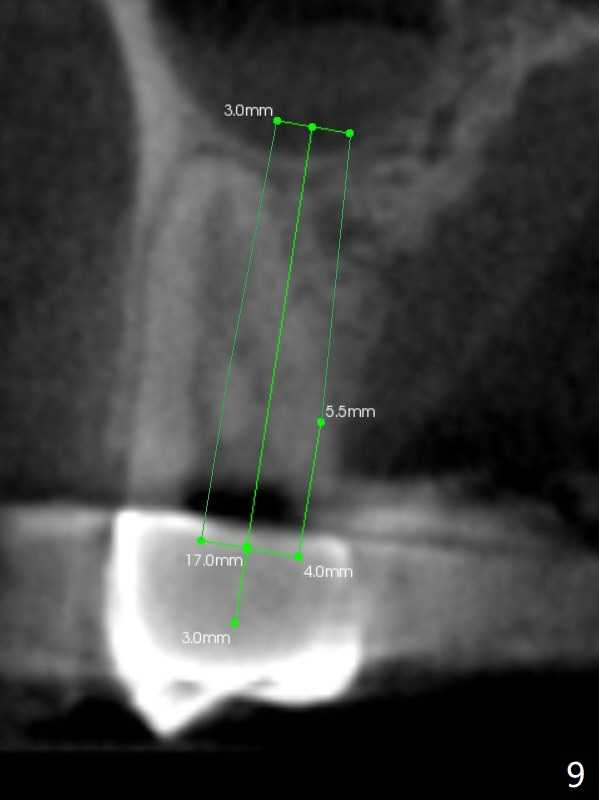
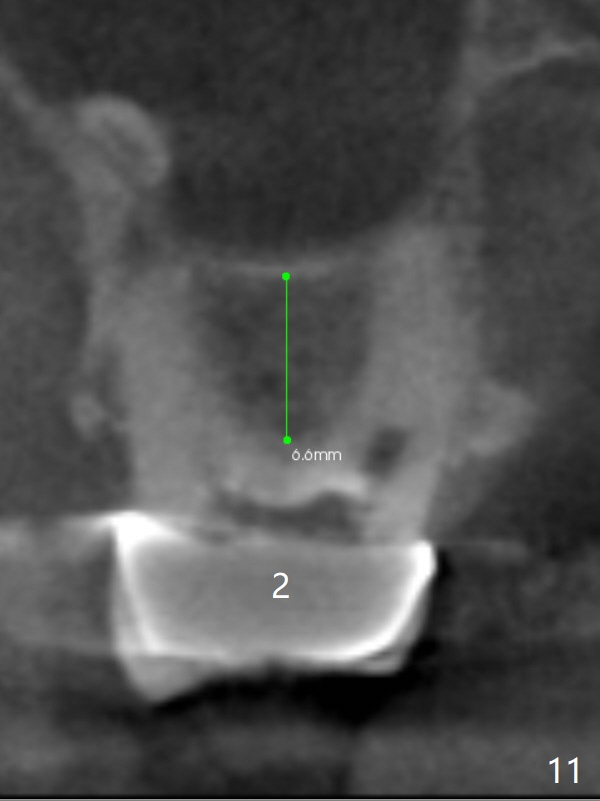
A 64-year-old man requests implant restoration after the upper FPD dislodges (Fig.1). The measurement of the septal height at #2 by PA (Fig.2) is not as precise as CBCT (Fig.11, taken 4 years earlier). There appears to be 2.8 mm bone apical to the tooth #4 (Fig.2); in contrast, the bone is more or less buccal and palatal to the root apex shown by CT (Fig.5). Furthermore CT more clearly shows apical lesions of the tooth #5 (Fig.3,4) than PA (Fig.2). In addition to pulpal test, RCT should be done for #5 prior to implant placement at #4.
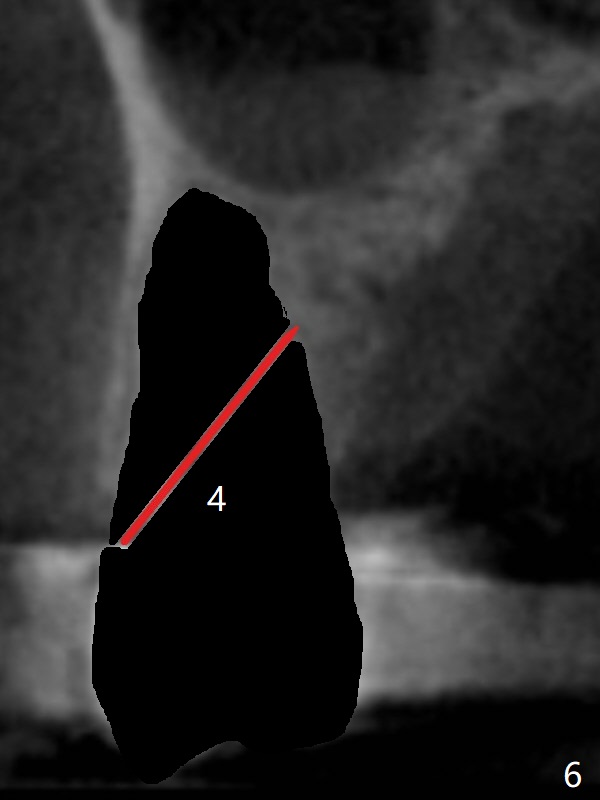
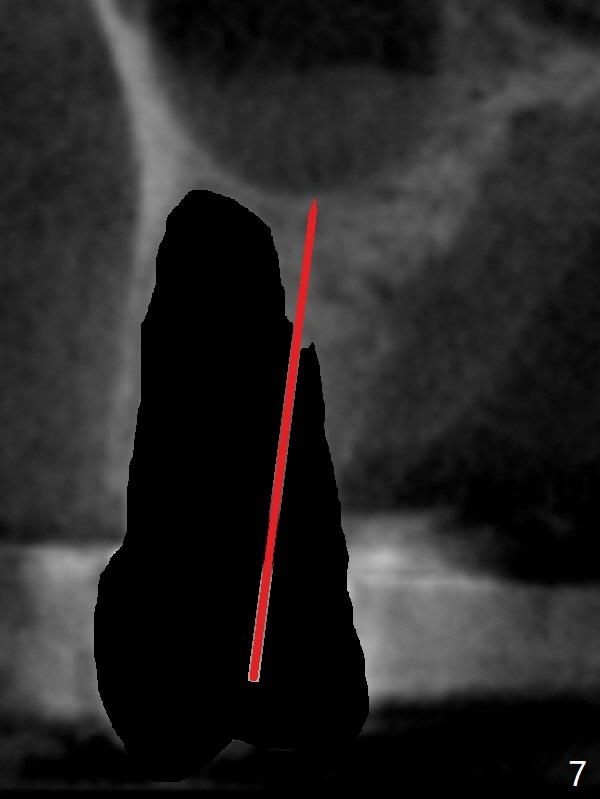
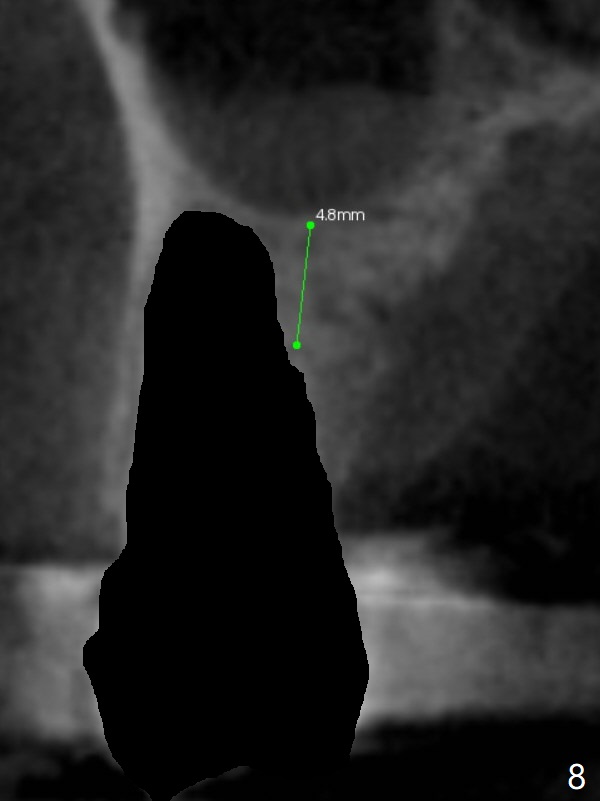
After extraction of the tooth #4, osteotomy is initiated in the middle of the palatal slope (Fig.6), followed immediately by change in trajectory (Fig.7). The depth of the osteotomy is ~ 5 mm (Fig.8), followed by 2.8 mm round bur from Sinus Lift Master Kit. Press the burs palatally. Following Vanilla Graft (red circles), place a 3.5 or 4.0x17 mm dummy and final implants (Fig.3,9,10).
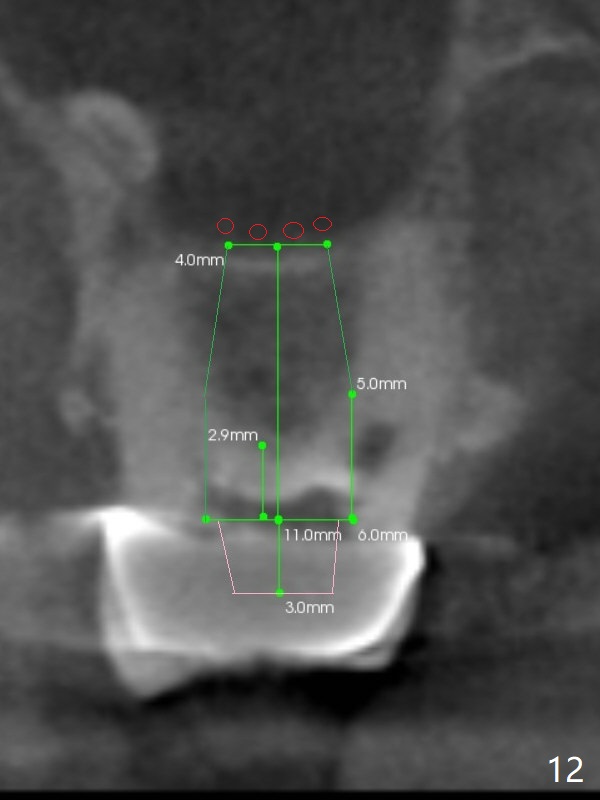
Sinus lift at #2 is relatively easy because osteotomy is not to be done in a slope (Fig.3,11,12).
Return to
Upper Molar
Premolar Immediate Implant, Prevent
Molar Periimplantitis (Protocols,
Table), IBS,
Metronidazole
Xin Wei, DDS, PhD, MS 1st edition 10/22/2017, last revision 01/19/2018